- 6803
- 04-01-2021
- Author: Mysekret Team
- 1
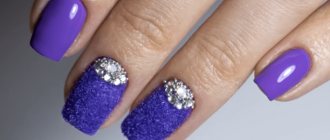
Every woman has her own concept of a beautiful manicure: for some it’s long cat nails, others are delighted with short and colorless ones, and still others are in constant pursuit of trends and choose only the latest designs. Let's talk about one of these today. On the agenda is a manicure with rubbing of different types and colors.
Types and characteristics of rubbing
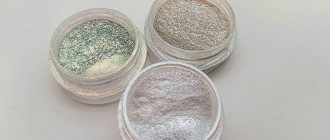
Rubbing is a polyester powder with different degrees of grinding and different effects created.
Usually it is packaged in jars of 1, 2, 3 grams. The powder can be colored, pigmented, or create only the effect of glare and shimmer on the surface of the varnish. It may also contain flakes or small glitter.
For the base-substrate you can use:
- Regular varnish
- Gel polish
- Shellac
- Top coat without color
- Extension gel transparent or camouflage
Camouflage nail gel - let’s figure out what it is and how to use it correctly
There are the following types of nail rubs:
- Chrome or superchrome with metallic effect (gold, silver)
- cat's eye
- Prism (very fine grind)
- Holographic
- Pearl (with or without pigment): mermaid, unicorn, aurora
- Yuki with small flakes
- May bug, combining 2-3 rich colors in a composition
- Chameleon
- Colored, pigmented, covering the shade of the base
- With colored sparkles
- Melange fine
Popular manufacturers of mirror rubbing into gel polish are Irisk, TNL, Bluesky, Fox, Patrisa Nail, Lianail, Nano Professional.
Let's look at the most popular types of nail rubs with illustrative photos:
Mirror rubbing with a metallic effect, also called chrome or superchrome, is the most popular. It doesn't just come in gold or silver. Its peculiarity is an even shiny coating with metallic tints in one color, without transitions. It interrupts the color of the base and can be applied to both dark and light backgrounds.
The chameleon changes color depending on the lighting. The brighter it is, the richer the pigments. You can choose rhinestones to match the color of the rub and create a harmonious nail design. Depending on the color of the base, the chameleon will show a deeper or lighter shade.
Pearl - can be uniform white with a characteristic pearl tint, or contain light pigments of blue, green, pink, creating colored highlights. Pearl pigment with glitter looks good on a light base. The rub can be used for wedding and everyday designs.
Colored mirror rub contains dense pigments that cover the color of the base. They can be applied not to the varnish, but directly to the base, and covered with a top coat. The colored pigments contained in the material create an even color coating.
The Maybug with the “Northern Lights” effect is distinguished by a combination of several dark, rich tones, hence the name of the pigment. Most often it has one distinct color, which is the leading color after application. The combination of blue and green, red and purple, pink and green is suitable for evening looks. The pigments reveal themselves well on long nails, demonstrating all the color transitions. The brighter the lighting and the darker the tone of the base-background, the richer the shine and shades of the “beetle” rub.
Holographic – has a very fine grind and is considered one of the most difficult to apply. It is similar to a prism rub. The main focus of the pigment is on the rainbow circles extending from the central highlight.
Yuki flakes give an effect similar to foil casting. They can be applied in two ways - by patting (foil effect) and rubbing (mirror effect). They can have either a two-color or a transparent base, depending on which they either interrupt or highlight the background varnish.
Nail design with rubs
There are many options for using a variety of powders. It all depends on your desire, here we will present several interesting, unusual ways to use the material. Most often, powder can be rubbed into pastel varnish to add emphasis. But this is not necessary. You can highlight just a few nails, for example on the ring and middle fingers. After covering with top, you can apply stamping or draw on top.
Nail design with rubs
Monograms on a matte top with rubbing
These powders look very good with a variety of stones and a matte top. If you want to draw some details and make them shiny with powder, then you need to follow the instructions.
Instructions:
- To do this, the nail is prepared in a standard way, covered with colored varnish, dried and covered with a top coat. After this, the sticky layer, if any, is removed and the gloss is removed using a buff.
- After this, a drawing is done with paint without a sticky layer, dried in a lamp and powder is applied. This way it will only rub into those parts that have been painted and dried in a lamp. The pigment is not applied to the matte coating; it simply does not stick to it.
- After this, the remains are brushed off with a soft brush and, if necessary, covered with a glossy top or left as is. If you want a matte finish, instead of buffing, you can simply use a matte topcoat. Powder is also practically not rubbed into it.
Monograms
Drops on matte top
We present an interesting, unusual design that can be created using rubbing.
Instructions:
- To do this, you need to prepare your nails, apply two layers of colored gel polish on them and cover them with a top coat without a sticky layer.
- Next, the powder is applied, and after that it is not fixed with anything. Volume dots are placed using a thick topcoat or sculpting gel
- Everything dries in the lamp, try to place the dots one at a time to maintain the volume and sufficient height of the droplets
- Everything is listened to in a lamp and the sticky layer is removed using a cotton pad soaked in a degreaser or cleaner.
- This way, the powder that was not fixed with a top will remain on the cotton pad.
- And the shiny areas that are covered with droplets will remain underneath them
- It turns out to create an interesting and unusual design. This way you can create a variety of designs
- If desired, those areas that are not covered with pigment can be covered with a matte top.
Drops on matte top
French manicure with rubbing
Oddly enough, you can also create a metallic French manicure using rubbing.
Instructions:
- To do this, the marigolds are covered with two layers of any flower bed that you have chosen.
- A matte topcoat is applied, listened to in a lamp, and dispersion, if any, is removed
- The smile line is covered with a glossy top without a sticky layer, dried, and while the top is still hot, powder is applied
- Use a soft brush to remove residue that does not adhere to the matte topcoat.
- The entire design is finished with a glossy or matte finish. If desired, in this way the pigment will remain only on the smile line, which was formed by a glossy top without dispersion
French manicure with rubbing
Release forms
Rubbing for nail design is available in two formats:
- Crumbly;
- Pressed.
Loose rubbing is a fine powder in a small jar. This is the classic format that is most common.
The second option is pressed or hard rubbing. It is something similar to eye shadow - a small palette with refills - small compartments with pressed rubbing powder, or the same jar, but with solid contents.
There is no fundamental difference between the two formats - the result is the same if you follow the application technology. But masters who have already tried hard rubbing note that it is more practical - nothing crumbles or scatters.
Options in different shades
When combining different colors in one manicure, special attention should be paid to their harmony and interaction with each other. It must be remembered that rubbing enhances the color. Therefore, if the shades turn out to be inappropriate, it will completely ruin the design.
The following colors combine most harmoniously:
| Color | Suitable combination |
| Red | Yellow-green, blue-green, red-violet, pink |
| Blue | Red-orange, yellow-orange, blue-violet |
| Green | Blue-green, red-orange, red-violet |
| Yellow | Purple, blue-violet, light blue |
| Orange | Red-orange, blue-green, yellow-green |
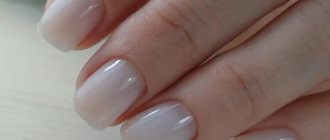
There is also a separate category of nail polishes, the colors of which can be combined with all shades. These are flesh-colored varnishes. The closer such a varnish is to the natural skin tone, the better it will fit into the design.
Multi-colored manicure creates a bright and rebellious look. It suits girls who prefer grunge, sport-chic or boho styles in clothing. With the right outfit, a bright nail design will fit perfectly into everyday and social life, but in a work environment it will look ridiculous.
Materials and tools
Mirror pigments can be rubbed in and applied to nails using several different techniques. Next, we will look at the four most popular options, and here we will provide a list of everything that a novice master or amateur needs to master the technology.
- The rubbing itself is the desired color with the desired effect;
- A transparent base, preferably of a liquid consistency, since the design requires a large total number of layers;
- Gel polish, shellac;
- Transparent modeling or camouflage gel (can be used without varnish)
- Top with and without sticky layer. According to the technology, both options can be used; a product with a sticky layer has its own nuances in application;
- Bond or primer, always acid-free, for sealing the ends of the nails;
- Cleaner, degreaser, lint-free wipes;
- Soft brush to remove powder residue;
- Eyeshadow sponge or silicone brush for working with glitter dust.
General recommendations
The rub is distinguished by gentle tints of color that resemble the play of pearls in the sun. Its feature is its ease of application. You can do this manicure not only in the salon, but also at home.
The cost of the material with this method is not high, so the savings will be significant. The overflow of the rub can mask unevenness and imperfections in the coating on the nails. That is why even an unprofessional manicure will look neat.
A manicure with pearl rub, the photo of which looks so attractive, must be done on a gel polish coating. It is this application technique that will allow you to fix the unstable material on the sticky layer of varnish in order to preserve the beauty of your nails for a long time.
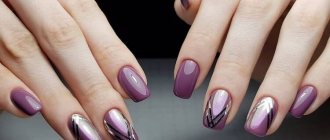
The photo shows examples of manicure with pearl rub.
There are many colors of pearl rub:
- classic and yellow gold;
- silver;
- cherry;
- pink;
- blue;
- black;
- green;
- orange.
In addition to these primary colors, mixed shades can be found in professional stores for craftsmen. You should choose a specific color based on the undertone of the skin of your hands, which can be warm or cold.
Pearl rubbing does not cover the shade of the varnish, unlike mirror rubbing. On the contrary, it emphasizes and strengthens it. Thanks to this feature, it looks good both in a single-color manicure and in combination with any design.
Craftsmen use it for decoration:
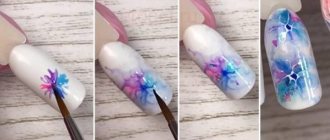
- floral patterns;
- ombre;
- design with “negative space”;
- French and reverse French;
- moon manicure;
- origami;
- inscriptions on nails;
- matte manicure;
- broth;
- foil.
It is the versatility of pearl rubbing that allows it to be used in many design options.
Applying a rub on gel polish, shellac with top coat without a sticky layer
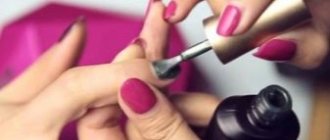
This is the most common, classic method of applying mirror pigment. Before performing the design, it is recommended to have a trimmed or hardware manicure. This is the first preparatory stage for all of the following methods of applying the rub.
Nails are degreased and covered with a thin layer of base. After drying the base, apply two more layers of gel polish or shellac, allowing each to dry.
- We apply the top without a sticky layer, level the surface of the coating, and send it to dry for half the time recommended for complete drying. For example, 60 seconds in a 38W UV lamp and 30-40 seconds in a 36-48W LED lamp.
- It is recommended to apply the top one finger at a time before rubbing, so that it does not have time to cool, and it is well distributed, without bald spots.
- Apply mirror powder to your nails with your finger, sponge or brush and rub in well, spreading from the center to the edges. Don't skimp on rubbing; it's better to brush off the residue with a brush. If you apply the powder with your finger, it is recommended to work hard-to-reach corners with a thin brush. This is true when applying background gel polish under the cuticle. Afterwards, brush off the remaining rubbing compound with a soft brush. Do not use brushes to avoid scratching the mirror texture.
- The pigment is covered with a top or finish in two layers to ensure the result is well secured. The first layer should be distributed very carefully, without pulling.
- After drying the first layer in a lamp, it is important to treat the ends of the nails well, otherwise the powder may chip off, because it does not have a strong adhesion to the material.
- Using a file, the edge of the nails is completely removed from the bottom and sides, up to the growth zone. The filing areas are treated with an acid-free bond so that the primer does not get on the surface of the nail. Usually the bond dries in the open air for 2 minutes. Some brands – from 30 to 60 seconds, you need to look at the recommendations on the packaging.
- After the bond has dried, a second layer of topcoat is applied, the ends are sealed and everything is dried in a lamp. Mirror manicure is ready!
How to use rubs?
There are many use cases depending on the design. Pearl powders, as well as cockchafer pigments, are usually rubbed into the finish without any residual dispersion. Please note that some decor options may have bald spots.
This happens if you save material and apply a very thin layer of powder. If this happens, it is better to replace the regular sponge with a silicone hoof. This way the powder will fit better on the nail without bald spots. If this happens, and the powder is not rubbed into this area in any way, it is best to cover the nail with the finish and repeat the procedure. That is, apply a second layer of pigment, which will most likely lie completely without bald spots.
This happens if you apply the material to a cold or old topcoat. Forbid clients, or if you do it yourself, from touching your nails to hair, coating or fingers. To avoid greasy stains. It is these oily areas on the nails that prevent the normal application of powder.
Instructions for using the rub:
- It is necessary to prepare the nail in the standard way for applying gel polish. That is, the cuticle is cut off, the shine is removed from the nail, a degreaser, a primer, a base are applied, which is dried in a lamp, and two layers of colored gel polish. Most often, white or black gel polish is used as a base. Sometimes they experiment with flower beds. After this, apply a thin layer of finish without dispersion, dry in a lamp until completely dry and polymerize.
- While the surface is hot and not cool, apply a small amount of powder using a brush or sponge using rubbing movements. After this, using a buff, you need to walk along the tips of the nail and remove the remains. This is so that the pigment along with the finish does not chip off from the ends. Next, everything is sealed under a thick layer of finish and dried. In this way, pearl powder, chafer and holographic are rubbed in.
- Materials such as magnetic powder and Yuki flakes are rubbed in a little differently. Yuki flakes are usually applied in a tapping motion to the dispersion finish and then covered with another coat of finish. After which the dispersion is removed. Magnetic powders can be rubbed into the dispersed layer, but in this case they are rather poorly magnetized using a magnetic stick.
- It is best to mix this type of pigment with a small amount of finish and apply with a brush, just like magnetic gel polish. After this, a thin layer of coating is exposed to a magnet and sent to dry in a lamp. They pass with a buff along the ends, covering with a thick layer of finish.
Please note that the powders themselves do not adhere quite well. Therefore, if you do not adhere to a certain application technique, in just a few days you will get peeling nails. To prevent this from happening, use a very thick finish without dispersion for the design.
After application, be sure to go along the edges of the nail with a soft buff or file in order to remove particles of the rub. Only after this can you cover it with a finish, making sure to seal the ends. For even greater reliability, we recommend covering the powder with a finish with dispersion in two layers. It is best if it is rubber.
Hologram
Applying rub on top with dispersion
A professional nail artist always has several options for tops in his arsenal, but what should an amateur beginner who only has a top with a sticky layer in his cosmetic bag do? You can come out of this situation with a good result.
- The procedure for preparing nails for applying the rub is the same as in the first method.
- After drying two layers of gel polish, apply a top coat with a dispersion layer to the nails and cure in a lamp for half the standard time.
- From the still warm top, remove the sticky layer with a napkin, and while the clinser on the surface is not completely dry and the top is warm, distribute the powder until the desired uniform shine is obtained.
In this option, it is very important to treat the nails one at a time so that they do not have time to dry out after removing the dispersion and cool down after the lamp. After rubbing in the powder, cover the nails with one layer of top coat, treat the ends as in the first method, and seal them together with the second coat of top coat.
Benefits of using rubbing
When the technique used to make pearl nail polish is mastered to perfection by the master, he will be able to delight his clients with brilliant work.
Limitless possibilities will be available to him - a fashionable design with a gold and silver tint, a light pearl sheen, a shimmering scattering of small shiny crumbs. Rubbing has other advantages. Among them:
- simplicity of technology,
- fast execution of any design,
- the ability to create beautiful smooth transitions,
- coating durability,
- impeccable work results,
- unlimited scope for the creative realization of a nail art artist.
Applying a mirror or colored rub directly onto gel polish, without topcoat
This method differs in that we get fewer layers of topcoat as a result, and the manicure does not look as dense. This will save time for professional professionals when there is a heavy flow of clients.
- Pink rub is applied to black gel polish. After drying the second layer of gel polish, remove the dispersion from it and get a matte background.
- Wet the tip of your finger in alcohol or cleanser, dip it in mirror powder, and rub it into the gel polish or shellac. The finger should always be wet when working with the rub. The secret of this method is that the alcohol or clinser quickly dries, evaporates, and a beautiful mirror finish is obtained. The rubbing time may be seconds longer than usual, but the mirror effect is the same.
- We seal the mirror layer with two layers of topcoat, filing the tips and ends of the nails after the first, and sealing them with the finish when applying the second.
What is pearl rub for nails?
Pearl rub is a spectacular new addition to nail polish and gel polish that has become incredibly popular among bridal designs in 2022. Its peculiarity lies in the soft, gentle and noble radiance inherent in natural pearls. Ultra-fine grinding into microfine dust ensures ease of application, without the formation of lumps, and uniform glow under the light source.
Visually, on the surface it looks sophisticated and feminine, without any vulgar, deliberate mother-of-pearl. That is why the new product has become very popular among girls who prefer modest but elegant nail decoration. Romantic shades beautifully emphasize the grace of hands and the shape of nails, look stylish at any length and look appropriate in designs for any age.
