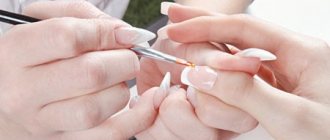
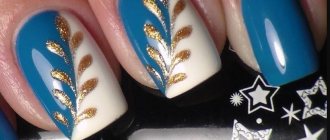
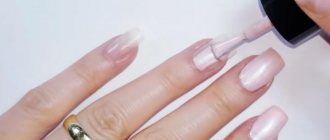
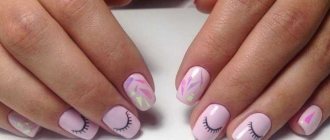
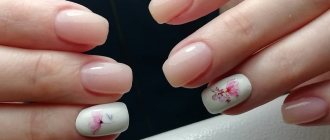
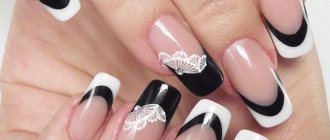
Extending nails before applying a decorative coating is now quite common, as it allows you to change the shape and length of the free edge so that your manicure matches fashion trends.
You can do the cosmetic procedure yourself at home, however, to do nail extensions at home for beginners, follow the instructions step by step.
If you skip any stage, the adhesion to the gel polish decreases, which is why it may come off ahead of time.
What do beginners need to do nail extensions on forms?
Required set of tools:
- Pusher. Lovers of natural materials replace it with an orange stick. The pusher is more convenient because it connects two tools at once - a sharp hatchet tip and a flat spatula. Used to move cuticles and skin from the nail, correct minor gel defects, place rhinestones, etc.
- A set of files for processing nails of different shapes and degrees of abrasiveness. It is necessary to have a soft type of buff file for polishing the surface of the nail plate.
- Manicure scissors, nippers, tweezers - for processing hangnails, cuticles, etc.
- Soft brush for removing sawed off particles.
- Coating brush set.
- Tweezers for working with small parts.
- Wipes made from lint-free material.
- Ultraviolet lamp for fixing the gel coating.
- Forms for modeling nails.
Mandatory set of materials:
- Antiseptic for pre-treatment of nails and adjacent skin.
- Cuticle softener.
- Composition for disinfection, degreasing, dehydration. You can use separate formulations, but it is better to purchase a specialized spray or 3-in-1 liquid preparation that performs all three functions.
- Primer (or other adhesive composition) - to ensure adhesion of the nail plate to the gel.
- A degreaser that removes the sticky layer.
- Base gel coat. The gel can be one-, two- or three-phase.
- Colored gel coatings.
- Finishing gel coating that adds shine.
Types of gel for nail extensions
For successful nail extensions, it is necessary to ensure strong adhesion of the polymer to the nail plate, correct the shape of the nail and give it shine and smoothness. According to the process technology, gels are divided into one-, two- and three-phase - depending on the number of technological stages and compositions required for work.
There are a large number of gels on the market from different manufacturers.
Experienced professionals advise choosing products from the following brands:
- FormulaProfi , Russia. Good value for money. It produces several varieties of three-phase gel. Demanded among professionals as a quality product.
- IBD, USA. Offers a range of products: gel for priming, for construction, etc. It features a composition that is gentle on nails and high quality. Mainly used by professionals.
- Global , USA. Offers single-phase and three-phase types of gels. It is of high quality. Recommended for beginners and for home treatments.
- CNI , Russia. Premium developments for three-phase simulation.
There are other brands on the market.
Read the popular article in the category: Nail extensions with gel, gel polish, on forms, without gel and acrylic for yourself at home. Lessons for beginners.
Step-by-step instructions for gel nail extensions at home
Even if you know how to extend nails with gel, the step-by-step instructions for the procedure must be strictly followed, otherwise there is a risk of carelessly performing the decorative coating and obtaining an unnatural result.
After preparing the tools, you can first make a steaming bath for your hands to soften the cuticle and nail bed. Additionally, you can add sea salt or essential oils to the water. It will be more convenient to work this way.
Also make sure that the work surface is clean - nothing should interfere with your work or come within reach. This is the only way you will get a neat, natural manicure.
After preparing the workplace and hands, you can begin basic nail correction:
- Use a file to adjust the shape of your nails. File off the free edge, leaving a short length of 1-2 mm for attaching cardboard backings.
- Apply cuticle remover to soften it, then push it back with a pusher or an orange stick and cut it off.
- Sand the surface with a buff, removing the glossy layer from it, and additionally go along the end to remove the remnants of the uncut nail.
- Degrease the surface, apply primer. Give the primer some time to dry.
- Trim the shapes to the desired length and then secure them under the free edge. The ends can be stapled together to make working with the substrates more convenient.
- Use a brush to grab the fixing material and transfer it to the center of the nail. Carefully distribute it first along the side lines, along the central part, and at the end draw the cuticle line. You can use a thin brush.
- Turn your finger over so that the mixture stacks toward the center. This will help eliminate any uneven surfaces. In this state, they can be carefully touched up with a brush.
- After 7-10 seconds of performing such a correction, return your hands to their previous position, make sure that the applied layer is uniform, and dry it in the lamp for 1-2 minutes (which depends on the type of device).
- Unpin the forms. Using a file, adjust the shape of the finished nails; you can carefully go over the top part with a buff to eliminate unevenness.
- Perform a decorative coating - apply a base, colored gel polish, top coat.
- Remove the sticky layer from the top with a cleanser.
Typically, nail extensions using a gel composition take about three hours in the salon, so performing the procedure yourself at home can take much longer. This is due to the fact that a woman spends a lot of time distributing the composition evenly and eliminating irregularities on its surface.
Sometimes colored compounds are used for work. Then, after detaching the form, the girl needs to apply an additional thin layer of gel, dry it and fix everything with a top coat. Sometimes this option with a camouflage shade of material is used to perform a French manicure. The technique significantly reduces extension time.
Correction work should be performed on average 3-3.5 weeks after you have extended your nails. There is no need to do it too often, since the remover used has a fairly aggressive composition that can compromise the health of the plate.
To remove decorative coating at home, the standard method is to use only a chemical method, which involves creating a compress with a remover - a liquid for removing gel polish, which gradually softens the composition. After this, it can be carefully removed with a pusher or an orange stick, without applying strong pressure to the nail bed.
What is the difference between single-phase and three-phase gel
The sequence of step-by-step actions for gel nail extensions on forms differs depending on what technology is used: single-phase, two-phase or three-phase.
Differences:
- The gel composition used for single-phase extensions performs all the necessary functions: it guarantees adhesion to the nail base, allows you to model the required contours of the nail, and ensures the smoothness and shine of the coating. This technology is very convenient for beginners, because... the easiest to use: only one type of gel is required, which is applied in one step and fixed in one session of irradiation with an ultraviolet lamp.
- Two-phase technology requires the use of two types of gel. One of them provides connection and modeling, and the second is protective, ensuring smoothness and strength of the nail. Accordingly, two layers are required and two curing sessions under a UV lamp are required.
- Working with three-phase technology is the most time-consuming. Three compounds are used: for adhesion, for modeling, for protection. Each layer is applied and irradiated with a lamp separately. This method requires the master to have work experience and qualifications. Professionals prefer this technology due to the high quality of modeling.
Nail preparation
Before extensions, the nail needs high-quality preliminary preparation:
- Disinfecting treatment . To avoid possible infection, it is necessary to thoroughly treat the nail and surrounding skin with an antiseptic. In this case, you should choose a material that does not leave lint.
- Cuticle treatment . It is not cut to avoid possible injury. A special softening agent is applied to the base of the nail plate, after which the cuticle is carefully pushed back. The same product softens the skin that has grown on the nail - pterygium. The pterygium should be moved away especially carefully, because its particles will disrupt the adhesion of the gel to the nail plate.
- Filing the nail. The edges of the nail plate are processed with a file to give the desired shape. The length of the edge of the nail is about 3 mm.
- Treatment of the surface of the nail plate . To ensure adhesion, the top layer of the plate is removed. It is important not to remove too thick a layer, which will lead to thinning of the nail, so you should not use files with a high degree of abrasiveness. Experienced professionals advise using a 180 grit buff. The direction of treatment is from the cuticle along the nail to the edge. Processing across is unacceptable, because leads to nail damage.
- Removing sawn-off particles . Avoiding touching the sawn plate with your fingers, carefully brush off the resulting dust.
- Disinfection , degreasing, dehydration. To do this, the nail is treated with a special composition - liquid or spray.
- Application of adhesive compounds . A layer of adhesive (primer, gel adhesive, etc.) is applied to the treated surface. When using molds, the primer is applied after applying the templates. There are two types of primers - air-drying and UV-drying.
The nail plate is ready for extension.
How long can extended nails be made?
The size of the extension, which can be performed safely for natural manicure and matrix, also depends on the initial state of the nail plate.
If you sawed off the free edge too much during nail correction, you should only attach it to a medium length on a small backing, with a classic shape - an oval or a soft square, to avoid strong pressure on the free edge.
If the free edge is 1-2 mm, as is recommended, the plate can be made longer, the girl has no restrictions on the choice of shape, she can even make stilettos or a “ballerina” shape. However, keep in mind that the length of the extended nail should not exceed the size of the base to which it is attached. Otherwise, a large risk zone can lead to plate fracture, even if it was healthy.
The size of the nail that can be extended depends on the type of material used for lengthening:
- Acrylic. Acrylic powder is mixed with liquid to a viscous consistency and then distributed over the nails. This option is used most often in the salon, since it can be difficult to achieve the desired consistency on your own. Acrylic is a fairly aggressive substance that often causes an allergic reaction when it comes into contact with the skin. Acrylic creates a dense base that is not subject to any mechanical stress, but because of this it should not be used to significantly lengthen nails.
- Gel. The composition is easier to use, but it takes an average of two minutes to distribute it evenly over the surface, which is due to the thick consistency of the solution. The gel base is absolutely safe for girls, which is why it is used most often now.
The porous structure of the gel will provide a manicure close to natural, which is similar to a girl’s nails and does not weigh them down, so you can create almost any length and shape using the gel.
If you want to grow long nails, it is recommended to first pay attention to the product that will be applied to the form.
Gel is especially suitable for stilettos or strictly squares, since it prevents mechanical stress on the regrown free edge, preventing it from breaking and premature convergence of the decorative coating.
The optimal size, which will look beautiful after visiting the salon and will remain in the same condition for a long time, depends only on the condition of the girl’s hands and the size of the original coating.
Also, when choosing the length of the nails, you need to take into account the thickness and size of the fingers:
- Thin, long fingers are recommended to be combined with a short plate length; the free edge should not exceed half of the main stock in order to visually shorten the fingers;
- Plump, short fingers. To visually lengthen them, it is recommended to use longer plates;
- Wide nail bed. In order not to emphasize the defect, you should visually draw it out with an almond or an oval; using symmetrical shapes (square, circle) is not recommended.
When decorating your nails, keep in mind some tricks: applying light colors visually lengthens the manicure, while applying dark colors, on the contrary, emphasizes its boundaries, making it more modest and smaller.
With proper selection of the optimal length for extensions, the result will last in the same state for up to 3-4 weeks. It is not recommended to keep the coating on any longer, since the risk area increases over time.
How to adjust the shape to the nail
The form is a template with markings made of metal, Teflon and other materials. Durable reusable forms require careful disinfection after use, so disposable forms made of paper, thin plastic, and foil are often used. The form can be fixed at the top or bottom of the nail.
Installation and adjustment of the form is a very important stage on which the quality of the extended nail depends.
When using solid forms, you need to choose the size of the template so that it fits perfectly on the nail plate. The form is bent with light pressure and put on the nail through the provided hole. Once the shape matches the “smile line,” it is securely attached to the finger.
Disposable soft forms require additional adjustments. They make it possible to adjust the stencil to the contours of a specific nail plate. This is especially convenient when processing nails with non-standard shapes. If the forms are too soft, then experienced craftsmen advise gluing two pieces together.
The disposable template is removed from the backing, the perforated oval is extruded and glued to the back of the form, providing additional rigidity. The bottom edges are torn along a perforated line, the shape is slightly bent and placed on the finger. For orientation, there is a center line on the form.
Before final fixation on the finger, the form is given the desired slope - it should continue the line of the nail, without deviating up or down. If this creates gaps between the surface of the nail and the form, the cutout of the form is corrected with nail scissors. The shape must match perfectly with the root arch, otherwise the gel will leak into the resulting gaps.
After adjustment, the “ears” are carefully glued together to fix the shape on the nail. The bottom edges of the form are glued to the finger. The shape is adjusted individually for each nail.
Cabinet
You can be a smart person and think about the beauty of your nails... Remember this phrase from “Eugene Onegin”? In the modern world it is more relevant than ever. The hands of people of any profession should look decent and well-groomed. And if you don’t want to devote time to manicure every day, nail extensions are your option!
A little history In the modern world, when people are in a hurry and are in a hurry, it is difficult to imagine how we would manage without the invention of the American dentist Fred Slack. It was he who invented acrylic nail extension technology. Now there are many nail extension techniques and materials that allow you to achieve almost any nail length. But all this might not have happened if not for the accidental invention of an American.
Requirements for nails Some girls believe that before they can grow their nails, they need to grow their own a little. This is absurd. Excuses like “you can’t do nail extensions on such short nails”, “you need to grow them a little longer” - this is the level of a cheap hairdresser, where they don’t want to bother. Or they don't have enough experience. The only reason worthy of refusal is sore nails. For example, affected by fungus. Nail extensions can be done at any length. There would be skills and desire. A variety of extension methods allows you to choose the best option for everyone. Even for “advanced cases”.
The material decides everything. If we take into account modern technologies and raw materials, then there are two ways of nail extension: 1. with tips, 2. with forms (matrices). If your nails are at least a short length, then matrix nail extensions are possible. That is, the master will be able to “put” the form under your slightly overgrown nail plate. This shape serves as the basis on which the extension of the acrylic or gel nail will lie. If you choose acrylic for nail extensions using this method, they will have a completely natural look. Especially for this, during the manufacturing process, manufacturers add special dyes to the powder. What is better: gel or acrylic, tips or molds? – clients often torment craftsmen with these questions. There is no clear answer to these questions. And it can't be. Any option has both its pros and cons. So, extended acrylic nails are much easier to remove and correct, and easier to restore. Gel nail extensions are much more difficult to remove and cannot be repaired. But they are much stronger than acrylic ones, they look more presentable, natural, aesthetically pleasing and attractive.
Size matters Nail extension technique, raw materials - all this is very important. Extensions are most often used to increase the length of your own nails. But excessive length is not only inconvenient and impractical, but also not always beautiful. Sometimes it's even dangerous. This option is for photographs only. If you decide to get nail extensions for the first time, ask a specialist for advice. As a professional, he will tell you not only the optimal size, but also the shape of the nails that will suit you.
The maximum length of extended nails should not exceed the length of the nail bed! The ideal ratio between the length of the free edge and the nail plate is 2/3
— Minimum length (1) . This is not so much a way to lengthen your nails, but an opportunity to make them stronger and more attractive, and forget about manicure for several weeks. This option is suitable for doctors and young mothers, people whose responsibilities include caring for children - Medium length (2) . The best option for beginners who have never had long nails before. Over time, after several corrections, you will get used to it and you can gradually increase the length of your extended nails. This length of extended nails is usually chosen by business women. — Long (3, 4) . The maximum length of extended nails should be no more than the nail bed! The ideal ratio between the length of the free edge and the nail plate is 2/3. This version of extended nails is suitable exclusively for media ladies, for those associated with show business. The indicated dimensions are not a panacea. If you want, the ratio of the free edge to the nail plate can be 1:1. But this is by no means an everyday option. And “claws” of this size are not only inconvenient, but can also cause danger and bring a lot of unnecessary trouble. Do you need it?
What size should I choose? As mentioned above, the ideal size for the first extension is one and two. The maximum is three. You will always have time to increase it. As practice and experience show, over time, clients switch to longer extended nails. Over and over again, extended nails become 50-70% longer than the originally chosen size. You can lengthen your nail not only through extensions, but also visually. For example, if you choose the right design for an extended nail or painting. Visually lengthens extended nails and the color of the varnish. If you pursue this goal, choose plain varnishes in light colors. The rich pattern and dark color of the varnish make the extended nails visually shorter.
How long will they last? This question is asked by every girl who decides to get nail extensions, regardless of the size chosen. The answer is infinitely long. Modern materials do not interfere with the passage of air and moisture to the nails. Accordingly, the nail plate is almost in its natural state. The main thing is to follow a few simple rules: - choose the right length of extended nails ; — within 24 hours after extension, do not expose them to high temperatures (for example, in a bathhouse or sauna); - Do not tap your nails on hard objects. Especially at first ; - use rubber gloves when washing dishes and doing household chores ; — hand and nail care products must be safe . For example, the composition should not contain acetone. It is strictly contraindicated for extended nails, both acrylic and gel; - choose the right lotions and hand creams . It is better to avoid baths with warm water and salt; - regularly care for your cuticles ; - make corrections on time (about once every three weeks).
Regardless of the length of your nail extensions, forget about products that contain acetone. It has a detrimental effect on both acrylic and gel.
Trends 2017 Many people consider extended nails to be a timeless trend. Especially if the course is taken on naturalness. For those who want to stand out from the crowd and surprise their friends with their manicure, extension specialists offer painting and design. What types of nail extension designs are trending this year? - French In 2022, both the classic French jacket and variations on the theme are relevant. For example, a French manicure with a bow, with voluminous flowers or rhinestones on the rim. The master can combine several colors and several variants of geometric patterns (not only a smile in the shape of a semicircle); — a plain matte design will create a truly royal look;
— the master performs a volumetric design of extended nails with colored gel or acrylic paints. To create a three-dimensional design, the material is applied with thick strokes, decorated with a variety of decorative elements, beads, rhinestones - all at the discretion of the master. Of course, this design is better to choose for a celebration or festive evening. Like very long nails, unfortunately, this is not always convenient in everyday life. - Aquarium design is considered the most durable among nail extension artists. With timely correction, this type of extended nail design can last up to three months! This is because it is based on a pattern that is “hidden” under a layer of transparent coating. It can be either gel or acrylic. The craftsmen use various materials directly to complete the drawing itself - all based on the client’s wishes. — artistic painting by a skilled craftsman always turns out to be unusual and catches the eye. As a rule, it is done with acrylic paints, adding elements of a French manicure; — sparkles and rhinestones can be used to decorate extended nails both along the entire length of the nail and to place accents. For example, pink nail extensions with rhinestones on the ring finger will make your look romantic. If the nude color of extended nails is “diluted” with black sparkles or rhinestones, then your image will become daring and fatal.
Stages of nail extension with single-phase gel on forms
Due to its ease of use, single-phase gel is optimal for those who are just learning the art of nail extensions. Beginners should build each finger separately.
After developing practical skills, it is important to follow the order of extensions: first, 4 nails (except the thumb) of one hand, then 4 nails of the other, last of all, the nails on the thumbs are processed - otherwise the gel will drain from them due to their angled location.
Extension step by step with gel on forms:
- Preliminary preparation of nails:
- antiseptic treatment;
- hygienic manicure;
- filing the edge of the nail and the nail surface;
- cleaning nail dust;
- application of dehydrator and primer.
- Installation and adjustment of the form.
- Applying the first gel layer. The layer is made thin by distributing the gel with a brush over the entire area of the nail. Apply a thin layer of gel to the first third of the nail at the base - the cuticle area. In the stress zone (the remaining area of the nail, the line connecting the nail and the form, a third of the form), the layer thickens slightly, because This is where the bulk of the load falls. Toward the edge of the modeled nail, the layer thins again. The layer is polymerized - under a UV lamp for 2 minutes, under an LED lamp - 1 minute.
- Applying the second gel layer. A drop of gel is applied to the middle with a brush and carefully distributed over the surface. Then you need to hold your fingers horizontally for half a minute so that the gel is evenly distributed over the surface of the first layer. The polymerization conditions are the same as for the first layer.
- Removing the sticky layer is done with a lint-free cloth.
- Removing the stencil.
- Grinding the surface and adjusting the edge of the created nail.
- If necessary, apply a decorative coating.
Repairing a broken nail. Extension with gel base. Photo lesson
To my great regret, I managed to break a nail, and not just, but right to the root, plus the layering. There are two ways out of this situation - cut off the rest, which I personally didn’t want, and create a new nail. I chose the second option. Please take a look. I’ll say right away that this is the most problematic nail for me - the nail bed is short, which results in a very active pad and high side ridges. This is what my nail looks like before all the manipulations (sorry for the lighting, I took it in the evening)
So let's get started. First you need to prepare everything you need: 1. Tools for manicure
, in my case these are files, pusher, scissors, cuticle remover.
2. Means for degreasing and removing the sticky layer
, I use Severina Cleaner.
3. Forms for extensions
, I have the most common noname, 20 pieces cost 40 rubles.
4. Base for gel manicure.
I have this
rubber Masura Basic Gel Polish 298-10.
Not every base will do. First of all, it should be thick and viscous. The base from Masura is just like this, it holds a drop well, does not spread, and self-levels.
5. Lamp.
First, you need to perform a regular manicure - treat the cuticle with a remover, file the remaining nails, remove the corners so that they do not interfere in the future, remove the shiny layer from the nail with a buff, and degrease it.
This is what my nail looks like after treatment
Then you need to fill in the form. There is a nuance here - all success depends on how correctly the form is set up. When I first started using this method, nothing worked for me. Not the first time, not the second, not the third. The first time I applied too much gel, it ran onto the side rollers. The second time I placed the form crookedly, so I ended up with a crooked nail, the third time I rolled it down. And only for the fourth time, taking into account my mistakes, I was able to grow my nails. When placing the form, you need to make sure that it is clearly in the center, do not clamp it too tightly at the base of the nail, and make sure that it does not ride up or fall down. Another important point is to make sure that there is no gap between the free edge of the nail and the form itself, otherwise the gel may leak there. This time I had practically no free edge, I had to push the form, causing myself pain, and still, the gel was a little numb. If the shape does not become straight, it can be cut in the right places, the main thing is that it fits evenly and clearly along the border of the nail.
Then I apply the base gel. You can take some kind of flat brush for this, but I apply everything with my own. First, I put a drop of gel on the border between the natural nail and the substituted form and distribute it along the form and approximately to the middle of the nail, reducing the border to the cuticle to nothing. Then I put another drop, distribute it again, make sure that everything is even at the side rollers and put it in the lamp to dry. This particular rubber base from Masura dries in a 36-watt UV lamp for exactly two minutes. Then I remove the form, cover the nail again with the thinnest layer of base, all the way to the cuticle, and dry it.
After drying, I remove the dispersion layer and process the extended nail to the shape I need using a file. This base gives an elastic nail, but at the same time strong, it lends itself well to a file - you create an almost complete feeling that you are working with a natural nail. If there is excess thickness, it can also be cut off without any problems.
This is what my nail looks like after filing
Once again I adjust the length, file the sides, remove some blemishes, and the nail is ready for further coating. It takes at most 10-15 minutes to write about everything, I write longer)
Next, I decided to give myself a complete gel coating; for this I used the same rubber base and Masura Tilt Leopard gel polish. Do you see the difference?) This base wears well, the nail itself is not wooden, it can be removed simply by normal soaking.
Thank you for watching) I am Lena. I hope this was helpful. My method is aimed at painlessly growing the free edge of the nail. I don’t advise anyone to grow their nails this way and walk around with them for months, and I don’t do it myself.
Increase
How to use three-phase gel - step-by-step instructions
Extension step by step with three-phase gel on forms requires the master to have certain experience and qualifications.
Sequencing:
- Preliminary preparation of nails:
- antiseptic treatment;
- hygienic manicure;
- filing the edge of the nail and the nail surface;
- cleaning nail dust.
- Installation and adjustment of the form.
- Applying dehydrator and primer.
- Application of the first composition - basic, transparent, ensuring adhesion of the artificial nail to the nail plate. It has a liquid consistency, is applied and evenly distributed with a flat brush. The layer is polymerized under a UV lamp for 2 minutes, under an LED lamp for 1 minute.
- Application of the second composition - a gel modeling structure. This is a thick, viscous composition suitable for giving the nail the required shape. The layer is polymerized under a UV lamp for 3 minutes, under an LED lamp for 2 minutes.
- Removing the sticky layer with a lint-free cloth.
- Correction of the resulting nail.
- Applying the third layer is a top coat. This is a protective layer that secures the two previous layers and gives the extended nail shine and strength.
Extension lesson: French on forms - step by step with photos
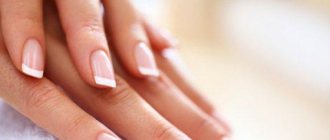
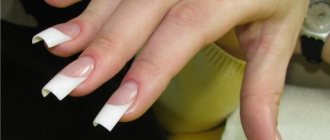
Classic French manicure (French) is a plain, discreet background (flesh or pinkish tint) and a clearly drawn white “smile line” along the edge of the nail. The appearance of extended nails has led to a new round of popularity for the French style, which looks especially impressive on nails of a regular geometric shape.
When creating a jacket using molds, it is lined with gel of the selected color.
Stages of performing French on forms:
- Preliminary preparation of nails.
- Installation and adjustment of the form. The edge of the form is placed under the nail, the other edge is fixed on the finger.
- Applying a layer of base gel. To give it a matte finish, you can blot it with a napkin.
- The nail is formed with gel of the selected shade (pinkish, flesh-colored) - up to the border of the future “smile”. “The Smile Line” is laid out very carefully. The surface must be perfectly flat.
- Using a brush, a white gel is used to form a smile contour; the gel is applied close to the main color. The layer is polymerized under a UV lamp for 2 minutes, under an LED lamp for 1 minute.
- Removing the form.
- Grinding the surface and adjusting the edge of the created nail, removing sawed off particles.
- Apply a clear coat for protection and shine.
You can create a French manicure without using white gel. Then a “smile” is drawn on the formed nail with white acrylic paint, and the nail is covered with a protective layer of transparent gel, which polymerizes according to technology.
Tips with ready-made designs
Special tips make the task of a nail technician much easier. Their use allows you to quickly and efficiently create a flawless manicure, which does not take much time. You can choose for yourself which tips to grow beautiful ends. These can be plates of a single color, with a finished pattern, or with a snow-white smile line. By choosing this option for express manicure, you will significantly save your personal time on creating the design, because it is already ready. This method of modeling artificial tips can be done even by beginners in the field of nail art, since its technology is extremely simple.
Let's look at step-by-step instructions for extensions using tips with a ready-made French design.
- Having prepared the nail plate, select tips according to size for each finger. Apply glue to the inside of the artificial tip and press the material to the surface of the nail.
- After removing excess glue, trim the free edge and buff your nails using a buff.
- Cover your nails with two layers of clear or camouflage gel and let the material cure under a UV lamp.
As you can see, you can quickly and quite easily grow beautiful and neat nails using ready-made French tips. You will learn more about this technology from a useful and very informative video lesson from the wonderful Svetlana Sokolova.
Gel-jelly extensions
Gel jelly is one of the latest developments in the field of nail design. The dense jelly-like consistency makes it a very convenient material to work with. Working with jelly gel takes noticeably less time than with conventional gels. It is easy to shape, convenient for correcting mistakes made during extensions, and convenient for repairing nails.
Setting time is only 5 seconds, polymerization takes 2 minutes. Manufacturers offer natural shades of gel-jelly: flesh-colored, beige, pink.
How to work with top forms
When using the upper forms, a template with an already formed nail is applied to the nail plate.
Step-by-step sequence of gel extensions on the upper forms:
- Preliminary preparation of nails is carried out.
- A nail is modeled on the inside of a sculpture gel stencil and the layer is partially polymerized in a UV lamp (20 sec) or LED (10 sec).
- A layer of base gel is applied to the nail plate to ensure adhesion to the artificial nail.
- The stencil form is pressed tightly in the desired position (without distortions) to the nail plate and fixed for 15-20 seconds.
- Using a pusher, excess gel mass is removed.
- The nail is placed under a lamp for final polymerization.
- The shape is carefully removed and the edge is adjusted with a nail file. The surface of the nail does not need correction, because... with this method it turns out perfectly smooth.
- A protective layer is applied.
This method is quite labor-intensive, but it is indispensable for repairing broken nails and correcting cracks and other serious defects.
Modern techniques and materials allow you to create a durable and beautiful manicure. One of these technologies includes gel nail extensions on forms. If you follow the step-by-step instructions, you can achieve an aesthetic and wearable manicure.
Features of extended nails
It is advisable to entrust nail extensions to a professional who will do everything carefully. A specialist can do everything quickly and, at first glance, even beautifully, but there is no need to rush here. Properly prepared handles are already half of successful extensions. Not removing the cuticle can cause the gel or acrylic to lie unevenly, and it will not look very attractive.
If extended nails visually resemble natural ones, then the manicure will be more durable. Girls usually decide to get extensions when their own nails are constantly breaking or peeling. In addition, they are attracted by the opportunity to wear a beautiful pattern for a longer time. Also, with extended nails, the good news is that if one of the nails breaks, it is enough to redo it. In the case of natural nails, it becomes necessary to trim the rest.
Such nails also have negative qualities. Usually the extension and correction itself is not cheap, and failure to follow the basic rules can lead to peeling of the substance and even allergies. But beauty requires sacrifice, and therefore girls boldly go to a beauty salon or a familiar manicurist.
To prevent the coating from starting to peel off, you must follow these rules:
- The previous coating must be completely removed.
- Nails should be well sanded and treated with antiseptics.
- Before applying extensions, it is advisable not to wet your hands again, and especially not to smear them with creams. Pairs of the latter can be released, thereby contributing to rejection.
- Before applying gel or acrylic, nails must be degreased.
- Correction must be done in a timely manner.
