Rules for perfect coverage
There are several main factors on which the final result depends - a high-quality and beautiful coating.
- High quality manicure . No matter how hard you try, no matter how many layers of material you put on your nails, until a clean manicure is done, there can be no talk of any beautiful coating. If the manicure is poorly done and there is pterygium or smooth, untreated areas left on the nail plates, then the material may flow along the surface. This means that there will be streaks, an uneven paint line, material will be poured into possible cuts, the color will be in a rut, and you will have to file the nails when removing them;
- Materials with suitable consistency . All the materials you work with should be familiar to you: their consistency, fluidity. Select the materials with which you are comfortable painting, drawing, modeling, etc.;
- Convenient coating tools . Again, you should be comfortable and comfortable working. Select brushes of the required length, the correct shape of the nail file and the rest of the tools;
- Knowledge of the architecture and capabilities of certain materials . It is important to understand how the material behaves on nails and what thickness of coating it can provide. And if during the manicure process you need to do leveling, then several layers in a decorative manicure, then you just need to know and regulate the placement of the material on the nail plate;
- Refined movement technique and coverage algorithm . Of course, everything needs to be done quickly so that the material does not flow down or accumulate on one side. It is also necessary to observe a strict sequence of layers. You understand, if you apply a top coat instead of a base coat or vice versa, then it is unlikely that such a manicure will have the correct architecture, be beautiful and last a long time.
Steps to creating the perfect manicure at home
Going to a nail salon is a battle between love and hate. On one hand, you want to have beautiful nails that complement your style and make you look completely put together. But on the other hand, professional manicures are quite expensive (if you go at least twice a month, they really cost a lot), they take quite a long time, they need to be planned in advance and they are probably not very hygienic. .
To solve this dilemma, you can learn how to paint your nails like a pro.
By giving yourself a manicure at home, your hands will look great, you'll save a ton of money, and you'll have complete peace of mind that your tools are clean. Now that's what we call a win-win! Step 1: Gather Materials
Make sure you have all the necessary tools. | iStock.com/ratmaner
Before you officially get started, it's important to make sure you have all the necessary equipment at the ready. This includes a bowl of hot water, nail clippers, nail polish remover, a nail file, a buffer, a cuticle stick, three types of nail polish (more on this later) and moisturizer.
Step 2: Remove Remaining Nail Polish
Before starting, remove any old nail polish. | iStock.com/Josfor
A word of advice: don't try to paint over chipped nails.
The result is a lumpy, unevenly colored mess that won't save you any time in the long run. To get perfect nails, you need to completely remove any remaining polish (even if it's a light or clear layer) and start over. We recommend using an acetone-free nail polish remover, which is less harsh and drying. Step 3. Trim and file your nails
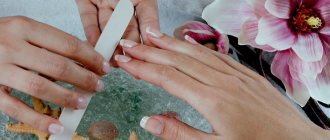
After trimming your nails, take a nail file. | iStock.com/margostock
Once your nails are completely free of polish, it's time to achieve the desired shape that you like.
Using nail clippers, trim your nails to the desired length. Then round or round the edges of the file. Step 4: Polish Your Nails to Perfect Shape
This tool is truly a must have.| iStock.com/Ridofranz
Many people skip this important step, but we know it's worth doing if you want a finished manicure.
To polish your nails, gently rub your nails with a buffing board to smooth out any rough edges or nicks. It also makes them smoother and shinier, making them easier to paint. Step 5: Soak your hands
Take a relaxing bath. | iStock.com/OlgaMiltsova
Even if you don't get your nails done professionally at a beauty salon, you should still enjoy getting your nails done!
Fill a basin with warm water, then add your favorite bath salts, oils, or fragrance. After you soak your hands in the water for about five minutes, they will feel soft and clean. Pat them dry on a warm fluffy towel before continuing. Step 6: Moisturize with lotion
Dry hands are simply not good. | iStock.com/OlgaMiltsova
The condition of your hands is one of the fastest prizes of your age.
Or worse, they can make you appear older than you actually are. To keep them looking youthful, be sure to moisturize your hands daily, especially with chemicals used in manicures. Step 7: Push Cuticles Back
Use a cuticle stick instead of cutting cuticles. | iStock.com/MichaelNivelet
Cuticle trimming is an unnecessary and dangerous practice that should be avoided at all costs!
Instead, gently push them back using a wooden cuticle stick. Unlike cutting your cuticles, it will not make you susceptible to bacterial and fungal infections. Finish with Omega Labs Nourishing Cuticle Oil. Step 8: Apply Base Coat
Applying a base coat to your nails makes the finished look long lasting.| iStock.com/clownbusiness
You may have wondered in the past about the purpose of basecoats.
After all, they do nothing to improve the appearance of your finished manicure. However, as Good Housekeeping points out, base coats do play an important role in making manicures last longer, preventing polish from staining your nails (nobody wants a yellow tint!) and strengthening weak or brittle nails. We recommend Omega Labs USA Nailed It for excellent nail polish adhesion. Step 9: Apply at least two coats of your favorite color
Yes, you really need two coats. iStock.com/iprogressman
Finally, you have reached the long-awaited promotion.
It's time to paint your nails. Choose your favorite color, then apply an even coat of paint to each nail. Depending on the opacity, you will need to go back and add at least one more layer to achieve the color you want. Step 10: Apply Top Coat
Apply a top coat to preserve your hard work.| iStock.com/Yulia-Images
To make your hard work last longer, you need to apply a top coat.
According to Glamor's Lipstick, this acts as a protective shield, enhancing the shine of your nails. And honestly, any great manicure can be judged by its shine. Step 11: Dry naturally or use cuticle oil
Give your nails time to dry. | iStock.com/VladimirFLoyd
This last step is perhaps the hardest of all. It seems like just when you're finishing painting your nails, the doorbell suddenly rings, you need to zip up your jacket, or it's time to go to the bathroom. Believe me, the best thing to do is not to get distracted and just stay in place, leave your hands free and not smear the wet paint.
If you need to dry your nails a little faster, avoid using ultraviolet light, which can damage your skin and age your hands. Instead, use a cuticle oil, which promotes quick drying and acts as a slippery barrier. Once your nails are completely dry, you can go about your life and enjoy a great manicure!
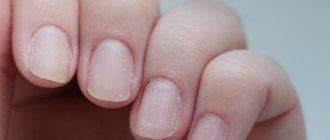
Layers of the natural nail plate
You need to understand which nails can be done with any type of manicure, which of them will take a little longer to work on, and with some you can’t do anything at all. It depends on the condition of the natural nails.
Dorsal - a layer that affects the adhesion between the polymer artificial material and the nail plate. Everything works out due to its presence.
If you degrease poorly, then poorly raise the scales of the dorsal layer, leaving shiny smooth areas, then most likely there will be no adhesion in places. The dorsal layer guarantees good adhesion of the material to the nail plate.
The presence of material detachments may be due to the following reasons:
- Improper preparation - poorly sanded surface with shiny areas;
- The nail plate can be very mobile, and the material chosen is too hard, so there is no shock-absorbing membrane between the nail and the hard material.
Intermediate or soft keratin . Nails with such a top layer will already have poor adhesion; nail strengthening is a must. If you have such nails in front of you, then do the following:
- Shorten the length;
- We use a primer;
- Strengthen your nails by straightening them.
Ventral . For marigolds with a ventral top layer, any type of manicure is in principle contraindicated. There is no coupling, it cannot be covered, a recovery period is required.
Learn more about the structure of nails, which affects their growth and healthy appearance.
Baths and masks for nails
Oil baths are considered one of the most useful home remedies for nail care. Any vegetable oil is suitable for their implementation:
- olive;
- linen;
- burdock;
- almond;
- coconut;
- castor;
- apricot.
The procedure is carried out as follows:
- Heat the oil to a temperature of 38–39 degrees.
- Dip your fingers into the container with oil for 10 minutes.
- Blot your fingers with a napkin. There is no need to wash your hands with soap.
You can add lemon juice or apple cider vinegar to the bath.
The course of treatment is 10 days. Then you need to repeat them once a week for preventive purposes.
Oil baths are very beneficial for nails
Salt baths are no less effective and useful. Pour 1 teaspoon of sea salt without additives into a glass of warm water and immerse your fingers in the solution for 20 minutes. The course of treatment consists of 15 procedures, followed by baths once a week for maintenance purposes.
Sea salt baths strengthen and nourish nails
I managed to significantly improve the condition of my nails with the help of salt baths. After a course of home treatment, the effect lasted for six months. However, it should be noted that the effectiveness of this procedure may depend on the composition of the salt. After relaxing at sea and “bathing” my nails in sea water, they pleased me with their strength and health for more than a year.
You can improve the condition of your hands and nails with the help of herbal decoctions and infusions:
- Dried chamomile flowers in the amount of 2 tablespoons are poured with a glass of boiling water and simmered over low heat for 15 minutes. The resulting mixture is filtered and allowed to cool. Add the same amount of fresh blackcurrant juice to 100 ml of decoction and make a bath for 20 minutes.
- Mix a tablespoon of dried chamomile flowers, St. John's wort and burdock root. Brew a glass of boiling water, leave for 15 minutes and let cool. Immerse your fingers in the bath for 15 minutes.
Herbal baths are done every other day for therapeutic purposes or once a week for prevention.
Chamomile decoction is an excellent remedy for improving the condition of nails.
A very effective nourishing and whitening bath can be made from the following components:
- 50 ml almond oil;
- juice of one lemon;
- 3 drops of iodine.
Fingers are immersed in the heated mixture for 15 minutes. Remaining oil is wiped off with a napkin or washed off with water without detergent.
Homemade nail masks
For therapeutic and caring masks, you can use available home remedies.
Cabbage mask with cream:
- Using a blender, grind a leaf of white cabbage and half a banana or a raw potato.
- Add a teaspoon of cream and honey to the resulting mixture.
- Apply the mask for 15–20 minutes.
- Wash off with a cotton swab or disk, moistening it in warm milk.
This procedure has a whitening effect and nourishes nails and skin well.
To whiten yellowed nails, you can take a teaspoon of almond oil and add 3 drops of essential oil:
- pine;
- cedar;
- sandalwood;
- patchouli;
- ylang-ylang;
- bergamot.
The mixture should be rubbed into the surface of the nail plates in the evenings.
With the help of essential oils, you can restore your nails to a healthy appearance, shine and transparency.
To get a healthy glow, you can make a mask from the following components:
- jojoba oil - 2 teaspoons;
- rose oil - 2 drops;
- lemon oil - 3 drops.
Rub the resulting mixture on your nails every evening.
You can lighten your nails with a mixture of equal amounts of lemon and thyme oils. Rub this mixture on your nails at night with light massage movements. If you replace thyme oil with eucalyptus oil, the marigolds will become transparent.
Stages of preparation for coating
- The first thing you need to do is a hygienic manicure, which includes cleaning your hands, removing the old coating, shaping your nails, cleaning and treating the skin around the nails and the nail plates themselves;
- Degreasing nail plates . The lipid layer, this natural fatty film, must be removed with a degreaser. You cannot begin to lift the scales of the dorsal layer along the fatty layer. Be sure to degrease the surface first;
- Sanding the top layer the nail plate is produced in one direction. First, we identify the middle part of the nail, where the central plane is located, and two side slopes. Dense lipid plaque, which has settled into the porous structure of the dorsal layer, is lifted with a 180 grit buffer in the case of a dense nail structure, with a hard lipid layer, or 200 grit in the case of a thinner structure. We move the periungual roller and move the file strictly in one direction from one side to the other, first on the side slope from the roller to the center, then move to the central plane, and then to the other side slope;
- Dehydrator application . Apply liberally to the entire nail plate and draw out moisture and excess fat from the lower layers of the scales. You can even walk on the skin around the nail;
- Primer application. If the nails are healthy and problem-free, then we proceed immediately to applying the base. If there are minor problems, then we use a primer. To do this, squeeze out the brush, use a semi-dry brush from the bottle to the middle of the nail (from the smile line to the free edge), and rub the primer into the structure of the dorsal layer with trampling movements. It’s as if you want to fill all the areas and weak spaces of the natural nail. After application, polymerize in a lamp for 30 seconds. The primer works on the natural nail. Used when nails are damaged, hyperplastic, and heavily exfoliated. There is no point in applying primer over the base coat.
How to prepare nails for manicure: photos, videos
Nail care includes not only painting with varnish and applying various designs, but also pre-treatment of the hands. Not all women know how to prepare their nails for a manicure correctly. To do this, we have prepared interesting recommendations and tips, which are all collected in one place. They should become your reference book on manicure. But first things first.
Manicure tools
Did you know that manicures began 5,000 years ago in Ancient Egypt? Then the pharaoh had many slaves who treated the master’s hands every 9 days. They had special tools. Since then, they have undergone many modifications, and to help women, products have been created that help them get a beautiful and well-groomed manicure at home.
And here they are:
Leveling technology
- First layer. The applied first layer of base coat must be cured in a lamp if:
Nails are thin or damaged, and applying too much material can burn them. Apply the base using trampling movements. When leveling healthy nails, there is no need to dry the first layer, it remains damp;Several bases are being connected: the plastic one is used first, and the more rigid one is covered on top;
- Drop installation. At an angle of 45 degrees, the drop is placed on the nail with a brush and pulled to the sides towards the lateral sinuses and downward according to the “left-right-center-down” pattern. The result should be a beautiful, even funnel;
- Contraction of volumes. As soon as a funnel is formed, we begin to pull the material from the funnel area to the free edge of the nail plate;
- Marigold flip at an angle of 45 degrees to the parallel of the table so that the distributed material is collected at the apex, the highest point of the natural nail.
- Polymerization in a lamp.
For the leveling process, you can replace the base coating with biogel and follow the same scheme. It is also important when distributing the material to move the brush over it gently, without pressing.
Biogel and its properties for strengthening, building, health and growth of nails
The influence of nutrition on nail health
The condition of nails and skin is one of the important indicators of the general condition of the whole organism. There is a whole direction in medicine that allows you to identify many diseases by the appearance of the nail plates. To keep your nails healthy and strong, you need to pay attention to your diet. Experts recommend adhering to the following rules:
- the menu should contain as many fresh products as possible and a minimum of pickles and preserves;
- Regular consumption of fresh vegetable juices will help improve the condition of your nails and give them a healthy shine. You can mix cucumber and carrot juices in equal quantities - this mixture is rich in sulfur and silicon, which are necessary for nails;
- You need to include fresh greens in your diet. The more of it on the menu, the better your nails will look;
- You can increase the amount of magnesium in the body with celery and parsnip juice. Magnesium ions improve not only the condition of nails, but also the nervous system, which means that juices will help get rid of the neurotic habit of biting nails.
Table: substances and products beneficial for nails
| Product | What substances does it contain? | How does it affect nails? |
| Carrot |
| gives nails shine and strength |
| Nuts |
|
|
| Sesame seed |
|
|
| Dairy | calcium | prevents nail brittleness |
| Fish |
|
|
| Cucumbers, cabbage |
|
|
| Brown bread and cereals | B vitamins |
|
| Oatmeal and buckwheat, seeds | zinc | gives strength to nails |
| Seafood, seaweed |
|
|
| Persimmon |
|
|
| Pumpkin seeds | selenium | protects against aggressive external factors |
List of tools and materials
Some people prefer going to a salon because they don’t have to worry about purchasing materials. Yes, buying a starter kit will cost you a lot of money. It will pay for itself after several procedures, and the quality of a home manicure is not inferior to a salon manicure.
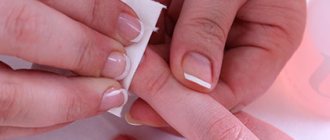
Color coating should be applied in several layers
List:
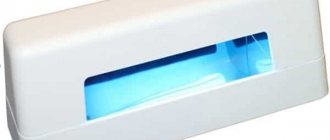
- A drying lamp, without it the gel polish will not harden. There are two types - UV and LED lamp. The UV lamp was the first to appear in salons. Its price varies from 800 rubles. The main thing to pay attention to when purchasing is the power of the device. Experts do not recommend a lamp below 36 W, otherwise there may be problems with drying the varnish. The disadvantages include replacing light bulbs every few months. LED lamp is a newer invention. The varnish dries quickly, consumes minimal energy, and does not require replacement of components. The price starts from 2000 rubles. Disadvantage - not suitable for all varnishes.
- Basic manicure set - tweezers, scissors, files, nippers, orange sticks. Most women have these items by default.
- Buff is a quadrangular file for polishing a nail. The optimal roughness is 220-240; for thin and weakened nails, the buff is selected with a roughness below 200.
- Primer is a means for adhesion of the nail to the base coat.
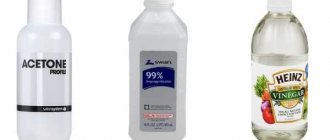
- Degreaser for cleaning the nail after polishing.
- The base is a transparent coating, applied before colored varnish. Applying gel under gel polish ensures better adhesion of the nail to the material.
- Colored gel polishes.
- Top (finish coating) for fixing colored varnish. It comes in glossy, matte, with or without a sticky layer.
UV lamp
The items needed for a beginner were listed. In the future, you may need more - stencils, brushes for drawing, rhinestones, sparkles.
Ready-made Kodi manicure kits have proven themselves well. Materials from an American manufacturer are slightly more expensive than Chinese ones, but the quality is not inferior to professional products. You can buy them in specialized stores or order online. Kodi gel polishes and auxiliary materials are often ordered by professionals for work in salons.
Performing a manicure
Nail treatment with a machine
How to properly treat your nails with a manicure machine? There is no need to steam them, because the procedure is carried out only on a dry nail plate. The rpm is set to a speed of up to 10,000. The machine must not be pressed or put pressure on it during processing. First, it is advisable to practice on silicone tips.
So, how to properly treat your nails with the device? The cuticle is first pushed back to the nail hole with an orange stick. In this area you can use medium-hard drums. Removal of dead cells on the palms and fingers is performed using ball-shaped burs. Trapezoidal or cylindrical cutters can be used to give the nail plate the desired shape.
Next, how to properly treat your nails with a machine? Now you can start polishing. This is quite difficult for beginners: you cannot bring the edge of the polisher to the nail to avoid scratches, you cannot hold the tool in one place for more than one second. Next, all that remains is to remove dust and nail residues, lubricate the skin around it with oil and apply varnish.
Nail fungus: treatment rules
How to properly treat nails with fungus? This disease requires long-term and systemic treatment. Fungal infections remain viable after washing or cleaning with conventional means; a person becomes dangerous to others and even to himself, because without proper treatment, relapses are guaranteed.
To remove the fungus, you need to regularly apply compresses, baths, use tablets and medicated varnishes. How to properly treat fungal nails? Using a sterile instrument, the nail plate is first treated with a file, and then with antifungal ointments.
For procedures, you can use “Chlogexidine” in the form of a ready-made solution (1%). Use a cotton pad to thoroughly wipe the inside of the shoes, the insole, and all tools for manicure and pedicure. Socks need to be boiled in a special solution or treated with a pharmaceutical antifungal drug.
Applying colored nail polish
Colored varnish is applied in a thin layer. The procedure must be repeated after a few minutes so that the first layer has time to dry. The final stage is applying a topcoat or adding additional shine. This will keep your manicure in good condition longer. It is best to buy a product from the “two in one” category, that is, one that is both a fixer and a base, and adds shine.
Many professional nail polishers recommend applying polish not immediately after a manicure, but the next day. The fact is that the steamed nail plate takes on its normal shape over time, and the varnish sets earlier. This creates an air gap between the nail and the varnish. Because of this, all the beauty breaks off literally the next day. And if you paint your nails a little later, the polish will last the required 5 days.
How to use a cuticle protector for shellac, water-based, gradient and ombre manicures?
In addition to Skin Defender, there are many other products for protecting cuticles from varnish. Here is the list:
- Dance legend Pure manicure. This is a cheap replacement for Skin Defender. The smell of the product is stronger and the color is different. But its effectiveness is not inferior to the most famous remedy. Sold in a bottle like regular nail polish with a bristle brush.
- Kasako Docai . This is a liquid of Korean origin that is white in color and very similar to PVA glue. Easy to apply and has a convenient applicator. It takes a very long time to dry, but is much cheaper than Skin Defender. Fulfills its purpose and is removed from the nail in a single strip
- El Corazon. This is also an inexpensive analogue. Available in pink and blue. It is not clear what is in the product, it smells like some kind of solvent. The price is low and much lower than Skin Defender. Fulfills its purpose, can be used for applying stepping and coloring in ombre style
means for protecting the cuticle during manicures with shellac, water-based, gradient and ombre.
How to use means for protecting the cuticle:
- Almost all products are sold in bottles with brushes and apply well
- It is necessary to moisten the brush in the product and treat the side rollers and cuticle with it.
- Allow the substance to dry and turn into a thin film. Try to put a lot of product on the brush so that it does not tear after removal
- After this, paint your nails in the desired way and let the polish dry.
- Remove the product with one continuous film
means for protecting the cuticle
As you can see, after dyeing ombre or stamping, it is not necessary to wipe off traces of varnish for several minutes with a stick dipped in acetone. It is enough to use a special product, this will significantly reduce the time for a manicure.