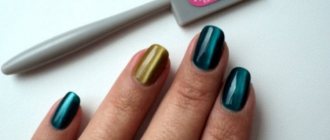
What is gel polish, its types
Gel polish is a unique cosmetic product designed to cover nails. It is a hybrid combination of classic nail polish with modeling gel. At the same time, it retains only the best properties of the above-mentioned components.
Covering nails with gel polish provides their owners with the long-term effect of a beautiful and well-groomed manicure.
Color and design can last up to 4 weeks. This is explained by the presence of a dispersion medium in the composition of the drug, which forms a checkered film on the nails. Thanks to it, the gel polish adheres to the surface of the nail as well as possible and lasts for a long time. The uniqueness of gel polish coating is that it is great for natural nails and artificial nails (extensions).
Gel polish coating for beginners is one of the best developments in the beauty industry for nail care in recent years. Residents of Europe were the first to appreciate this product 15 years ago.
Nowadays gel polish is very popular both among famous beauty salon masters and among ordinary girls who want to get a beautiful manicure at home. In the popular environment, gel polish is called “shellac”. Since the pioneers in Russia were the Shellak CND brand.
Distinctive properties of gel polish:
- High durability. It can stay on nails for 2 to 4 weeks. This is why it attracts a large number of fashionistas who want to wear a fresh manicure for a long time.
- Nice composition. Most often, it contains hypoallergenic substances that reduce the risk of harm to the nail plate. Many brands take care of their customers and add useful strengthening and nourishing components to their composition.
- Color saturation. Unlike regular polish, gel polish does not lose its pigmentation. When properly applied, the coating does not become cloudy, does not wear off, and is resistant to chips and scratches.
- Ability to withstand household loads. Any girl has frequent contact with water, various detergents and household products. Gel polish, hardening upon application, creates a dense film on the nails that does not destroy the manicure.
- Simple application technology. Gel polish is applied quickly, painlessly and dries for a short time under a special lamp. Anyone can create the perfect coating using gel polish.
Gel polish composition:
- A photoinitiator is a molecular compound that absorbs UV radiation. Thanks to it, the gel polish dries quickly under the influence of ultraviolet rays.
- A film former is a chemical component that provides a durable coating and prevents its destruction.
- Thinners are esters, monomers that are used to maintain optimal consistency. So that the texture of the gel polish is moderately viscous and ensures tight adhesion to the nail plate.
- Coloring pigments are organic or inorganic components. The density of the coating and the saturation of shades depend on them.
- Various additives and fillers allow gel polish to strengthen and nourish nails.
According to the application system, there are three types of this product:
- Single phase. To create a manicure, you only need a tube of colored pigment and nothing else. The coating is not permanent, great for strong natural nails. With the help of a single-phase gel polish coating, novice nail technicians can easily create a manicure.
Single-phase gel polish coating is great for beginners. - A two-phase product implies the application of a top (fixing) coating after applying the color. Two-phase products are rarely found in beauty salons, as the effect leaves much to be desired.
- Three-phase gel polish involves three stages of application. The first is the base coat, followed by the color pigment, and the final stage is the top coat. This system is the most reliable and in demand. Because the result is the most durable and practical manicure.
Mani Pedi
Here are free video tutorials on manicure and pedicure. Manicure comes from the Latin manus - hand, and cura - care. In general, manicure is taking care of the beauty and health of fingernails. This is a cosmetic procedure that may include: giving nails a beautiful shape, baths for the skin of the hands and nails, hand massage, removal of keratinized periungual skin and hangnails, polishing nails covered with varnish, rhinestones, etc. (decorative manicure). Manicure can be performed either by specialists in beauty salons or independently at home. Pedicure is the care of your toes, i.e. removing calluses, polishing nails, etc. Learning manicure using online video lessons will be useful for both beginners and more experienced people in this matter. You can watch video tutorials from the Manicure and Pedicure category for free at any convenient time. Some manicure video tutorials come with additional learning materials that you can download. Enjoy your learning!
Total materials: 11
Materials shown:
1-10
Pages: 1
»
Sort by: Date · Title · Rating ↓ · Popularity
Watch lesson online
How to do a classic pedicure correctly - training for beginners
Here we talk about how to properly do a classic trimmed pedicure - training for beginners. This master class will show you the basic tools for working with pedicure, as well as provide recommendations and tips for working with these tools. Training will be carried out during the work of the master with the client. Tools you will need for work: A grater for removing dead skin and calluses on the heels and soles of the feet. The grater has a double-sided working surface. One…
- Personal care
- Mani Pedi
- Duration: 11:31
- Date: 05/25/2014
- Views: 1617
- Rating: 4.7/3
Watch lesson online
How to make a long-lasting manicure with a mirror shine - nail polish and foil
The online lesson “How to make a long-lasting manicure with a mirror shine - nail polish and foil” is devoted to the question of how to make mirror nails at home. A manicure with a mirror shine can be achieved using special foil and gel paint. In this case, we will use foil and GLOSSEMI E.Mi nail polish, which can provide long-lasting color for up to four weeks. In addition, the resulting coating is resistant to moisture and temperature influences. This video tutorial provides many...
- Personal care
- Mani Pedi
- Author: Ekaterina Miroshnichenko
- Duration: 27:56
- Date: 05/23/2014
- Views: 382
- Rating: 5.0/2
Watch lesson online
Shellac nails - manicure with gel polish at home (set, lamp, how to apply and how to remove the coating)
This online lesson tells you how to do a manicure with gel polish (shellac) at home. Here you will learn what shellac is, what a shellac kit is, how to apply and how to remove the coating at home. Shellac is a durable polymer coating for nails. Gel polish is a hybrid of a hard and durable gel and a much lighter plastic, but less durable traditional varnish. Shellac is applied to nails just like regular polish, but requires exposure to dry...
- Personal care
- Mani Pedi
- Duration: 8:24
- Date: 10/01/2014
- Views: 663
- Rating: 5.0/1
Watch lesson online
Hardware pedicure - how to get rid of cracked heels and corns
This video is devoted to the question of how to get rid of cracked heels and corns using a hardware pedicure. This master class will show the process of treating the heels of the feet. Calluses, corns and cracks on the heels of the feet are the most common ailment in middle-aged and older people. First, keratinized areas of skin - corns - appear on the legs, then cracks may appear and, if they are not eliminated, this can lead to more serious consequences...
- Personal care
- Mani Pedi
- Duration: 20:15
- Date: 05/25/2014
- Views: 1562
- Rating: 5.0/1
Watch lesson online
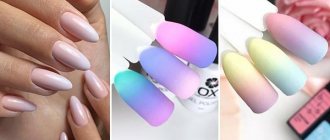
How to make a gradient manicure at home (smooth color transition on nails)
The lesson “How to make a gradient manicure at home (smooth color transition on nails)” is devoted to the question of how to paint your nails in different colors with a smooth transition. One of the most beautiful and effective techniques in nail design is creating a gradient transition of two or more different colors. In this case, a gradient from blue to cyan will be used. Of course, you can experiment with the colors that you like best. The main thing is to know the technology...
- Personal care
- Mani Pedi
- Duration: 4:57
- Date: 05/24/2014
- Views: 203
- Rating: 5.0/1
Watch lesson online
Trimmed classic manicure - how to do it, execution technology
This video talks about how to make a classic edged manicure, the technology of execution. Here you will learn what tools you can use to do a manicure at home, and also see the process of doing a manicure. The set of tools that will be used in this tutorial consists of a special spatula for separating the cuticle from the nail, a glass nail file, cuticle tweezers and tweezers for cutting off excess parts of the nail. If nail tools...
- Personal care
- Mani Pedi
- Duration: 12:38
- Date: 05/24/2014
- Views: 541
- Rating: 3.5/2
Watch lesson online
How to quickly make beautiful nails - hard varnish, how to apply false plates and how to remove them
The online lesson “How to quickly make beautiful nails - hard varnish, how to apply false plates and how to remove” is devoted to the question of what hard nail varnish is and how to use it. With hard polish you can quickly and easily create beautiful nails. The use of hard varnishes is good for short nails. For long nails there is an option using gel. Solid varnish is a set of thin overlay plates that are selected according to the shape of the nail and, in the case of…
- Personal care
- Mani Pedi
- Duration: 6:48
- Date: 05/27/2014
- Views: 147
- Rating: 3.0/1
Watch lesson online
Pedicure socks - how to use (foot skin peeling at home)
The video lesson “Pedicure socks - how to use (peeling the skin of the feet at home)” is devoted to the question of what pedicure socks are and how to use them. The purpose of this procedure is to completely get rid of dead skin, calluses and corns that often appear on the heels and soles of the feet. Pedicure socks contain a special composition that helps gradually soften the skin and exfoliate it. Of course, this process does not happen in one...
- Personal care
- Mani Pedi
- Duration: 14:02
- Date: 05/25/2014
- Views: 123
- Rating: 3.0/1
Watch lesson online
Manicure on short nails at home
This video tutorial explains how to do a manicure on short nails at home. The process of creating an easy and original manicure is shown here with an explanation of what is happening. Before you start, you'll need to prepare your nails by filing your cuticles and buffing your nail beds with a nail file. To create this manicure, two nail polishes will be used. One of them covers the thumb and index finger, as well as the little finger. The rest of the nails are covered...
- Personal care
- Mani Pedi
- Duration: 4:36
- Date: 09/30/2014
- Views: 265
- Rating: 0.0/0
Watch lesson online
Pedicure at home
This online lesson tells you how to properly do a pedicure at home. In order for your legs to look good and attract the attention of men, you need to take care of them. One of the most important foot care procedures is pedicure. In addition to directly caring for nails and decorating them, this procedure also includes removing dead skin on the legs, getting rid of corns and calluses that often appear on the heels and soles of the feet. IN…
- Personal care
- Mani Pedi
- Duration: 23:51
- Date: 05/25/2014
- Views: 430
- Rating: 0.0/0
1-10
11-11
Classification of gel polishes by texture
All gel polishes are divided into 2 main categories:
- Reflective gel polishes. The main advantage is quick adhesion to the nail. Such tools are easy to use and easy for beginners to work with.
- Non-reflective gel polishes. In addition to this drug, an activating substance is also required. This type of gel polish has a glue-like texture. To dilute it, a special spray is required. And you need to apply this gel polish with a professional gel brush.
Nail extensions for beginners: tips
Marina Litvinova will test a nail extension kit ordered from a Chinese online store. She will analyze its composition, the quality of materials, gels, and then test them on herself.
.
Viewers will be able to make sure that cheap materials do not always create a truly professional finish, a neat shape on the surface of the nail and a beautiful, well-groomed manicure with extensions.
.
Marina will analyze the main difficulties in using such a set in work, tell you which materials are best to choose and where to start, so that the result will pleasantly surprise both the master and the client.
.
With the help of these tips you can expand your knowledge on this issue.
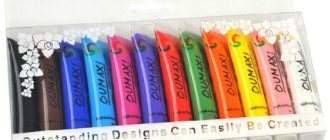
Rating of gel polishes
| Segment | Place | Name | Price | Characteristic |
| The best premium gel polishes | 1 | Shellak CND gel polish | 900-1000 rub. | Provides the most dense and long-lasting coverage. Best in its category. Advantages: durability, thick texture, color saturation, huge palette. Manufacturer: France. |
| 2 | Gel polish Beautix UV Gel | 850-980 rub. | It differs from its competitors in the glossy effect on the nails. Advantages: durability, palette of rare shades, dries in 30 seconds. Manufacturer: France. | |
| 3 | Gel polish Akzentz Luxio | 1100-1300 rub. | Ideally distributed over the entire nail plate. Convenient to use. Advantages: durability, contains a huge amount of plant extracts that care for nails. Manufacturer: Canada. | |
| The best gel polishes for beginners | 1 | Gel polish FOX Professional Gel Polish | 320-400 rub. | Leader in quality in this price category. Pros: longevity, pleasant scent, comfortable wide brush, rich pigmentation. Production: USA, Ukraine. |
| 2 | Gel polish BOHEMIA APEX GEL | 440-500 rub. | The product is certified according to a three-level quality testing system. Advantages: uniform distribution, wide range of shades. Production: USA, Europe. | |
| 3 | Gel polish Kodi Professional | 380-430 rub. | Has the ability to change tone depending on the ambient temperature. Lightens at high temperatures, darkens at low temperatures. Advantages: durability, ease of use, available in many cosmetics stores. Production: Ukraine. | |
| The best budget gel polishes | 1 | Gel polish Haruayama Soak-Off | 220-280 rub. | Great product for the money. Pros: longevity, pleasant scent, excellent pigmentation. Made in Japan. |
| 2 | Gel polish Bluesky | 130-200 rub. | Not suitable for beginners. Application requires the attention of an experienced technician. Pros: affordable price, comfortable medium-sized brush. | |
| 3 | Gel polish Tertio | 180-220 rub. | The only gel polish made in Russia. It has light pigmentation. As a result, the color will appear translucent. Advantages: fast drying, wide range of colors. Production: Russia. | |
| 4 | Gel polish TNL MagnetEffect | 130-150 rub. | Allows you to create a cat-eye manicure using a magnet. Advantages: creation of an unusual design on nails, affordable price, economical product consumption. Production: Korea. |
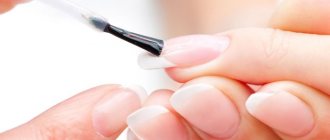
How to prepare your nails for gel polish
Before you start performing a manicure with gel polish step by step, you need to properly prepare the nail plates - only on well-groomed hands will the coating look aesthetically pleasing and attractive.
First, using files of varying abrasiveness, the desired shape is given. It should be even and the same on all nails. The cuticles are pushed back using a special stick and trimmed. Usually, when performing a standard manicure, a bath is used to steam the fingers. With this method, at least 1 hour must pass before applying gel polish.
Use a buff (grinding file) to polish and level the upper surface of the plate. After processing, it should become matte and lose its glossiness. There is no need to press hard on the file; sanding is carried out with light movements. This procedure is necessary for better adhesion of the coating to the surface of the nail.
Degreasing nails is the final stage of preparation for applying gel polish. Here they use cotton pads soaked in a special degreaser, nail polish remover or alcohol. The nails are thoroughly wiped, sometimes this procedure is repeated.
How to choose gel polish
To cover nails with gel polish, beginners should focus on the following points when choosing a product:
- Professional grade compounds. Such products contain fewer chemical components and more natural ones, which have a beneficial effect on nails.
- A large number of professionals (beginners and professionals) give preference to well-known brands on the world market (Shellak CND, Beautix UV Gel, BOHEMIA APEX GEL), which have long been able to win the trust of girls. There is no doubt about their quality.
- Price. Low price is not a guarantee of good quality. Most likely, this coating using gel polishes is suitable for beginners. Craftsmen interested in providing high-level services should pay attention to more expensive materials.
- Color palette. It should be varied. So that you have plenty to choose the right shade from. But remember that bright colors require 2-3 layers. Accordingly, the product consumption will be greater.
- Easy to apply gel polish and easy to remove from nails. A high-quality product will be evenly distributed over the entire surface of the nail and dry quickly under the influence of UV radiation. In addition, it should be removed even faster after its life cycle (from 2 to 4 weeks) using a special liquid.
Step-by-step instruction
Shellac does not dry out under normal conditions at home or outdoors. You will need a UV lamp for drying. Under the influence of ultraviolet rays, the gel base dries in half a minute. It is also important that the claws are properly prepared for the procedure.
For perfect application, it is necessary to follow all points in order, use high-quality materials and special equipment.
Softening the cuticle
Manicure includes care not only for the nails, but also for the skin around it. Hangnails, cuticles, and dryness will not allow your hands to look beautiful, so to soften them, use a regular bath with slightly hot water or apply a remover (lotions or creams).
Attention! You cannot use boiling water for the bath. The skin will become over-hydrated and coverage will not work.
Treatment
The softened cuticle easily moves to the base of the claw if it is well moistened. A scraper is used for this procedure.
Grinding
At this stage, it is necessary to sand the nail plate and trim the edges, giving it a certain shape. Grinding is done with a special device called “Buff”.
Nail polishing
Degreasing
In order for the gel polish to adhere well to the nail, it must be degreased. A primer is used for this. Example in the photo.
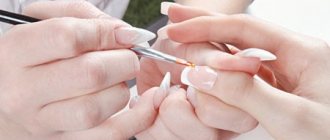
Applying varnish
The first layer is the base. It must be applied with a pepper colored coating. It ensures a smooth plate and durability of the manicure.
Applying gel polish
After the base coat, apply gel polish. A wide range of colors from various manufacturers allows you to choose and paint a cheap and high-quality option with the perfect highlight.
Rules for applying varnish
Drying
After the varnish is applied, it must be dried. For this you will need a special lamp. It is desirable that it has mirrors on all sides. This way, ultraviolet radiation hits the entire finger area evenly.
Drying nails in a UV lamp
There are also lamps for drying on one or both hands at once. The choice depends on the buyer. There are also models with a timer and a fan. Studying the reviews, we can say that you can save money on such additions and, while performing the procedure, time the time on a separate watch.
Application of a protective layer
The protective layer (top) must be applied over the gel polish. It allows you to achieve the perfect highlight and fix the shade. After coating, you must use the lamp again to dry.
Apply base to nails
For reference! There are varnishes on sale that can be used as a base and top at the same time. Judging by the reviews, they can be painted once.
Removing the sticky layer and moisturizing
It is carried out at the last stage. The skin of your hands suffers in the lamp because it dries along with the varnish. It should be moisturized with oils or cream.
Important! The master class is presented clearly in the video.
What is required for a manicure besides gel polish?
To apply gel polish to your nails, beginners need the following tools:
- Hand sanitizer. It disinfects hands, nails and cuticles.
- Primer (base) – it degreases the nail plate, ensures tight adhesion of the natural surface of the nail to the gel polish, thereby extending the life of the manicure.
- Base coat (first layer) – evens out the nails and hides their minor imperfections. It also prepares the surface of the nails for applying the main color.
- Colored gel polish.
- Top coat is the final stage in manicure. The top protects nails from external environmental influences, from chips and scratches.
- Special lamp for drying. The main task of the lamp is to dry the gel polish as quickly as possible. It all depends on its power and variety.
| Type | Characteristic |
| UV lamp | Budget price, ability to dry not only one hand, but two at once. Maximum power – 36 W. Drying time is over two minutes. |
| LED lamp | LED lamp. Drying time: 1 minute. |
| Hybrid | Combines only the best qualities of the two previous lamps. |
- Matching nail files. They allow you to carefully process your nails and create the desired shape (almond, oval, square, soft square and others).
- Buff is one of the types of nail files. It is used at the initial stage of manicure and for removing gel polish.
- Tools for removing cuticles. These include: special gels for softening and removing cuticles, orange sticks, tweezers, manicure scissors.
- Cuticle oil. To make the skin along the nail look well-groomed and neat, cuticle oil must be used during the manicure process. It should be rubbed in with massage movements until completely absorbed.
- Nail degreaser. It removes the sticky layer after using gel polish.
- Gel polish remover, foil and cotton pads. With the help of these media, gel polish is removed quickly and painlessly. The solution is applied to a cotton pad, which must be pressed tightly to the nail and wrapped with foil on top. After 10-15 minutes, the old layer of gel polish can be easily removed from the nails with an orange stick.
How to grow nails: what you need to know
It is especially important for beginners to familiarize themselves with the technology of the nail extension procedure from the very initial stage, cultivating the cuticle and giving the nail plate area its shape, until the moment of coating with gel polish. This is the main procedure to know and the most important basics.
.
.
You will learn how to make a curve correctly, how long you need to dry, when and what component you need to apply, whether you should dry your nails longer, what a sticky layer is, and how to make your manicure look natural. What is better - to make a French manicure or cover the center of the nail, or part of it?
.
The author of the video will give valuable advice on the correct application of the gel, applying the stencil, cutting it, attaching the upper decorative parts, and tell you what tools are used.
.
You will also learn how to interact correctly with a client to achieve a good result.
.
At the end of the video, you will get acquainted with the features of thermovarnish - it has a chameleon effect, changing colors under the influence of different temperatures. Apply it and see your girlfriends.
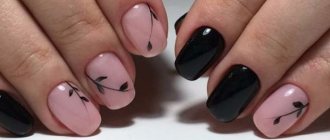
Master class on applying a single-color manicure with gel polish
The trend in 2022 is manicure in pastel shades. Such as beige, powdery, pale pink. This color scheme is perfect for gentle and sophisticated natures.
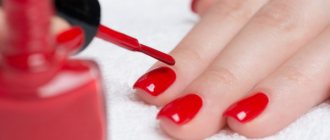
A classic red manicure will never go out of style.
It is ideal for self-confident and self-sufficient women. And most importantly, it will be appropriate at any time of the year and in any environment, be it everyday work or a relaxing vacation.
Technology for creating a monochromatic manicure with gel polish:
- It is necessary to disinfect your hands with an antiseptic.
- Next comes the removal of the old gel polish coating using a special solution, cotton pads and foil.
- Correcting the shape of the free edge of the nails using a file and a buff.
- Having previously removed dust from the surface of the nails, you need to generously moisten a lint-free cloth and thoroughly wipe your natural nails with a degreaser. Especially in the cuticle area. You will need one napkin per hand.
- For more reliable adhesion of materials, it is necessary to apply a primer. You only need the right amount of the drug so that moisture does not remain on the surface of the nail. The primer should evaporate following the movements of the brush.
- Applying the base should begin with your thumbs. This will save a significant amount of time during the procedure. The consistency of the base must be stretched from the cuticle to the free edge of the nail.
- Fix the coating in an ultraviolet lamp for at least 30 seconds.
- Next, you should evenly distribute the first thin layer of colored gel polish over the entire surface of the nail. Paying special attention to the sides of the nail plate and the end of the free edge.
- Fix the coating under UV radiation for at least 1 minute.
- Using the same scheme, it is necessary to apply a second layer and then seal it under ultraviolet rays.
- After applying the color, you need to alternately cover all the nails with top coat (finish coat) and dry them under the lamp. For best results, it is recommended to apply the top in two layers.
- At the end of the procedure, use a degreaser to remove the sticky layer with a lint-free cloth.
What do you need to buy?
It’s not difficult to do your own gel polish manicure at home. To work you will need:
- scraper;
- ultraviolet light lamp;
- files;
- buff;
- primer;
- varnishes: top, base.
Examples of tools are shown in the photo. Any moisturizing cream or oil will be useful to moisturize the skin of your hands. To remove nail polish you will need: cotton pads, acetone, pusher, buff and foil.
Gel polishes and UV lamp
Attention! If a craftswoman wants to make a French coat, she will additionally need strips to border the claw.
Master class on applying multi-colored manicure with gel polish
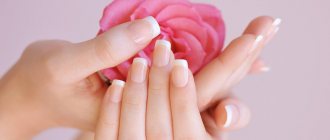
French manicure, or French in other words, has been popular for many years. Due to the organic combinatorics of the natural shade of nails with white color, you get a neat, beautiful manicure that is ideal for girls and women of any age.
French adds femininity to the image of its owner and emphasizes the length and beauty of her nails.
Step-by-step instructions for creating a French manicure using gel polish:
- The first stage is preparing the nail plate. It is necessary to process the free edges of the nails, remove the cuticle using auxiliary tools, and degrease the surface.
- Apply primer and dry under lamp for at least 30 seconds.
- Apply a thin base coat and dry for at least 1 minute.
- Apply the main color (light beige, light pink) to the entire surface of the nails and dry under a lamp for at least 1-2 minutes. It is recommended to apply 1-2 layers.
- Using a thin brush for nail art, you need to draw a crescent line on the tip of the nails and dry it in a lamp for 1-2 minutes. Cover in 1-2 layers. If you can’t handle a brush, you can use stencils to create a French manicure.
- Fixing the design with a top. Dry under lamp.
- Removing the sticky layer using a degreaser.
- Applying nourishing cuticle oil.
Gel extensions
It’s very easy to do this at home; you just need to download a free online video lesson in Russian.
- We prepare the nail - remove the cuticle and file off the top layer with a large file, degrease it, apply primer
- Applying the form
- We apply the first layer of gel and give it a shape, send it to a UV lamp for drying. Taking off the uniform
- We degrease this layer of gel and apply the next one and send it to the lamp
- We file down the bumps and irregularities, adjust the shape and length with a file, degrease and apply the next layer of gel and send it to the lamp
Editor's choice: Gel nail polish: advantages, disadvantages and application technology
Before applying the last layer of gel, you need to apply a pattern or varnish, if the varnish is under the gel, in order to fix it with the top layer.
The procedure is not complicated.
The correction is carried out in the following order:
- We file off the old gel with a file, apply a form and apply new layers of gel according to the same principle as for extensions.
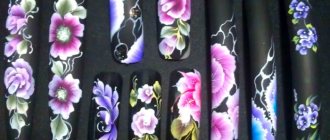
How to apply simple patterns and designs to gel polish
The main tool for creating designs on nails are special brushes.
They are:
- in the form of a fan;
- wide flat with an even or oblique cut;
- thin with different lengths of pile;
- dots;
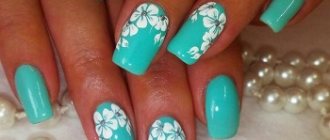
Popular ideas:
- Web. After coating with colored gel polish, beginners should polish the nail and using a thin brush, you can safely draw patterns that represent a spider’s web. The main thing is to initially collect a minimum amount of material, and then add little by little as you go.
- Monograms. The design is created using a single-color gel polish and a brush, convenient for a beginner in size. After the base, you need to put a little dark gel polish on your brush, black will look most expressive, and draw monograms in the shape of semicircles. To get an elegant design on each nail, you can make monograms in different colors rather than one. If desired and in the mood, you can add rhinestones, sparkles, and stickers.
- To create roses on your nails you will need: dots, several colored gel polishes and a thin brush. After drying the base layer, you need to cover your nails with the main color of gel polish and seal the result under the lamp. When it dries, you can draw roses.
Gel polish coating for beginners with designs and patterns is always relevant. Roses will lift your spirits in the spring and summer. And cobwebs and monograms will add zest in winter and autumn.
Nail extension step by step: fiberglass
Fiberglass is a new nail extension technology that is only gaining popularity.
.
The manicurist will tell you how to extend your nails using fiberglass - it’s simple, as natural as possible and takes only a few minutes.
Outwardly, no one can distinguish an artificial nail grown with fiberglass from a natural one.
.
This material can only be used to lengthen nails - it is not suitable for nail correction.
.
It is also very convenient to work with fiberglass bundles - you will see this by watching the video and putting into practice the advice from Masha, a nail extension master. And don't forget to coat your new nails with gel polish!
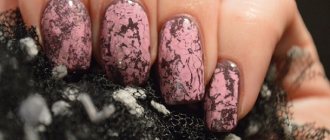
How to apply decor to a manicure with gel polish
Popular techniques for performing nail designs:
- Rhinestone inlay is part of the image of a charming and gentle girl. Rhinestones are glued in a chaotic manner naturally onto the uncured surface of the nail, coated with gel polish. The decor hardens under a UV lamp and at the final stage is filled with a finishing coat to ensure the durability of the manicure. Rhinestones can be complemented with patterns and designs.
- Rubbing. This is a special finely ground powder for nail art. It is rubbed onto the already lamp-dried nail surface. The result is a natural shine effect. A manicure with this design will fit perfectly into a festive look.
- Broken glass. The effect is created using a small piece of multi-colored foil, which must first be cut into small pieces of the desired shape. They should be carefully distributed over the nail plate. You can make an unusual pattern or mosaic out of them. This design is suitable for everyday life.
Gel polish coating for beginners has a lot of advantages. These include: attractive appearance, durability and protection from household defects. In order for the coating to be perfect, you need to choose only high-quality tools and materials, as well as a good, powerful lamp. In this case, a manicure will always please the eye.
Nail extensions using liquid tips
Alena, the author of the video, will show you how to properly use liquid tips in manicure.
.
Tips are special forms for creating the base of the nail, which can be easily mastered by any novice nail artist. They are suitable for any nail plate and come in various shapes and lengths:
.
— Classic tips;
— Straight tips;
— Square tips;
— Tapered tips.
.
Special glue is required to attach them. This glue can be purchased at any specialty store.
.
Alena will show you the whole process from start to finish - from working with the cuticle and giving the nail shape to painting the finished nails with bright gel polish. Although liquid tips are an artificial material, this manicure looks really natural.
.
The video tutorial will be useful for beginners and those who want to improve their nail extension skills and learn more about such useful material as tips.