Related Articles
How to do a pedicure at home: 7 simple steps from barb.ru specialists
2021
25 best pedicure designs 2021-2022
2020
Fashionable pedicure 2022 photo
2019
Everyone without exception knows what a pedicure is, but, unfortunately, not everyone pays due attention to it. Pedicure is not a luxury or a whim, but a part of personal hygiene, and requires a thorough approach. This procedure is not only aesthetic, but also medical and is recommended not only for women, but also for men.
It is necessary to maintain foot hygiene, care for them and do a pedicure all year round, and not remember about it with the arrival of spring. Caring care helps to avoid such troubles as calluses, corns and hyperkeratosis of the feet (excessive keratinization and thickening of the upper layer of the epidermis on the soles of the feet).
Pedicures should be done at least once a month during the winter season and once every 2-3 weeks during the warm season. This is good for health, and your legs will look aesthetically pleasing, and your gait will become flying. Yes, many women have noticed that pedicure gives them lightness, as if wings grow behind their backs, and they want to fly.
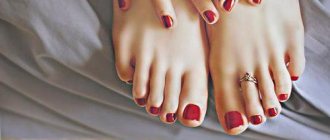
Smooth pink heels and beautifully painted nails make women attractive and speak of her neatness. Of course, a pedicure can be done in a salon, but you can try to do it at home, especially since it won’t be difficult, but you will get great pleasure from the work done.
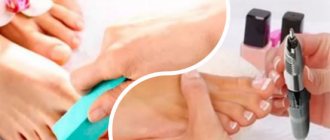
Before we begin to consider step by step the process of performing a pedicure at home, let’s decide what tools are needed for this.
Fashion trends in manicure
Star manicure: Madonna
Decorations for nail design. part 2
Celebrity manicure: Kim Kardashian
What is hardware manicure
Hardware pedicure has gained great popularity and fame due to the fact that this type of foot treatment is more durable. If, after you have trimmed the calluses and polished off the corns, the skin begins to get rough on the second or third day, then after hardware treatment, calluses and corns begin to appear only after the second week.
This is due to the fact that a trimmed manicure always injures the skin, cutting off the rough area under the finger, you always touch the top layer of living tissue, the skin begins to regenerate and protects itself with rapid growth. It is much more effective to remove calluses and corns with pumice stones, brushes, etc. But this is long and tedious.
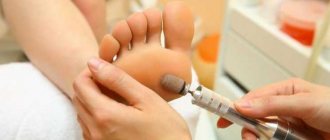
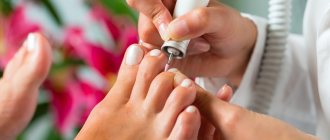
Hardware pedicure is the treatment of the skin of the feet and nails using a device and special attachments, cutters and caps. They come in different shapes and are made from different materials. Due to rapid rotation on the nozzle, the device removes rough skin, cuticles and forms the nail bed.
The device has different rotation speeds and power and is adjusted depending on the condition of the skin and the type of attachment installed. What are the features and advantages of hardware pedicure:
- removal of rough skin without steaming;
- effectiveness - removal of calluses and corns;
- therapeutic effect - removal of ingrown nails and cracks;
- you can learn to do it yourself at home;
- Suitable for any skin, even particularly sensitive ones.
What is a pedicure
Pedicure is a procedure for caring for toenails. It is worth noting that the process also affects the skin of the feet. Everyone knows that a quality pedicure is not only beauty, but also health. Most people remember this procedure only with the arrival of the warm season, because it is then that our legs are constantly in sight. Of course, this approach cannot be called correct. It must be remembered that foot and nail hygiene is important throughout the year. This is the only way to avoid the following problems:
- calluses;
- corns;
- hyperkeratosis of the feet;
- foot fungus;
- onychocryptosis (ingrown toenail);
- etc.
Note that pedicures need to be done not only by women, but also by men.
Procedure frequency
As for the frequency of pedicures, everything is individual. Depending on the time of year and the condition of your feet, the procedure can be done one to four times a month. The type of pedicure also matters. The effect of the hardware lasts for a very long time, thanks to which you can save time and money on your next trip to the specialist. The classic procedure cannot give you the same effect, so you will have to do it more often.
A pedicure performed by a professional in a beauty salon will delight you for a very long time.
It is worth noting that in the summer, pedicures must be performed at least once every two weeks. The same applies to people who have problems with their nails or the skin around them. In winter, you can perform the procedure only once a month if everything is in order with the health of your feet. It is also necessary to remember that in case of serious diseases (fungus, onychocryptosis, etc.) you need to consult a doctor. In such a situation, you cannot do a pedicure yourself, as there is a risk of harming your health.
If you have thin and dry skin on your feet, then do not get a pedicure more than once every three weeks.
Benefit ghjwtlehs
- Healthy and attractive appearance of nails and feet in general.
- Prevention of most skin diseases.
- The procedure includes a light foot massage, which improves blood circulation in the legs.
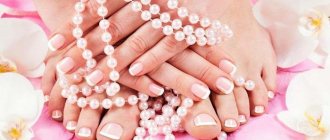
- The skin of the feet is moisturized and beautiful even in the interval between procedures, since during pedicure special creams and products are used to soften and remove the rough layer of epithelium.
- Pleasant sensations for a long time after the procedure.
The essence of hardware pedicure
Using a hardware version of pedicure, nails and feet are treated with a special machine, which polishes off unevenness, corns, rough skin, and eliminates other problems.
It is considered a more advanced method in contrast to classic pedicure, in which the foot is treated with a blade, grater, water and special softening creams.
The pedicure machine uses attachments with an abrasive surface that rotate at speeds of up to 50 thousand revolutions per minute. Experienced professionals not only eliminate minor defects, but also solve problems of cracks, ingrown nails, and fungal infections.
The standard version of the hardware pedicure technique includes treatment of heels, toes, keratinized areas, cuticles and overgrown nails. There is also an untrimmed method without mechanical removal of the cuticle; in this case, it is only gently moved with a stick. The most enjoyable spa pedicure is when steaming, peeling and massage are performed before using the machine.
It is believed that it is quite difficult to carry out such processing correctly at home. However, pedicure machines have been in great demand lately. This technology is especially easy for those who are masters of classic manicure and pedicure. But mastering it from scratch is also possible, the main thing is to have the desire and a good professional apparatus.
Pedicure at home for beginners step by step
For home use, the so-called classic pedicure is best suited. It is based on steaming the legs. It is simple and pleasant and suitable for all feet. Perfectly relieves fatigue, nourishes, rejuvenates and smoothes the skin. Most women prefer this method, since you can do a pedicure at home before going to bed, without rushing, while watching your favorite TV series or listening to music. In general, thoroughly enjoying the process.
Stage one is preparatory. Use nail polish remover to remove nail polish. Carefully shape the edges of the nails with tweezers or scissors. We do not recommend cutting your nails very short, because... they can grow into the skin of the finger. We trim the edges with a coarse file, and with a fine-grained file we sand and give them the desired shape. If your nails are thick and rough, then your feet should be steamed first. Using an orange tree stick or a cotton swab, remove all dirt from the surface and back of the nails.
At the second stage - steaming, we recommend adding the following to warm water for health purposes:
- soap and soda, which quickly soften and whiten the yellowed skin of the feet;
- sea salt. It wonderfully refreshes and softens the skin of the heels;
- an apple bite, which will help fight sweating and destroy characteristic odors;
- honey. Fights fungi well. Exfoliates and tones the skin;
- Herbal decoctions will help relieve fatigue and have a mild antiseptic and softening effect. Aromatic oils perfectly relax, soothe and relieve heaviness.
Stage three. Getting rid of rough skin and calluses. After a 20-minute bath, remove one foot from the water and gently pat it dry to remove excess moisture. The leg should be steamed. We remove rough skin using pumice or a pedicure file. To do this, we go over the entire foot with a pumice stone in a circular motion, not forgetting to dip it in water more often. You need to wash off any remaining skin from it and make sure that the pumice stone or nail file is damp. The edges of the legs, the tips of the fingers, the inner corners of the big toes, the back of the ankles and the forefoot are treated in this way. Having finished working with one leg, we move on to the other. Afterwards, rinse your feet and dry them with a clean towel.
Stage four. Working with the cuticle. We apply a cuticle softener to the nails and after a few minutes, carefully, slowly push back the softened cuticle with a stick, and cut off the side skin with tweezers. When doing a trim pedicure, you need to be careful when working with sharp instruments.
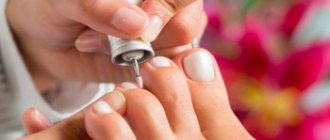
Stage four, creative. We move on to coating the nails with varnish. Apply the first layer, base for nails, with transparent varnish. It will protect the nail surface. Apply colored varnish in one or two layers, allowing each of them to dry thoroughly. We apply a fixing varnish on top so that the colored one does not chip off.
This completes the DIY pedicure in a relaxed home environment. This is all you need to know about doing it on your own. As you can see, it’s nothing complicated, the main thing is patience and following simple rules.
Latest articles about fashion and style
For craftsmen and beauty salons: mobile application development
All about diamond cutters
Helpful tips for a flawless manicure
Skin types
The choice of attachments and operating parameters of the device depend on the condition of the skin of the feet. The master himself assesses the amount of work and sets up the device. Each skin type has its own characteristics that affect the procedure.
Normal
Such feet are characterized by slight roughness in the heels and outer lateral part of the sole. Corns may form in the summer due to dirt and dust that gets into open shoes. In most cases, pedicure is limited to polishing; cutters are rarely used. The result lasts for at least 3 weeks.
Average
A more problematic type, characterized by a tendency to dryness. It is considered the most common in our climate zone. The skin becomes yellowish due to the thick stratum corneum; if not properly cared for, calluses and cracks appear. The procedure takes longer and requires grinding. The effect lasts for an average of 2 weeks.
Problematic
Due to increased dryness, the soles of the feet become covered with cracks, calluses, and become very flaky. It hurts to step on a person's feet. One treatment procedure is not enough. Every week and a half, you can restore the health of your feet with the help of the device and correctly selected attachments. The master also gives recommendations for home health improvement.
What is better - a classic trim or a hardware pedicure?
A hardware pedicure differs from a classic one in that a special tool and various attachments are used for grinding. The master selects them individually for each client. The likelihood of injury and cuts is minimized. And the softening of rough skin occurs not due to soaking in the bath, but thanks to a special solution that is used to lubricate the feet.
This is interesting: How to lose weight on buckwheat
The main advantages of this procedure can be considered the following:
- It takes less time, since the treatment of feet is done not manually, but using a machine;
- It is safe and hygienic and also allows for treatment in hard-to-reach places (for example, fingertips or between the fingers);
- During the procedure, a foot massage occurs, which also has a beneficial effect on the health of the legs;
- Regular procedures help to almost completely get rid of calluses and prevent their occurrence in the future.
A hardware pedicure is much more expensive than a classic trim pedicure, but its advantages are obvious. And which procedure to choose - each person decides for himself.
Indications for the procedure
In some cases, the choice between classic and hardware pedicure is a matter of health. Processing with cutters and attachments is necessary when:
- hangnails - removing them with forceps will be difficult and traumatic;
- thin cuticles - ordinary tools damage it, causing pain for several weeks after a pedicure, and the device carefully removes it;
- uneven surface of the nail - polishing with attachments smooths out the bumpy surface, makes the thick nail plate thinner;
- diabetes mellitus – only a device can quickly improve the legs of people suffering from diabetes;
- damaged nails - special attachments correct any imperfections;
- ingrown nails - cutters not only treat ingrown nails, but are also considered its main prevention;
- cracks, corns, calluses - dealing with them manually is more difficult and takes longer.
Contraindications to the procedure
There are practically no contraindications to hardware pedicure. The only diagnosis for which it is prohibited is an allergy to the components included in the products used. You can try to select other materials, but the choice is not so large, and most of them have approximately the same composition.
For certain situations, a thin and weakened nail plate will also be a contraindication. Milling cutters may damage it during processing. However, experienced craftsmen know what attachments to use in this case and how to avoid injuries.
Advantages and disadvantages of hardware pedicure
Girls prefer this procedure because it has many advantages over the classic procedure:
- With the help of medical devices, you can get rid of corns without affecting the healthy layer of the skin.
- The layer of dead cells that usually accumulates on the nail plate is quickly and painlessly removed by polishing.
- During the process of grinding and removing the cuticle, the specialist carefully massages the legs, thereby stimulating blood circulation and toning the entire body.
- The cuticle is not completely removed, but simply smoothed using various attachments.
- Calluses and rough skin are polished painlessly and without discomfort.
- Using an electric machine, you can remove fungus and ingrown nails.
Experts recommend carrying out the procedure at least once every two months. This will not only relieve the woman of existing problems, but will also help maintain skin elasticity for a long time. In addition, a hardware pedicure in the salon includes coating of nails with gel polish, which will not only restore health to the feet, but also get beautiful nails for a period of 1 to 2 months.
Like any other procedure, hardware pedicure has its disadvantages, which include:
- High price. In order to pamper your feet with a hardware pedicure, you will have to shell out a considerable amount of money;
- The opportunity to get an appointment with a non-professional. With this outcome, be prepared that within a few days you will have to visit the beauty salon again;
- If the feet are in a neglected state, then one procedure will not be enough. You will have to come to the salon 5-10 times.
What to work with: choosing a device and attachments
To perform a hardware pedicure at home, you need, at a minimum, to buy this tool for the job. On this occasion, I advise young ladies to first decide what you want, study reviews of various models, and then choose for themselves a household appliance from the middle price segment, but with:
- Good power;
- Slight vibration;
- Light weight;
- Comfortable ergonomics;
- Universal functions;
- Manufacturer's warranty.
The working body of these devices are the various attachments that are included in their package. Depending on the purpose they can be:
- Diamond. These are small attachments that are used to treat the free edges of the nail and rough cuticles.
- Ceramic for treating nail plates or repairing cracks. Usually these are the safest attachments that are recommended by experts for beginners.
- Metal. These carbide cutters are made with a variety of serrations on the tip to remove trampled calluses or acrylic layers.
- Silicone, felt or rubber, which are intended for polishing and grinding work.
- Sandy. These disposable caps are Chinese-made caps with varying degrees of abrasiveness. By the way, they are inexpensive, very convenient to use, and according to the reviews of some craftsmen, they are not inferior even to cool European brands.
What cutters are needed for a hardware pedicure?
Attachments for hardware pedicure are the main part of the device. They differ in the material used for manufacturing, surface rigidity, and the presence of additional configurations. It's easy to understand them:
- 100 micrometers (pink notches) – the softest cutter, used for cuticles and areas with delicate skin;
- 200-300 micrometers (white notches) – belongs to the medium category. With their help, you can remove corns and calluses from the heels, rough skin, etc.;
- 400 micrometers (black and brown notches) – the hardest cutter. Used for trimming nails.
Also, nozzles are distinguished by material. For example, carbide cutters for pedicure will help remove polish, acrylic and gel from nails. Softer ones include ceramic tips.
For beginners, it is better to take devices with 25,000 rpm, with a power of 30 watts or more (which will protect the device from overheating), reverse for better treatment of skin and nails, as well as with convenient controls (for example, with a foot pedal).
Types of hardware processing
Classic hardware pedicure . With this treatment, a device for hardware pedicure is used on the heels, under the toes, and on other rough areas. They use it, only with a different attachment, to remove the overgrown cuticle and file down the overgrown edge of the nail.
Uncut pedicure . The key difference from the previous treatment method is that the device does not remove the cuticle. It is not removed mechanically at all, but is only softened with special preparations with acids or oils. After this, they move it away with an orange stick so that it looks neat.
SPA pedicure . SPA pedicure is the most intensive foot care complex. Before treatment, the feet undergo spa treatments - steaming in a bath with salt and oils, peeling, massage and others. For SPA pedicure, special moisturizing and nourishing creams and oils are used.
Step-by-step instructions with photos
A careful study of processing technology helps you quickly master the use of a pedicure machine.
Here are some important tips from the experts:
- Move the machine in the opposite direction from its rotation, do not stop in one place;
- Do not press the cutter too hard against the skin to avoid damaging it;
- For the first time, operate at low speeds, below the recommended speed;
- Position the cutter at an angle of 30-40 degrees to the surface;
- Process the cuticle from the center to the edges;
- Walk along the nail folds along the growth of the nail.
The stages of the procedure will depend on the number of attachments in the kit. Stepped, gradual processing will be preferable for a smoother, cleaner effect.
Classic step-by-step instructions:
- Prepare your feet by wiping off the old polish with a solution. If there is gel polish, remove it using a grinding cutter, after treating the nail plates with acetone and foil.
- Wash your feet in cool or warm water and soap and dry well.
- Apply an antiseptic solution to the entire surface of your feet and toes and wipe with a clean towel.
- Treat the skin of the feet with a large, hard cutter, remove non-inflamed calluses, corns and rough skin of the soles.
- Next, use a medium-abrasive nozzle, eliminating small irregularities, paying special attention to the treatment of the heels.
- If there are cracks on the heels, outline the formation with a thin nozzle.
- Using large, soft cutters, sand and polish the entire skin of the feet until smooth.
- Use a small soft brush to work on the side ridges and between the toes.
- Remove cuticles using a needle cutter or a diamond cutter with a ball end. If you are afraid of damaging the skin, then treat the cuticle with an emollient for the first time and move it away.
- File off the required part of the edges of the nails with a medium-abrasive cutter and give the desired shape.
- To polish the nails and pterygium, use a felt or rubber tip or use a buff.
- Wipe your feet with a disinfectant.
- Apply moisturizer and apply a light foot massage.
- Finally, you can apply varnish - healing, strengthening or colored. Do not forget to degrease the nail plates from the cream before doing this.
Step-by-step instructions for hardware pedicure: first stage
Second phase
Self-training in hardware pedicure may take time, but gradually the skill of selecting cutters will improve, and the movements will become correct and as accurate as possible. After just a few procedures, it will be possible to appreciate all the advantages of this technique.
How to do a pedicure correctly
Unfortunately, every second person considers himself a master of hardware pedicure, buying various certificates for completing courses. In order not to become a client of an unprofessional master, you need to know the algorithm of actions that must be followed when providing the service.
For a safe pedicure you need:
- Special clothing: white coat, gloves, headscarf and mask.
- A disinfectant that treats not only the client’s feet, but also the master’s hands.
- Availability of working equipment.
- Cutters for pedicure.
- For nails you will need a gel remover that will slightly soften the nail plate.
Preparation
This is the first step when performing a hardware pedicure. To do this you need:
- Remove old nail polish.
- Treat tools, hands and feet with a disinfectant solution.
- Trim your nails at your discretion, using clippers to adjust their shape and length.
- Wash your feet thoroughly and then dry them with a towel.
- Then a special gel with keratin properties should be applied to the feet to soften the compacted, rough layer. Typically, according to the instructions, its duration of action is from 10 to 20 minutes. At the same time, it selectively acts on the keratinized layers of the skin, where there are no nerve endings and blood vessels.
Tools
The pedicure apparatus is presented in the form of a small instrument and a long handle, with the help of which the procedure is actually performed. The handles are equipped with attachments that come in the kit.
Only specialists who have undergone special training and have a medical education are allowed to work with the device.
Hard cutters are used to shorten nails and remove calluses and corns, while soft cutters are used to treat cuticles and small rough areas.
Mandatory stages of pedicure at home
[yandex2] [google2]
Before doing a pedicure at home, make sure you have enough time, as this is not a quick procedure. If done haphazardly and in a hurry, it will not only not bring the expected effect, but will also make the feet even more sloppy. The procedure must be performed approximately once every 10 days. At the initial stages of care or after long breaks - perhaps more often.
Below are instructions on how to perform a pedicure step by step at home.
- Take a shower or at least wash your feet thoroughly;
- Make a foot bath. This will help make the skin softer, all further procedures will become less traumatic and more effective. You can add sea salt, caring oils or extracts, etc. to the water. It is recommended to keep your feet in the bath for about 10 minutes;
- Dry your feet with a towel;
- Trim the overgrown parts of the nail. The cut line must be straight, since rounded nails have an unpleasant feature - they grow into the skin;
- Use a rough file to remove scratched fragments of the cut;
- Pull back or remove cuticles. You can move it away using an orange stick or a special pedicure spatula. If the cuticle needs to be cut, then it is better to pre-treat the nail scissors with an antiseptic;
- If the cuticle is hard and there is a lot of it, you can resort to using a special softening cosmetic product. Usually it is applied for 5 minutes, and then unabsorbed residues are removed;
- Clean the area under the nails from accumulated dead particles and dust after filing the nail;
- When performing a pedicure at home with your own hands, you can use some items for other purposes. In particular, using a medium-hard nail file, corns, calluses and other areas of rough, keratinized skin are successfully removed;
- Using a glass file, give your nails the same shape and polish the nail plate so that it becomes even, smooth and shiny.
These steps are mandatory when performing both female and male pedicures. This is the necessary minimum of procedures that must be performed regularly in order for your feet to have an aesthetic appearance.
Step-by-step instructions for implementation
Next, we will look at step-by-step instructions on how to do a manicure for beginners:
- Prepare your feet. Wipe off any old polish if it remains on your nails. Remove gel polish using cotton pads soaked in acetone, foil and a sanding cutter or file.
- Wash your feet or take a bath. In order for the roughened areas to soften and be easier to process, your feet should be kept in warm water for 10-15 minutes. You can add salt, oil or other additives to the bath.
- Apply preparations that soften rough skin to corns and calluses. Leave for the recommended time indicated in the instructions. This will soften the stratum corneum and make it easier to remove.
- Wipe off any remaining product with a napkin. You can use a small towel; its fleecy structure will also capture the softened layers of skin. Rub your feet vigorously and roll up the skin particles with a towel. The towel must be washed after each use. It is unhygienic to reuse it during your next pedicure without washing it.
- Treat your feet with a large milling cutter with a high level of abrasiveness - it will remove rough skin and deal with calluses and corns.
- Use a medium abrasive cutter and then a fine abrasive cutter to polish and polish the feet, making them smooth.
- Use a small fine milling cutter to process the side rollers of the fingers and the areas between the fingers. For these areas it is important to use a fine-grained nozzle; too hard one can damage the delicate skin.
- Remove the cuticle using a diamond bit with a ball at the end or a needle-shaped cutter. If you are treating your feet with a machine for the first time and are afraid of damaging the cuticle, do an unedged pedicure. Soften the cuticle with a special product and move it back. Remove with the machine when you get used to using it.
- File off the overgrown edge of the nail or trim it and shape it with a cutter with medium abrasiveness.
- Polish the nail. To do this, you will need a special felt nozzle or a rubber cutter. If there are no such attachments, use a regular buff, that is, a soft file.
- Wipe your feet with a disinfectant to prevent infection. Apply moisturizer.
Note! If you have ingrown nails or overgrown nail plates or warts, it is better to go to the salon. It is difficult for beginners to get rid of these problems at home, especially when using the device for the first time.
For a detailed video on how to do a hardware pedicure at home, watch here:
Application of decorative coating
A pedicure done at home involves an action such as painting your nails. After finishing the care procedures, they begin decorating.
- Separating pads placed between the toes will help make the process easier.
- First, the nails are degreased and covered with a base coat containing vitamins and microelements.
- The nails are covered with the chosen varnish, preferably in the same color scheme or a couple of tones darker than on the hands.
- The varnish should be applied in 2 layers, securing it with a special compound at the end. The coating will last a long time and look aesthetically pleasing.
How to properly do a pedicure at home is an art that any woman can master. If you have problems with your nails or skin on your feet, you should visit a cosmetologist or dermatologist before the procedure. They will tell you how to solve the problem and help you properly care for your feet.
Sterilization and processing of the device
A novice master must remember that after each pedicure session, all instruments, including cutters, must undergo mandatory sterilization. This must be done, as particles of skin, nails and fat remain on the attachments.
The complete tool processing process includes:
- dry cleaning from biological residues;
- disinfection;
- preparation for sterilization;
- sterilization.
Important! Only after going through all the stages should the nozzles be put into an airtight container.
Home foot care
Whether you get a pedicure at home or in a salon, your feet need some maintenance care in between. This not only prolongs the durability of the pedicure, but also improves the condition of the feet, health and vitality in general, since we spend a third of our lives on our feet.
Home care consists of the following stages:
- Cleansing
- Hydration
- Nutrition
- Protection
- Massage
Cleansing is not only daily hygiene procedures, but also the use of large scrubs to remove dead skin. Peeling is recommended once a week followed by application of cream.
After contact with water, and every evening before bed, apply a nourishing, moisturizing or protective cream to your feet, depending on the condition of the skin and the season.
Once a week, make nourishing foot masks at night under plastic or silicone socks. Masks can be found in the lines of almost all foot cosmetics manufacturers.
Creams containing paraffin have a protective effect on the skin. You can also do cold or hot paraffin therapy once every 10-12 days. The resulting thin film retains moisture and protects the skin from the effects of negative environmental factors, which is especially important in summer.
Once a day, massage for 10-15 minutes using either a light moisturizer or oil if you do not plan to go outside. It relaxes, tones vital acupuncture points and uplifts your mood. In addition, massage helps cosmetic products to be absorbed.
Recommendations and tips for beginners
To give yourself a pedicure using an electric device at home, I would advise beginners to still adhere to certain rules:
- Start working at minimum speeds to get used to the machine or avoid injury if you are careless.
- Position the nozzle in relation to the plane of the body at approximately 35 degrees.
- When processing the nail fold, it is advisable to move the cutter in the direction of nail growth.
- The cuticle should be processed from the center to the edge.
- To prevent the attachment from jumping off, move it opposite to the rotation of the cutter.
- Do not press the nozzle tightly against the skin while the device is operating and do not hold it in one place for a long time.
That's probably all I wanted to tell you. Don't be afraid to start, it's not difficult. The main thing is that once you get the hang of it, you will no longer be fixated on the salon, since you can get your legs in order at any time convenient for you.
Sources
- https://luludmila.ru/chto-takoe-apparatnyj-pedikyur/
- https://www.LadyWow.ru/apparatnyy-pedikyur-v-domashnih-usloviyah.html
- https://nails-class.ru/pedicure/501-apparatnyj-pedikjur-kak-delaetsja-pljusy-i-minusy-vidy.html
- https://prostonail.com/dry-pedicure/
- https://modnail.ru/publication/apparatnyj-pedikyur/
- https://anyutglazki.ru/uhozhennye-nogti/kak-sdelat-apparatnyj-pedikyur/
- https://manicure-women.ru/pedikyur/apparatnyj-pedikyur-poshagovo.html
- https://myslitsky-nail.ru/about/articles/luchshie-frezy-dlya-pedikyura-poleznye-stati-myslitsky-nail/
- https://mirpilok.ru/article/frezy-dlya-pedikyura/
- https://idealnyi-manikur.ru/articles/manikyur/instrumenty/frezy-dlya-pedikyura.html
- https://nails-mag.ru/pedikur/pedikyur-v-domashnih-usloviyah/
[collapse]
What tools are needed for a pedicure?
• high-quality scissors and tweezers, • orange stick, • wire cutters, • brush, • nail file, • cotton pads
• and nail polish remover.
In addition to the above tools for pedicure at home, you must have a bath, scrub, callus and corn remover and, of course, foot cream. You can take any cream that you use daily, be it moisturizing or deodorizing. It is better to store tools in a special cosmetic bag, clean and dry. After each use, thoroughly sterilize each item. If we talk about the easiest way to get your feet in order at home, then this is the classic type of pedicure. It will not require large expenses or special skills.