The optimal solution to many nail problems
Using the gel, you can strengthen the nail, hide all sorts of defects, create the desired length and shape, decorate it with a variety of designs, and much more. After polymerization, the gel has a fairly plastic structure, which allows you to create artificial nails that are as similar as possible to natural ones. However, as the nail continually grows, the material also shifts. To restore your nails to their original beautiful appearance, it is necessary to carry out regular corrections.
A procedure such as correction of gel nails in a beauty salon is one of the most popular services. Usually, after 3-4 weeks, the nails grow by several millimeters, the architecture of the artificial nail is disrupted, and the highest point, the apex, shifts. All this contributes to fragility. It is also possible for the material to peel off.
Benefits of gel nail extensions
So, before moving on to the correction process, you need to pay attention to the extension itself. Gel nails differ from others in their structure and method of extension. For natural nails, this material does not have a negative effect, since the gel allows real nails to breathe, thereby reducing the risk of diseases forming under extended nails. Before you decide to get extensions, it is better to find out all the information about materials for artificial nails so that you know what to expect.
For example, acrylic for real nails may not be very useful, since after it is removed, the nails become brittle and weak, and you have to restore them. After gel, nails also need to be restored, because this is the process of closing the natural nail plate from the environment and oxygen. But gel extensions do not damage nails as much as acrylic can.
Materials and equipment
For gel correction, the following consumables and equipment are required:
1. Gel. The wizard selects a 3- or 1-phase system. You will need a base gel, a transparent gel to create a base, a camouflage gel, and a white gel for a jacket.
2. Degreaser.
3. Primer. Acid or acid-free. Designed to create good adhesion of the gel to the natural nail plate.
4. Gel topcoat. Designed to create a protective layer and add shine to finished nails.
5. Liquid for removing dispersed (sticky) layer on the surface of the gel coating.
6. Paper forms.
7. Brush for gel nail extensions.
8. UV lamp with a power of at least 36 W.
9. A router or a set of files of different abrasiveness (from 100 to 240 grit).
Each correction differs in the complexity of execution, the amount of consumables spent and time. Simple nail correction with gel is the most common. Technically it is basic.
A simple correction is always planned in advance and carried out after 3-4 weeks. In its process, the material is laid out only in the area of the regrown nail and the side ridges. The instructions below will tell you how to correct your nails with gel in 1 hour. The procedure is simple, but requires patience.
What you need
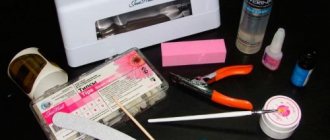
For proper correction, you need to have all the tools at home. What to use:
- files of various hardness;
- means for degreasing the surface of the nail plate;
- primer;
- gel of different phases;
- to change the length of the plate, special stencil stickers are used;
- ultraviolet lamp for drying the gel.
A machine for hardware manicure helps you quickly and easily get rid of the old layer of gel. But, this device is not included in the mandatory list of tools, since the machine will not affect the final result and quality. Instead of cutters, you can use saws.
Correction of gel nails is performed in stages, each individual point is performed in turn.
Step-by-step gel nail correction
Step 1: the hands of the master and client are treated with a disinfectant solution.
Step 2: If necessary, a European manicure procedure is performed.
Step 3: at the client’s request, the length of the nail is shortened and the free edge is given the desired shape.
Step 4: those places are processed using a router or file where the material has peeled off. The entire surface of the nail is also smoothed. The highest point is cut down because the symmetry is broken. The gloss is removed from an overgrown nail using a softer file with an abrasiveness of 240 grit. You need to work with files very carefully so as not to saw through or injure the natural nail. After washing down, use a brush to remove all dust well.
Step 5: The nail plate is degreased. The regrown part of the nail is treated with a primer. It is applied in a very thin layer. Too much of it can be one of the reasons for the material to peel off.
Step 6: if the master uses a 3-phase gel system in his work, then he applies a base layer of gel to the entire surface of the nail. This layer is polymerized in a UV lamp for 2 minutes. Sometimes during the polymerization of the gel, the client may experience discomfort and burning on the surface of the nail plate. In this case, it is recommended to remove your hand from the lamp for a few seconds and place it again as soon as the reaction stops.
Step 7: Without removing the dispersed layer, apply a small amount of gel to the regrown part of the nail and distribute evenly. Do not allow the gel to come into contact with the cuticle or flow onto the skin of the client’s hands. The distance from the gel to the cuticle should be approximately ½ millimeter. This layer is also polymerized in a UV lamp for 2 minutes.
Step 8: The second layer of gel restores the nail architecture and creates the highest point - the apex. This layer is polymerized in a UV lamp for 2 minutes.
Step 9: Once the new nail is created, it is filed to even out the surface of the gel and give the nail its final shape. The cuticle area is cut very carefully.
Step 10: the entire surface of the nail is covered with finishing gel and polymerized in a UV lamp for 1-3 minutes. If a gel with a dispersed layer is used, then after polymerization it is removed with a special liquid.
After the new nails are ready, you can offer the client to cover them with decorative varnish or decorate them with a design. Finally, nourishing oil is rubbed into the cuticle.
Acrylic nails: how to make adjustments
Correction of extended nails at home is possible, although a specialist will do it better and faster.
Important! Do not use baths before extensions and corrections and do not apply oil-based cream, as there is a high risk of nail detachment.
- Hand disinfection with antiseptic agents is a must. If the procedure is done in a salon, then the master must also treat his hands.
- Remove any remaining nail polish. Gently push back the cuticle.
- The photo shows that the pockets (minor peelings) are cut out with a router, then the material is cut down with a nail file.
- At this stage, you will need a sanding buffer that will remove shine, and using a nail file (180 grit) you will file the natural nail between the cuticle and the extension material. Then you need to remove all the dust.
- A composition is applied that degreases the surface. It will take a few minutes to dry, and the nails are ready for further work.
- A sufficient amount of acrylic powder is placed in a separate bowl, rolled and applied carefully to the regrown area of the nail. The cuticle remains unaffected, otherwise the manicure will peel off. Acrylic is applied to the surface and smoothed from the cuticle to the extended nail until the entire space is filled.
- After application, excess material is removed with a nail file and given the desired shape.
- The buff removes all defects and polishes the extended nail.
Sanding buff
Now you can design your nails. The whole procedure lasts no more than an hour if done in a salon, but at home it will take more time.
You can learn how to tidy up your nails at home step-by-step using both online lessons and courses.
Nail polishing
Complex correction
Complex nail correction with gel is carried out in cases where the time from extension to correction is more than 4 weeks. As a rule, at this time there are definitely breakages, and the material has already moved to the middle of the natural nail. This correction almost corresponds to full nail extensions. In the process of complex correction, the master cuts all the material down to the substrate. Then the gel completely creates a new nail, taking into account all proportions.
During complex corrections, an aquarium design or French manicure is often performed or restored. It is important to correct the reverse side of the nail as well. Be sure to cut out any irregularities or detachments using a router, and create a new arch.
French manicure correction with gel
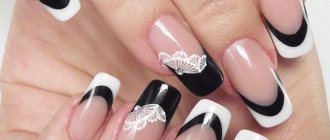
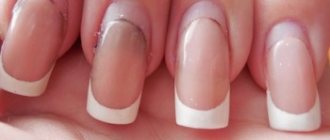
It should be noted that the correction of the French manicure itself is somewhat different from the usual correction. You can restore the jacket using complex correction and cutting, or you can use the method of removing the free edge. In this case, the free edge is completely cut off with a router or file. It is given a correct and symmetrical smile shape. The filing of the nail surface and general preparation follow the same steps as for a simple correction. Then a special paper form is placed under the natural nail. This will serve as a working surface for creating a new free edge. White gel is laid end to end with the processed edge. After its polymerization, the nail is filed in accordance with the rules, and the free edge is given the desired shape and length. At the end, the French manicure is covered with a topcoat.
Typically, the time for a complex correction or jacket is 1.5-2 hours, depending on the chosen design.
Correction with gel polish
If the client is already tired of extended nails, but does not want to completely file them down, then we can offer nail correction with gel polish. This is a great way to gradually remove artificial material. In this case, the nail is processed in accordance with the instructions for a simple correction. During filing, the border of the artificial material is compared with the surface of the natural nail, without forming an apex. The nail is given the desired shape and length.
After washing and pre-treatment with primer, the entire surface of the nail is covered with a thin layer of base gel polish. Next, 2 layers of gel polish and the topcoat are applied according to the technology. Gel polish coating cannot be corrected. After 3 weeks, all material will simply be deleted. If the client wishes to extend her nails again, the master will perform full nail extensions with gel. In the future, correction will also take place every 3-4 weeks.
