- 3963
- 02-12-2020
- Author: Mysekret Team
- 0
A new manicure always lifts your spirits, because well-groomed hands are the calling card of any woman. But what a disappointment when, on the second or third day after a visit to the specialist, a chip appears on the nail. A chipped piece of gel polish ruins everything. What to do in such a situation? We tell you secrets that will help you disguise the problem and avoid having to go for a repeat manicure.
Working with foil
You can use special compounds not only for rhinestones, but also for other decorative elements. In particular, foil adhesive is often used. Recently, this nail design has become popular, so manicurists use adhesives to create a beautiful pattern.
The foil itself varies in type. It can be detachable, translated and untranslatable. The tear-off non-transfer is cut into patterns and secured with glue. The transfer has a sheet appearance, and with its help you can cover the entire surface in a beautiful color or pattern that is located on the film. Often it has a mirror surface.
Glue that can hold the foil can be easily found in professional manicure stores. When working, you must adhere to the following algorithm. First, the nail is coated with a base coat and a layer of colored varnish.
After this, a pattern is made with glue, which it is advisable to plan in advance, or the entire surface of the plate is covered. All you have to do is place the foil on top and after a few seconds tear it off. The result is secured with a top coat.
When working with glue for rhinestones and nails, you must be careful. Never overdo it with the amount of composition and do not replace it with superglue or the like.
Careful work will allow you to get a beautiful manicure that will delight you for a long time.
What to do if your nail breaks until it bleeds?
Firstly, if the gel polish on the nails is cracked and along with it the nail is injured to the core, then it is better to forget about the perfect manicure until the plate is completely restored. You have to sacrifice beauty for health!
If a nail breaks to the point of bleeding or at the root, you should not start thinking about how to glue it, but first properly treat the wound with chlorhexidine, hydrogen peroxide or any antiseptic. Beauty is beauty, but health is much more important!
You need to completely remove the manicure to give the nail time to recover.
Next, wrap it with a plaster or bandage and leave the injured finger alone until the wound is completely healed, after which it is recommended to seek professional help at a salon. During healing, you need to promptly change the dressing material and lubricate the cuticle with products that promote rapid nail growth. If you plan to contact the hand, the nail on which has broken at the root, with water or chemical reagents, you must wear a rubber fingertip or even special protective gloves.
To avoid aggravating the situation, it is strongly not recommended to repair a deep plate rupture yourself.
After the wound has completely healed, you can think about how to fix the situation with your damaged manicure. The ideal option is to contact a professional. In the salon, to the question “Gel polish is cracked, how to save it,” the master will most likely answer with an offer to fix the broken nail with biogel. This is an innovative drug containing many healing substances, including protein. With the help of biogel, damaged layers of the plate and nail bed will be restored in record time. In addition, it perfectly protects wounds from infections and germs.
Biogel restoration technique
This is a universal tool that can be used for both extension and restoration of a broken nail.
This is an easy way to restore your nails and takes less than 30 minutes. There are only three stages:
- Apply biogel.
- Dry.
- Apply base, decorative gel polish and top. Dry in a UV lamp after each application.
Biogel does not tolerate the proximity of household chemicals, so cleaning the house and washing dishes should only be done with rubber gloves.
Extension on forms
If you are a beginner, then before you extend your nails with acrylic, you should stock up on forms.
This method is simpler. Before starting extensions, you must wash and disinfect your hands. Get a manicure and trim your nails with a file. Using a grinder, go over the entire length of the nail, removing dust from the nail plate and around it. Apply a special cleanser and wait until it dries completely.
Attach the form and glue its ends together, thereby creating the future nail. Next, pour the liquid into the container and dip the brush into the monomer. We squeeze the brush well from the liquid so that it is almost dry. Now use a brush to pick up a ball of camouflage powder. In appearance it should resemble a hedgehog. If the ball turns out to be wet, then you will not be able to work with it; the acrylic will simply spread over the entire nail.
Wait until the ball is completely saturated with liquid, then apply it to your mold. Now you need to roll it out over the cuticle area and the entire shape, retreating a millimeter from the cuticle itself. We create the required nail shape. That's all, we do all the nails in the same way, dry the nails in an ultraviolet lamp, and cover the top with a final coat.
Nail extension with glue powder consists of three main stages. In total, the procedure takes no more than an hour; the total duration of the manicure depends on the complexity of the final painting.
Tips for extensions
Tips intended for nail extensions are plastic templates that are glued to the surface of a real nail using special glue.
Next, using special grinding and a file, the boundaries between the artificial and natural nails are aligned.
You can reduce the length of the tips using special tweezers, and if it is necessary to adjust their shape, it is recommended to use a nail file. It is extremely important that the tips you choose are elastic, can withstand certain loads and fit perfectly into the shape of your natural nail. Today, the most popular shapes are oval and square nails.
Using glue for rhinestones
Glue characteristics
Since manicure crystals must be attached to the nail as tightly as possible, there is the most reliable method for this. Glue for attaching rhinestones to a nail, which has sufficient ability to secure a decorative element, may vary by manufacturer and brand.
However, the most important characteristics that ensure maximum durability of the resulting manicure include those qualities that guarantee a tight fit of the rhinestone material and their complete safety.
The process of applying rhinestones to nails
The adhesive for attaching rhinestones has the following parameters:
- No negative impact on the health of the nail and the condition of the person in general
- Rapid development of adhesive properties for faster attachment of rhinestones to the nail
- Possibility of easy application
Today, manufacturers offer a large selection of glue that meets the specified parameters.
Technique for gluing rhinestones using glue
The procedure for sticking rhinestones is quite simple. It requires increased accuracy and firmness of the hand, so as not to spoil the appearance of the manicure and to install the rhinestones accurately.
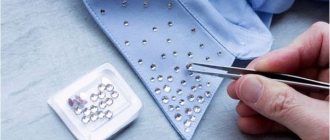
Typically, glue is used for those types of crystals that do not have a self-adhesive backing. The gluing technique consists of several stages:
The process of attaching rhinestones to nails
- First, a decorative coating is applied to the nail and dried thoroughly.
- Next, a small drop of glue is applied to the bottom plane of the rhinestone.
- The rhinestone with glue is immediately applied to the nail in the right place and tightly attached to obtain maximum fastening on the surface of the nail plate.
- After the glue dries, the entire surface of the nail is covered with a fixing coating, which protects the manicure from external influences and secures the rhinestones even better. This rule applies to small-sized rhinestones, since when applying the final coating, the surface of large rhinestones may become duller.
To make your manicure look attractive, before you start working with a decorative coating and using additional elements, you should definitely perform a hygienic treatment of your nails, removing the overgrown cuticle, filing the nail and giving it the desired shape.
Types of nail gel
Step-by-step extension includes several phases that you need to know before applying gel nail extensions. The three-phase variety includes three components that differ in their functionality. The materials used for the first layer are responsible for the safety of contact between the nail plate and the artificial coating, creating maximum adhesion. The second one models the body of the nail. The third layer creates strength, protecting the nail from the negative effects of external factors, providing a smooth and shiny surface.
Gel nail extensions, step-by-step instructions with photos using a two-phase system, happen differently. One of the components is necessary for modeling and adhesion, the second is responsible for the final strength of the nail. The single-phase system uses a universal material, like acrylic, it is distinguished by the presence of all the necessary properties, while providing strength, modeling and adhesion.
Why do nails break?
There are many reasons that can be divided into 2 groups: external and internal.
Let us list and discuss the external ones in more detail.
- One-time mechanical impact (strong blow of nails on a hard surface).
- Systematic mechanical influences (typing on a keyboard, opening packages, cans, bottles, tapping fingers on the table).
- The use of an aggressive remover, which leads to overdrying of the plate and, accordingly, fragility.
- Application of gel polish without preliminary strengthening.
- Incorrect filing technique.
- Interaction of hands with chemical reagents and household chemicals
- Hand contact with low and high temperatures.
As for the internal causes of failure, they are as follows:
- lack of vitamins,
- dehydration of the body,
- hormonal imbalance.
