In what cases is it necessary to correct extended nails with gel?
Correction of extended nails is necessary as they grow
The most common reason for needing gel nail correction is for them to grow back . Overgrown nail extensions not only do not look very nice, but they are also much more likely to break than those that have just been done.
Other reasons to visit your master or to work magic on the beauty of your nails yourself are blows and pressure, as a result of which the plate becomes deformed and cracks appear.
Gel nails often crack along with natural nails. This is unpleasant, but not critical - the defect can be corrected.
Laser correction of ingrown toenails
A separate topic for many girls is the correction of ingrown nails with a laser device. This technique appeared relatively recently, but quickly became the most effective in solving this problem.
Laser nail correction
An ingrown toenail is an unpleasant and dangerous phenomenon. For example, if it grows into the leg, it can cause gait distortion or injury. For some time, a pedicure on the foot can save you from it, but often the effect lasts for less than 2 weeks.
How to perform laser correction of a toenail step by step:
- The technology includes exclusively medical intervention. You shouldn’t expect them to give you a pedicure or file a plate – this is what beauty salons do. First, you will need to fill out some paperwork and choose a suitable painkiller, then, together with your doctor, decide on the type and strength of the laser beam;
- Pain relief can be carried out with lidocaine subcutaneously or using special creams (ointments);
- The skin ridge is removed first. It is this that is the main cause of improper growth of the plate. The doctor simply burns it out with a carbon laser;
- Under the ridge there is almost always a process, which is the main cause of ingrowth. It is adjusted using tweezers and supported with gauze turunda for fixation;
- The treated area will require special care for several days. If it’s summer outside, it’s important to avoid dust and dirt, and also avoid swimming in open water; if it’s winter or autumn, it’s recommended to wear loose shoes.
The average price of laser correction is $10 per session. To find out exactly how much a procedure costs, you need to consult with a doctor personally, demonstrate the scope of work and choose the optimal treatment option.
Tools and materials for nail correction
To perform correction you need the same set of tools as for extensions. It includes:
Before the correction procedure, it is necessary to prepare all the necessary materials and tools
- gel;
- forms or types;
- disinfectant;
- file;
- primer;
- wire cutters;
- orange stick;
- buff;
- tassels;
- cuticle oil;
- lamp;
- materials for design.
Is it possible to repair a nail or make a full correction on your own? Yes, but if you haven't done this before, it's better to make an appointment with a specialist.
Correction of acrylic nails
Before correcting extended nails with acrylic, it is important to prepare all the tools :
- File with coarse grain (wide, optimally 100x100);
- Cap for monomer (a product is collected into it to avoid overconsumption);
- Powder;
- Degreaser, primer;
- Acrylic;
- Brushes and pipette.
You can use regular alcohol or any alcohol-based tonic as a degreaser - they have the same functions. Also, before correction, the old varnish is removed and the nail is slightly filed.
Nail correction and extension set for beginners
Step-by-step instructions for beginners with a video on how to correct nails with acrylic:
Video: Correction of gel nails (nail design lessons)
- The cuticle is moved to the very bottom of the nail, after which the filing is made. The technology is the same as for extensions. From the cuticle down to the hole, the file moves in a circular motion. This is necessary because the plate grows unevenly. The goal is to equalize the old acrylic to the level of the natural surface;
Removing old acrylic material - Next, a quick cleaning is carried out to remove the characteristic deposits after sawdust. A napkin, brush or towel is suitable for this;
- As when working with biogel, first the surface of the nail is degreased. Afterwards, a primer is applied to the dried plate;
- Now take a capsule for the monomer and the acrylic itself. Using a pipette, the required amount of product is collected. Next, a brush is dipped into the capsule; first it needs to be well moistened with acrylic. Afterwards, everything unnecessary is brushed onto the walls of the container with monomer;
Set of powder for brush with acrylic - A small amount of acrylic is collected on the tip of the brush, then it is lowered with the same tip into the powder and a ball is collected on it in a circular motion;
- The resulting ball must be distributed very quickly and evenly over the plate;
Stretching an aryl ball - When distributing the powder, special attention is paid to the place where there is a seam between the old acrylic and the natural plate. The brush is slightly pressed into this area;
- Before each next layer, be sure to wipe the brush on a napkin so that there is nothing unnecessary on it;
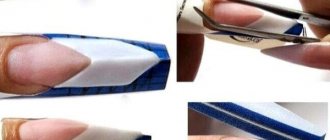
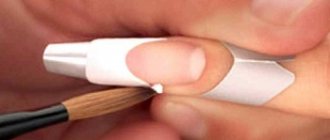
- Correction with acrylic is most often carried out on tips. To do this, you need to attach the form to the plate and select the desired length according to it. It needs to be placed under the nail and completely adjusted to the shape - so that there are no gaps or sharp transitions;
Forming an acrylic plate - The acrylic in the capsule is replaced and correction work is resumed. The system is the same as before. The brush is soaked in monomer and then dipped in powder. The product is applied over the staples;
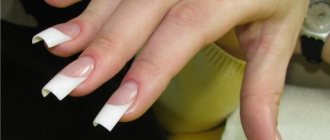
Fixation tips - All that remains is to dry your nails and paint them. You can make bright long claws with plates or, conversely, a flirty French correction of extended nails.
Acrylic extensions with gel coating
Many modern ideas for correcting acrylic nails include the use of gel polish. Outwardly it looks very natural (if the correct length and shape are chosen).
Types of nail correction
Correction happens:
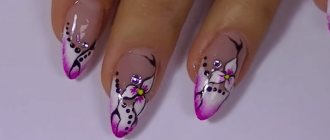
Nail correction with French gel
- Small, medium and large : small is performed for minor damage, medium involves filling the regrown part of the nail bed, large corrects even the most serious defects (detachment, breakage, displacement of the artificial nail).
- French gel – with re-growth of the free edge of the nail – the French line.
- With design restoration – involves restoring the design on the regrown nail.
The more serious the defect, the longer it will take to fix it, and the higher the price for this service.
Types of correction of extended nails
All types of correction are classified according to the complexity of the work :
- Small. Least labor intensive. Includes minor editing of the drawing or painting over cracks. It is also required if the nail has been slightly damaged mechanically (its edge has been trimmed or the varnish has worn off a little);
- Average. This is the re-extension of an artificial plate on top of a natural one. It looks natural after any manicure. Includes painting and finishing a “fresh” edge;
- When a nail breaks, a complex correction is made. If the model breaks the plate or wears off the polish, the master repeats the manicure procedure on one or more fingers. The same type of work is used to deform the coating.
If the correction of overgrown nails is a natural process, then the correction of broken or cracked plates is a necessary measure. To avoid this, simply handle them carefully, try to minimize exposure to household chemicals and do not test them for strength.
Performing Gel Nail Corrections: Step-by-Step Guide
The general flow of the procedure, regardless of the type of modeling (form or tip), is as follows:
Before correcting your nails, you need to get a manicure.
- First of all, a manicure . It is best to trim the cuticle a few days before the correction, and during the correction push the cuticle to the hole using an orange stick.
- Using a special file the length of the free edge is adjusted and it is given the desired shape (in the so-called stress zone, two-thirds of the coating must be removed).
- The natural shine of the regrown part of the nail is removed with a buff in the direction from the cuticle. Manicure peelings are also treated with a buff, and this is done especially carefully on the side surfaces of the nail.
- Dust is removed , the regrown area of the plate is degreased and disinfected.
- Uneven edges are glued using a special solution to smooth out the edges.
- The natural part is treated with a primer .
Nail correction with gel
Next, modeling is carried out into types or shapes . The tips are glued to the nail with a special glue, the top gel or acrylic layer is filed off along with the design. The first thin layer of material is applied, the design is made, and the next layer of material is applied. Nails are dried in a lamp and filed.
When applying extensions to forms, the material is laid directly on the filed nail. To avoid peeling, be careful not to apply the material to your skin.
If you decide to correct your nails yourself, then this video tutorial, where the whole process is presented step by step, will be useful to you:
The highest aerobatics in the nail correction procedure is French modeling of the free edge of the nail. How to do it is shown in detail in the video master class:
Step-by-step instructions for correcting nails with gel
Correction of gel nails at home includes:
- Removing old material;
- Shaping;
- Removing overgrown cuticle;
- Manicure with gel polish.
Let's look at each stage in more detail. To remove old gel polish
It is most convenient to work with a router. Of course, you can use special solvents or file away the biogel, but this is an atavism.
A milling cutter is a special machine that is used during manicure, nail extension and correction. Includes attachments for filing, polishing, and smoothing uneven plates. The cutters allow minimal trauma to the plate and remove old varnish much faster.
Fraser
After this, using a nail file or the same manicure cutters, the nails are given the desired shape
. It is important not to leave too thin edges, otherwise they will easily break even with everyday use. For beginners, it is best to limit yourself to the classic semicircle.
Forming the plate
Now the nails are soaked in a bath to soften the cuticle
. The skin itself is moved from the plate into a hollow, where it is cut out with nippers or scissors. You can also buy a cuticle softener, which will allow you to remove it without cutting tools.
Shifting the cuticle
Step-by-step instructions for correcting nails with shellac at home (plus photos):
- A degreaser is applied to the plate. It needs to be carefully distributed, you can go a little onto the skin;
Degreasing the plate - When the degreaser is completely absorbed, it is necessary to apply a coating layer of gel or base. To do this correctly, work with a flat, wide brush. This way there will be no stains, and the shellac will be able to spread evenly;
Applying base gel polish - After this, a camouflage layer is applied. You can apply any drawings to it or make a jacket;
Applying camouflage shellac - The next stage is the application of a transparent modeling layer. For the first time, it will be quite difficult for yourself to apply it evenly and accurately. Therefore, it is important to practice beforehand;
- The surface (after drying, of course) is sanded first with a file, then with a soft buff;
Immediately after drying the gel correction - Only after this polishing is the nail coated with finishing gel polish and the correction is completed. Reviews say that after the session you can wait another month before the next procedure. This saves a lot of time and money.
It is important to note that the technique for working with single-phase gel is almost identical, with the exception of speed. This type of nail design and correction can be done many times faster than with regular shellac. That's why it's called express technology.
Important facts about the correction procedure
Formation of a stress zone of the nail
- It consists of several stages and always involves hand treatment.
- Nails must be shortened.
- The free edge of the nail decreases in thickness.
- And only then can you begin to form a stress zone in the central part of the nail plate, evenly distributing the material.
- The final stage of correction is drying and polishing.
About nail correction after extensions
If the client has extended her nails, after 2 or 3 weeks she will use a corrective service in a beauty salon. It is useful to find out what nail correction is and why it is needed.
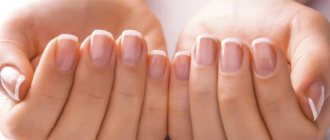
Nail correction with gel
Without correction, the manicure looks careless and unaesthetic. The main reason for the adjustment is the physiological process of nail plate regrowth. This means that the extended plates are moved forward and free up the area of the natural nail at the root. The design on artificial nails becomes sloppy.
Reasons for correction include the ability to change the shape of the nail plates or breakage. In this case, the damaged part is glued. When manipulation is impossible, the plate is extended again.
Features of implementation and labor intensity determine the division of nail adjustments into 3 types. When the nails experience minor mechanical damage: chips, scratches, the varnish wears off a little, we are talking about a minor intervention. Performing the manipulation will require less cost and time.
A medium adjustment to an acrylic manicure will blur the line between a natural nail and an artificial one, depending on the growth. From 1 to 2 hours – that’s how long the procedure takes.
Major corrections are made in case of significant damage: detachment, displacement, change in the shape of the nail plates. Peeling of nails is caused by:
- careless handling;
- incorrect size of nails;
- allergic reaction or incompatibility;
- chronic disorders.
Important! Incompetence and inexperience of a specialist are among the possible causes of detachment.
Complex corrections require more time. An experienced specialist has many ideas for design: applying a pattern or letters, decorating with sparkles, rhinestones, using watercolors or acrylic paints.
Length increase
If nail correction requires lengthening the plate, you will have to first remove the existing layer. The manipulation is performed using a file or machine. Please note that this procedure does not have a very favorable effect on the condition of the natural plate: the nails become thinner, begin to crumble and lose most of the surface layer.
In cases where lengthening is inevitable, it is necessary to carefully file away the gel. After this, glue stencils to your finger to adjust the length. Cover the original plate with a base coat. After drying, lay out the sculpting gel, making a preliminary shape. You need to apply the middle layer for new extensions one to three times. Much depends on the quality of the material, the desired shape and the woman’s nails. The manipulation is completed in the same way as a regular correction.
Gel polish correction at home
Carrying out the procedure for correcting gel polish, if you have the appropriate equipment and skills, is not difficult, even at home. However, do not forget that when you find a workplace at home, you must be sure that all sanitary and hygienic standards are observed; reusable tools must undergo heat treatment in a dry-heat oven, and the hands of the master and the client must be treated with an antiseptic solution. To avoid large amounts of dust from sawed-off gel polish, you need to purchase a special desktop vacuum cleaner. To perform correction work you will also need:
- Nail files of varying degrees of abrasiveness;
- Buff polisher;
- Basic strengthening coating;
- Gel polishes of various colors;
- Finish gel;
- Lint-free wipes;
- Gel polish remover;
- Foil;
- Primer (best acid-free);
- Liquid for removing the dispersion layer;
- UV lamp;
- Nail machine + various cutters for it;
- Dust brush;
- Scissors or nail clippers;
- Pusher or disposable wooden sticks, it is also desirable to have a gel polish corrector with a silicone nozzle;
- Cuticle oil.
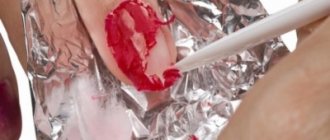
How to correct gel polish at home
Now let's figure out how to perform this or that type of manicure correction with gel polish. Let's start with a procedure that does not require removing and replacing the coating:
- Pre-treat your handles with an antiseptic. It is very convenient to use the product in the form of a spray;
- Using a pusher or a wooden stick, carefully push back the cuticle, remove it with scissors, tweezers or a device;
- Give a beautiful shape to the free edge of the nail, make sure that all nails are the same length;
- Take a coarse file and remove the top (finishing) layer of gel polish;
- Moisten a napkin in the dispersion layer remover, remove the resulting dust from the nail and around it;
- Degrease the regrown area;
- For better adhesion of the material to the surface of the nail, drop a couple of drops of acid-free primer onto it;
- Apply the gel base, dry it in a lamp;
- Carefully apply gel polish to the regrown part, also send it to dry in a lamp;
- Now cover the entire nail with gel polish in 2-3 layers, each of which must be dried in ultraviolet light;
- Apply the finish, dry, remove the dispersion layer;
- Treat the cuticle area with a special nourishing oil.