With the onset of spring, a whole line forms in front of the doors of the beauty salon. Every fashionista who takes care of her feet wants to get them in order before wearing open shoes. And many resort to hardware pedicure. What is it and how to do it step by step?
Advantages and disadvantages
This type of procedure has many advantages:
- The gel, which is used to soften the stratum corneum, acts gently without touching living cells, so the risk of injuring the skin is zero. In addition, this product has a disinfectant effect;
- The use of various attachments allows you to treat the skin even in the most inaccessible places;
- Massage is an undoubted positive addition to the procedure;
- After the procedure, the skin grows much slower than with a classic trim pedicure;
- This type of procedure can be done for both women and men. In addition, many doctors recommend hardware pedicure as a preventive measure for foot diseases with diabetes.
Like any other procedure, hardware pedicure has its disadvantages, which include:
- High price. In order to pamper your feet with a hardware pedicure, you will have to shell out a considerable amount of money;
- The opportunity to get an appointment with a non-professional. With this outcome, be prepared that within a few days you will have to visit the beauty salon again;
- If the feet are in a neglected state, then one procedure will not be enough. You will have to come to the salon 5-10 times.
Features of trim pedicure
First, let's figure out what a trim pedicure is. The very name of the cosmetic procedure contains a decoding of this term. The classic method of treatment is a whole range of hygiene measures aimed at maintaining the beauty and health of the skin of the feet and nails. Before proceeding with the actual cutting of the cuticle and removal of rough areas of tissue, as well as calluses, it is recommended to thoroughly soften the skin of the feet using a bath of warm water. In addition, it is necessary to shape the nail plate, lubricate the cuticle area with nourishing oil and, if desired, apply a decorative coating. You will learn more about all the processes of performing a classic pedicure by reading the video instructions below. And now we invite you to consider the main advantages and disadvantages of this method of nail treatment.
Process
Hardware pedicure includes several stages of the procedure, here is its order:
- The master disinfects all instruments in front of the client;
- Next, the client’s feet are disinfected. Special means are used for this;
- A gel is applied to the skin of the feet to soften the skin. Keep the mixture on your feet for 10-15 minutes;
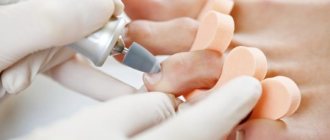
- The stratum corneum is removed using grinding attachments and cutters;
- All calluses and corns are removed using cutters;
- The cuticle is polished, the nail plate is polished;
- The skin is smoothed by grinding;
- A rich cream and essential oils are applied to the skin of the feet;
- A foot massage is performed;
- If required, apply varnish to the nails.
Hardware pedicure - step by step for beginners
Be prepared for your first pedicure to take two hours. Once you master the technique, this pleasure will last no more than an hour. What steps will you have to take.
Step-by-step hardware foot pedicure
- Before starting the procedure, the feet must be disinfected. Simply put, wash your feet first.
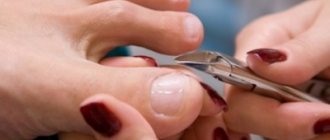
- Nail plates must be shortened using special clippers, if required.
- A remover is applied to the skin of the feet to soften it and removed after a few minutes.
- We set the power of the device to 10-12,000 rpm and a coarse-grained cap with 60/60 abrasive and process the foot.
- Next, you need to polish your feet using a fine-grained nozzle with 100/100 abrasive until the skin is even and smooth.
- Rub remover into your toes.
- We polish the toes using a cone-shaped ceramic nozzle.
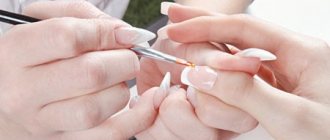
- Lastly, you should treat the cuticle and side ridges with a special cutter - a diamond-coated ball.
- Using a felt cap, polish the nail until it shines.
- Apply a nourishing product to the skin of the feet.
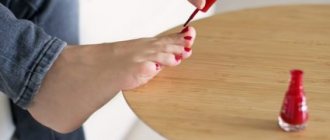
- After this, we proceed to applying nail polish.
If you use gel polishes, remember that such pedicures are dried in LED lamps.
VIEW NOW
Contraindications
Hardware pedicure has such contraindications as:
- Pregnancy period. The fact is that various chemicals are used to soften the skin, which can harm the fetus;
- For any diseases of the kidneys or liver. The reason, again, is the chemicals contained in the products;
- Individual intolerance to individual components.
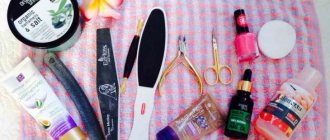
What pedicure tools will you need?
Firstly, all the devices for manicure, because the nails on the hands and feet are the same.
But specific devices are also needed, including:
- Pedicure machine with a set of blades. Some, however, also work with a regular razor, and professionals too, but it’s more difficult to get used to.
- A plugger that cleans side ridges and deals with ingrown toenails.
- Nippers for working with large and hard nails
- Pedicure file for rough skin on heels.
- Consumables: foot baths, wipes.
- Nail polish remover, cuticle oils, products for adding to water, antiseptic for disinfecting equipment and skin, cuticle softeners, as well as a product for softening keratinization and calluses, foot cream, scrubs.
Home pedicure
If you don’t have extra time to go to the salon, then the procedure can be performed at home.
In order to carry out the procedure, we need to prepare:
- A product intended for skin disinfection;
- A device with the necessary set of attachments;
- A stick (orange), which is intended for the cuticle;
- Ointment intended for the treatment of calluses and cracks;
- Foot mask with paraffin;
- A liquid designed to remove varnish from nails, as well as a degreaser.
Before starting the procedure, you should carefully study the instructions. Step by step process:
- First of all, you need to wash your feet and remove nail polish;
- Wipe the foot with the prepared disinfectant. This stage will get rid of dirt;
- The cuticle needs to be softened. This step is necessary in order to remove the stratum corneum;
- Remove dead skin layer;
- Correct the cuticle using a small attachment. If you are not comfortable, you can use a stick;
- Adjust the length using a cutter;
- Sand the surface of the nail;
- Remove all calluses and corns;
- Degrease nails and apply varnish.
This procedure should be done no more than once every 21 days.
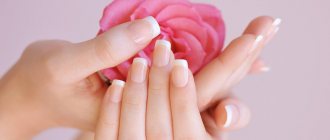
Hardware pedicure is a procedure that is very popular among girls. Its enormous success can be explained by the fact that the results after the procedure last for a long period of time.
A few words about the electric pedicure machine
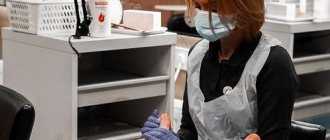
A pedicure apparatus is a special electric instrument that is used to perform a “dry” method of treating feet and toes. This pedicure is a variation of the European version of foot care. Today on store shelves you can find an electric pedicure set for every taste. Different models differ in design, number of attachments, functionality, power and, of course, cost.
Which one should you choose for a home pedicure? What attachments are needed for complete care? Let's try to understand this issue. As a rule, a qualified master uses a professional device equipped with a large number of attachments and several rotation modes. For home use, a less powerful and more compact pedicure machine is suitable. For example, as in the photo.
Typically, an electric set contains attachments (special cutters) for both manicure and foot treatment. The more expensive the set, the more functions it performs. Some salons use a pedicure machine with a vacuum cleaner that sucks up dust generated during nail filing. However, such machines have one drawback: if the vacuum cleaner breaks, you will have to repair the entire tool.
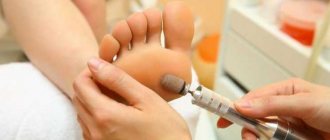
Treating the foot
In order for the heels to become soft, you need to take strict measures and treat them with a machine.
But first you need to get your feet wet.
- Having placed them in a bath with soda and aromatic oils (if you have calluses and the skin is simply too rough, professionals advise adding fir oil to the water, and if your feet are tired - lemon oil), you need to relax properly. Too hot water is not recommended, either. As well as too long maceration, that is, soaking. 25 minutes is enough, and during this time you can have time to do a manicure.
- Now let's grab our heels in the truest sense of the word. The heels are processed by the machine in the direction from the center to the edges; we hold the machine as if we were peeling potatoes with it. Do not touch the skin in the center of the heels, otherwise it will grow with double force.
- We pay special attention to all calluses. Before maceration, you can treat them with softening agents. By the way, calluses can be removed relatively painlessly - using liquid celandine. Here it is important to work with gloves, and lubricate the area around the callus with a thick cream, because the thing is poisonous and can burn the skin on your hands and feet. Deep core calluses need to be treated with it for several days in a row, while small and dense calluses can go away in one go. It is important to remove the dissolved callus using the same machine and rinse the foot very well.
- We also process the side of the foot with the machine - also from the center to its edge.
- Next we take on the toes and top of the foot. Yes, your fingers also need to be machined.
- Now we polish the heels and feet with special files. The heel is polished with sharp movements from left to right, then in a circular motion, the rest of the foot - only from left to right. It will be a little ticklish.
Spa at home
Of course, all foot spa treatments are very difficult to perform, but this is not a reason to deprive your feet of pleasure.
To tone your legs, you can add ground coffee (1 tbsp), salt (2 tbsp), as well as lemon, mint and orange oils to the bath.
After this, treat the cuticle with a mixture of the same lemon oil and white clay, and then move it aside.
Extend the pleasure with a foot mask made from rosemary oil, olive oil and salt. Keep on your feet for 10-15 minutes, lightly rubbing your feet.
Afterwards we carry out a full foot massage up to the ankles and put on warm socks.
You can get rid of swelling with a bath of dried rosemary, as well as cedar and peppermint oils.
After holding them in the aromatic water for 10-15 minutes, we wipe our feet and apply a scrub of olive oil and brown sugar to the cuticles. Afterwards the skin can be removed. We treat the feet with a mixture of soda, dried mint and ground coffee. We wash off the scrub.
Apply a mask to your feet, which includes egg yolk, half an avocado, 2 tsp. honey and mint oil.
Rub your feet with olive or coconut oil.
Relaxing treatments
They start with a bath of pine, rosemary and mint oils. Afterwards, a mask of pink clay and mint oil is applied to the cuticle.
We make the scrub from fine sea salt and iodine. Let your feet be stained with iodine, it is even useful - prevention of arthritis and arthrosis.
We do a foot massage with any cream, then put on warm socks.