- 1 Features of nail extensions on forms
- 2 Advantages and disadvantages of gel extensions on forms
- 3 Necessary tools and materials for nail extensions on forms with gel 3.1 Features of choosing a gel for nail extensions on forms
- 3.2 About choosing tools
- 3.3 Features of choosing a form for nail extensions
Every self-respecting girl wants to have beautiful and natural-looking nails, but, alas, not everyone has been blessed with such a gift from nature. Fortunately, modern manicurists and nail designers are ready to come to the aid of fashionistas, offering them nail extension services using various techniques.
Features of nail extensions on forms
Gel nail extension on forms is a long-known and most common extension technique used in many modern salons. The main advantage of this technology is that it allows you to give the nail a certain shape. Depending on the wishes of the owner, the nails can become oval, pointed or even square. At the same time, the nail continues to look natural, without causing the feeling that it was artificially glued. The procedure itself, not including design work, takes from one to two hours.
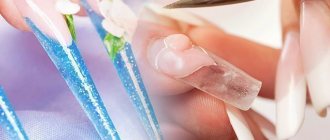
Photo: nail extension form
A form for nail extension is a special template, which during the extension process is tightly attached to the nail plate or under it and serves to create the desired length of the nail using gel or acrylic.
Preventing the natural question of how long extended nails last, it is worth saying that if the minimum care requirements are met, such a manicure can last up to four weeks, after which you can carry out the correction procedure and again enjoy a beautiful manicure.
Gel
This is a thick, creamy substance that can dry in just a few minutes (even in half a minute).
You can find the following instructions in the video tutorial about nail extensions with forms:
- The working surface of the hands is prepared - processing and cleaning (degreasing);
- The nail file is used to process the nail, the cuticle is moved back;
- The gloss is removed from the entire surface of the nail (just a little);
- On the selected blank, which will extend slightly beyond the nail, gel is applied to the inner surface;
- The blank is carefully applied to the nail;
- All excess liquid is wiped off with a napkin;
- Place your hand in the lamp for 20-30 seconds, pressing on the resulting workpiece;
- Wait 6 minutes for the gel to dry completely;
- Remove the form (begin to gently press on the ends);
- We complete the manicure and are happy with the result.
Advantages and disadvantages of gel extensions on forms
Among the advantages of the above procedure, experts highlight:
- Durability of the aesthetic appearance of nails after the procedure;
- Improving the strength of the nail plate;
- Giving nails a suitable shape;
- Hiding visible defects of plates;
- The natural nail also strengthens over time, acquiring its desired shape;
- Protection from the effects of household chemicals and other adverse factors.
It is not without its drawbacks, including:
- You should not resort to nail extensions if you have any fungus.
- Inapplicability for diseases of the endocrine, excretory, digestive systems and many other diseases. The fact is that with each of these diseases, the extended elements simply will not be able to firmly gain a foothold in their place.
- Not applicable during pregnancy.
- Inapplicability if you are allergic to materials included in the substances used for extensions.
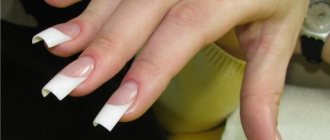
Square shape
Those with long fingers should choose a square nail shape. A square will make the brush visually softer and neater. The tips of square nails can be either sharp or rounded. The second option is preferable in terms of comfort. The sharp edge often catches on surrounding objects, which leads to its fragility and the need for frequent correction.
Girls who have a short nail bed should not choose a square shape. Also, it is better to avoid a square nail plate for those with wide hands or short fingers.
Necessary tools and materials for nail extensions with gel forms
To complete this task at home you will need:
- Gel for extensions;
- Template molds (to give the gel the desired shape);
- Dehydrant-degreaser (for processing);
- Special scissors for removing cuticles;
- Pusher or orange stick;
- Brush (for applying gel);
- Primer (to ensure better adhesion of the gel to the nail);
- The file is hard;
- Buff (for polishing);
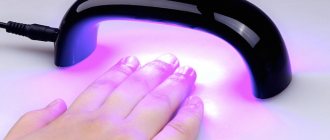
- Special lamp for drying.
Features of choosing a gel for nail extensions on forms
Among the materials needed for extensions, gel occupies a special place. When choosing the type of coating, it is especially important to pay attention to the composition and texture of the substance. Most well-known companies try to show care and caution and not add harmful substances to the composition of their products, but, on the contrary, supply the produced gels with vitamins and minerals necessary for the full and healthy development of nail tissue.
As for the texture of the substance, everything is simple: the gel should have a medium viscosity in order to make it most convenient to work with.
There are several basic recommendations for choosing the right extension gel. When choosing a gel, manicurists recommend:
- Don’t be fooled by low prices, but choose products from a trusted manufacturer. A good gel is easy to remove, it does not flow when applied and does not bubble. During long wear, a good gel will not lose its properties.
- In order to check the authenticity of the gel, it is recommended that before purchasing, go to the manufacturer’s website and check the information presented on the official page. And also read reviews from real customers.
- Another sign of a high-quality gel: the absence of an unpleasant odor.
- The choice of a truly good gel is carried out not only by testing, as they say, “on yourself,” but also with the help of advice from friends who use a specific material, as well as based on reviews from real customers.
About choosing tools
When applying nail extensions, the role no less key than the role of the gel is played by the correctly selected brush for its application. With a good tool, even learning how to do nail extensions will be easier, since its selection implies the absence of “technical” inconsistencies and problems.
In order to choose the right brush, experts advise giving preference to models with natural but dense bristles. This choice is determined by the good elasticity of the brush and simultaneous softness, thanks to which the gel can be easily and evenly distributed over the entire nail plate, giving the nail a beautiful, regular shape.
As for the shape of the brush, depending on the ideas or preferences of the master, it can be anything: from flat and rectangular, to oval or square. Oval thin brushes will allow you to apply the coating to areas near the cuticle in the most “jewelry” possible way. As for mini brushes, they are most often used for applying patterns or designs to an almost finished manicure.
Features of choosing a form for nail extensions
There are two main types of forms for nail extensions:
- Disposable. Such forms are made of soft materials: paper, flexible plastic or foil - this is the main advantage of disposable forms, because they are easy to adjust to any type of nail. These forms are inexpensive and are sold in sets of 100 to 500 pieces. After use they are thrown away.
- Reusable. Such forms are made from more durable materials: metal, hard plastic. When used, the forms are not deformed and are convenient to use. The cost is a little more expensive than disposable ones, but they will last a very long time.
Types of forms for nail extension (modeling)
When it comes to the question of what forms there are for modeling nails, it is difficult to get confused, since the classification here is quite narrow. According to the modeling method, this tool can be divided into two types of forms:
- lower;
- upper ones
The lower variants appeared on the market first. At that time they were made exclusively from paper. This caused a whole lot of inconvenience: the product was easily torn, quickly lost its shape, destroying all the work previously done.
Today, this look has improved as the paper surface has begun to be covered with foil, increasing the strength and rigidity of the product. Of course, the durability and strength of extended nails primarily depends on the level of professionalism of the master; templates cannot greatly influence this factor. But the shape of the finished result directly depends on them. At the same time, the above-mentioned lower and upper templates are among the most convenient analogues, since they allow you to adjust any shape to even the most problematic nail.
All templates are usually divided into disposable and reusable types. The first option is quite cheap and is used only once, after which it can be disposed of. This, as well as the ability to adjust to the desired size, is the main reason for the popularity of the disposable option.
Disposable stamps can be made:
- using foil;
- made of paper coated with polymer;
- plastic (usually such stamps are transparent, which is very convenient during the modeling process).
Multiple dies cannot be cut and are slightly more expensive. After each use, they must be thoroughly disinfected. The most common materials for their manufacture are plastic, metal and Teflon. But, nevertheless, they are suitable for craftsmen who do not want to constantly buy working materials.
Technique for gel nail extensions on forms for beginners
Typically, the stages of nail extensions are considered as separate mini-procedures. It is very important not only to follow their order, but also to approach the process responsibly and carefully, since it can be quite difficult to correct some mistakes.
In this article we consider the option of extension using lower forms. First you need to prepare the nail for applying the material:
- File the nail and give it the desired shape, leaving about two millimeters of free edge;
- Using scissors or tweezers, carefully remove the cuticle and clean the pterygium;
- Next, treat the surface of the nail using a buff to remove the “shiny” layer and use a stiff brush to sweep away the dust from the nail plate;
Use a buff to remove the top layer - Then the nails need to be treated with a degreaser and an acid primer applied.
Degrease - Next comes one of the extremely important stages - installing the form. Modern forms are fully adapted to work. You don't need to cut them yourself. It is enough to peel off the form from the special paper and place it under the nail so that it fits snugly to the bottom of the free edge of the nail, after which the edges of the form are easily secured under the finger, ensuring a reliable fixation. If you set the mold poorly, a gap will form where the gel will leak and the manicure will be ruined.
- After installing and checking the form, apply the first thin layer of gel to the nail itself, then without drying the first layer, approximately from the middle of your nail to the required length on the form, apply a second denser layer of gel, after which the nail is placed in a special lamp for 1 -2 minutes.
Forming an extended nail - Next, a third, leveling layer of gel is applied to give the nail a natural convex lens shape when viewed from the side.
Leveling the nail with gel - After straightening the nails, the form can be removed and the nails can be filed again using a file along the free edge to adjust the shape of the nail.
Use a file to shape the extended nail - Leveling the surface of the nail using a buff.
We achieve a perfectly flat surface of the nail without any bumps or depressions by sanding the nail with a buff from the cuticle to the free edge. Level the surface of the nail with a buff - Next, the extended nails are once again treated with a degreaser and you can begin to apply the color coating.
Finished nail after top coat
Modeling technique on upper forms
The upper forms are very similar in appearance to nail tips, with the only difference being that they are removed after the modeling material has hardened. The extension procedure, which uses the upper templates, is performed as follows.
- After the preparatory measures, a tip is selected according to size for each nail. The gel or acrylic is evenly distributed inside the plastic blank, which is then pressed tightly to the surface of the nail.
- After the material has hardened, the upper forms are carefully removed, and the extended ends formed underneath them have a smooth and shiny surface. Then you just need to give the free edge the desired shape using a file.
The disadvantages of this technology include material detachments that occur due to a loose fit of the plate to the nail. Reinforce your knowledge about template types by watching an interesting video lesson.
Popular mistakes made by beginners when carrying out the extension procedure
There are a number of common mistakes that beginners in manicure make most often. Among them:
- Rough sawing;
- Using too hard buffs and files;
- The mold does not fit tightly (causes the gel to get under the template);
- Poorly performed degreasing;
- Insufficient complete removal of the gel layer remaining from the previous procedure;
- Insufficient gel polymerization.
Using the instructions above, relying on the tips provided and avoiding common mistakes, most fashionistas will be able to carry out a full-fledged nail extension procedure using gel and forms on their own at home.
We recommend visiting our Manicurist Forum , where you can ask questions or chat about interesting topics!
What forms are there?
There are two types of top forms. They differ in the presence or absence of auxiliary markings on them. Most often, forms with markings are used by beginners who are just getting acquainted with nail extensions. For them, such help will be indispensable.
The marking itself can be arched or mesh. With the help of ready-made lines it is much easier to adjust the length and sharpen the edges of the nail.
We recommend reading:
Cuticle removal - tips on choosing products and an overview of the best removal methods. 130 photos and videos of cuticle care- Beauty salon Persona-Mayakovskaya
How to restore nails after gel polish - a review of the best means and methods of restoration at home (120 photos + video master class)
Oval shape
The oval shape of nails is universal and will decorate the hands of every woman. In order to give the free edge of the nail plate an oval shape, you need to make it look like an arc. A manicure with oval nails looks very elegant and feminine. Smooth lines give the hands a special softness of movement and grace.
Non-standard forms
For those who do not want to see an ordinary and ubiquitous manicure on their hands, nail art masters have created bold, unusual and extravagant forms: stilettos and pipes. Long and pointed stilettos look fashionable and bright, but at the same time feminine. Fingers with them seem thin and long. The pipe shape is distinguished by an edge running through the center of the nail plate. It looks original, impressive and is guaranteed to attract everyone's interest.
Video selection:
Materials for extensions
First of all, you will need an ultraviolet lamp, without which you simply cannot dry your nails.
You will also need a cuticle shovel, a file with an abrasiveness of 180 grit, tips (these are the forms on which nails will be extended), special glue, gel brushes, and tweezers.
You will also need an antiseptic, a dehydrator (dries out the nail plate), a primer (allows you to create better adhesion of the gel to your nail), a bonder, the gel itself, a finishing top, a remedy for the sticky layer that always remains after nail extensions, as well as scissors for tips .
Gel extensions
Gel is also a polymer used for extensions. It is considered safer and more environmentally friendly compared to acrylic due to the absence of a strong odor and the possibility of using an acid-free primer in application technology.
Gel nails can be extended by pregnant women.
Manicure and pedicure during pregnancy - do's and don'ts
Gel technology allows you to achieve a more natural appearance of artificial nails. The plate is thinner and more flexible. The consistency of the gel resembles a very thick varnish.
The technology consists of applying the gel with a brush to a special form or tip, attached or glued to the nail. The material is dried in a lamp for 2 minutes or according to the instructions. Next, a second layer is applied, dried, and the shape and thickness are modeled by filing.
Liquid tips
For gel technology, one, two and three-component systems are used:
- The three-component product consists of a base, camouflage colored and finishing transparent gel with additional shine.
- Two-component set - basic translucent and camouflage pink or beige gel.
- One-component – translucent gel that serves as a base and the main camouflage layer.
Camouflage nail gel - let’s figure out what it is and how to use it correctly
For gel extensions, an ultraviolet UV, combined or LED lamp is required. Also, for removal you will need a device with attachments - a milling cutter.
Lamps for manicure, pedicure: types, features, popular brands
Gel nails last 10-20 days, then correction will be required. On average, a manicure lasts 10 days in perfect condition. Some manage to wear it for up to three weeks.
A milling cutter is used to remove and correct the gel. During correction, the material is removed almost completely, with the exception of a thin layer from the base layer, on which a new one is applied.
To adhere the material to a natural surface, you will need an acid-free primer, unlike acrylic, which requires an acidic version.
pros
- Safety, environmental friendliness of the material
- Ease of use, aesthetics
- Strength, durability and comparative flexibility of the artificial plate
- Using a safer acid-free primer as opposed to acrylic ones where an acidic one is required
- The gel is polymerized in a UV or LED lamp, which gives an unlimited amount of time to create the form.
- Less sensitivity to acetone and household chemical products
Minuses
- A lamp is required for extensions.
- To remove or correct, you will need a milling cutter with attachments
- With active use, the service life of nails is 5-7 days shorter than acrylic ones. However, with careful wear, the period can also be extended to three weeks.
Read more about mastering gel extension technology.
Nail shape
Now it's time for you to think about the shape of your future nails. First, what length do you want, and then select the shape. There are not many forms, of which two types are distinguished: classic and original.
Classic
- Square, rectangle, soft square, oval, almond, round, mountain top.
Original
Edge, stiletto, pike, lipstick, ballerina, bell-bottom, arrow
Application of lower forms
It is necessary to follow the entire nail extension technology step by step:
- The hands of the master and the client are pre-treated with an antiseptic; this will protect both from the exchange of microorganisms and bacteria;
- A standard manicure is performed: the cuticle is removed in the way the client chooses - edged or European unedged, the nails are given a rounded shape, and the grown edge should not exceed 3 mm. The nail plate is polished and degreased for better adhesion to the artificial material;
- It is necessary to attach the form to the finger as follows: slightly squeeze the disposable or metal form into an oval shape, and put it on the finger so that it seems like an extension of the nail; the natural tip of the nail itself is inserted into the hole adapted for this. The “ears” of the form cling to the finger itself, while it should tightly clasp the nail and side ridges. As for disposable forms, they will suit any shape and width of the nail, and the use of reusable forms is at the discretion of the manicurist. If the form does not hold tightly, the material being laid out will spread and all efforts will be in vain;
- Using a special cosmetic brush, acrylic or gel material is applied to the nail and form. Marking on the form will allow you to create a symmetrical artificial nail;
- The nail should be dried in a special lamp emitting ultraviolet rays. If you apply several layers. Then everyone needs to dry;
- After hardening, all existing defects are corrected with a nail file and a buff. One and a half to two hours and you can admire the result.
The cost of the lower forms is low, approximately 250 rubles for five hundred forms rolled into a roll. Reusable ones will cost the same amount, but for 5 pieces. Manicure stores and online stores offer a wide selection of these products; finding them will not be a problem.
