- July 29, 2018
- Nail care
- Lazareva Valeria
A neat manicure gives a girl, or rather her hands, a well-groomed look. However, not every lady has perfect nails. They can flake, break, be uneven, etc. That is why acrylic for manicure is used to give the nails the desired shape. This material is often used for building or strengthening. Having familiarized yourself with the technique of use in detail, you can perform the procedure yourself.
What is acrylic used for?
The effect is noticeable immediately after covering the nails with the material. They become denser and stronger. Thanks to its unique properties, acrylic applied to nails protects them from mechanical stress, ultraviolet radiation, exposure to cold and aggressive household chemicals, as well as from dirt and dust. That is why the plate is strengthened under acrylic, and delamination occurs less often.
You need to understand that this is a synthetic material. Therefore, strengthening of nails does not occur due to the penetration of nutrients. The whole effect is achieved thanks to a kind of acrylic shell. If everything is done correctly, the material does not flow onto the cuticle or side ridges, and detachments do not appear.
Minuses
There are surprisingly few of them. Like any synthetic material, acrylic can cause allergies. However, according to statistics, this occurs in no more than 5% of clients. However, this does not mean that you can neglect safety rules. Before you are interested in how to use acrylic for nails, you need to make sure that you are not allergic.
In addition, the material has a rather pungent and unpleasant odor, which may be unbearable for some. Not all girls are ready to endure discomfort. Even to get the nails of your dreams. You need to work with acrylic in rooms with good ventilation.
Pros and cons of nail extensions
Any outside interference in the systems of the human body causes a number of consequences that have their own individuality. How strongly the body will protest depends on the experience of the master and the level of materials and equipment used.
The extension procedure is carried out in three ways: gel, acrylic or a combination of both (in our case). But regardless of the choice of base, we can say for sure that all methods are safe and equally beautiful. The period of operation of such a nail lasts from two weeks to one and a half months.
It is worth paying attention to the following factors:
- Before carrying out the procedure, the master calculates the durability and the possibility of quickly restoring the lost nail, as well as the possibility of correction.
- Depending on the growth rate of the nail plate and its condition, the period of service of the artificial one will be determined.
- High-quality materials and sterile equipment ensure the safety of the skin and minimize the occurrence of the inflammatory process.
- Modern technologies make it possible to use safe acrylic that does not contain methyl.
- It is worth considering that an artificially created nail prevents the flow of air to the plate, thereby providing a favorable environment for the development of microorganisms.
Types of acrylic
To understand how to use acrylic nails, you need to know what types of material are on the market.
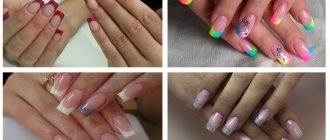
- Transparent powder is considered universal. It is used for both building and strengthening. This is also a great option for creating a classic French manicure. Nail artists use transparent powder for decoration, creating beautiful designs and sculpting. To achieve the desired result, transparent acrylic powder is mixed with glitter, dyes and other decorative elements.
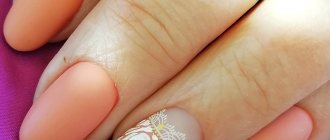
- Camouflage powder is useful to disguise defects or hide unevenness. Typically, this acrylic has a beige tint, reminiscent of skin color. This allows you to imitate a natural nail. Camouflage acrylic has a denser structure. It is incredibly convenient to use due to its flexibility and plasticity. This allows you to use it even on thin or damaged nails.
- Finishing acrylic powder is recommended if a glossy top coat is desired. It's quite easy to use. After hardening, the nails acquire a mesmerizing glossy tint.
Step-by-step acrylic extensions onto tips at home for beginners
- The hands of the master and the client are cleaned and disinfected.
- Using a pusher or an orange stick, the nail plate is freed from the cuticle, and the pterygium (the film under the cuticle, covering a small part of the nail) is also removed from the surface.
- The top glossy coating is removed with a fine file; the movements should be in one direction and the nail should become completely white.
- Taking into account the convexity and width of the nails, tips are selected, glue is applied to the inside of the tip and pressed against the natural nail.
- The free edge is corrected.
- The tips are sanded with a file to a matte white color.
- Then, use a brush to remove dust particles from the nail.
- Nails are degreased and treated with primer.
- The brush is dipped in the liquid, then dipped in acrylic powder and the ball is placed in the center of the plate, and a nail is formed with the brush.
- The surface is filed to give the desired bend, starting from the sides, then adjusting the top and tip.
- Small scratches are removed with a buff and the surface is polished to a shine.
- Oil is applied to the cuticle and rubbed in.
After a few workouts, you can make beautiful nails yourself at home.
Fashion trends in manicure
Decorations for nail design. part 2
Manicure by zodiac sign: Aries, Leo, Sagittarius. Photo ideas
15 baths for your feet
5 Instagram nail design masters: interesting works
Which acrylic to choose?
Before you learn how to use acrylic nails, you need to decide what type of material to use. The choice should not be random. Start from what result you need to get.
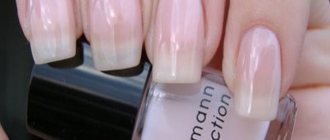
- If you need to straighten your nails, use camouflage powder. It will do the job perfectly and provide your manicure with a natural effect. Those around you are unlikely to realize that the surface is actually artificial.
- If you want to strengthen your nail plates, choose transparent acrylic.
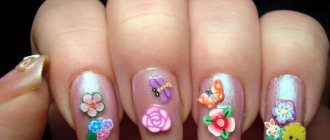
- To create a spectacular design, choose finishing acrylic powder in combination with rhinestones, iridescent sparkles and mirror glitters. The amazing effect will pleasantly surprise you.
Step-by-step instructions for correcting nails with acrylic
General correction is carried out approximately once a week and takes about 2 hours. As soon as you notice that an overgrown natural nail has appeared between the artificial nail and the skin, you need to immediately make a correction.
The correction procedure is as follows:
Correction of acrylic nails
- First, the nail polish is removed and the cuticle is removed .
- The nail surface between the acrylic and the cuticle is carefully filed and polished .
- A primer is applied to the natural nail .
- Next you need to make a small ball of acrylic powder . It is applied to the regrown nail without touching the cuticle.
- Acrylic is applied alternately, first to the left and then to the right hand.
- When the acrylic hardens , you need to sand the surface and move on to the design.
Peculiarities
One of the functions of acrylic is nail extension. He copes with it perfectly. No matter how long your nails are, they won’t break under acrylic. It allows you to maintain a flawless manicure for a long time. It is enough just to make the correction in time. Because as nails grow, the coating loses its freshness and attractiveness. That's why you need to make timely corrections.
There are many options for how to use acrylic nails. This is thanks to the amazing variety of shades and textures. Hundreds of design options have been invented: aquarium, artistic, “knitted”, etc. If you have a certain skill, you can create and implement a variety of ideas. Acrylic is quite pliable. This creates limitless scope for imagination and the embodiment of talent.
For those who are interested in how to use acrylic nail powder, the biggest surprise is the fact that the design, extension or strengthening process does not take much time. If you have the skills, everything is done in a matter of minutes. You can speed up the creation of the coating even more if you choose acrylic with the inscription high speed. This means that the material hardens faster than its analogues. However, to use it you will need high speed.
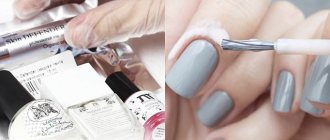
Required materials and tools
Whatever nail procedures you perform, you cannot do without auxiliary products. It is advisable to purchase all materials from trusted sellers so as not to waste time and money.
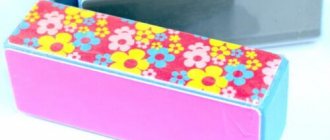
- Acrylic Powder. Can be purchased immediately as a set.
- Liquid. It may also be called liquidity. Needed to dilute dry powder. It does not change the shade of acrylic. The composition contains plasticizers that add stickiness and remove dust.
- Flat brush.
- Degreasing agent. Needed to clean your nails and increase adhesion to the material.
- Buffs and files. Useful for grinding.
It must be said that acrylic powder is not cheap. This can be intimidating for newbies. However, by purchasing just one jar of dry acrylic, you can complete not one, but several coatings. In the end it will be quite economical.
Execution technique
It is very important to know how to use acrylic nail extensions. If you work with the material incorrectly, chips, cracks, and detachments are possible in the future. All these defects spoil the appearance of the acrylic coating. To avoid having to learn from mistakes, you need to immediately find out all the nuances. Knowing how to properly dilute, use, apply and remove acrylic will prevent you from making mistakes.
Is it necessary to use a primer for acrylic nail extensions? One of the popular questions among those who begin to use this material. The primer is applied to the nail plate after degreasing. It forms a thin, rough film that improves the adhesion of the acrylic material to the nail. Professionals consider the use of a primer mandatory. It dries the surface before applying the material and destroys microbes.
Acrylic nail care
- Before extensions, it would be useful to test for an allergic reaction . To do this, apply a little acrylic to the nail. If blisters and red spots appear on the skin, then it is worth replacing acrylic with gel.
- Despite the strength of acrylic, it must be handled with care. Natural nails are not so strong, and any damage to the artificial plate always negatively affects the condition of the natural one.
- acetone to remove acrylic . He can give an unpredictable reaction.
- Do not apply polish on artificial nails too often . Otherwise, they will stop breathing and will gradually begin to deform.
- Do not use nippers and scissors , which severely injure the nail plate. Use special files.
- If your nails grow quickly, file them to the desired length with a nail file and coat them with varnish. The latter must be of very high quality.
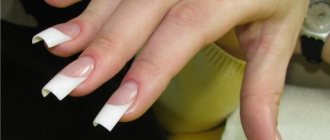
Beautiful extended nails
Acrylic nail extensions have many advantages. But the result of the procedure can only please you with strict adherence to the technology and high-quality care for the extended nail plate.
More interesting articles:
Acrylic for strengthening
Girls with fragile, peeling nails know how difficult it is to grow their length. Reinforcement with acrylic will make them denser and protect them from mechanical stress.
How to use dry acrylic nails? If your goal is strengthening, you need to follow these steps.
- Get a hygienic manicure.
- Apply primer.
- Cover with gel polish base.
- Using a spatula, sprinkle acrylic powder onto the uncured base. First, place your nail over a jar or other surface where the remaining powder will be poured.
- Dry in a lamp.
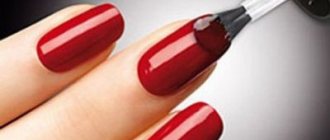
- The final stage is surface grinding. Then you need to apply a colored coating and secure it with a top coat.
By following a simple sequence of actions, you will not make mistakes when working with acrylic.
It is important to know that the powder dries out quite quickly, so it is recommended to practice in advance, for example, on tips. It may be necessary to apply acrylic powder in several layers to achieve the desired result.
Advantages and disadvantages of the procedure
An interesting fact is how this technology has penetrated into nail salons. It was primarily dentists and stomatologists who used acrylic in their work, since its hardness is ideal as a dental material.
Over time, namely in 1957, the idea of nail extensions was born in the world of manicure, and then leading specialists tried this material in order to introduce something new and spectacular into the manicure field. Until today, this technology is one of the leading ones in working with nails.
There are many advantages of acrylic nails that will equip you with the subtleties of manicure:
Acrylic adds elasticity and therefore naturalness to manicure.
- this material gives elasticity , and therefore naturalness to the manicure;
- thinness and, at the same time, strength of nails due to the absence of toxic methyl methacrylate in the composition;
- insensitive to temperature;
- more durable than other materials that are used for the same purpose (gel for example);
- can be easily removed if necessary (in a special solution);
- versatile design (artistic, aquarium, volumetric);
- easy restoration in case of breakdown.
At the same time, we will not hide some of the disadvantages of such a procedure, because we want the best for you:
- “lifelessness” of the nail , which is under the influence of acrylic;
- "dental" smell;
- possibility of temporary loss of natural shine;
- the need to first use a base varnish and only then an acrylic material to give the desired color;
- the need for leveling and sanding after application;
- Possibility of allergy to the material.
With cosmetic procedures, everything is not always so simple, there are always pros and cons to whatever you use. It is true what they say: “Beauty requires sacrifice,” and, unfortunately, this is so. But most of these disadvantages when working with acrylic manicures can be avoided if you use the technology correctly, which we’ll talk about next.
Building up
Before the procedure, it is recommended to decide in advance what color and texture you will use. You may need to learn how to use liquid acrylic nails in advance.
- You need to perform a hygienic manicure.
- Treat your nails with a degreasing liquid.
- Apply primer.
- Liquid for acrylic is poured into a small container.
- Place the nail extension molds.
- Dip the pre-prepared brush into the liquid and then into the powder.
- Apply the mixture to the nail and shape, forming the desired length. It is very important to perform all actions quickly so that the solution does not have time to dry out.
- After the acrylic mixture has hardened, the molds are removed and the nails are sanded, making the surface perfect.
- Polishing is completed with a fine buff to remove all roughness.
What to choose as a basis: tips or forms
Forms in acrylic extensions refer to special patterns. With their help it is convenient to model the future nail. Disposable paper forms are used. Tips are made of plastic and are special blanks that imitate natural nails. They are thin, strong, and easy to file.
The process of nail extension on forms
- If you are growing almond-shaped or oval-shaped nails, then it is possible to use both bases of your choice.
- If a person regularly bites his nails, it is better to do extensions using tips with a small contact surface.
- When extending trapezoidal nails, you should take forms with a small contact surface.
- For flat nails, you can use both tips and forms. However, if the width of the nail is too large, it is better to take forms, since the tips may not correspond to this width.
- If the nails are curved down, then only forms can be used for extensions.
How to remove acrylic coating?
If the material was used to strengthen nails, it is easy to remove. It is enough to simply dissolve the old coating using a special liquid. Thanks to the small thickness of the acrylic layer, this is easy to do. It is enough to apply a small piece of cotton pad soaked in the product to each nail. Then wrap in foil and leave for ten minutes.
If acrylic was used for extensions, the coating will have to be cut off.
Acrylic for nails performs several different functions - extension, strengthening, decoration.