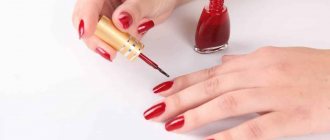
Necessary tools for manicure at home
To carry out the treatment efficiently without damaging your nails, you need to purchase professional tools. Firstly, their service life is much longer, and secondly, they operate efficiently and as safely as possible, allowing you to speed up the process significantly.
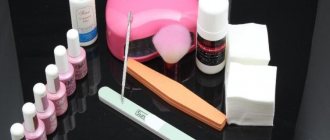
For manicure you will need the following tools:
- Cuticle nippers. Some of the best time-tested companies are Solingen and Zinger. The tools are made in Germany, the material of manufacture is stainless steel. The pliers come in different sizes depending on the length of the blade. For home processing, a parameter of 0.5 cm is suitable.
- Pusher is
a special double-sided device for pushing back the cuticle and modeling the nail hole. On the one hand, it has a “spatula”, on the other, a small knife. The tool must be made of metal. - Knipser. Used for shortening long plates. Outwardly it resembles a guillotine and operates on the same principle. There are powerful toenail clippers and standard ones for hand care.
- File. It is necessary to trim the plate and give it the required shape. It differs in material of manufacture and rigidity. For a home procedure, a file with a grain size of 180 grit is suitable.
- A polisher is
an accessory that gives your nails a beautiful glossy shine and perfect smoothness. It can also have different abrasiveness, ideally 2000 grit.
In addition to the main set, you will need auxiliary items and tools:
- terry towel or paper napkins;
- cotton pads;
- steaming container – large cup, bowl, etc.;
- wooden sticks made from citrus fruits for cleaning nails, pushing back cuticles, etc.;
- nail polish remover - if you need to remove the previous coating;
- disinfectant - you can purchase sanitizers at a pharmacy or specialty store, or use regular chlorhexidine (Miramistin) or a 70% alcohol solution.
Depending on the type of manicure and the desired coating, you will need additional accessories. For example, you can take a special oil to soften the cuticle or a pencil for rhinestones if you plan to decorate with stones.
Which manicure tools should you use and which should you not?
For beginning craftsmen, the listed set of items will be sufficient. Don't ignore the orange stick - it will help push the skin away from the cuticles without damaging it. If you don't have clippers, you can use regular nail scissors. However, tweezers have beveled blades, which allows you to remove the dead layer of skin more deeply. As a result, the nail bed looks well-groomed longer than when trimmed with scissors.
On sale you can find various kinds of tools, for example, cuticle forks. At first glance, they seem convenient, since they cut the skin at the “right” angle.” However, they are considered a non-professional device and are not used by craftsmen. It is very easy to damage the capillaries with forks, after which your hands will bleed for a long time. They are also not recommended because the blades create unnecessary pressure that deforms the nail bed. Sometimes the damage is so severe that the nail begins to grow crooked and never straightens out again.
Sterilizing instruments at home
Trimming manicure is considered one of the most traumatic, so sterilization of instruments is a prerequisite for its implementation. In nail salons, this procedure is performed in special dry-heat ovens; at home, you can use an oven. Simply load metal tools into the cabinet on a separate baking sheet, set the temperature to 250˚ and heat for 15 minutes.
If during the previous treatment the skin was damaged and blood came out, the items must first be soaked in a solution of one of the following products:
- chlorhexidine;
- 70% alcohol;
- special pharmaceutical composition.
If you use reusable orange sticks, they also need to be sanitized. It is enough to wipe them with antiseptics; the nail files are treated in the same way.
Home manicure kit
To make a classic edged manicure, you will need a minimum set consisting of nippers, scissors, files of varying hardness, an orange stick, oils and cuticle products. The most important thing is that all items are well sharpened. Don’t forget about sterile standards when doing a manicure at home. All instruments must be treated with an antiseptic.
The technique of performing a trim pedicure involves the use of the following tools and accessories:
- To soften the skin. To soften the skin of the feet and make it more amenable to treatment, use a bath with warm water. Soap is added to it, sometimes salts and aromatic oils.
- For treating calluses and corns. The master can use a special pedicure grater or blade. The principle of operation of both tools is similar: they are used to cut off rough and dead layers of skin.
- For nail treatment. A basic set of pedicure tools includes scissors, nippers and a nail file. Tools are needed to trim the overgrown edge of the nail and polish it.
- For processing cuticles. If the master does a manicure with cuticle trimming, he uses nippers or a special cutting device to remove it. If the cuticle is not thick and has not grown much, it is simply pushed back with an orange stick.
- For polishing nails. The master has several types of files at his disposal - hard ones for removing gel polish and soft buffs for polishing.
Choosing a nail file
Manufacturers offer a wide range of files that differ in hardness, shape and material. Choose a tool based on the result you want to achieve and your financial capabilities.
Classification by material
The following types are produced:
- Glass. Their advantages are long service life, versatility, safety, prevention of plate delamination. If the coating has worn off (usually a file lasts for a year), this indicates the need for replacement. The main disadvantage is fragility. Glass breaks easily, so it should be stored in a special case.
- Ceramic. The choice of professionals and people who have to treat weak, damaged nails. Ceramic is also suitable for removing old gel coating.
- Diamond. The main advantage is the ease of processing the plate in all directions. The diamond file also does not damage the nails and seals the tip, reducing the risk of splitting. Used on both natural and artificial nails. Its cost is several times higher; it is classified as a professional device.
- Metal. Masters do not use this type, as there is a high probability of injuring the nails. The price of such a file is low, it lasts quite a long time, but that’s where the positive qualities end.
You can also find paper and plastic tools; you should not purchase them for home use. The best option is a ceramic or diamond file.
Classification by shape
The shapes of the files are also varied:
- oval – for correcting the shape of natural and extended plates;
- rectangular - to form the length;
- boomerang - to give nails a rounded shape;
- diamond-shaped - the most convenient option for correcting artificial plates;
- dome - to give the extended nails the desired shape along the entire length.
The best choice for working at home is an oval file. With its help you can perform almost any manipulation.
Classification by hardness
The grain size of the file is determined by grits, that is, the amount of abrasive applied per 1 cm². A low indicator indicates maximum roughness of the instrument, a high indicator indicates softness. The following types are used in manicure:
- 80-150 grit – for processing artificial plates;
- 150-180 grit – for final polishing of extended nails;
- 180-240 grit – for working with natural plates that do not delaminate;
- 400 grit – for weak and thin nails;
- 400 – 2000 grit – polishers.
The hardness is indicated on the file itself. If you do not see this indicator, do not purchase the tool. Most likely, it will be of poor quality and will only “fragment” your nails.
Useful tips for learning manicure
If you want to not only master the art of manicure, but also actively develop in this area, use a number of recommendations.
- watch good training videos: often popular beauty bloggers can give truly valuable advice;
- subscribe to the blogs of popular “gourmaniacs”, since girls who are passionate about this topic often post step-by-step photo instructions on how to perform a manicure on their websites, share their experiences, and write detailed reviews on various products and tools;
- practice on artificial nails. Buy a set of inexpensive tips, stick them on a hard surface and hone your skills: give it a different shape, apply varnish and designs, try new manicure techniques.
Choosing a nail shape
The nail plates on each finger are different, and with the help of proper filing you can visually align and lengthen them, giving them elegance and subtlety. The most difficult to treat are the thumb and index fingers - usually the nails on them grow crookedly, and the nail bed itself is different from the rest. The little finger and ring fingers are considered the easiest to work with - the nail on them is narrow and beautiful.
Be sure to align short nails in length so that the free edge does not show through and does not reveal uneven plates. When choosing a specific shape, be guided by the bend of the bed, the length and thickness of the fingers. There are several form options:
- Square. This type is considered the initial type for any other form, but it is not suitable for everyone. If you have plump, short fingers, it is better to avoid the square. It is sawed quite simply - the length is removed, after which several manipulations with a nail file are made on both sides to emphasize sharp corners.
- Soft square. The corners of the square are beveled and rounded, the edge is made a little “smiling”, but not much, otherwise the transition to an oval shape occurs.
- Oval. A file is placed at the corners of the finished square at 45˚, then the corner is filed. The resulting edge needs to be smoothed, giving the plate an oval shape. To make the nail symmetrical, the oval should be drawn from a square. If you immediately try to file the plate on both sides, the proportion will be disrupted.
- Almond. A shape that should only be done by those with long, thin fingers with an elongated nail bed. Otherwise your hands will seem awkward. To give your nails an almond shape, you need to file off the corners of the finished square at 60˚, and then smooth the edge.
The shaping is completed by removing the sawdust from under the plates. To do this, place the file perpendicular to the free edge of the nail and perform several manipulations in an upward direction.
Instructions for applying the design
Each design technique in nail art has its own subtleties and features. But there are basic rules:
- Professional artists use only well-pigmented paints. Paints with weak pigmentation will only spoil the overall look of the manicure.
- Only good glue is used to attach design elements. It not only firmly secures the decoration, but also becomes transparent and invisible when dry.
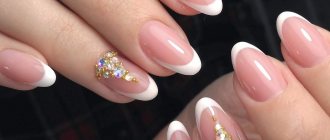
Classic French
The classic French manicure is the most popular type of design both in beauty salons and when creating manicures at home. You can draw the smile line yourself, or you can use stencils.
The latest fashion trend has become a French look using colored varnishes. For example, the combination of a blue base and a silver free edge is a current and fashionable solution.
Don't miss the most popular article in the section: How to extend nails with gel polish. Nail extension instructions for beginners. Photo.
Lunar manicure
Lunar manicure is designed to whiten the area of the nail hole by painting it with varnish. Often, outlining the hole is combined with painting the free edge of the nail, although this is not necessary.
Lunar manicure, like a French manicure, can be presented in both classic and bright color palettes.
Sliders
Sliders have become a new word in simplifying nail design. These ready-made designs can be placed either fragmentarily on individual nails or completely on all nail plates.
There are two types of sliders:
- Thin sliders are placed in water and the design itself moves away from the base; all that remains is to carefully place it on the surface. But be careful, such sliders break very easily.
- Thickened sliders have an adhesive base and are suitable for leveling the surface of the nail. But they are extremely difficult to damage.
Stencils
There are 2 types of stencils on the market: classic, for French manicure, and designer, with a patterned cut of snowflakes, funnels, and other things.
Let's take a closer look at how to do a manicure at home using stencils:
- First, you need to cover your nail with a base color. The color can be any, the main thing is that it differs from the second layer of coating.
- Secondly, we will place the stencil on the desired area. If this is a designer stencil, then we simply cover everything with a contrasting varnish. If the stencil is of the classic type, then we paint only the free edge of the nail along the border of the sticker.
- After complete drying, the stencil is removed. All this is covered with a layer of transparent top.
Stamping
Another invention of nail art was the transfer of a design from a metal plate using a gel stamp. Stamping will help owners of short nails to create a unique design with their own hands in a matter of minutes.
Experts recommend that women with short nails choose plates with small designs or abstract patterns, because many engravings are quite large and may simply not fit on a small nail.
It is often difficult to transfer a small design onto a short nail plate; for this, nail service professionals use stamps with a transparent bottom.
For stamping, it is important to use only thick, well-pigmented varnishes or paints. If you don’t have a special varnish, you can leave the tube you like open for 20 minutes and the varnish will acquire the desired consistency. The greatest visual effect will be achieved due to the contrast of the colors of the base and pattern.
Sequins
Glitter in nail design creates brightness and festivity. They can cover all the nail plates and get a stunning festive effect or highlight individual areas in the composition on the nail. A popular trend today is glitter stretching. To design short nails, glitter is used carefully and in small quantities.
Rhinestones
Designs with rhinestones always look interesting and bright, and rhinestones on short nails can look very stylish if you follow a few basic rules. For small nail plates, experts recommend choosing the smallest rhinestone diameter. Nail experts do not recommend overloading short nails with many rhinestones.
There are several options for unobtrusive and sophisticated design of short nails using rhinestones:
- Rhinestones can be laid out on the border of different colors, which will give the transition line a special appeal.
- Many nail artists offer designs where rhinestones are attached one to each nail.
- Experts do not advise: Combining a bright, flashy design with a lot of rhinestones, it can look vulgar and inappropriate. Therefore, you need to choose one thing.
Matte manicure
Another interesting design technique is matte manicure. It is created by coating with a special topcoat. The contrast between glossy and matte finishes looks especially impressive. Masters suggest matting not the entire nail plate, but only individual parts. You can paint a few nails with a matte top, while leaving the rest with gloss.
Gradient
Gradient is a fashionable and stylish trend today. For short nails, masters recommend choosing a vertical gradient over a classic horizontal one. In this case, the gradient line visually lengthens the nail.
Also, an excellent solution for short nails would be to apply a gradient coating not to all nails, but only to one or two, while the rest can be coated with a monotonous color.
The Baby Boomer gradient has become especially popular. This technique is performed in nude tones. It is perfect for those with short nail plates, making them look well-groomed and healthy without visually shortening their length. So, by doing a manicure at home, you can significantly save money and time.
In addition, by creating unique designs on their own, any woman is able to reveal the talented nail artist within herself.
Useful baths as a preparatory stage
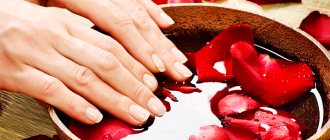
Before a classic trim manicure, it is necessary to soften the cuticle and prepare the skin for further procedures. Baths are used for this. Fill a container prepared in advance with warm water (not hot), then lower your hands there for 3-5 minutes. This time will be enough to give the skin sufficient softness.
If desired, you can add sea salt or aromatic oils to the water. Then the procedure will be more pleasant and useful, strengthening the nail plates. After the bath, it is advisable to use a hand scrub and moisturizer.
What is a classic edged manicure?
Trim manicure is a classic type of nail care that involves removing the cuticle from the surface of the nail folds. The procedure is carried out with preliminary steaming of the keratinized layers of skin around the nail in warm water, which is why this method is called “wet” manicure.
Classic trim manicure is done in the same ways for both men and women.
A classic manicure prepares your nails for further application of any coating. Trim manicure is carried out even when the nails are in poor condition. Treating your hands with nourishing products after a session is comparable to spa treatments, because it has a positive effect on the surface of the nail and cuticle.
Technique for performing classic edged manicure
At home, manicure is carried out according to the following instructions:
- Wash your hands with detergent.
- Completely remove the previous coating.
- Give the nail plates the required shape.
- Make a softening bath. To do this, lay out a towel, place a container of warm water on it and place your left hand there if you are right-handed, and your right hand if you are left-handed.
- Wait a few minutes, then take out your little finger and pat it dry with a towel.
- Gently work the cuticle with the side of the pusher that resembles a “spatula”.
- Remove the pterygium from the plate with the side of the pusher where the blade is located.
- Using clippers, cut off the dead skin from the skin folds and nail bed.
- Consistently repeat the described procedure with the remaining fingers and the other hand.
- Polish your nails.
- Cover the plates with your chosen varnish, transparent base or medicinal composition.
- Massage your fingers and hands with special oil.
Learn how to do French manicure
Doing a French manicure correctly is very simple; it does not require any special skills or tools, so it is often done at home. The only thing is that it is recommended to buy white varnish with a thin brush. Of course, you can work at home using stencils, but any professional craftsman will tell you that only by painting with a brush can you give your nails the desired and beautiful shape.
Instructions on how to do a simple French manicure at home step by step:
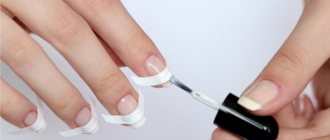
- The nail is prepared: degreased, covered with base. When the base is completely dry, the main color is applied on top of it. French is a very soft and elegant type of manicure, where pastel colors are often used. The base polish can be pink, beige, coffee, etc.;
- After the base dries, smiles are drawn. To create them, you can use stencils, but this technique has several disadvantages: there is no originality, varnish leaks through them, and they are inconvenient to peel off. Therefore, it is better to draw patterns by hand;
- This is why you need a varnish with a thin brush. The “smile” is drawn with thin short strokes along the natural white stripe at the end of the nail. Depending on the shape, it can be round, more square, or even straight. Depending on your skills, you can also decorate all your nails or just one with a simple pattern. For example, draw a few stripes or write something;
Photo - French manicure in stages - All that remains is to coat the varnish with a fixative and wait for it to dry. Some girls use glitter varnish (with sparkles) instead of a fixative. It also holds up well, but can be inconvenient when removing manicure.
Video: an easy way to create a French manicure
Unedged manicure at home
In the salon, for unedged manicure, a machine with many rotating attachments and caps is used. The cutters remove the keratinized layer of epithelium on dry skin. To perform a similar procedure at home, you can use a cuticle softening cream, a special file for European manicure and a ceramic hoof. They will help to gently push back the skin without injuring it. There is no need for baths for the procedure, since the treatment is completely “dry”.
Unedged care is performed according to the following algorithm:
- Wash your hands with soap.
- Apply a softening composition to the cuticles. Let it soak in.
- Start with your little finger. Open the nail bed with the round end of a file or a wooden stick, pushing away the skin folds.
- Remove the softened part of the cuticle remaining on the surface of the plate.
- If the skin ridges are rough, go over them with a stick with an abrasiveness of up to 240 grit.
- Wash your hands again.
- Use a degreaser or alcohol to prepare the plates for further decorative coating.
- Apply polish or gel.
Hardware manicure for beginners
Probably everyone has already heard about hardware manicure. More and more fans of this technology are appearing. Its trick is that it allows you to free it from dead cells without damaging the cuticle. Of course, here you will have to master a special apparatus, which is equipped with various cutters. It will help you forget about wire cutters and other devices. Hardware manicure is performed quickly and painlessly.
It is performed on dry skin. At home, it is better for beginners to work at low speed to prevent accidental damage.
Stages of work:
- If there is old coating, it must be removed. How to do this correctly, see the section: How to remove gel polish.
- Treat the skin with an antiseptic liquid.
- Use a stick to push back the cuticle. Using a cone-shaped nozzle, remove the skin. Hardware manicure for beginners should be performed at medium speeds. Movements should be neat and smooth. The cutter should not be pressed too hard against the skin. To remove the cuticle you need to move from left to right.
- Give your nails the desired shape. The disk attachment is designed for this purpose.
Cuticle removers
A wide range of softening compositions for hardened areas of skin on the fingers and hands are on sale. All of them are divided into three types:
- alkaline;
- acidic;
- based on fruit oils.
The first two require mandatory rinsing after a certain period of time, the third option can be left as is. Alkaline and acidic solutions are suitable for European-style home unedged procedures. They will soften the skin equally well. However, you should carefully study the instructions for the products so as not to overexpose them and not get inflammation, burns or dryness.
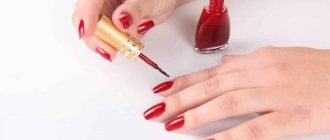
Features of applying nail polish
Applying nail polish is not as difficult as it might seem at first glance. There are some useful tips about this:
- The varnish must be the correct consistency. If you just bought it and it hasn’t been sitting on the counter, then its thickness is optimal. If you notice that the density is too high, then add a special liquid to dissolve the varnish into the bottle.
- Do not use acetone or nail polish remover to thin the base. These compounds will simply curdle her.
- If you are going to apply a colored coating, first prepare the plate and treat it with a transparent base. Otherwise, the gel or shellac will quickly be absorbed, leaving uneven streaks.
- Practice on some similar objects before painting your nails. An incandescent light bulb is ideal.
- After dipping your brush into a container of varnish, be sure to squeeze out the excess.
How to properly treat your nails
By covering the nail plate with bright varnish, you will not achieve the main goal of a manicure - neatness. Because well-groomed hands mean, first of all, the absence of burrs, cuticles and uneven edges. Nails should have the same shape and length.
Required tools and materials
A large number of manicure products and devices often frighten impressionable clients. And they continue to use expensive procedures just to avoid having an “operating room” at home.
But to make a good and professional manicure yourself, you need to purchase a standard set that will last a long time.
Every woman should have a standard manicure set
To work at home you will need:
- regular and sanding files,
- scissors for removing cuticles,
- deburring nippers,
- trimmer,
- ceramic nail file,
- nail polish remover,
- cotton pads,
- paper towels,
- bowl of hot water,
- cuticle softener,
- hand cream.
Sequence of treatment of nails and skin around them
It is recommended to carry out the procedure once every 5 days. It will take 30–60 minutes to complete, it all depends on your professionalism and the condition of your hands.
For safety reasons, experts recommend strictly following the sequence of work:
- Removing old coating. The nail plate must be completely free of varnish, glitter and rhinestones. To do this, use a cotton pad with nail polish remover to carefully remove the entire decorative layer. Movement: from the base of the nail to the edge.
- Adding shape and shine. To work, you will need a regular file and a sanding file, with which you can shape your nails and also remove unevenness. To avoid splitting the nail plate, the file should move from the side edge to the center in one direction.
- Softening the cuticle. First you need to apply a special product to the skin around the nail. After 3-4 minutes, the skin will soften, after which the fingers should be placed in a bowl of hot water with the addition of liquid soap (0.5 teaspoon per 300 grams of water) and 1 tablespoon of sea salt. After 5–7 minutes, remove your fingers from the water and pat dry with a paper towel.
- Cuticle removal using cutting method. Use the rounded end of the trimmer to carefully push back the cuticle around the perimeter. Then use the sharp side to remove any remaining skin from the surface of the nail. All movements should be performed without pressure, from the center to the side edges. Cut off the remaining part of the cuticle using special scissors. Don't forget to treat the cut areas with an alcohol solution or hydrogen peroxide.
- Deburring. Nail clippers or scissors are suitable for this work. It is important to know that hangnails should not be pulled, as painful wounds and other unpleasant consequences may appear, including suppuration and infection.
- Treatment of rough skin areas. Calluses on the fingers and rough pads are sanded with a ceramic file or pumice stone. Trimming rough skin is not recommended, but with regular procedure this problem will disappear forever.
- The final stage. After treating your nails, you need to apply a moisturizer to soften the skin. After five minutes, when the cream is absorbed, degrease your nails with nail polish remover.
To avoid splitting the nail plate, do not use a metal file.
Hands and nails are ready to apply decorative coating.
Untrimmed cuticle removal method
It is not necessary to resort to a trimmer and nail clippers; an alternative is a special composition for removing cuticles. The consistency can be liquid, gel or cream. The peculiarity of its composition is fruit acid.
Cuticle removal sequence:
- Lubricate the side rollers and cuticles with an orange wood stick soaked in a special composition.
- Wait 2-3 minutes, then carefully peel off the top layer.
- Move the softened bottom layer with a stick, this will form small pellets of dead cells.
- Rinse off any remaining product with water and sand the surface around the nail with a diamond file.
To work with cuticles, it is better to use orange tree sticks.
Small tips that will come in handy when treating your nails
To become a good professional, a set of tools is not enough, you need a thorough study of the sequence of the procedure, as well as experience, which will appear later.
Useful life hacks that can improve the quality of your nail treatment:
- Choose a nail polish remover without acetone, as it dries out your nails, making them faded and prone to brittleness.
- Before work, disinfect tools with any solution containing alcohol and check their sharpness.
- Do not use metal files; they delaminate the nail plate. For fragile nails, choose a file with a fine-grained structure; for healthy ones, choose a sapphire or sand file.
- File and polish only dry nails. Treatment of wet and soaked nails leads to disruption of their structure and delamination.
- It is not necessary to polish the plate with each treatment, since frequent grinding thins the surface.
- Nail shapes can be any: from classic oval to square or sharp. The square shape is more resistant to external influences and, due to transverse grinding, allows you to save brittle nails. But it makes the hand heavier and is suitable for hands with thin and long fingers.
Video: how to do a manicure at home
Applying Shellac: A Step-by-Step Guide
Shellac is a kind of hybrid of regular varnish and gel for nail extension. It lasts longer than its analogues, gives the nails additional rigidity and allows those with brittle plates to grow longer. Apply gel polish according to the following algorithm:
- Clean your fingers from dust after a manicure using a special brush. Degrease the plate so that the shellac adheres better.
- Cover your nails with base coat. To ensure an even layer, first apply the base to the edges of the plate, then paint the middle and finally seal the free edge. After each application, you need to dry the gel in an LED or UV lamp. The time depends on the type of device.
- Now coat your nails with your chosen polish. For beginners, it is better to paint with one color, and only after a positive result obtained several times, move on to complex designs. So, apply the base coat in the same way as the base coat, but do not seal the edge.
- Dry the layer in a lamp. If you notice that the gel is swollen, you will have to remove it and start the process again from the first point.
- Apply the base composition a second time and dry it. This is necessary to create a rich, vibrant color. If you are going for a translucent effect, you can skip this step.
- Apply topcoat or finishing coat to your nails. This layer should be the densest and thickest. It takes longer to dry than others, and the tip is sealed during application.
- Wipe the finished, dried nails with a special compound or a lint-free cloth to remove the resulting sticky layer. If you don’t have professional products at hand, you can use regular alcohol. However, keep in mind that it takes away some of the gloss from shellac.
If you want to do a more complex finish, such as a cat eye, practice on single color designs first.
Nail designs at home You don't have to go to a salon to give your nails an original look. The procedure can be completed at home, but some designs may require additional materials and experience.
Among the popular types of nail plate decoration are the following:
Classic French.
Shape your nails into a soft square, then cover them with a base coat in a natural shade. Usually choose pale pink, beige or milky. After this, the free edge should be highlighted with a white “smile”. It is difficult to apply it evenly, so beginners often use stencils.
Lunar manicure.
Similar to the previous option, only here you need to select not the tip, but the hole at the base of the plate. You can use a stencil for a clearer drawing. In the lunar design, the holes look interesting, drawn in a bright color contrasting with the base.
Sliders.
These are small stickers with ready-made designs on one side and an adhesive layer on the other. Before manicure, cut out the necessary stickers, apply the base and, while it is still wet, secure the slider. Smooth the film with an orange stick and remove any bubbles. Secure with top.
Stencils.
They allow you to apply the design as accurately as possible, without allowing the varnish to spread. Simply separate the template from the leaf and glue it to the desired location on the plate. After this, cover the nail with the desired color of shellac, dry for 5 seconds under UV rays and remove the stencil.
Stamping.
For this manicure you will need special stamping kits. It is understood that you will use these silicone impressions to apply the selected patterns to the nail plates using the stamping method. It can be stripes, flowers, ornaments, etc. It all depends on your taste. Choose the colors of the base and stamps at your discretion.
Glitter.
The universal shade of glitter is silver. It fits any design and accents just the right amount of attention. To apply glitter, wait until the varnish is completely dry, arrange the decorative elements as desired and secure them with a top coat.
Rhinestones.
They decorate only two nails, otherwise the design will look redundant. Buy a set of Swarovski crystals of different sizes and a special pencil for gripping them. Decorate with rhinestones a plate on which the shellac has not yet dried. To do this, moisten a wooden stick or pencil with water and bring it to the crystal. It will attach itself. Place the largest stone in the center closer to the nail bed, leaving smaller rhinestones at the edges. Simply release the stick after alignment to adhere the crystal.
Matte manicure.
It is also called "Velvet". To complete this you will need a special “Satin” varnish. After complete drying, it becomes matte, while hiding all imperfections of the nail. If you apply a top coat over it, the coating will become glossy. You can make two nails shiny, for example, and leave the rest matte. It is better to use “Satin” on bright colors; on nude colors the dullness is not visible.
Gradient.
A smooth transition from one color to another is assumed. The direction of the stripes can be vertical, horizontal or diagonal. To begin, apply one of your chosen shades to the plate, and while it is still wet, apply a stripe of the next one. Blend the border with a brush.
Water manicure.
Pour water into a container and place a drop of the first color you choose, place a drop of another on top, etc. Using an orange stick, move the drops to create the pattern you want. Since you will need to submerge half your finger in the water, try to tape off as much skin on it as possible. Dip your nails into the water right in the center of the design. Wait for the pattern to transfer to the plate. Pull your fingers out and clean off any excess polish. Apply topcoat.
Newspaper manicure.
Cut pieces of newspaper slightly larger than your nail beds. It is better to take publications in a foreign language, they look more interesting. Apply base to your nails and wait until it dries. Take a piece of newspaper with tweezers and dip it in alcohol for 10 seconds. Take it out and press it onto your nail, hold for half a minute or longer. Remove the newspaper and let the print dry. Coat the plates with finishing agent.
How to properly care for your cuticle?
The most important condition for the beauty and health of hands and nails is proper cuticle care. Experts strongly recommend removing the cuticle body, because often this area not only becomes rough and unsightly, but can burst, causing significant pain. In addition, cutting the cuticle lengthens the nail plate, so it is recommended for those with short nails.
To make it easier to work with cuticles, nail experts recommend hand baths. At home, you can remove the cuticle using nail clippers.
You can also move and lift the edge of the cuticle with an orange stick and trim with sharp, rounded scissors.
At home, the cuticle can be softened with fruit acids, which greatly facilitate the further process of removing the cuticle body.
Today, hardware manicure has become very popular. This manicure is very easy to do at home.
Using cutters, you can painlessly and non-traumatically make the cuticle perfectly smooth. On sale there are not only professional devices for salons, but also small kits for home care.
Do not forget that the cuticle area requires regular care and nutrition with oils. Special oil-vitamin cocktails are widely available, sold in an ergonomic tube-handle with a brush.
What pharmaceutical products may be useful?
You can buy several antiseptics at once at the pharmacy:
- chlorhexidine;
- 70% hawthorn tincture;
- 70% alcohol.
All of them are good as a disinfectant for treating tools and hands before starting a manicure. You can also consult a pharmacist to purchase professional formulations for sterilizing devices. During the work, BF-6 glue may also come in handy: if you accidentally cut your skin, immediately apply it to disinfect and seal the cut instead of an adhesive plaster.
Baths and oils to strengthen and grow nails after a manicure.
Baths can be done not only to steam your hands, but also to strengthen the nail plate. To prevent waves and white spots from appearing on your nails, to keep them strong and not peeling, you can prepare baths with sea salt for them several times a week. It is not necessary to use expensive salt from specialized stores; regular salt from the grocery store will do. Just dilute a couple of spoons in a container of warm water and put your hands there for 15 minutes.
After the bath, it is useful to apply a nourishing oil-based cream to the skin of your hands. Choose products that contain avocado, apricot and aloe. If you see essential or mineral oils, do not purchase such cream. It contains products of chemical petroleum processing, so it does not bring a positive result.
Advice from experts on hand care after a manicure
A manicure will last much longer if you properly care for your hands after the procedure.
Nail service experts advise following a few simple recommendations that will help maintain the beauty of your nails:
- On the first day after a manicure, if possible, you should avoid contact with warm water and steam. Therefore, it is better to avoid visiting a bathhouse or sauna, as well as washing dishes.
- To avoid chipping or peeling of the gel polish, all housework should be done with rubber gloves. Household chemicals and too hot water dry out the skin of your hands, which negatively affects their appearance.
- It is not advisable to file coated nails yourself. This opens the sealed end of the nail, which will certainly lead to a violation of the integrity of the manicure.
- Removing gel polish yourself must be done extremely carefully. You need to use only a specialized product that softens the coating well. Excessive pressure with a pusher while removing polish residues leads to damage to the nail plate.
- Manicure correction should be done every 3-4 weeks as the nail grows.
- To soften the skin of your hands, it is better to choose nourishing creams containing fatty oils. Light fluids do not sufficiently moisturize the skin and evaporate quickly. You need to renew the cream after each hand washing.
- Before going to bed, you need to lubricate your cuticles with oil. This will help prevent dryness and improve blood circulation.
- Regular exfoliation of dead skin particles using peeling or scrub will give your hands a well-groomed appearance.
