Nail extension with gel polish, the procedure of which is presented in the video, is a very popular procedure among visitors to beauty salons. Indeed, such nails look very natural, and the manicure is very durable. However, it is not at all necessary to go to a salon for this. After watching several video lessons and doing a series of training sessions, any girl will be able to extend her nails with gel for herself or a friend on her own.
[yandex1] [google1]
The secret of the popularity of French
French is also known as “French manicure”. This is a fairly simple manicure technology to perform at home, but very effective. A thin “smile” is applied to the base color of the coating - an arc of a different color along the edge of the nail plate.
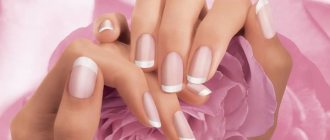
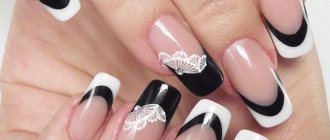
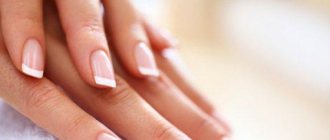
Beautiful French manicure
The secret of the popularity of this manicure is that the French manicure is quite universal . It suits any style of clothing and any situation, and all because the French jacket is the embodiment of naturalness.
In the process of creating a manicure, natural colors are used , which from an aesthetic point of view hides any imperfections in the nail plate. French manicure is one of the classic types of manicure, although it has very extreme variations.
Nail preparation
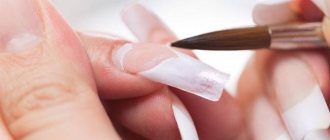
Treat your hands with antiseptic. Then carefully remove the cuticle using a spatula. Sand the surface of the nail until matte. The top layer is removed for better adhesion to the gel. Brush away any dust generated during the work and apply a dehydrator. It will remove excess moisture from the nail plate and dry it deeply. It's okay if you touch the skin with a brush: there will be no harm. But if the liquid dries quickly, this indicates dry nails. In this case, do not hold your hands under the lamp for long. Next, cover the nail and its end with primer: apply it in thin strips, joint to joint, from the cuticle to the free edge.
What are the features of French manicure extensions?
Depending on whether the French manicure is a secondary design or is done during the extension process, the technique for its creation is chosen. There are only three of them:
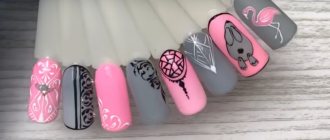
French with rhinestones
- Drawing a “smile” (white tip) with a thin brush with varnish or paint.
- Using a thin stencil to create a smile.
- Using a special French gel for extensions.
It is necessary to choose a technique depending on your goals and skills, the time allotted for manicure and the requirements for the quality of the result. For example, the easiest way to draw a French jacket is using a stencil. An experienced master will no longer use this trick.
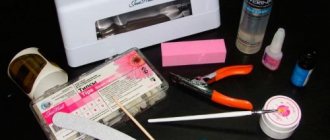
What tools and materials will be needed
For the technology of French nail extensions on a natural nail, you will need the following materials:
- camouflage gel in pink or beige depending on preference
- thick white gel
- gel remover
- primer
- dehydrator
- finish coating
- nail files and buffs
- pusher
- forms or types
- cuticle care oil
- gel drying lamp
Special gel for drawing the “smile” line
French extension methods
It is worth getting acquainted with the different methods of French manicure extensions in order to determine the one that suits you personally.
Nail extension with tips
- On tips . In the extension procedure, you can use two types of tips: regular tips, so that you can then form a French smile on top of them, or French tips, on which a white edge has already been drawn. All that remains is to attach them to your nails and cover them with appropriate products, following the extension rules.
- Drawing a French coat using white gel on camouflage . In this method, a white stripe is drawn along the finished beige or pink base of the extended nail.
- The colored jacket is a flight of imagination of the author. The festive, bright appearance of a colored jacket is often popular in the summer. A variety of gel colors are used for the base coat of the nail and smile.
- Layout on forms . This type is similar to ordinary extensions on forms, the difference is that the main volume is laid out using camouflage gel, and the creation of a specific white edge is done using white gel butted to the camouflage one.
- Stained glass French manicure is done using transparent materials. As a rule, the tip of the nail is made quite long so that colored transparent gels can be decorated with sparkles, rhinestones, drawings, and microdust.
Stained glass French
There are three classic French shapes: oval, square and triangular. They are created depending on the preferences of the person who will wear them and the shape of the fingers.
Extension technique step by step
Gel nail extensions on forms, step-by-step instructions for which are presented below, can be done using two technologies. They differ depending on which forms are used - upper or lower. The lower forms are fixed under the nail plate, lengthening it; the gel is laid out on top. The gel is first applied to the upper forms, and then the workpiece is pressed onto the nail.
Working with lower forms
Step-by-step instructions for gel nail extensions on lower forms:
- Prepare for extension.
- Squeeze the template into an oval and insert your finger into the resulting hole. In this case, the inner edge of the form should extend slightly under the nail, being its continuation and coinciding with the smile line. Disposable forms made of foil and paper are given the necessary parameters, cutting off the excess with nail scissors.
You can do gel nail extensions on forms yourself if you follow the step-by-step instructions. - Apply gel to the entire surface of the shaped nail plate using a flat synthetic brush (for example, No. 6), starting from the base. When working with liquid types of gel (most often single-phase), turn your finger with the nail down to distribute the product evenly. Dry in a UV lamp for 2-3 minutes according to the gel manufacturer's recommendations.
- To form a natural bend of the nail plate, repeat step 2 again. This stage is more important the longer the extended nail.
- Remove the sticky layer with a degreaser or alcohol and lint-free wipes, carefully lift the form and separate it from the finished nail. If the mold is poorly removed, then it is necessary to increase the exposure time in the lamp.
- Using an artificial nail file, give the desired shape and adjust the length. Use a buff to level the entire surface, filing and sanding it. Remove dust with a brush.
- Apply the finishing coat, dry, degrease.
Working with upper forms
Step-by-step instructions for gel nail extensions using top forms:
- Select top shapes for each nail. Place a couple of gel balls into an inverted form and distribute them evenly with a synthetic brush. Dry in a lamp for 10-20 seconds.
- Repeat step 1, but dry for a few seconds longer the second time.
- Apply the gel at the base of the natural nail and, without polymerizing it, apply the upper form to the nail. Press the mold, squeezing out and removing excess gel. Dry for the time recommended by the gel manufacturer (usually 2-3 minutes).
- Remove the top forms, remove the sticky layer from the inside of the resulting nails
- File your nails to shape, apply top coat, dry, and degrease.
How to extend French nails: step-by-step instructions
Let's start creating your own French manicure. Prepare your work area and make sure it is well lit.
- we work through the cuticle properly , pushing it back without leaving any areas that have not been pushed back.
- a nail file to remove the shiny coating of the natural nail.
- We file down the side skin ridges , this also helps to create a beautiful nail shape.
- We coat the nail first with a dehydrator , then with a primer .
- We select the shape according to the size of the nail , place it under its free edge.
- If we are doing extensions on tips, then we glue the tips , and when the glue sets, we file off the shiny layer of the tips. If stained glass extensions are being done, then we choose only transparent tips.
- Using camouflage gel or transparent pink gel , if stained glass extension requires it, we lengthen the natural nail plate . If in-lay extensions are done, then the white smile will be applied adjacent to the beige or pink gel, and in other cases on top of it.
- Don't forget to thoroughly dry the layers in a lamp . We are waiting for high-quality polymerization of materials.
- Removing the sticky layer.
- We give the free tip the desired shape, and also check that the thickness of the nail plate is the same everywhere.
- We polish our nails with a buff.
- We cover it with a finishing coat , which we dry again in a lamp .
- Rub caring oil .
Before extensions it is necessary to treat the cuticle
Nail extension process
Manicure can be done both in a classic version and in an unusual design. Watch a master class on how to build a bright rainbow jacket:
Subtleties of edge design when French nail extensions
Since the feature of French-style nails is the edge, when modeling nails, maximum attention should be paid to it.
Before you start building up, you need to determine what the shape of the edge will be. Otherwise, it will be impossible to determine the quality of the result.
Today, in the practice of extensions, there are the following types of edge design:
French nail extension PhotoSquare;- Stylet;
- Almond;
- Edge;
- Pipe.
Square
– design of a completely square edge without rounding. At the same time, the “smile” can be drawn with varying degrees of concavity.
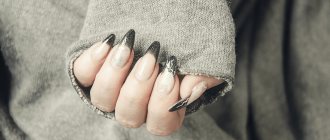
Stylet
– these are the sharpest nails, the length of which can be very varied. This type of nail edge design is especially good for thin, long fingers.
Almond
- This is the classic shape of a woman’s nail. As a rule, these are long and thin nails.
Edge
– the shape is quite extravagant. It differs from others in having beveled tips on the sides of the nail. In this case, the middle can be quite sharp.
Pipe
– long oval nail shape. We can say that this is the shape of an elongated oval.
This shape perfectly stretches fingers and nails, making them longer and “slimmer”. Therefore, this shape of the nail edge is suitable for those nails that need correction of the natural shape of the nail.
In order to correctly and beautifully, as well as reliably form the edge of the nail, you should follow the rules of modeling.
Rules for forming the edge of the nail and the shape of the smile:
- Mark the central axis of the finger, starting from the place where the smile is most curved;
- Find the points where the whiskers end. This is determined by the symmetry of both halves of the nail;
- To form a clear smile, it is necessary to create a border of the same height along the entire length of the nail extension, without lunges or sagging;
- Maintain the correct ratio of the white part of the tip to the pink base of the nail. The edge should always be smaller than the base;
- When installing the forms, make sure that there are no gaps and that the central axis of the finger coincides with the center of the form;
French nail extension photo In the process of building the length of the nail, be sure to ensure that the applied coating is narrower than the natural nail.- Based on the chosen shape of the nail edge, a smile is modeled. So, for a “square” shape, a more rounded smile shape is applied. For the “stiletto” shape, the smile is more elongated and narrowed. The smile for the almond shape is modulated in a similar way. For the “pipe” shape, a rounded and elongated smile shape is suitable. And for the “edge” shape, a smile that follows this nail shape will be harmonious.
- Make sure that the smiles on all nails are done the same way.
Thus, following all the rules and taking into account all the nuances of French nail extensions, the result will be natural and chic.
Top
French manicure correction
It’s easier to re-model the French than to correct it - this is the paradox of the French. However, most women do not have free time for new extensions, so now we will talk about correction.
French manicure correction is more difficult to carry out than new extensions.
- File off the finishing gel.
- We pay special attention to the cuticle area, where detachments most often begin.
- We cover it again with camouflage gel , modeling a new apex (bump on the nail), which has already moved from its original place.
- Dry in a lamp until the material polymerizes.
- Cover with finish again .
With this type of correction, we do not affect the position of the smile on the nail. In the case of correction with white tip transfer, the procedure becomes more complicated, which requires more time and unjustified costs.
French manicure on extended nails
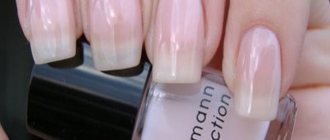
French manicure looks best on extended nails. Considering that nude or clear polish covers most of the nail, colored polish only occupies the tip, this allows your nails to look great even after they grow out. Gel coating always creates a good impression and looks better than natural nails. Gel polish makes nails shiny.
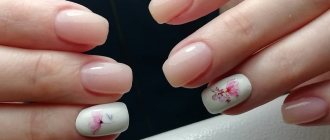
This season, bright manicures with a variety of colors, designs, and decorations will be popular. Green, crimson, blue, red will add a good mood - these are the colors that can be used in a French manicure.
You can also draw anything on your nails; flowers and various monograms look beautiful. If you want to be fashionable, do French nail extensions; the examples in the photo will help you choose the best design for you.