Currently, many beauty salons offer their services. Almost every such organization can give you a manicure and pedicure. This is the treatment of hands and feet, respectively, using caring elements. In addition to removing dead skin, the master pays special attention to the nails. In beauty salons, hardware pedicures are increasingly being performed. Step-by-step instructions with photos will be presented to your attention in the article. You will learn about the features of the procedure and the basic rules.
Many representatives of the fairer sex try to save their time and money by refusing to visit beauty salons. They do pedicures at home. Step-by-step instructions for this processing will also be described below. Another reason for refusing salon services is the fear of infection. After all, through instruments that have not been sterilized by the master, you can get an infection from the previous guest.
Should you do a pedicure at home yourself?
There is no clear opinion on this matter. Some people believe that home treatment of nails and feet is much safer than salon services. Others are sure that you can do the manipulation incorrectly with your own hands. As a result, irreparable consequences will arise.
Whether it is worth treating the legs yourself is a personal matter for everyone. In any case, you need to know the principle of operation. The instructions below will tell you about this. Note that the algorithm for performing salon and home pedicures is very different.
Pedicure at home
What will you need to carry out the manipulation? This is the question that arises first. The simplest and most popular way to treat your fingers is a wet manicure. To carry it out, you will need tools (scissors, tweezers, files, buffs, etc.), as well as a bowl of liquid. To soak the skin, you can use special salt and nutrient solutions. They are purchased ready-made. If desired, you can use regular soapy water.
In addition to the products described, you will need a cloth, a degreaser and a coating that will be applied to the plate. If desired, you can use moisturizing formulations and nourishing oils for the cuticle and skin. Let's look at how to do a pedicure at home with your own hands. Step-by-step instructions are in front of you.
What is a classic pedicure?
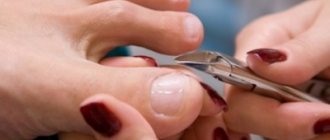
Classic pedicure is also called trim pedicure. Its technology consists in not using special equipment for treating nails, feet and cuticles.
@gragosha
During a trimmed pedicure, the overgrown nail, cuticle and feet are processed manually with mechanical tools. This hygiene procedure can be easily performed independently at home. But of course, you can turn to beauty salons for the service, and also choose a combined pedicure, where mechanical tools (scissors, orange sticks, pumice, etc.) partially interact with a hardware pedicure.
@victoria_manikur
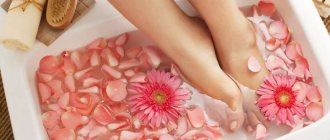
Softening rough skin
Pour the softening liquid into the bowl. After this, lower your legs into it. Some people prefer to use refillable formulations. They look like varnishes or pencils. These products lubricate the cuticle around the nail plate. Under the influence of the unique composition, the skin softens. After this, you can remove it without much difficulty.
Softening the cuticle with the help of special means requires a strictly specified time. Some formulations require exposure to the skin for 15 minutes, others act after just 5. If you do a pedicure at home with your own hands (an easy way for beginners), you will most likely choose softening with water. This effect on the skin should occur within 20 minutes.
Ongoing treatments to maintain soft feet
You must remember:
- Foot socks must be made from natural fabrics better than cotton;
- You need to soak the skin in water without allowing the accordion effect;
- If there are cracks or wounds on your feet, do not use acidic ingredients;
- All these recipes are guaranteed to make your skin soft, but for this you need to do the procedures regularly.
Homemade bath to soften feet using soda:
You will need a product common in our kitchens - baking soda! Add 4 tablespoons of baking soda to warm water and soak your feet in this solution for about half an hour (the skin should steam, but not shrink). After steaming, apply patchouli or sandalwood essential oil.
For maximum benefits, you can add bath salts (sea salts). Salt helps soften the skin and relax the muscles.
Repeat this procedure regularly! Sea salt with lavender extract is especially relaxing; this steaming before bed will allow you to completely let go of your thoughts and fully relax. Rub your legs with your hands to circulate the blood and relieve fatigue. You will immediately feel light, especially after a day spent in heels.
Banana puree mask for feet and heels (softening):
Banana is a tropical fruit that boasts a number of health benefits. It will also help cure rough skin on your feet.
Grind a ripe banana with a blender (or fork), add a tablespoon of honey to the puree and apply the resulting banana pulp evenly on your feet. Let it dry for 10-5 minutes and then rinse with warm water. Apply nourishing cream 20 minutes after the mask. Carry out this procedure once a week, preferably before bed, and get the desired result - soft heels.
Daily cleansing procedures (heel polishing):
It is very important to regularly practice simple hygiene practices, such as scrubbing your feet with a buffing grater. This will prevent dead skin from accumulating on your feet and will also protect your skin from drying out and flaking. This procedure will take no more than 6 minutes for both feet, but it is thanks to it that the skin will become smooth.
All you need is to rub your feet while showering with a grater (before treating your heels, apply liquid soap or shower gel to the grater, this is mandatory). The hardness of the grater-polishing should not be higher than 100/180 grit. Once you're done, let your feet dry and moisturize them well with cream.
Wearing socks during sleep will help maintain the nourishing effect of the cream.
Foot massage with olive oil to soften:
Olive oil is an excellent moisturizer, especially for dry skin. To use olive oil, your feet must be clean. The easiest way is to dip a cotton ball in olive oil and apply it to the rough areas. Gently massage your feet in a circular motion to restore blood circulation. Once you're done, put on the wrap and a pair of warm socks on top and let your skin absorb the oil. After an hour, rinse your feet. Massage your feet with olive oil every other day.
For maximum benefits, leave the oil on overnight (but use it without film for no more than an hour; you shouldn’t soften your feet too much) and wash off the next morning.
We use vinegar to steam out old skin on the feet:
IMPORTANT! This method is only suitable if you have very dry skin WITHOUT CRACKS.
Dissolve 5 tablespoons in warm water, use only apple cider vinegar; its texture is more delicate. Soak your feet in this bath for no more than 10 minutes, and then be sure to apply the cream liberally and let it absorb (without socks). This procedure is not for every day; soften the skin of your heels with this bath 2-3 times a week.
Peppermint for dry feet:
Apply a small amount of peppermint oil to clean feet every day before going to bed or some time before leaving the house in the morning. The antiseptic properties of the oil will not only make the skin smooth, they will give a pleasant smell and prevent bacteria from entering the skin throughout the day. The oil also reduces pain and discomfort.
This is one of the simplest home remedies to treat cracked and rough heels.
Exfoliating homemade foot scrub:
Treat your dry heels with this simple homemade scrub. It will remove the dead layer of skin. Make this scrub by mixing oatmeal with lemon juice, honey and sea salt.
- honey one and a half tablespoons;
- lemon juice - 4 parts lemon;
- oatmeal - half a glass;
- sea salt 1.5 tablespoons.
Keep the scrub on for 30 minutes and then rinse your feet with warm water. Moisturize your feet with mint oil after scrubbing.
Another homemade mask, honey and salt to moisturize and exfoliate the skin on the feet:
Honey has many healing properties and is an excellent product for the skin. Add salt to honey so that the mask has an exfoliating effect, the ratio of components is 1 to 1. Just distribute the mask over your feet and massage your feet, rinse as usual. After the procedure, you don’t need any cream or oil, just put on socks. Do this procedure every day for 10-15 minutes and say “bye” to dry heels.
The best natural moisturizer is milk:
The value of milk for the skin was felt by Cleopatra herself and many women in Egypt. Prepare a warm water bath with a cup of hot milk and 2 tablespoons of sea salt to open the pores. Keep your feet in it for a while. Do this not every day, but only once a week!
Soak your feet in warm water with iodine and salt:
Once or twice a week, soak your feet for 10 minutes in warm water with two tablespoons of sea salt and a tablespoon of iodine. Polish the skin with a grater and apply cream. Do this softening method once a week.
Caring for calluses on feet at home:
If you have problems with calluses or corns, use a small finger grater.
You will need:
- finger grater;
- remover (a professional product for softening corns and skin);
- oil to add to water (or honey);
- moisturizer (oily texture).
On dry skin, apply the remover to the roughest areas of the skin, hold for 5 minutes and immerse your feet in warm water with oil. Steam for 7-10 minutes and lightly rub them with a grater, rinse off the removed skin, dry your feet from moisture and apply cream (no need to wear socks). Repeat the procedure if corns appear, usually once every two weeks.
Toe hygiene - remove all excess with an orange stick:
Take an orange stick, steam your toes in a warm bath with aroma oil and sea salt to clean all the dirt from your toenails. Be very careful not to inject yourself. You can also use steel tools, but an orange stick is completely harmless. Use one stick only once.
Removing hangnails and cuticles:
Clean hangnails and cuticles quickly and easily with a cuticle remover. After you have steamed your feet and cleaned your nails, carefully remove, push back and cut off the cuticles with clippers. You don't have to push the cuticle to the base of the nail if it's very small.
Trim your nails regularly:
You should trim your toenails at least once every two weeks. Long toenails are not very hygienic and even unsafe, since they can push against shoes and deform their growth, this often leads to this. that the nails begin to grow into the skin. You need to cut your nails carefully, especially at the free edge (in the corners). Do not cut your nails too short; it is better to remove the main length with a tool and then shape it with a nail file.
Polish the surface of your nails with a buff:
Polishing your toenails is just as important as your fingernails. This should be done in the same way as on your hands.
The problem of sweaty feet:
If your feet sweat and smell bad, then you need to wear shoes that “breathe” to work. Apply talcum powder to the inside of your shoes (if you wear shoes on bare feet) or sprinkle talcum powder on the bottom of your feet (if you wear socks). This will absorb sweat and get rid of bad odor. You can also rub two drops of pure sandalwood, lavender or peppermint oil on your feet before putting on your shoes.
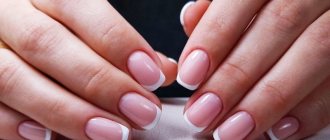
Base coat of nails:
If you're not in the habit of painting your toenails, but you like a neat pedicure, try painting them with a clear polish. This will give a healthy, natural look to your toenails.
To keep your feet soft and healthy, take care of your shoes:
Be sure to use antibacterial sprays for shoes, especially closed ones. It will remove the unpleasant odor and the bacteria that causes it (if you have such a problem). It can also be used for preventive purposes. Before use, read the instructions from the manufacturer you purchased.
These simple methods will help restore and maintain softness to the skin of your feet, as well as maintain neatness and beauty until your next full pedicure.
Treatment of cuticles on legs
How to do a pedicure at home with your own hands? The step-by-step instructions involve removing the skin around the nail. To do this, you can use tweezers, thin scissors, special cutting blades for nails and other devices.
Carefully trim away excess skin, being careful not to damage sensitive areas. If you use special compounds to soften the cuticle, some of them can independently corrode the rough areas. All you have to do is wipe the treated skin with a soft cloth. If you accidentally damage your skin while working, use peroxide or alcohol. Be sure to disinfect the wound and stop the bleeding.
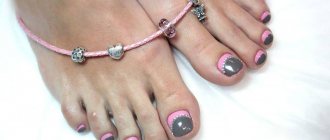
How to decorate your toenails
Today there are many ideas for designing nails on both hands and feet. Let's look at the most common methods.
Coating with varnish, gel, shellac, biogel: how to choose the color
The most common and simplest method, which is available even at home, is applying varnish . But you should not take this step lightly and underestimate its importance.
The most difficult thing here is probably choosing the right color. To do this, it is important to consider some points.
- Color of clothes and accessories . If you are doing a pedicure on a night out, then you need to think carefully about how the colors will combine with each other. You can choose a shade to match the color of your shoes, handbag or accessory, or you can choose to match your outfit.
- Durability of varnish . It has long been noted that varnishes with mother-of-pearl and sparkles last much longer than glossy and matte coatings. If you need a pedicure for a long time, you should give preference to these products.
- Varnish color combination . If you decide to get a multi-colored pedicure, check how the colors harmonize with each other. This can be done by applying varnish to the nail or paper.
- If you find it difficult to decide on a color , keep in mind that the most popular are still universal red and all kinds of nude shades.
For a more durable coating, it is recommended to give preference to gel polish (aka shellac). This coating will last 2-3 weeks without correction. If your nails are thin, break or peel, it is better to use biogel, because... it will strengthen the nail plate.
It is very difficult to do a pedicure with gel coating on your own without professional products and equipment, so you should not waste money on visiting a professional.
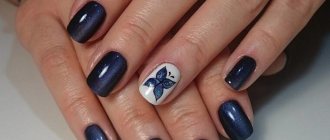
Decoration: rhinestones, sparkles, modeling
You can make your nails even more attractive by decorating them with rhinestones or sparkles. The main thing is not to overdo it, 1-3 elements per nail are enough.
And for them to stick better, you need good nail glue. As a last resort, you can use clear varnish, but it is less reliable.
Artistic painting
This is a more complex technique that is difficult to implement at home. It is better to turn to a professional and save time and nerves.
French pedicure
Nobody canceled the classics. French on the legs is no less popular than on the arms. It allows your nails to look stylish, well-groomed and will go with any outfit and accessories. It’s easy to make with the help of special smile stickers and good varnish.
If you decide to buy a set for French manicure/pedicure, pay attention to the consistency of the varnishes: they should not be too thick, because... The layers are applied very thinly.
Where to find and how to choose an idea for a beautiful pedicure
If it’s difficult to decide on a pedicure style, look for ideas online. Nowadays there are many professional websites, groups on social networks and photo galleries, where masters of their craft post their works and even master classes.
First, try copying a couple of other people's designs. The main thing is patience while working, because the drawing does not always turn out right immediately.
Here, for example, is an original idea - ethnic pedicure:
Beautiful combinations of pedicure and manicure
Fashion changes every year. Recently it was stylish to do a manicure and pedicure in the same color, today it is allowed to decorate your nails in different ways. If you decide to do just that, pay attention to the harmony of the chosen coating. There should be a common style: be it a bright pattern or rhinestones.
Tidy up your nails
Step-by-step pedicure instructions indicate mandatory nail treatment. Carefully give the plates the same shape and length. To do this, use a file, tweezers or scissors. Toenails are always coarser and thicker than those on the upper limbs. This is why they require polishing. Using a hard buff, file off the top layer of your nails. After this, sand the plates with a fine-grained surface.
Applying varnish or any other coating should be done only after the feet have been completely treated. Degrease the plate first. If you use gel formulations, you will need a special lamp.
What you need for a home pedicure
Pedicure is an integral part of the life of any representative of the fair sex, because beauty is not only the face, clothes, and the pleasant aroma of perfume. Of course, this also means well-groomed toenails. But what is required for such a procedure as a pedicure? For high-quality execution you will need:
- Scissors (manicure).
- Nail files.
- Special nail stick.
- Foot brush (pumice).
- Sea salt.
- Bowl.
- Foot scrub.
- Nail polishes.
- Nail polish remover.
- Cotton pads.
- Gel polishes.
- LED lamp for drying.
If this is your first time paying such close attention to your feet and you have problems such as cracked heels, corns and other “charms” - it’s okay, you’ll fix everything quickly with the advice of our specialists.
Particular attention to feet and heels
How to do a pedicure at home with your own hands? The step-by-step instructions indicate that you need to pay special attention to rough areas. These are heels, calluses and corns. To remove the latter, you can use special compounds. They are sold in almost every cosmetic store or pharmacy. Depending on your preferences, you can choose the appropriate tools to clean the specified areas.
Using a metal file or pumice stone, remove plaque and rough skin. This method of work is suitable for those people who regularly carry out preventive measures. When the legs are in disrepair, you will have to try to bring them into proper shape. For this purpose, special blades, scrapers and tweezers are used. Carefully cut off the top rough skin. Try to do all movements very carefully. Upon completion of the manipulation, walk with a soft pumice stone and remove any small particles.
Stages of pedicure
The main stages of a pedicure include preparing the necessary tools, treating the surface of the feet, subsequent removal of skin defects, treating the nail plate (if necessary with a decorative coating), and moisturizing the skin with suitable cosmetics.
An additional condition is daily care, which allows you to prolong the result and keep your feet looking beautiful and tidy.
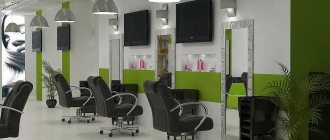
Carrying out a procedure in a beauty salon
Contacting a specialist will reduce the procedure time and get a better result. Some people wonder what it takes to get a pedicure at a salon. No preliminary preparation is required; it is enough to observe the minimum hygiene rules, and an experienced specialist will perform all the manipulations independently:
- Preparatory stage. A prerequisite before the procedure: the master’s hands are treated with an antiseptic and gloves are put on. Then the surface of the skin is disinfected to prevent infection. If there is a coating on the nails, it must be removed. For simple varnish, a special liquid is used; for gel, removal with a machine is preferable.
- Steaming the feet is required only in classical technology; the hardware method is performed on a dry surface. A bath of warm water softens the skin, after which the client’s feet are treated with a grater. This makes it easy to remove keratinized areas and carefully cut off the ridges around the nail plate and cuticle with pliers.
- In the European method, instead of steaming, professional pedicure products are used, which achieve a similar effect for treating calluses and removing corns. To soften the cuticle around the nail plate, a remover is applied.
- Nail treatment. Using a machine or tweezers, they are given the desired length and shape, and finished with a file and a grinder. If there are problem nails, a special tool is used to correct defects. To prevent ingrowth into the skin, you should not leave too sharp corners, but you should not round them too much.
- Nail coating. After treating the surface of the foot and correcting the nails, the process of decorative coating is carried out. This stage is carried out in accordance with technology. The first layer is applied with preparatory liquids (for degreasing and adhesion of the nail plate to the varnish), then a base layer (to protect the plate from the effects of dyes), after that several layers of colored coating (depending on density), and, if desired, decor/design , at the end - a finishing layer (to consolidate the result).
- Application of moisturizing and nourishing products. The procedure is considered complete if, after all manipulations, cosmetics are applied to the skin with massage movements. The active ingredients allow you to maintain the effect after the session for a longer period. To care for the cuticle, it is recommended to rub oil (almond, coconut, olive, peach and others).
Carrying out the procedure yourself
The inability to visit a salon is not a problem for home foot care. The sequence is practically no different from salon equipment. You must first prepare the instrument used and the skin of your feet. To do this, the feet are steamed in a bath or special exfoliating agents are applied.
After thorough steaming, rough spots can be easily removed using a grater or pumice stone. The overgrown cuticle is carefully pushed back with an orange stick and, if necessary, trimmed with nippers or nail scissors. It is important to follow the execution technology, as careless movement can cause injury and infection. The length and shape of the nail is adjusted.
At the end of the session, it is necessary to wash off any remaining cosmetic products from the surface and apply a nourishing cream.
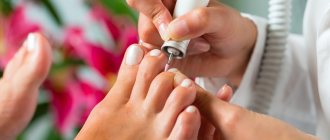
Step-by-step instructions for hardware pedicure
To perform this type of foot treatment, you must have a special device. Many beauty salons use professional machines with attachments of different shapes and hardness. Some of them are designed to cleanse nails, while others treat feet.
Currently, pedicure files that are small in size and run on batteries are becoming very popular. One of these is Scholl, but you can try Aphrodite or Solingen. Step-by-step instructions (how to do a pedicure) are always on the package. Before starting work, carefully study it and comply with all conditions. But what about those devices that do not have an annotation?
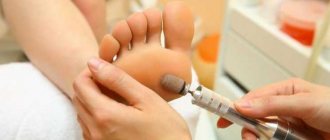
Skin care using the device
Take the coarsest nozzle and treat especially problem areas with it. These are heels, dry calluses and corns. After this, use the nozzle to gently go over the entire skin. Remember that when doing a hardware pedicure, you can’t stop at one place. A rotating file can severely damage the skin. That is why all movements must be made carefully, moving slowly in a certain direction.
Once the rough layer of skin has been removed, you need to put on the sanding attachment and complete the pedicure. This type of file can be used to process the inside of the toes and the center of the foot.
What to do with your nails?
How to do a pedicure at home with your own hands? The step-by-step instructions say the following. The nail plate, like the rest of the skin, must be treated using attachments. However, they are smaller in size and have a different shape. Gently file away the cuticle without affecting sensitive areas and delicate skin.
The surface of the nails must be sharpened using a special attachment. After this, polish. Finally, you can apply the coating.
Step-by-step trim pedicure
A classic trim pedicure in a specialized salon is carried out in stages:
- Disinfection of the skin of the feet. To do this, the stage of soaking the feet in baths with the addition of various disinfectants is carried out. Comfortable water temperature – 38 degrees C. Bath duration – 7 minutes.
- Cleaning the surface of the nails from old varnish. You can use any nail polish remover.
- Trimming nails. The length must be trimmed in small steps from corner to corner, using special pliers. It is not recommended to file your nails at this stage.
- Softening the cuticle. A special softening agent must be applied to the side ridges of the nails. You need to distribute it over the entire surface of the nail.
- Cutting away rough skin from the heel area. The procedure is carried out using a special machine. It is necessary to hold the machine at an angle to the skin so as not to cut it. You need to cut off the rough skin gradually; you should not remove a large layer, as this can lead to painful sensations when walking. Movements should be made along the cracks, from the middle of the heel to its edge.
- Cutting off rough skin from the metatarsal area.
- Sanding the skin with a pedicure file. The rough surface of the file quickly and easily removes the remnants of rough skin on the foot. Periodically, the surface of the foot should be wiped with a damp cloth, then the surface of the file will self-clean.
- Treating cracked heels. Using special forceps, you need to carefully cut off the skin around the cracks. The cutting blade of the pliers should be positioned along the crack. At the end of this stage, you need to sand the heel skin again using a file.
- Treating the skin on the fingers. Using a soft file, the fingertips and sides are sanded.
- Cuticle removal. Remains of the softening agent must be removed from the nails with a damp cloth. Next, using the spray, you need to clean the lateral sinuses of the nails and push back the cuticle, remove dirt from under the free edge of the nail. Using special forceps, it is necessary to remove the cuticle and process the side ridges.
- Shaping the free edge of the nail. Using a file, it is necessary to give the nails the maximum possible square shape, this will prevent them from ingrown.
- Disinfection of feet. Using a special nail disinfectant, you need to treat their surface. The area between the toes must be treated with special antifungal talc for feet.
- The final stage. Apply nail polish or strengthener to your nails. Treat the surface of your heels with an anti-crack cream.
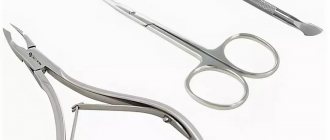
Basic pedicure tools
The master has in his arsenal, in addition to skills and experience, many different tools that allow him to perform a classic trim pedicure with high quality. Basic tools:
- Rasp is a tool for filing the corners of nails and scraping the cuticle layer from the surface of the nails. Used to treat ingrown nails. At one end of the tool there are special notches, with their help the nails are filed. Thanks to the shape of the tool, the master can penetrate into the deep sinuses of the nail;
- Files. The variety of surfaces of this tool allows you to polish not only nails, but also skin. Soft surfaces polish the nail to a shine, while rough, hard surfaces can remove layers of rough skin;
- Scraper. Has replaceable sharpened blades. Designed for cutting calluses and rough skin.
Additional procedures
If the client wishes, the pedicurist can supplement the classic pedicure with the following procedures:
- foot massage session;
- covering nails with various varnishes, with drawings and other decorative elements;
- paraffin therapy;
- foot masks;
- nail plate modeling;
- wax depilation.
Trim pedicure at home
To carry out this cosmetic procedure, it is not necessary to visit a salon. You can also do a trim pedicure at home. Of course, the result of a do-it-yourself pedicure may not be as perfect as that of a professional, but doing your own foot care will help improve their appearance. Be prepared for the fact that it will be very difficult for you to remove the rough skin on your heels using a scraper. Try not to injure the skin. Follow the above procedure step by step very carefully. Even at home, it is necessary to monitor sanitary standards when performing a pedicure.
Start by using a foot bath, then gradually treat the skin of your feet and nail plate. The procedure is no different from the work of a professional master, except that at first it will take you longer.
When choosing foot care cosmetics, pay attention to the natural ingredients in their composition. The instructions for creams and talcs will help you choose the right product.
Even a self-trimmed pedicure will give your feet beauty and well-groomed.
Recommendations for performing different types of pedicure at home
Adhere to the following rules:
- If you perform the manipulation yourself, you should always disinfect the instruments. Even nail files for hardware manicure can be processed. Otherwise, a fungus may develop on them, which is very difficult to remove.
- Do not use other people's pedicure products. When you come to the salon to have a specialist work on your beauty, always make sure that the equipment used is clean.
- Try to file your nails first, then perform softening procedures. Otherwise, the plate may begin to delaminate and crumble.
- Avoid trimming sharp corners of your nails. This can lead to the formation of ingrown toenails. This pathology causes a lot of inconvenience. In some cases, a person simply cannot move normally.
- If you use oil-based compounds, you should always wipe your nails with a degreaser before applying the coating. Otherwise, the varnish and gel simply won’t stick.
- When applying gel substances to your nails, sand the plate first to ensure a stronger adhesion.
- Use moisturizing and nourishing products after a pedicure, do not forget to treat the cuticle. It is worth noting that such compositions should be used not only after the described manipulations. Moisturizing your feet daily will help prevent dry, cracked feet.
- Perform a light pedicure at least once every two months. This will allow you to avoid the occurrence of corns, calluses and rough skin.
Tools
To do a classic pedicure at home, you need to prepare the following tools:
- Foot bath or regular basin;
- Several sanding files with different grits;
- Nail file;
- Tool for removing cuticles (this can be scissors, nippers or a trimmer);
- Disinfectant;
- Foot scrub;
- Nourishing composition for skin;
- Various nail coatings (base coat, hardener, colored varnish if desired).
A classic pedicure is best done in the evening, before bed. If this is not possible, you should set aside at least two hours to completely relax your legs, then the effect of the procedure will be much higher.