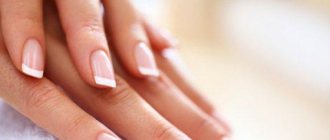
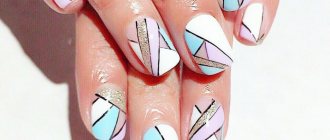
Every woman dreams of having long, strong nails with an artful design on her fingers? However, the reality is that only every fifth woman can boast of naturally strong nails. The rest are content with “short” ones, and even this minimalistic size, given the rhythm of life of a modern woman, is extremely difficult to maintain. Those same fashionistas who have in their “combat arsenal” long and strong nails, like stilettos, cannot always boast of their ideal shape.
Photo from the site: womansecrets.club
Fortunately, the nail industry does not stand still. For decades now, manicurists have been using the procedure of gel nail extensions on forms, which allows you to create nails of any length and shape, no different from real ones, except... they are stronger. The technique and sequence of gel nail extensions on forms, as well as the essence of the procedure itself - all this is under the spotlight of the “Ideal Manicure”.
Technique for gel nail extensions on forms
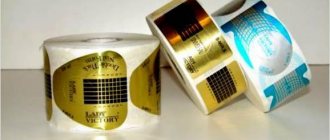
First, let's figure out what forms for nail extensions are. As you know, there are two options for nail extensions:
- On forms
- On tips
Tips are ready-made plastic blanks for future nail tips. They are fixed with an adhesive base and modeled using gel.
Photo from the site: nailart-sho.ru
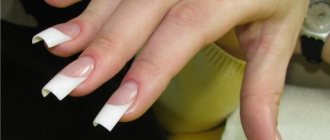
Forms for creating nails are a kind of substrate with a small window for the nail plate. During the work, a modeling gel is applied to the substrate and natural keratin, which after polymerization will represent an artificial free edge of the nail. For the convenience of forming this very free edge, the forms have a drawing in the form of graph paper, which allows you to calculate the approximate width and length of the nail being formed. The very basis - the form - is removed after the procedure is completed. Therefore, nails created on the basis of forms look thinner than nails formed on tips.
Photo from the site: onlinepeek.ru
There are two types of forms:
- Disposable, they are also called soft. They are made from paper or flexible plastic and are used only once. Due to the fact that they have a pliable structure, they can be easily adjusted to any contour of the natural nail. However, they can wrinkle during the extension process and require precise “fitting”.
Photo from the site: allfornails.ru
- Reusable molds are made of hard plastic or metal. Their price is much higher than that of disposable forms, but due to repeated use they will quickly recoup their cost. In addition, in the process of working with them, such troubles as deformation, the formation of gaps and the flow of gel through them are excluded. The main thing is to choose forms that perfectly match the shape of the natural nail bed, and then you will never have problems with the formation of an artificial nail.
Photo from website: nazya.com
It is believed that extensions on forms require more filigree work and experience from the master, while tips are easier to use. However, nails formed on forms look more natural, and this determines their popularity. Fortunately, the Internet is replete with all sorts of video tutorials on how to extend gel nails onto forms, which show the entire procedure with extreme accuracy. With a little practice and diligence, even this procedure can be done at home.
Application of upper forms
The technology of extension using upper forms differs significantly from that described above and is as follows:
- Primary treatment is the same: antiseptic, cuticle treatment, filing and polishing of the nail;
- Then the material for modeling is laid out in pre-selected silicone molds, which is evenly distributed over the form and applied to the nail;
- 15-20 seconds are needed for the material to spread over the nail and harden;
- The excess is processed with a nail file and buff.
The approximate cost of such forms varies from 300-450 rubles for a set of 100 pieces; they are quite similar to nail tips, but have a different function.
Video on the topic of the article:
Hi all! At one time I became interested in nail extensions, although my own were growing, but something pulled me to experiment. After watching enough video tutorials on YouTube and purchasing everything I needed, I got down to business.
And when choosing forms for extensions, I decided, in addition to disposable forms, to also purchase reusable ones. It’s the latter that I would like to talk about in today’s review.
Price
today 70 rubles
Quantity
5 items
There is no point in taking a set of 10 pieces, because even if you do extensions for someone, you won’t be able to do it on 10 fingers at once. I generally do this to myself with one finger at a time.
Method of making molds
most primitive. The wire is wrapped in a special material similar to soft plastic, and everything is held in place with regular tape. The wire helps to secure the shape on the nails as needed and takes the desired shape.
I use forms only for repairing broken nails; I didn’t bother with extensions, as it takes a lot of time.
Usage:
It often happens that it is a pity to cut your nails because of one broken one. That’s when these forms and a rubber base come to my aid; instead of a base, you can use a gel for extensions. I won’t describe the technology, since I learned it myself from video lessons.
I'll just show you the Before and After photos.
After applying and fixing the form, I begin to cover the nail with a base, and apply several layers of base to the extension site.
After drying the nail in the lamp, I file and shape it. This is a work in progress, the length needs to be adjusted. But I think the meaning is clear.
This is how I save my broken nails. Under gel polish, no one will notice that some part of the nail is missing. It all lasts until the gel polish is washed off.
As for the shapes themselves, they are not entirely comfortable and will not suit all nails. We'll have to adapt to them. It’s more convenient to do extensions using disposable forms, but even these will do for home use. I took them, so to speak, for testing, they suited me, it’s convenient for me to do minor nail repairs with them.
The gel easily comes off the mold after drying, adheres well to the nails, does not fly off during use, and holds well.
The price is not high, you can try it out of curiosity!
You can read about my manicure at home! I share the information received at special manicure courses! Here you will learn what it means to paint your nails subcuticularly or butt to the cuticle, as well as how to properly do a manicure at home!
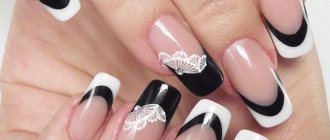
Nail extensions have become incredibly popular. And this is not surprising: after all, hands are a kind of business card of every woman, and without beautiful nails this business card will not be completely complete. But not everyone is blessed with beautiful nails. So we have to correct this oversight by building up...
Sooner or later, every newcomer to the nail service is faced with the question - how to choose the right forms for extensions? Each website offering nail products and materials has several types of paper forms in its assortment, but how to choose exactly those that will be convenient to work with? How to understand this diversity? We will try to help you.
There are molds created specifically for gel or acrylic. Transparent plastic forms will be ideal for gel, since the transparent form allows ultraviolet light to pass through, and there is no need to dry the gel nails in a lamp on the reverse side as well. But these forms are not suitable for acrylic nails. They do not have a paper backing and will be too soft for acrylic material.
The shape of the intended nail plays an important role in the choice of forms. As you know, nails come in different shapes - square, almond, oval, stiletto.
Markings will help you decide on the shapes - special divisions on the forms that will help you lay out the material according to the shape of the intended nail extension.
If you are planning to do this, then forms that have clear markings with lines intersecting at right angles, like JT-02 and JT-00, are ideal for you. But at the same time, the JT-02 shapes are designed for wider fingers.
To slightly soften the square shape of your nails, you can use the forms JT-06, JT-09 and JT-07. They have slightly rounded markings to create shaped nails. This type of shape is distinguished by slightly curved transverse lines on the template. Considering these types, JT-06 is more suitable for working with wide fingers compared to others.
Shapes with strongly curved transverse lines will help create ideal almond-shaped and oval nails.
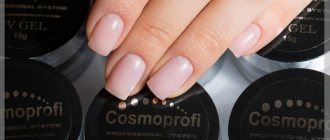
Not every woman can boast of strong, beautifully shaped nails. However, it is possible to get the perfect manicure using nail extensions. Many resort to the services of nail specialists for this, but with the advent of the gel system, which is easier to use than acrylic, it has become possible to lengthen nails or restore broken ones at home.
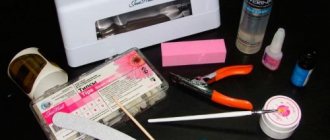
What is needed for nail extensions on forms?
To apply nail extensions to forms, you should stock up on a special kit, which should include the following tools and components:
Photo from the site: stood.ru
- Antiseptic.
- Express cuticle remover. You can get by with a regular bath to soften the cuticle.
- Pusher or orange stick for pushing back cuticles and pterygium.
- Manicure scissors and tweezers for cutting cuticles and side ridges.
- Files and buffs of varying degrees of abrasiveness for creating, designing and polishing nail plates, both natural and artificial.
- Brush for removing nail dust.
Important
You can't go anywhere without antiseptic! Never miss this important moment. Nails, hands and tools not treated with an antiseptic are a risk of fungal infection. Medical alcohol, chlorhexidine solution, or special disinfectant sprays for manicure are suitable as an antiseptic.
- Dehydrator for degreasing natural keratin and removing the sticky layer from gel polish.
- Primer for adhesion of natural nails to artificial material.
- Base and top gel coatings.
- Modeling gel for creating artificial nails.
- Brushes for applying gel.
- Colored or camouflage gel polish for creating a design, decorative elements, if this item is provided.
- Lint-free wipes for removing the sticky layer and degreasing the nail plate.
- UF lamp (gel for nail modeling polymerizes only under the influence of UF radiation, the LED lamp is not suitable for extensions. But the LED lamp can be used when designing nails with gel polishes).
- Forms for nail extensions.
Stages of gel nail extension on forms
In order to better understand the technology of the process, let’s consider the procedure for gel nail extensions on forms step by step:
Stage 1. Treating fingers and nails with an antiseptic.
Photo from website: gribokgplus.r
Stage 2. Hygienic manicure. Cuticle trimming and pterygium removal.
Photo from the site: krasotkapro.ru
Stage 3. Filing the free edge of the nail plate. Removing gloss from the surface of the nail using a buff.
Photo from the site: yanail.ru
Important!
It is necessary to leave a free edge of the nail of 0.5 mm in order to pry it under and fix the shape.
Stage 4. Removing nail dust with a brush.
Photo from the site: yanail.ru
Stage 5. Applying a dehydrator to degrease the nail plate.
Photo from the site: yanail.ru
Stage 6. Applying an adhesive base (primer).
Photo from the site: yanail.ru
Stage 7. Coating the natural plate with base gel (the layer should be very thin). Dry your nails in a UF lamp for at least 2 - 3 minutes (depending on the power of the lamp.)
Photo from the site: yanail.ru
Stage 8. Installing the mold using a metal plate and tubes to press the “arch”.
Photo from the site: bpwomen.ru
This is one of the most difficult stages, requiring a certain skill. After all, the entire result depends on how correctly the nail extension uniform is worn.
How to use forms for nail extensions? If the forms have a solid base, then there should be no problems, the main thing is to choose the right size and carefully fit it to the nail. If the shape is soft, then first, using nail scissors, you should adjust the window to the size of the subungual arch. It is important that there are no gaps, otherwise the gel will leak into the holes formed and as it grows, this defect will be noticeable.
After fixing the form, you should make sure that it has beautiful side and end bends. A shape without a bend will look like a trampoline, and a slope that is too steep will create beak-shaped nails.
Remember that the step-by-step instructions for nail extensions on forms require that the work be carried out according to the scheme - 4 nails of one hand, then 4 nails of the other hand and the nails of the thumbs of both hands. This is necessary so that during work the gel does not flow from the nails of the thumbs, which, as a rule, are always at an angle in relation to the other fingers. Beginners should even work on each finger separately.
On a note!
How to extend nails on forms if they are very soft? It's very simple - glue two forms together. This way they will be stronger and more stable.
Stage 9. Formation of an artificial nail using modeling gel.
Photo from website: delodom.com
At this stage, you should strictly adhere to the rules of how to extend nails with gel onto forms. The nail is conventionally divided into 3 zones:
- Cuticle area (1/3 of the natural nail closer to its base).
- Stress zone (the remaining 2/3 of the natural nail plate is the junction of the nail with the form and 1/3 of the form. This area bears the greatest load and hence its name).
- The free edge of the nail, or more precisely the remaining part of the form.
The technology for gel nail extensions on forms at the modeling stage is as follows. A thin layer of gel is applied to the cuticle area with a brush, which thickens slightly as it approaches the stress area. The stress area should be “reinforced” with a small gel thickening, especially at the junction of the natural nail and the form - here the modeling gel is applied very thickly. The future free edge of the nail is formed in a thin layer.
After applying the modeling gel, the nails are dried in a UF lamp for at least 2 - 3 minutes.
Stage 10. Removing the sticky layer from the artificial nail and removing the form. The resulting nail should be sanded to give it a smooth surface. At the same stage, the shape of the free edge of the nail is adjusted.
Photo from the site: studio-helena.ru
On a note!
Don’t be surprised by the removal of the sticky layer from the nail, while the color coating has not yet been applied. If with a regular gel manicure this is contraindicated, since the dispersion is removed, which ensures the adhesion of the layers, then when extending nails on forms, as a rule, the dispersion is removed in order to decorate the artificial plate with a nail file. It’s just that the dispersion will interfere with adjustments due to sticking to the nail file. There is no need to worry about the adhesion of subsequent layers to the artificial nail. A well sanded surface will provide the necessary adhesion.
Stage 11. Applying camouflage gel or colored gel polish. Camouflage or colored gel is applied in 2 – 3 layers depending on the density of the pigment. Each layer is dried in a UF lamp.
Photo from the site: dekornogtei.ru
Stage 12. Design and decoration of nails, if required by the design. If it is not provided, then this step is skipped.
Stage 13. Apply topcoat and dry in a UF lamp. It is better to dry the top coat in a lamp twice as long as the previous layers for better polymerization.
Photo from the site: mirlady.com
Stage 14. Removing the sticky layer.
Stage 15. Moisturizing the cuticle with oil or cream, massage the hands, cuticles and periungual ridges.
Photo from the site: chelnyblog.ru
These are step-by-step instructions for gel nail extensions on forms. You may come across slightly different variations with more or fewer steps (everything will depend on the details of the process), but in any case the basis will be the same.
Material for making molds
Depending on the material, forms are usually divided into disposable and reusable. Most craftsmen prefer to use disposable forms in their work. They are made of a more flexible and pliable material, so they are easy to adjust to the shape of natural nails. In addition to being more pliable, disposable forms are more convenient from a hygienic point of view. To make disposable forms, paper and foil are used, and for reusable forms, plastic and metal are used.
Editor's choice: How to paint your nails beautifully: the latest ideas for performing a manicure
Gel nail extensions on forms: video instructions
No matter how detailed the instructions are, the best way to highlight the essence of the process will be a video on how to extend nails onto forms. Naturally, each master uses his own technology and his own secrets, we bring to your attention two video tutorials on how to extend nails onto forms with gel, which, in our opinion, shows in the most accessible form a process that is understandable even for a beginner. Lesson #1.
Lesson #2.
As you can see, each master uses his own skills and tricks in gel nail extensions on forms. Step-by-step technology is slightly different, but only in a few ways. The main basic “steps” - preparing the nail, setting the form, applying modeling gel - are unshakable. Perhaps in the future, as you gain experience and skill, you will find your ideal solution, more effective and convenient. In any case, try, learn and you will succeed.