Poor removal of old coating
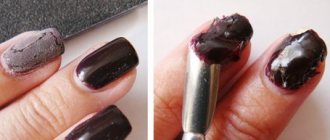
If the previous gel polish was not removed well enough, this will immediately affect the condition of the new design. The base will begin to lay down with sagging and streaks, which will subsequently spoil the whole picture. To avoid such a situation, remove gel polish according to the instructions, using a special product.
A regular “wash” will not help in this situation. The polish itself will either swell or not change at all, and the additional impact of a file or orange stick will worsen the nail plates, making them rough and covered with cracks.
Mistake 1: being your own master
See also...
✅ 5 ways to fix a nail if a piece of gel polish has broken off
✅ Spring manicure: 10 stylish new products
✅ 4 simple ways to take care of your manicure to keep it looking neat longer
✅ 10 low-key design ideas for short square nails
A few days before going to a specialist, many people have a desire to correct the cuticle. Yes, it grows back and doesn’t look as neat as it did after the procedure, but this is not a reason to take up the scissors.
- Firstly, it will be difficult for the master to fix anything;
- Secondly, working with the device on freshly cut cuticles is painful.
What should I do?
Do not cut the cuticle yourself. You can use an orange stick to lift the skin and give it an attractive appearance. It is also important to sign up for correction in a timely manner. When you visit a specialist once every 2 months, you shouldn’t count on perfect nails throughout the entire period.
Improper handling of the cuticle
If you cover the cuticle with oil before starting a manicure, then a spoiling fatty layer will form between the coating and the plate. The same applies to hand cream. A negative effect can also occur if the cuticle is not completely removed. In this case, baking will lead to the appearance of voids and bubbles that will be visible to the naked eye. Gaps, in turn, will reduce the durability of the manicure and its longevity. In addition, the growing cuticle may begin to displace the applied gel polish.
Mistake 5: Shortening your nails yourself
We have noticed that manicurists don’t just paint the nail plate, but “seal” the free edge. This is necessary to ensure that there are no detachments. But as soon as you file or cut off the free edge, the gel polish begins to come off. This is due to the fact that moisture can easily penetrate into the resulting cracks, separating the coating and the nail.
What should I do?
Carefully choose the shape and length during your visit to the specialist. If it seems. If your nails have grown too long and are in the way, visit a specialist for correction rather than trying to change the shape yourself.
Insufficient nail preparation
Before applying the coating, the surface of the nail should be carefully prepared, because the slightest unevenness will later be noticeable. After removing the previous coating, each nail should be sanded twice using a special buff. This must be done carefully, without being too zealous, so as not to damage the record.
The buff should follow from the cuticle to the wide edge. Under no circumstances is it recommended to replace the buff with a polisher, as this can significantly ruin the entire subsequent technology. Since the polisher smoothes the surface even more, adhesion of the gel polish and the nail itself will be impossible. Preparation always ends with degreasing the surface.
Top 7 common mistakes when applying gel polish at home
In the process of learning to apply gel polish, fashionistas most often make typical mistakes, which are best avoided because if you make them constantly, then such a manicure will no longer look as impressive as our fashionistas would like. Therefore, let's take a closer look so that your home experiments and creativity bring only positive results and impressions!
TOP 7 rookie mistakes
As you know, before applying gel polish, you need to carefully and efficiently prepare your nails for coating. It is necessary to give the nail the desired shape, then apply a degreaser, and only then all the other steps.
https://www.pinterest.com/
Mistake #1
If your gel polish base is sagging. The main reason for this is the incomplete removal of the old coating. You need to carefully file away all layers of the previous design with a nail file or filer so that the layer of the new base for gel polish lays perfectly flat on the nail.
https://www.pinterest.com/
Mistake #2
Microbubbles and mini-voids are visible in the layer of the polymerized base. This situation most often happens when the cuticle is removed; it has not been completely removed. And thus, when baked in the lamp, microgaps formed between the nail layer and the particles of skin remaining on the nail. If this situation occurs to you, then your manicure will not last very long.
https://www.pinterest.com/
Mistake #3
The color coating has peeled off the nail. This situation is due to the fact that our beautiful ladies skipped the stage of removing the top keratin layer with a buff. Damn the nail, it’s important not to damage it. Do not apply significant force when pressing the tool on your nails and follow the correct direction of movement. Correctly buff from the cuticle to the free edge, with light movements.
https://www.pinterest.com/
Mistake #4
The coating cracks and breaks off in small pieces. This situation occurs if it is not enough to clean the nail from dust (sawdust), dirt and sebum.
https://www.pinterest.com/
Mistake #5
The gel polish peels off as a whole plate. This situation occurs most often, and all because particles of the pterygium went unnoticed on the nail, and the delaminations on the free edge were not removed. With subsequent regrowth and peeling of the pterygium from the keratin of the natural nail, the gel coating also comes off. The continued delamination of the natural nail in depth (under the gel polish) leads to detachments of the manicure already from the end.
https://www.pinterest.com/
Mistake #6
You cannot make a mix of different gel polishes. And all because each brand of varnish contains different components that may be incompatible with another varnish. And if you combine two polishes together, the manicure may not work out at all. In particular, a primer that serves to degrease a nail can easily come into conflict with another varnish from a different manufacturer.
https://www.pinterest.com/
Mistake #7
Do not remove your hands from the lamp without waiting for the signal. This error most often occurs when applying gel polish. Beautiful ladies, thinking that her manicure is already ready, do not dry the gel polish and then there will be no manicure!
https://www.pinterest.com/
Thus, if fashionistas want to get a flawless manicure at home, you need to follow a few rules that are presented above!
Do you agree with this? We look forward to your comments!
If you liked the article, save it and share with your friends!
Applying a thick layer of gel polish
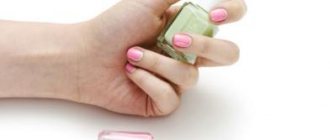
Excessive use of coating material does not improve the condition of the manicure at all, as it might seem. A thick layer at least takes longer to dry, and sometimes it dries unevenly with bubbles and waves. It also gets on the cuticle quite often.
Ideally, the coating is applied with quick and light movements, with the brush moving from top to bottom. There should be a feeling that what is happening is not painting, but rubbing the varnish into the surface. It is important to carefully go around the cuticle areas and side ridges and do not forget that when drying, the gel polish may spread.
Mistake 4: home hand care
On the day after the manicure procedure, you should not take additional care of your own hands. The oil that the masters suggest applying to the cuticle after the finishing coat is sufficient.
When you get home, you shouldn’t do hand baths, apply greasy cream, or use peeling or scrub. Postpone all this to the next day. let the gel polish “get used to” and get stronger, then cracks and chips won’t bother you.
Why doesn't shellac stick to nails?
For some women, the polish comes off as a film almost immediately after application, and this is not the fault of the manicurist.
For some women, the polish comes off as a film almost immediately after application, and this is not the fault of the manicurist. The point is the individual properties of the nail plate , which releases a large amount of wax-like substances. As a result, the shellac falls off because it cannot adhere to an oily nail.
There are not so many such special natures in nature - no more than five percent of the total number of women. For all other beauties who use shellac, the reasons why the coating quickly deteriorates are completely different:
1. Use of low quality materials. Any branded gel polish, and especially shellac, cannot be too cheap. Some women, trying to save money, buy coverage on popular Chinese sites, as they themselves put it, “for mere pennies.”
But what exactly is in the bottle, what is the composition of the purchased varnish, how safe is it for the nail plate - no one will get an answer to these questions.
You shouldn’t skimp on beauty and health, so as not to lose either one or the other. Buy shellac only from stores with good recommendations and a serious history.
2. Violation of the rules of working with your hands immediately after a manicure. The strength and gloss of shellac sometimes gives women the misleading impression that it has instant durability on their nails.
In fact, for shellac to finally set on the surface of the nail plate, it takes up to 12 hours. During this time, you should not shower, wash dishes, do laundry, or do wet cleaning—even while wearing gloves.
Also, you should not use steaming or oil treatments on your palms. Sometimes too much hand cream that turns out to be too greasy can have disastrous consequences for the manicure you just did.
Dry your nails under a UV lamp for the required amount of time.
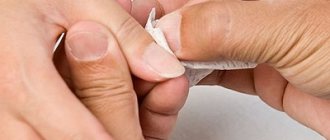
3. Filing down overgrown nail tips. Different women's nails grow at individual rates. Someone can wear shellac for the prescribed period of 2 weeks, and their nails will only grow slightly. But for others, they become too long, and in order to avoid the risk of breaking a nail, women shorten them with a nail file.
Benefits of manicure with shellac
See also...
✅ How to do a mirror manicure at home
✅ How to remove gel polish yourself?
✅ How to do a French manicure: 4 ways
✅ Shellac for short nails: design ideas, new items for 2021
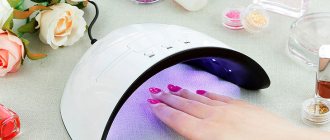
One of the main advantages of creating a manicure with shellac is the simplicity and convenience of its application. It is enough to purchase a special UV lamp for drying nails, after which you can start experimenting and creating a beautiful, neat and durable manicure at home.
But, of course, there are a number of other advantages of shellac manicure :
- Shellac does not contain harmful substances such as toluene and formaldehyde. This means that the product can be used by pregnant women and people suffering from allergies;
- The product lasts a long time;
- Attractive appearance of manicure: rich tone and natural shine;
- Shellac is easily removed and does not damage the nail plate;
- Resistance to damage to manicure;
- Large color palette - about 61 colors;
In order for shellac to stick well to your nails, it is enough to treat it only with a degreaser. There is no need to file the nail or remove the top layer.
Interesting fact: shellac is a waste product of insects living on tropical trees. This unique composition of the product helps protect and strengthen the nail plate.
So, in order to create a manicure with shellac at home, you need to prepare special tools and materials, which will be discussed further.
Coverage is selected incorrectly
The nail service industry has come a long way today. Now it is already possible to select a coating based on the characteristics of each client’s nails. Therefore, when choosing it, you need to take into account the type of nail plate. There are two main components for nail polish on the market: shellac and gel polish.
Shellac contains more varnish, which makes it more elastic when it dries and is perfect for thin, bendable nails, while on thick, strong nails it is better to use gel polish - its density will allow the manicure to last longer on such nails.
Step-by-step instructions for applying shellac
If you don’t have the desire, time or money to contact a specialist, you can cover your nails with shellac at home. The task is not easy, but you can learn.
Before we describe sequentially the instructions for applying shellac, pay attention to a number of tips that you should follow:
- Prepare everything you need: decide on the color of the varnish, connect the UV lamp, treat the surface of the nails;
- Shellac is attached to the nail and hardens only under UV light. Therefore, after applying shellac to the nail, each finger should be held under a lamp;
- In order for the manicure to look neat for up to 3 weeks, it is necessary to prepare the nail plate: disinfect, sand if necessary, treat. It is imperative to monitor the condition of the cuticle; this will help the nail breathe and receive the necessary nutrition.
Due to its structure, gel polish does not roll off like regular polish. This means that you can create a variety of designs on your nails.
Processing the nail plate
Step 1: file the nail plate and remove the cuticle before applying shellac. The nail needs preparation, so it is important to soften and remove the cuticle.
Decide on the shape of the nail, its length and polish the surface. This is necessary to eliminate the glossy shine, and not to thin the nail. So don't overdo it.
Clean your nails from existing dust and dirt, this will allow you to wear your manicure longer.
Having completed the grinding using a special file or buff, removing all microcracks from the nail, you should proceed to the next stage.
Degreasing the nail
Step 2: degreasing the nail plate. The material should adhere to the surface and lie evenly on the nail. To do this, degrease the nail: using a smooth cotton pad, wipe the nail with a special product or regular medical alcohol. After this, a primer is applied and allowed to dry naturally.
It is necessary to degrease your nails immediately before applying shellac. It is very important not to touch them again, as the greasy stains will appear again.
Apply base coat
Step 3: Apply the base coat. This stage is similar to applying regular decorative varnish. Apply a base layer from the base of the nail to the tip. It is very important to leave a gap of 2 mm between the skin and the coating.
Don't forget that the base layer must be sealed. This is done by coating the end of the nail.
Once the base coat is applied, place your finger in the UV lamp for 10 seconds. The time varies depending on sensitivity and individual tolerance, as well as the power of the lamp.
Cover with a colored layer
Step 4: Start covering your nails with colored shellac. Try to apply polish closer to the cuticle to make your manicure look neater. Having previously chosen the color of shellac, apply the first layer, then put it in an ultraviolet lamp for 2 minutes.
Apply the second layer in the same way and dry it in a UV lamp. It all depends on your preferences, but practice shows that if you leave one layer of varnish, the tone will turn out translucent.
Apply top coat
Step 5: consolidate the work. The last layer should be the densest; apply it to the entire surface of the nail and seal it. Place your fingers in an ultraviolet lamp for 2 minutes. Be careful to avoid streaks and unevenness. If you are careless at this stage, you will have to redo the manicure and reapply shellac.
A manicure with shellac at home is considered almost complete at this stage. All that remains is to remove the sticky layer. This is done using a degreaser and a lint-free cotton pad.
By following all the steps described above correctly, you will get a beautiful, uniform manicure. It will not wrinkle, will not burst and will delight you for at least 3 weeks.