How to paint your nails beautifully and neatly?
Of course, it is very important for a woman to always look beautiful and impeccable. Particular attention is paid to the condition and appearance of the nails. Every detail is important: from the well-groomed ends to the quality of the coating. Unfortunately, not all girls manage to paint their nails perfectly - without streaks and unnecessary strokes on the skin. However, we dare to assure you that a neat manicure can be done at home. We will tell you how to paint your nails correctly for flawless nail art.
To make your manicure look perfect, it is not enough just to apply the coating carefully. It is very important to properly prepare your nails, starting with the cuticle and side ridges. You can use our recommendations, covered in articles about classic and European manicure. In them you will find a lot of useful information, supported by useful photos and video instructions. Be sure to align all ends to the same length. Next, we will talk about how to carefully paint your nails yourself at home. Believe me, this simple skill will be very valuable to you. You can constantly improve your skills, making every future nail art flawlessly beautiful.
Nail polish color in manicure and character: detailed meaning of shades
You can learn more about your character based on the color of your manicure by analyzing the colors that you choose most often in nail art. Let's look at each color and the character that stands behind it separately.
- Red
Strength, passion, love, impulsiveness - this is the most emotional color in nail art.
It draws attention to the hands, so a red manicure should be flawless. Red speaks of your active life position, courage and courage to realize your desires immediately. You love sports, noisy companies and parties, chatting with friends, new styles and images. Often you judge people only by their first impression and act emotionally, leaving thoughts for later. In the design composition, red will be combined with black, white, blue, gray, brown. In ombre, it effectively borders with burgundy, coral, purple and black. In graphic designs, red is sharp and structured, so it looks good when combined with sharp angles and clear, contrasting edges.
- Orange
Joy, optimism, active actions, the desire to support and teach others everything that you can do yourself. You are cheerful, sociable, know how to find a common language and quickly make friends. If this is lacking in your character, choose the color orange for yourself to activate the qualities.
Orange goes with pink, black, green, blue and red.
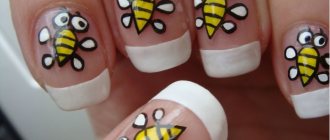
- Yellow
A sunny, joyful color that lifts your spirits and creates a feeling of celebration. Yellow is chosen by very smart girls, reformers in character and life priorities. Yellow will describe you as an open and friendly person with increased sensitivity. You often withdraw into yourself, into reflection and analysis. You are a reliable friend who knows how to keep secrets.
Yellow manicure ideas
In a nail art design, yellow will be combined with blue, blue, white, and light green. Looks good in ombre with white color, which dilutes it.
- Green
Lightness, naturalness and calmness are the main features of your character.
Green color is uplifting and has mild healing properties. You have many hobbies, you strive to help your loved ones and others. When communicating, you try to avoid conflict situations; your friends call you a peacemaker. Dark green color is associated with wealth, luxury and naturalness. Supplement it with gold to attract prosperity into your life. In graphic compositions, green does not like sharp corners and strives for streamlined shapes and curls. Combines with blue, light blue, black, white, olive.
- Blue
You are a fan of traditions and rituals, and you are often conservative when it comes to innovation and change.
She is sensitive both to others and to her own feelings. You never take unjustified risks or adventures. “Measure twice and cut once” - this is about you. Rationalism and sensitivity in your character require a constant search for balance. Manicure in blue tones: design ideas in different techniques and textures
Blue goes with yellow, green, pink, red and blue. Looks impressive both in contrasting and soft transitions of nail design.
- Black
The color of restraint, the desire to hide from the attention of others and preserve one’s inner strength. Black is often chosen by introverts, sensitive people who want to look impressive but not reveal their feelings. Mystery, the desire for prestige, respectability, classics - all this will be emphasized by the black color of nail art.
Black will go with any colors, as it is the background color. It highlights other bright shades in contrast. Black and white combination is a universal solution for quickly choosing a design. Pair black with gold or silver for a festive chic touch.
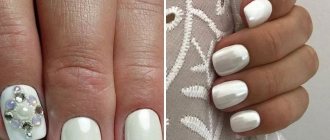
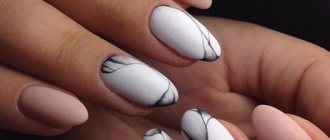
- White
A clean slate, openness, desire for knowledge, transparency in relationships with yourself and with others - it’s all about you if you prefer white in nail design. White is the color of brides, a good background for painting and color accents. Peacefulness, youth, ease of communication attract people of all ages to you. It's easy for you to make friends and support those around you. Details about white manicure in different techniques and many ideas.
- Pink
The combination of red and white brings its own characteristics to the final pink color.
If you are a fan of pink, tenderness, romance, kindness and passion live within you. Gentleness in communication can be replaced by the desire to captivate, motivate, and ignite those around you. In relationships you can be relied upon, you know how to love and make friends. Pink is combined with white, red, blue, gray, purple, lilac.
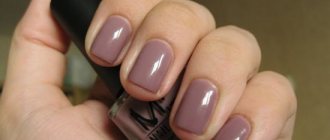
- Brown, nude, beige
In manicure it is an excellent alternative to black.
This is the color of strength, calmness, self-confidence. It eliminates playfulness and flirtatiousness from the image and creates a balanced business style. May suppress sensuality. Nude manicure ideas
To lighten the impact of brown, replace it with nude or beige shades of nail polish. Beige color is a universal solution for every day if you do not want to draw attention to your hands or want to emphasize a natural and well-groomed appearance.
- Golden and silver
Holiday, joy, wealth, luxury and comfort. If you choose metallic colors for your manicure, then you strive to attract the attention of others and express yourself in every possible way.
- Violet
All shades of violet and lilac reveal a girl’s creativity. People who prefer it in manicure often go against the system, defending their own opinion, which is not clear to many. If you suddenly take a fancy to purple gel polish, your soul is full of surprises, but vulnerable and receptive. You know how to make friends and charm, but you never open up until the very end.
Manicure with gold - step-by-step instructions, ideas for the holiday
Dose the amount of glitter, especially in everyday looks. Glitter manicures and designs with shimmering textures can be done on one or more nails, not all at once. This way you will get the right balance and compromise for every day.
Tips to help you paint your nails correctly
To ensure that the polish applies easily and evenly and stays on your nails for a long time, consider the following points:
- A high-quality varnish, with which you can beautifully and even perfectly paint your nails yourself, cannot be cheap
- Instead of liquid to degrease the nail plates, you can use alcohol or alcohol tincture, this is absolutely not harmful
- Instead of the base, you can paint it with regular clear varnish. However, remember that in this case the nail will not receive the necessary moisture and nutrition, and the varnish will only become an obstacle to the penetration of pigment into the layers of the nail plate
- You should not immediately correct the bad spots or wipe off the varnish that gets on the cuticle. During the manicure, fats were applied to the skin in the form of a special oil or nourishing cream, which will prevent pigments from settling on the skin. At the very end, the excess is carefully removed using a cotton swab dipped in liquid
- To make it look beautiful, all layers should be thin, but cover the nail without gaps
- The varnish should be allowed to dry naturally: do not wave your arms or put your hands in the oven - this is harmful to both your hands and the coating itself. Bubbles will appear on its surface and the varnish will come off very quickly.
These are not all the nuances. To get a feel for how to properly paint your nails with regular polish, you need to try this process.
Preparation
Let's face it, painting your nails correctly with decorative varnish requires a certain skill, patience and time. But if all these conditions are met, the result will be excellent!
In order for the polish to lay down evenly, you need to prepare the nail plate. The smoother it is, the better the result. Therefore, many manicurists pre-polish it.
A base coat will also help make your nails look smoother. In addition, it will prevent the appearance of yellowness. Well, if you have problem nails, use a medicated coating instead of a base.
Decorative coating technique
In fact, painting your nails carefully at home is not at all difficult. All you need is a little patience and skill. Since the good condition of the nail plates is very important for an ideal manicure, you may be interested in thematic articles about vitamins and nourishing baths for nails. All materials on our website are supported by useful video lessons and colorful photo galleries. Let's return to our topic. How to paint your nails beautifully so that people admire you?
Step 1: Applying Foundation
The first step towards a perfectly executed manicure is a base coat. It is very important to pre-paint your nails with a clear base. Firstly, the base protects the nail plate from aggressive pigments of colored varnish. Secondly, the base evens out the surface, making it much easier for you to do a neat manicure at home. You can use a varnish from the strengthening series or apply a regular transparent base.
Step 2. Applying color coating
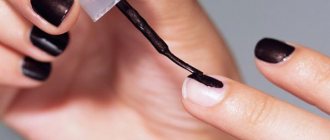
Before painting your nails with color, prepare cotton swabs, discs, toothpicks and nail polish remover to correct possible errors. Apply the first coat. To successfully paint your nails at home, use high-quality varnishes that spread more easily over the surface. Dip the brush into the bottle and remove excess by running it along the edge of the neck. Start painting from the central part of the nail plate, stepping back a little from the cuticle, as shown in the photo, and then distribute the polish to the sides.
What is the second layer for? Since it is almost impossible to paint your nails accurately the first time, re-coating will mask all the imperfections. In addition, only two layers of varnish will allow you to reveal the full depth and richness of the shade. You can re-paint your nails only after the first color layer has completely dried. Otherwise, the varnish will take a very long time to dry. Sometimes you can get by with one layer of decorative coating: the exception is working with varnish of a very thick consistency.
Step 3: Top coat
The stage of painting nails with a top coat would correctly be called optional, especially at home. Of course, protective coating has many advantages, but not everyone likes it. Make sure the colored polish is dry before applying topcoat to your nails. Considering the fact that the protective coating is already 3-4 in a row, not all girls are ready to wait 30 or more minutes for complete drying. The exception is “drying”, which can be applied even at home using a pipette, spray or brush.
The advantages of the top coat include a glossy shine to the nails and a longer lifespan of the manicure. When applying a protective layer at home, do not forget to properly paint the ends of the ends. After the nail polish is dry, remove excess polish from the skin. To consolidate your knowledge, we invite you to watch an interesting video lesson. From it you will learn how to properly paint your nails at home, without the help of specialists. To ensure that the procedure gives you only positive emotions, we have prepared useful recommendations for you, which you will find immediately after the video.
Instructions for applying varnish
There is a whole technology for painting nails. Keep in mind that you won’t be able to save time and get a perfectly even coating.
Remember that varnish applied to nails with overgrown cuticles makes the manicure ugly and sloppy.
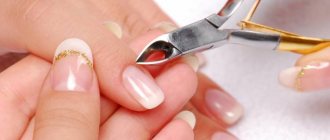
Therefore, in any case, before painting your nails, it is necessary to cut off the cuticles and remove the pterygium. This is done by soaking your fingers in warm water with salt and liquid soap. After the cuticles become soft, they are cut off with tweezers or scissors. Try to cut the skin not in pieces, but in a single strip. Using a stick, scrape off the thin film at the side ridges and near the lunula.
File your nails and go over them with a buff or polisher. If there are cracks or delaminations on the nail, before painting it, you need to sand them, otherwise the varnish will give the plate relief.
Instructions for applying an even coating:
- Apply a base coat to the plate. This can be a regular varnish base;
- After the base has dried, apply varnish;
- Cover your nails with top coat or sealer.
Of course, you don’t have to apply the base and top coat to the plate, but these products extend the life of the manicure and prevent the formation of chips and peeling. In addition, this coating is less scratched and does not fade. It is necessary to apply the base varnish not in one motion, but in several steps.
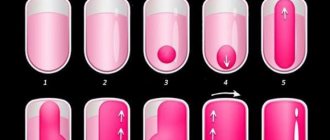
At the very beginning, 1-2 mm from the cuticle at the bottom, place a small and bold point. Using a brush, move the drop down towards the cuticle. Now stretch the drop up to the free edge. You should get a straight stripe. Now return to the place where the drop was originally and apply the varnish in an arcing motion at the side rollers.
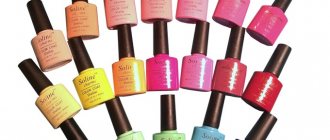
Without a good polish there won't be a perfect manicure.
You can’t skimp on your beauty. Therefore, when you go for your next bottle of varnish, take its purchase seriously. We do not urge you to overpay for a well-known brand, because many good products are also in the budget category. However, you should definitely avoid buying cosmetics in passages, dubious stores and on trays in the middle of the street. The likelihood that you will be given a very low quality varnish is huge.
To paint your nails accurately, the polish must be uniform, fresh, and sufficiently liquid.
- The thick coating lays down unevenly, forming stripes
- The presence of small lumps in the varnish can ruin any manicure.
- If the varnish is expired or has lost its original appearance, feel free to throw it in the trash.
Remember that bad polish will not only leave uneven marks on your nails, but will also significantly deteriorate their condition.
Preparatory stage
Before painting your nails, you must carefully prepare their surface. Only a few people can boast of an ideal nail plate. In most cases, there are small cracks that will be clearly visible under the glossy finish. Simple manipulations will help you carefully paint your nails:
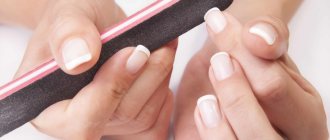
- Give your nails the desired shape using scissors and a nail file. Make sure all nails are the same length.
- Now it’s time to take care of the cuticle. We recommend steaming your hands in a warm bath with oil, and then pushing back the cuticles with an orange stick. It is better to do a trim manicure in a salon. If you don't get rid of the cuticle, the varnish will cover it and it will look terrible.
- Using a polishing block, thoroughly polish the surface of the nails.
- Degrease the surface of the nails with a soap solution or nail polish remover.
- Be sure to apply a base coat, because this is the key to an amazing manicure. The base heals nails, protects them from the effects of decorative varnishes and evens out the surface.
Don't forget to make masks for your nails to improve their health and bring them into proper shape.
How to paint your nails neatly and evenly without staining your cuticles or skin?
- Before you start applying a decorative coating, you must remove or push back the cuticle, otherwise the varnish will get on the skin, lie unevenly and you won’t be able to create a neat manicure. You can get rid of the cuticle by trimming it with tweezers from a manicure set, using a special cosmetic product, or pushing back the skin using an orange stick, file or toothpick.
- The varnish is applied with just three or four light strokes. Relax your hand and, without pressing on the brush, draw straight lines. Some find it more convenient to paint the nail first along the edges, then the center; for some, on the contrary, it is more convenient to start from the middle. But it’s definitely not worth making a lot of strokes, trying to create an even line, and putting too much pressure on the brush.
- Leave a place on the sides of the nail that is not painted over with varnish. Firstly, this way you will be much less likely to stain your skin, and secondly, because of this, your nails will visually appear longer
Varnish application technique
How to beautifully paint your nails with regular polish?
- If, despite your best efforts, the varnish does not apply evenly, then most likely it is too thick. You can try diluting it with acetone or buy a new one. To prevent the varnish from drying out so quickly, always screw the lid tightly and make sure that nothing remains on the rim
- If the polish doesn't stick well, you probably applied too much of it. If you apply several layers of varnish, they should be as thin as possible, and the varnish should be uniform and fairly liquid. When only cheap varnish is available, it is better to apply it in one layer
Nail polish should be liquid
Subtleties and secrets of applying varnish
- Before painting your nails, be sure to degrease them or simply wash your hands with soap . This will extend the life of the manicure.
- To better remove the polish from the skin, first apply cream to it without touching your nails.
- The workplace for manicure should be well lit. It is very important to position your hands correctly on the table. Please note - elbows should not hang !
- Before you learn how to paint your nails, make sure that the varnish is of high quality and not old. Before use, warm the bottle in your palms and shake it.
- Start painting your nails from your little fingers. If you move in the opposite direction, you may accidentally touch the fresh coating on other fingers.
- To paint your nails at home not only correctly, but also beautifully, use our recommendation. When applying the coating, leave the edges of the nails unpainted on the sides. This little trick will help you visually make your ends longer.
- For short nails, it is better to use a polish with a liquid consistency. It will be easier for you to apply it. You can dilute thickened varnish with a special agent, but remember that after this it will quickly become unusable.
- Before painting each nail, re-dip the brush into the bottle. If suddenly the varnish is not enough, immerse it in the bottle again. However, you should not allow excess, since in this case you will not be able to paint your nails beautifully.
Basic mistakes
Let's try to figure out what mistakes we make most often. It is forbidden:
- Paint your nails before bed. This way, you risk waking up with a pattern in the texture of your bed linen rather than glossy nails;
- Getting your nails wet before painting is also strictly prohibited. It’s worth waiting at least 15 minutes. As the nail dries, its surface will change. Dried varnish is not a flexible texture at all, and therefore it will quickly crack. The same applies to all medicated oils, creams and other moisturizing treatments;
- Shake and heat the jar of varnish. This negatively affects the properties of the varnish. Instead, roll it between your palms a few minutes before applying.
Execution steps
A manicurist needs to know the structure of the nail very well and understand exactly what movements, tools and substances can damage the nail plate. If you study the anatomical structure, many questions will disappear on their own. So, at the first stage, you should understand that the area under the cuticle is very sensitive, so you should not get into it with any piercing or cutting objects. Otherwise, the integrity of the nail is damaged, and in the future the client will have problems with the evenness of the nail plate.
The correct technique looks like this:
- The client's nails are being processed. This can be done in different ways: wet and dry. Be sure to remember that you cannot apply gel polishes to wet nails, otherwise the material will peel off. Therefore, you should either reserve time or perform a dry, unedged manicure.
- The cuticle may be cut or moved. In any case, the entire pterygium underneath must be removed. Removal of pterygium is possible using cutters. Since cutters can create cuts on the nails themselves if handled incorrectly, the manicurist must undergo appropriate training in working with different types of cutters (hardware manicure courses).
- When working with nail files and cutters, it is extremely important to turn on the manicure vacuum cleaner - it instantly draws in all the dust from filed nails and cut artificial material. Pay attention to Max manicure vacuum cleaners, as well as manicure rollers and pedicure stands from this Russian manufacturer.
- After processing the nails and moving the cuticle to the base of the nail, you can apply gel polish (in the usual sequence - after the primer and base). Movements should be smooth, and the cuticle should be pulled back so that as much as possible of the free space under it is exposed for applying gel polish.
- After the first layer has dried, the second layer is applied. In this case, the gel polish is applied to the brush from above, which allows you to paint the space under the cuticle more easily. Once a smooth edge has been outlined, the gel polish can be quickly and easily spread over the rest of the nail plate.
- After drying the second layer in the lamp, you can begin to apply the top and remove the sticky layer (if necessary).
Another way to apply gel polish under the cuticle is that the master works with an almost dry brush. The movements are performed at an angle of 45°, and the cuticle is also retracted. In this case, you can avoid the most important problem - gel polish wicking. If at least part of the pigment gets on the cuticle or forms an uneven edge, it will be much more difficult to correct the mistake. Therefore, novice artists choose the method of application with an almost dry brush, and if necessary, apply 3 layers of gel polish, drying in a lamp after each application.
What should be on hand
First of all, these are sharp manicure scissors and a nail file. No woman's cosmetic bag should be without them. Try to choose a glass or plastic file; they are less damaging to your nails.
For trim manicure, metal tweezers are simply necessary. With their help, we will subsequently remove the cuticle. When purchasing, be sure to pay attention to what material they are made of. Surgical steel will remain sharp for a long time.
How to choose a tool for manicure and pedicure
We will need a metal spatula Some people use an orange stick instead.
We will also need various bath products. Which ones specifically are up to you to decide. These can be various oils, sea salt and much more. Choose nail polish remover without acetone. This way we will damage the nail plate less. You can add a little glycerin to a regular liquid containing acetone and save your nails from dehydration. Cotton pads (balls, just cotton wool) are indispensable assistants when removing polish from the nail plate and around. For more “jewelry” work, you can use cotton swabs. In stores you can easily find a special correction pencil. It's a pleasure to use.
We will also need cuticle remover, cuticle oil, hand cream, base coat and nail polish fixer.
Cuticle removal
This stage always follows the bath while the cuticle is still soft. We push back the cuticle with a metal spatula or an orange stick and begin cutting. To cut it off, use tweezers or curved nail scissors. Remove any remaining skin from the surface of the nail plate with a spatula.
In the process of moving and cutting, try to ensure that your actions are as careful as possible. Otherwise, you may damage the skin or the base of the nail.
If you decide to do an unedged manicure, you won't need scissors or tweezers. Apply a special product to the cuticle and remove it with a stick.
Let's get to the main point
The preparatory work is over and we begin to create beauty on our hands.
First, let's apply the base. The base layer strengthens or vitaminizes the nails (depending on which one you use). In addition, it provides an even coating.
We begin to apply varnish. It's better to paint the nails of your dominant hand first. And that's why. If you are right-handed, then painting your right hand will be awkward. As a rule, in this case the layer turns out to be thick, and the color, accordingly, is more saturated. Starting with your dominant hand, you can adjust the layer thickness with your second. Thus, the manicure on both hands will not be different.
Lace manicure
Fashion trends for this type of manicure have been relevant for several seasons. If you want to create a romantic look, this nail design will be the perfect finishing detail.
- This manicure can be created with varnish and stamps, but there is another way. First you need to prepare 10 small pieces of thin lace. Their size should match the size of your nails.
- Apply a base coat of varnish – light colors work well. But to create a dramatic and fatal image, you can also use a dark shade.
- Place the prepared lace on your nail and straighten it using a toothpick.
- Apply several layers of clear varnish over the lace and wait until it dries.
Fashionable lace manicure with regular varnish
Interesting : Fashionable manicure and pedicure in the same style
How to paint your nails beautifully and correctly
There are so many ways to do your own manicure that it’s impossible to list them all – you’re bound to miss one. However, the rules for preparing hands for the procedure and applying varnish are the same. Before you begin the process of coating the nail plate with varnish, make sure that you have gone through all the preparatory stages and the result of applying varnish will be a perfect manicure that can only be compared with salon manicure procedures.
Before opening a bottle of colored varnish, you need to remove the old coating, shape it, level the plate, remove the cuticle and finally treat the skin around it with nourishing oils:
- To remove old coating, try to choose high-quality products that do not contain acetone.
- The nails are shaped using a nail file. Everyone determines for themselves which type of this tool is more convenient to use at home.
- A nail file is also used to level the entire surface. A more convenient way is a manicure device with a special attachment, which in a matter of minutes will make the plate perfectly flat without damage.
- The cuticle needs to be removed very carefully using tongs or a special trimmer, which is often included in a manicure set.
- You need to treat the skin with vegetable oils (apricot, almond, olive) or special creams.
How to carefully apply varnish
The first thing worth noting is that before applying any type of varnish, it is necessary to cover the nail plate with a transparent base, especially for manicures for children. It will not only protect your nails from the harmful effects of the coating, but will also allow it to last much longer without chipping. To avoid having to worry about how to paint your nails evenly, there are simple step-by-step instructions for applying polish:
- Step back 3-4 mm from the base of the nail, draw a center line to the tip of the plate with a brush with varnish.
- From the same place, draw another line to the tip of the nail, but this time painting one of the sides.
- Repeat on the other side.
- Finish the procedure by drawing a horizontal line along the tip of the nail, thereby securing the polish.
- Let the coating dry on its own or use a hair dryer to speed up the process.
Gel polish
Shellac is a new way to give your nails a new look, while maintaining it for up to 1 month. The coating is so durable that you will not see chips or cracks for a long time, and the color of the gel polish will remain until the very end of wear. If you do not know how to apply shellac correctly, then the instructions above will help you, the only difference is that drying occurs under an ultraviolet lamp, the light of which causes the coating to harden in a few seconds.
Simple varnish
When purchasing nail polish, choose a quality manufacturer, otherwise you risk using paint from an unknown manufacturer. In addition, varnishes from well-known brands are easy and even to apply. You will no longer have a question about how to beautifully paint your nails. They allow you to enjoy the results of your manicure longer. Good coatings are often more harmless than their cheaper counterparts. Application brushes also have a certain shape, which contributes to a smoother and faster application.
Color combination on nails
Recently, girls often choose multi-colored manicures. This trend has already firmly entered the fashion world, so the most famous brands specially produce sets of nail polishes so that you don’t have to think about which colors look best together. There are several types of combinations of varnishes that will help in the question of how to beautifully paint your nails in two colors:
- contrasting: yellow with purple, red with blue, etc.;
- monochrome: combinations of color shades, for example, pink with pale pink;
- related: similar colors, for example, blue and green, orange and red, etc.
How to beautifully paint your nails with gel polish or shellac?
Probably every woman has noticed how quickly ordinary nail polish can lose its attractiveness, cracking, peeling and bursting. For this purpose, manufacturers have invented a special shellac varnish.
What is shellac? This is nothing more than an exact combination of the most ordinary polish with gel polish. It is for this reason that working with this varnish is incredibly easy, even at home.
Shellac has its clear advantages:
- it shines (gloss) much more than regular varnish
- its coating is many times more durable than that of conventional varnish
- the reliability of the material allows you to wear a manicure for a long time
- It can be easily applied and removed by yourself
- it does not require removing the top layer of the nail plate
- it has a positive effect on thin and weak nails, making them stronger
- is completely non-toxic
shellac gel polish
The difference between this varnish is that it requires a special ultraviolet lamp for drying.
It is recommended to apply shellac in three layers:
- first layer - base (using base varnish)
- second layer - main (colored varnish)
- third layer - fixative (fixative varnish)
Applying gel polish to the nail plate:
- Perform your usual manicure with cleaning the nail, giving it a special shape, removing the cuticle
- Completely degrease the nail using nail polish remover.
- Use a special sanding file to polish the nail so that the varnish “grabs” onto the plate.
- Apply the base coat (it's clear) and cure it under a UV lamp for about two minutes.
- Apply colored varnish - this is the base. This layer also requires about two minutes of drying under a lamp.
- Then the third layer is applied - the fixing one. It must be applied very carefully, since if its residue touches the skin, it can easily break its integrity
- After this, the nails are polished with a special lint cloth, and oil can be rubbed into the cuticle. All. Manicure is ready
shellac manicure
Preparing nails before painting
In order for the varnish to last longer, and most importantly, for the hands to have a well-groomed appearance and attract attention, creating your positive image, you simply need to carefully prepare your nails for applying varnish.
Today there are many types of manicure, so everyone, even the most fastidious young lady, can choose the ideal method for herself. If we talk about salon conditions, then a competent master himself can clearly determine what type of manicure is right for you. Well, for home use, we recommend using a preparation or Japanese type of manicure. These are unedged methods, which means the technology is performed quickly, easily and safely.
If you want to know how to learn how to paint your nails, then you can’t avoid studying the theory.
Go through all stages of manicure carefully. The instructions also apply to those who have extended nails. In its simplest form it looks like this:
- Cleaned nails are given the required shape and length using a file.
- The cuticle and periungual tissue are softened using a special oil or soap bath
- Using an orange stick, the cuticle is carefully pushed back to the side ridges and base of the nail.
- The nails are polished with a special nail file.
- Apply a strengthening serum or nourishing cream to your own or extended nails.
It is very important to polish your nail plates well so that the polish lasts longer. But if you decide to do a shellac manicure on your nail extensions or your nails at home, then the process looks completely different, more on that a little later.
Video: how to make a beautiful manicure at home
Doing a manicure yourself is not difficult, especially when you have video tutorials from the best masters at hand, where the process is described step by step. By following all the recommendations from the video instructions, you will learn how to carefully paint your nails at the cuticle, how to beautifully paint short nails, and others. Photos of manicure options will help you quickly decide on a color or style, and you will see how to properly paint your nails in different colors. A little patience and everything will start to work out for you.
Easy manicure
Smooth and neat around the cuticle
On short nails
Beautiful painted nails
Tricks and life hacks
As for drying the varnish after applying the protective coating, I recommend doing it in natural conditions, without a hair dryer, wind, cold water, etc. All these methods leave a certain mark... A hairdryer makes the coating dull, cold water is not good for the skin, nails and joints.
And a few more tricks: once you dilute the varnish, you yourself pass judgment on it. Now you will dilute it regularly, but at least 2 hours before painting your nails! To extend its life, wipe the neck of the jar with a cotton pad soaked in nail polish remover every time after use. Then the lid will fit tightly and the varnish will last you longer.
Avoid painting your nails in a dusty room, small particles quickly settle and stick, resulting in a lot of “garbage” on your nails!
Do not forget! To ensure that your manicure is always perfect, it is not enough to paint your nails correctly, you need to take care of their health. Take a break between dyeing for at least 1 day. At this time, you can carry out any procedures to strengthen your nails.
What should be on hand
First of all, these are sharp manicure scissors and a nail file. No woman's cosmetic bag should be without them. Try to choose a glass or plastic file; they are less damaging to your nails.
For trim manicure, metal tweezers are simply necessary. With their help, we will subsequently remove the cuticle. When purchasing, be sure to pay attention to what material they are made of. Surgical steel will remain sharp for a long time.
How to choose a tool for manicure and pedicure
We will need a metal spatula Some people use an orange stick instead.
We will also need various bath products. Which ones specifically are up to you to decide. These can be various oils, sea salt and much more.
Choose nail polish remover without acetone. This way we will damage the nail plate less. You can add a little glycerin to a regular liquid containing acetone and save your nails from dehydration. Cotton pads (balls, just cotton wool) are indispensable assistants when removing polish from the nail plate and around. For more “jewelry” work, you can use cotton swabs. In stores you can easily find a special correction pencil. It's a pleasure to use.
We will also need cuticle remover, cuticle oil, hand cream, base coat and nail polish fixer.
Cuticle removal
This stage always follows the bath while the cuticle is still soft. We push back the cuticle with a metal spatula or an orange stick and begin cutting. To cut it off, use tweezers or curved nail scissors. Remove any remaining skin from the surface of the nail plate with a spatula.
In the process of moving and cutting, try to ensure that your actions are as careful as possible. Otherwise, you may damage the skin or the base of the nail.
If you decide to do an unedged manicure, you won't need scissors or tweezers. Apply a special product to the cuticle and remove it with a stick.
How to prepare your nails for a manicure?
It is necessary to erase traces of the previous varnish from the nails, if any, and begin to create the desired shape for them.
Choosing the shape of the nail plate is easy; it is important to adhere to several criteria:
- Oval nails are suitable for those with long fingers, giving them a graceful and graceful look.
- For wide nails, a round nail shape is perfect; besides, it is durable and, due to its slight protrusion beyond the contour of the finger, rarely breaks off.
- Round nails will be very useful for ladies with thick fingers. However, in this case, you should abandon the square shape - this will shorten your fingers even more and make them coarse.
- Square ones will be much more appropriate for women with thin and long fingers. Pointed nails are also suitable for them.
Next, having decided on the shape, you need to look at the condition of the skin around the nails - if it is dry, you should take a bath and soften the cuticle, and then carefully trim it.
Having sharpened the nails to the desired shape, the surface of the nail plate is sanded and polished with a file and buff. The resulting dust is washed off and the nail is degreased (alcohol is also suitable for this).
Let's get to the main point
The preparatory work is over and we begin to create beauty on our hands.
First, let's apply the base. The base layer strengthens or vitaminizes the nails (depending on which one you use). In addition, it provides an even coating.
We begin to apply varnish. It's better to paint the nails of your dominant hand first. And that's why. If you are right-handed, then painting your right hand will be awkward. As a rule, in this case the layer turns out to be thick, and the color, accordingly, is more saturated. Starting with your dominant hand, you can adjust the layer thickness with your second. Thus, the manicure on both hands will not be different.
It is advisable to start painting your nails from the little finger. This way you won't smear the polish on the rest of your nails.
Finally, you must apply a sealing layer to your nails. In this case, the manicure will please you longer. And don't forget to apply cream and moisturizing cuticle oil to your hands.
Doing a classic manicure
How to paint your toenails beautifully?
Before you start painting your toenails, be sure to get a pedicure: remove the cuticles and give your nails a beautiful shape. Some people believe that the color of nail polish on arms and legs should be the same.
Fingernails and toenails are the same color
Others think that they can be creative and decorate their toenails however they want.
Toenails with glued pebbles
You can glue rhinestones, stones and other decorations with special nail glue or superglue.
Toenails with rhinestones and designs
Step-by-step instruction
Before you begin the process of applying varnish, you should consider that the girl has 40 minutes of free time, eliminate or minimize distractions, and also think through the design. In addition, you need to check the shape of the brush; it should not be narrow and dense. Instructions for creating the perfect manicure:
- Apply wax or oil to the periungual area without touching the plate. This will help you subsequently easily remove excess material from the cuticle and rollers.
- It is recommended to apply a coat of base to facilitate subsequent application of colored varnish.
- Take a brush of colored varnish and wipe it on the edge of the bottle so that very little varnish remains on it, literally on the tip. This way it won't bleed onto the skin.
- We paint our nails with regular polish, starting with the little finger. You should place a drop in the center of the plate, then carefully “adjust” the varnish with a brush to the base.
- Then, with slow movements, holding the brush confidently, you need to apply the varnish to the side surfaces of the plate. Thus, the varnish does not flow onto the cuticle.
- You need to complete the manipulations with the brush by sealing the end of the nail. Thanks to this, the varnish will last longer.
- Apply another coat of varnish to deepen the color.
- When performing movements, the elbow should rest on the table and the hand on which we are applying the varnish should also lie on the table; you should not apply the varnish while holding your hand suspended.
- Apply a quick-drying top coat.
This item is optional, but it will extend the wear time of the coating and make the manicure perfectly glossy. On the left is a top coat applied to the nail, on the right is a nail without topcoat. Finished manicure with regular varnish.
How to start direct painting?
It is very important that the elbow does not hang down; support is needed; a table is best suited. This is important because it is difficult to do such work while suspended, and the final result may suffer greatly.
At the very beginning, a base is applied - a transparent coating that promotes a better connection of the varnish to the nail, preventing the colored varnish from being absorbed. This will allow you to remove the coloring agent after some time without turning your nail yellow, red or purple.
It is better to start applying the color layer with your working hand - left for left-handed people and right for right-handed people. What is important is that you need to start with your little finger. This will make it much easier to achieve the result without spoiling the already applied coating in the process.
It is better to warm the tube or bottle of varnish in advance in your hands or shake it (not too much). Do not overdo it with shaking, because the resulting bubbles can subsequently spoil the quality of the work being performed even before it begins.
If, upon reading, the reader thought that this is all there is to know about how to do a manicure with regular varnish, then no. There are a couple more nuances.
You need to paint this way: take a little viscous liquid onto the brush, leave some of it on the neck of the bottle and draw the brush from the middle of the nail plate to the end and back to the hole. Then go along the sides and finally paint the main middle part of the nail.
If varnish remains on the skin, you can wipe it off with a cotton swab dipped in the solution or with the nail of the other side and immediately wipe it on a cotton pad soaked in acetone.
If the varnish becomes faded, you can also apply a second or third layer. When the nails are dry, take a clear setting varnish and apply it using the same technique discussed above.