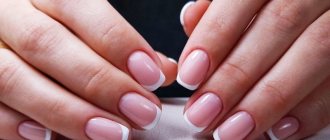
How to give yourself a manicure
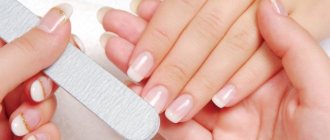
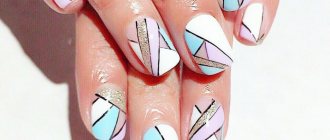
You can keep your hands in perfect condition and design your nails in an original way without visiting a beauty salon. We tell you in detail how to do a manicure step by step at home and achieve the perfect result. Read what tools you will need for the hygiene procedure and what design you can create at home. You don’t have to limit yourself to monochromatic coloring. Even if you do not have artistic skills, you can realize original ideas using available materials and special tools.
Manicure at home - what types can be done
The most popular and effective way to get your hands in order remains a trim manicure. Dead skin around the nails is cut off with a special tool - tweezers. It is important that they are of good quality; beauty, smoothness and absence of injuries depend on this. In addition, a sharp cutting tool from a trusted company will allow you to complete the procedure quickly, thereby saving your time.
For those who, due to health conditions, do not risk using a cutting tool (for mycosis and diabetes), an unedged manicure at home is suitable, the features of which are clearly demonstrated in the video. To remove dead skin around the nails, special removers are used - products based on acid or alkali. When used correctly, they eliminate the risk of skin injury, act gently, and do not contribute to the development of hangnails.
Another salon procedure is increasingly being done at home - hardware manicure at home. To carry it out, you need a special machine - a milling cutter. It performs the following functions:
- removal of keratinized cuticle;
- polishing and grinding of nails;
- treatment of calluses on hands and feet;
- correction of nail shape.
The device is equipped with a handle with a rotating cutter, the size of which and the rotation speed are selected depending on the task. For those with delicate, damaged skin, as well as cuticles that grow too quickly, purchasing a manicure machine at home is completely justified.
Applying gel polish at home
Having dealt in detail with the list of necessary equipment, materials and tools, let’s move on to the step-by-step procedure for applying gel polish. Please note that you should not apply cream to your hands first, otherwise the coating will come off the nail plate very quickly.
The procedure includes:
- Preparing the nail plate (or performing a manicure).
- Application of materials.
When preparing the nail plate, it is important to follow each step and perform it efficiently, otherwise the coating will not last long and detachments or chips will appear.
Nail preparation is performed in different ways, depending on the chosen manicure method.
Next we will look at the classic version, which consists of several stages:
1. Remove the old coating from your nails using nail polish remover or gel polish, depending on what you had on your nails.
2. Give the free edge of the nail a uniform and even shape using a nail file. If necessary, the side ridges around the nails are also processed with a nail file.
3. A softening agent is applied to the cuticle area, which must be left for a while (read the instructions for your remover) so that the skin becomes more pliable. Usually it does not exceed 1-2 minutes. You can also soften the cuticle in a bath with warm soapy water.
4. Push back the cuticle using a pusher or an orange stick.
5. Wipe off any remaining product with a lint-free cloth.
6. Cut off the raised skin with nippers or scissors.
In hardware manicure, cuticle processing is performed using a cutter. Carefully, at 10-15 thousand revolutions, we pass the device over the cuticle from right to left, lifting it.
Then we switch the reverse and work in the opposite direction - from left to right.
It is important to perform cuticle removal very well. Since if there are at least some protruding parts of the skin, hangnails or pterygium on the nails, it will be difficult to apply gel polish very close to the cuticle, it will flow and lie unevenly, which will lead to rapid peeling of the material.
How to prepare for the procedure
First you need to wash your hands and remove old varnish. Even if the old decorative coating has no defects, it is recommended to replace it, since after a manicure the distance between the cuticle and the varnish border will increase. And your hands will look imperfect.
The next stage is preparing everything you need, this list includes:
- tools for trimmed manicure (or a special product for unedged manicure);
- towel;
- a bowl of warm water to steam the skin;
- sea salt and liquid soap.
To complete a proper manicure at home, you will need oil - you can purchase a special cosmetic product that nourishes the skin. Cocoa butter or shea butter are also suitable for this purpose - they have a regenerating, protective, soothing effect.
After a manicure is done at home, you need to disinfect the tools. Chlorhexidine is ideal for this purpose.
Tools for manicure and pedicure at home
Before you skip going to the salon, you need to purchase quality tools. A beautiful manicure at home is only possible with the use of sharp, high-quality tools, which necessarily include:
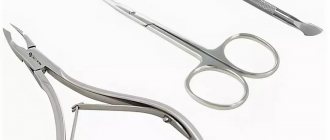
- Cuticle tweezers (or nippers) are made of medical alloy, have a smooth motion, remain sharp for a long time without sharpening and fit comfortably in the hands. Such characteristics will ensure an effective and quick procedure, as well as an excellent manicure result, which you can do for yourself at home.
- A pusher is a metal tool that is a thin handle with a spatula on one side and a sharpened scraper on the other. Use a spatula to move the skin, and use a mini-knife to cut off the keratinized cuticle.
- A nail clipper is a device for cutting nails, which is similar in configuration to a guillotine. Indispensable for manicure at home on short nails, as it makes the cut even, preventing delamination and the formation of nicks on the plate.
- File - designed to change the shape of nails. For working with natural nails, a gridness of 180-240 is recommended.
- Orange sticks - this element is not always used, but it is very useful to have it on hand, because it can be useful during the manicure procedure for beginners at home - both trimmed and untrimmed, and at the stage of applying a decorative layer. With a stick you can push back the cuticle, remove it after softening, clean the inner surface of the plate, and carefully apply glitter. In some cases, such a tool is preferable to a metal one, since it does not damage the surface of the nail and does not leave unsightly scratches.
There are not only useful tools for manicure at home, but also harmful ones. One of these is a fork. A small forked blade often leaves wounds on the fingers, as it cuts off not only dead skin, but also living skin. You won't need such a tool if you have purchased good tweezers and a pusher.
There is also a warning regarding the nail file - if it does not have a grid marked on it, then you should not buy it. Most likely, this is a very rough tool that will not be able to accurately process the nail cut, causing delamination.
When doing your own manicure at home, remember that only dry nails can be treated with a file. A wet plate is characterized by excessive flexibility, so a neat, perfect cut will not work. There is also a risk of breaking off the edge of the plate. You can also use a polisher only on dry nails; this will give you a really smooth and shiny surface and not cause any harm.
How to do a combined manicure using the machine for yourself
I thought for a long time whether or not to write this post, since it is impossible to tell and show all the intricacies of using a manicure device within the framework of a text post. But I really wanted to talk about my experience, how I was able to tame the device and what mistakes I made. I’ll warn you right away that the post will be long and suitable for those who are just starting to get acquainted with the device.
Prim
. I am not an active manicurist. At the beginning of my journey, I studied myself, and then completed the courses. So in any incomprehensible situation I do not pretend to be the ultimate truth. Thank you:)
What is the essence of hardware/combi manicure?
Hardware technology involves treating the skin only with the help of a device. But the combination of a device + scissors is called a combi manicure. On myself I practice the second option. And here it is important to note that hardware technology is traumatic and does not forgive mistakes! I remember at one time beauty salons propagated that equipment was super safe and impossible to hurt. It’s also possible that if you don’t realize what you’re doing, you can end up cutting yourself down to meat. But not everything is so scary, the main thing is to understand the theory of manicure and master the technique of setting up a cutter. For all the time that I have been doing manicures, I have only made one cut for myself - when I was studying and trying to remove the material with a cutter at 0.
How to choose a device?
The key characteristics when choosing a device are power and number of revolutions. For home use, to remove something, to file something, 20 thousand revolutions is enough. But you need to understand that cutting with such a device will take a long and tedious time, but it will not damage your budget.
It is also very important that your framer has a lock in the handle to secure the cutter.
Like many selfies, I started with very cheap Chinese devices and I can say that they are not worth considering even for home use. They will quickly fail, the cutter will soon begin to vibrate and hit the nail. The minimum price to start from is 2500-3000 rubles. Now I have a Nail drill machine, it’s weak, but it’s been working properly for a year now and it’s enough for me to cut myself and my girlfriends. I want Strong.
The first stage in manicure is removing the old coating. I know that many girls are afraid to touch their natural nails with a cutter, and in order to understand how a cutter works in general and how much pressure to use, you can use the following exercise. We take a tip, apply a standard layer of base, flower bed and top coat to it. We dry it, remove the stickiness and remove it all with a milling cutter down to a thin substrate, without touching the tip itself.
The notch on the first cutter was washed off after disinfection
Removal is made with carbide or ceramic corn. To remove very thin coatings, it is better for beginners to take a red notch; for everything else, a blue one is suitable. We select the size of the cutter to match the diameter of the nail, avoiding sharp tips and overly toothed cutters.
We shoot on forward, 20-30 thousand rpm (depending on the power of your device). Movements should be confident and elongated (not bite-bite).
There are a lot of removal techniques, for example, I have developed the most convenient one for myself. First, I turn my hand away from myself and photograph this area:
Then I turn towards myself and photograph these areas:
It seems that everything is very difficult, but when you get the hang of it, the movements become automatic.
In this position, it is much easier to control the progress of the cutter and not hit yourself with it on the nail. When removing, under no circumstances should you press on the cutter; before you know it, the cutter has already slowed down and is furrowing your nail. It’s better in this case to add speed. And we don’t use the cutter in the same place - the nail will heat up and it will burn.
To shoot to the end or not to shoot?
Manicure specialists advocate complete removal every manicure, but I don’t see the need for this if the base stands without peeling. This is my opinion and you may not agree with it :) By leaving a thin base, you protect the nail from the cutter and periodic scratching with a file. If you didn’t remove the old coating completely cleanly, or left pieces of gel polish or pits somewhere, you can smooth the surface with a 120/240 nail file.
How do you know when to stop?
We look into the end and control the thickness of the coating. Also, if you were sawing and sawing and saw a hole with a white edge - this is the junction of layers of material and a natural nail, you can no longer saw there.
The next stage is opening the pocket in which the cutter will work. A pusher or an orange stick will help us with this. If you open the pocket poorly, the cutter will trip over this gluing, won’t clean anything and, in the worst case, will injure you. We don’t press the stick into the nail, but rather slide it in small steps, peeling off the cuticle. If it is difficult to move away, we look for a place where it is not stuck so much (usually the sinuses) and start pushing from there. And also, in my experience, if you moisten your hands with water, the cuticle pushes easier, although I have heard from experts that there is no difference.
Before moving on to processing with a cutter, let’s consider such a concept as “ subcuticular space or pocket”
“, which... is different in size for everyone. Its size determines how close the matrix (nail root) is and how far you can get the cutter under the cuticle. If the pocket is small or doesn’t exist at all, you can’t get under the cuticle with a cutter! It is not difficult to determine how close this very matrix is, we look at the holes; the larger they are, the closer the matrix. For example, most people have almost no subcuticular pocket on their thumbs.
Which cutter to choose for stripping the pterygium?
There is a form of cutters that is considered generally accepted and universal - this is a flame and a medium-diameter candle. For beginners, it is advisable to take a cutter with a round nose (not round), namely a soft one. Red abrasive is for very thin and delicate skin, blue is for average skin.
For those who are just starting to get acquainted with the device, manufacturers have come up with a safe cutter. It has no abrasive and is almost impossible for it to cut through a nail. I have it in a slightly incorrect modification, as it has a sharp nose. But in general I highly recommend taking a closer look at them.
The abrasive should not be clogged or bald; a clogged/bald cutter is the best friend of cuts, because it really wants to be pressed in order to clean better. And pressure is the main taboo in hardware technology. To practice pressing, there is an exercise on the grainy side of the buff. We imitate the movements of a cutter on the nail on it and do not allow a cut.
Future cut
The working area of the cutter is the cheek. That is, we don’t poke the nose of the cutter into the nail, not with the belly, but place the cheek parallel to the nail plate.
Correct position of the cutter in relation to the nail
To clean off the pterygium, we conditionally divide the nail in half, move the cutter in short strokes from the center of the nail diagonally (although some masters do it evenly, but I was taught this way in the courses) towards the sinus and side ridge. It is very important not to blindly saw everything in your path, but to see the goal, and then only saw it. To do this, pull the roller as far as possible.
The number of revolutions depends on the type of skin and the diameter of the cutter. The smaller the diameter, the lower the speed. For a standard flame, revolutions from 15 to 20 thousand are used.
The most problematic area is the sinuses. For me they were always not cleaned and were ground with a milling cutter until I realized my mistake. I also went into the sinus with a cutter diagonally, but this is incorrect, because the nail is curved in this place! When entering the sinus, the cutter must be turned clockwise to fill the space between the nail and the skin. Unfortunately, this point was not explained to me even during manicure courses.
We also clean the side rollers using a diagonal. “Inserting” a cutter into the sinus threatens to thin the side wall of the nail.
There are many techniques for grinding side rollers, I will show you the most effective one, in my opinion. We move the cutter towards the cuticle along the roughness, then simply cut off the resulting crust.
Before cutting, the cuticle can be turned out. You can begin this step after cleaning the right side of the nail. I enter the sinus on the right, and then push the cutter towards the opposite sinus. We push not with one pass of the cutter, but in steps.
Before cutting, be sure to remove dust with water. You can also apply a little remover to check if we have cleaned everything and cut the cuticle along it. The cut with the remover is easier and cleaner.
Selection of cutting tools
This is a purely individual matter, some like scissors, some like wire cutters. Personally, I prefer scissors from 18 to 23 mm. They should be sharp so as not to tear the cuticle and have thin blades that will easily fit under the cuticle.
To better see the cut line, the skin can be moistened with water.
My scissors from Silver star
Before and after
The final stage is polishing the cuticle.
Many craftsmen manage to grind with diamond cutters, but this type of processing is not suitable for my skin. I have a silicone carbide cone and a corundum ball in my arsenal, they are my favorite.
Grinding is carried out by driving the nozzle along the surface of the cuticle and rollers at low speeds (up to 10 thousand).
Long-suffering coated finger:
And the whole hand:
What about the working hand?
I am right-handed and only use the device on my left hand. The right one sits firmly on the classics, since my non-working hand has not yet reached such a level of professionalism.
I don’t know if anyone read this post to the end, but I will be glad if someone finds it useful ❤️
Increase
Trim step-by-step manicure at home
The procedure includes the following steps:
- steaming - hold your hand for at least 5 minutes in warm water (you can add salt and cedar or grapefruit essential oil);
- remove one finger from the water (usually start with the little finger), dry with a towel;
- push back the cuticle with an orange stick or metal spatula;
- remove the pterygium with a hatchet - this is a layer of the cuticle that fuses with the plate, its presence negatively affects the appearance of the hands;
- Using tweezers, carefully cut off the keratinized skin (it is white when steamed).
This procedure is performed with each finger. This is what a hygienic manicure looks like step by step at home. If it is not intended to apply a decorative layer to the plate, then you can complete the procedure by rubbing in oil.
Tools and materials for manicure at home, choosing the shape of nails
List of tools for trim manicure:
- Manicure scissors
- Cuticle tweezers
- Orange sticks
- Nail bath
- Pusher
- File size 180-240 grit
- Salt
- Soap
- Towel
- Antiseptic
Try to purchase quality tools. Tweezers and clippers for ingrown toenails are required. They can be used to trim thick nails or use for pedicures. The difference between these nippers is the sharpening angle of the blades.
Tools for classic manicure
Tools for hardware manicure:
- Router handle
- Cutters: flame, needle, diamond and corundum ball
- File
- Antiseptic
Notches on cutters, explanation
Do not buy cheap cuticle cuticle nippers and forks. They do not cut it well and can cause a cut. Nippers for key rings are not suitable for manicure, they have a poor sharpening, they do not cut the edges, but tear them. Choose the right nail shape. A diagram with forms is presented below.
Nail shapes
Please note that the choice of cutter must correspond to the manipulation. Large cutters with green and black markings should not be used to process natural nails. The blue corn cutter leaves cuts on natural nails. Therefore, for cuticle processing and hardware manicure, choose corundum cutters or diamond-coated cutters. At the final stage, you can treat it with a silicone polisher.
Unedged manicure for beginners at home
For such a procedure, a bath is not required, and the set of tools is significantly different. If you have not purchased a manicure machine, but want to perform a similar procedure at home, you can purchase:
- a file for unedged manicure - has a square shape and small dimensions, intended for moving the roller;
- ceramic hoof - helps to remove dead skin from the base of the nail without damaging the plate.
You will also need a keratolytic agent to soften the cuticle. After its influence, keratinized areas of skin are easily removed, fingers become smooth and well-groomed. The products differ in composition - some are made based on alkali, others are made on acid. The former require a longer time for the desired effect, the latter act faster, but require caution.
High-quality removers allow you to perform a simple manicure at home, and at the same time take care of your skin, as they have a rich composition that includes moisturizing and nourishing ingredients.
Gel polish application technique
1. Remove the natural gloss from nails using a buff. This will improve the adhesion of the material to the natural nail.
2. Degrease the nails with a lint-free cloth soaked in a special liquid.
3. Apply a thin layer of primer to the entire surface of the nail plate and wait until it dries in the air (about 1 minute).
4. Apply the base and dry in a UV (LED) lamp for 30-60 seconds.
5. If necessary, use a second layer of base to level the nail plate. It is convenient to use a rubber base for this. Before drying it, the nail must be turned over for literally 30 seconds to self-level.
6. Apply the color coating in two thin layers. Dry each layer in a lamp for 30-60 seconds. If the gel polish is highly pigmented, applies evenly and without bald spots, you can apply it in one layer.
7. The desired design can be made on top of the color coating.
8. We cover the nails with a finishing topcoat and also polymerize it in a lamp.
9. Remove the sticky layer, if there is one on your top.
10. Apply nourishing oil to the cuticle area and rub it in with massaging movements.
Gel polish manicure is ready. After the procedure, prolonged contact with water is not recommended for two to three hours. Correction should be carried out when the coating becomes unpresentable or the nail grows too long. The most optimal time is three weeks.
How to do the right manicure at home - European unedged
You need to start with a hygiene procedure; you can apply the keratolytic only to clean hands. Follow the instructions of the product, keep exactly as much as the manufacturer recommends. When this time has passed, treat the cuticle with a stick - move it aside and sand the roller. Using a ceramic hoof, carefully remove the keratinized epidermis from the base of the nail plate.
The manicure continues step by step at home by treating the rollers with a special file, which will remove the layer of dead cells and make the fingers soft and smooth. Next, wash your hands and treat the plates with a degreasing agent, such as alcohol. This will provide a stronger grip.
How to properly do a manicure at home - choose a shape
Nail modeling is an important part of the procedure that helps to create a perfect look. The shape of the nails can visually lengthen the fingers and make the hands look more graceful and aristocratic. Conversely, insufficient attention to the free edge of the nail will reduce all efforts to “no”. Even if you managed to get a perfect gel manicure at home, but your nails are of different lengths and have an ugly shape, you won’t be able to pleasantly impress others. Rather, the opposite effect will follow.
It is important to trim all nails, focusing on the shortest ones - usually they belong to the index and middle fingers.
More details about the form:
- Oval is a universal option that suits both thin and wide fingers; it can be done on short and long nails, while they remain strong.
- The circle is a shape for short nails and is characterized by particular strength, which is why practical women choose it. This shape is most advantageous for those with large hands and massive fingers. Round nails will make your hands harmonious and neat.
- Square - this shape is more vulnerable to chipping, so it requires care in everyday life; it is not suitable for those with short, wide fingers. But if the cuticle has a square shape, then it is recommended to perform a manicure with varnish at home so that the protruding plate follows the outline of the base.
- Almond (pointed shape) - looks good on thin hands and long fingers. And on large ones it looks completely unharmonious, as it emphasizes flaws. This option cannot be considered durable, so strong mechanical impact should be avoided.
How to do your own manicure at home so that the polish fits perfectly and lasts longer
- Be sure to use a base coat and a top coat.
- Before applying the first layer, the plate should be sanded and degreased.
- You should never apply more than 3 layers of colored varnish.
- Do not shake the bottle of nail polish; sudden movements may cause bubbles to form. It is recommended for both beginners and experienced people to carefully roll a bottle of polish before using a manicure at home.
- Take your time - give each layer enough time to dry. Use devices and means for faster drying.
- Do a manicure at home step by step after completing household chores so that the decorative layer remains undamaged as in the photo; it will take at least 12 hours to gain high strength.
- To ensure that your evening shellac manicure at home retains its pristine smoothness, generously apply a special oil before going to bed. It will carefully care for the skin and protect the decorative layer from deformation.
- To achieve a long-lasting gel manicure at home, use quality products that are stored properly (in a cool, dark place).
- Do not use quick-drying analogues. Their secret is a large proportion of solvent in the composition. They dry quickly and peel just as quickly. In addition, such products are more harmful to the nail plate and can change the appearance of nails for the worse over time.
- Do not blow dry, as hot air changes the structure of the product, making it less durable. If you want to speed up the process of step-by-step manicure at home, we advise both beginners and experienced people to use the cold air option.
Stage 4. Nail design
Now you can move on to the designs. Since we make the coating at home and are not professionals, it would be logical to use the simplest designs. But don't be discouraged, they are very stylish and impressive!
For example:
- slider designs;
- stickers;
- foil.
Slider design Ibdi_Nails AIR FOIL 13
Stickers F660 Leaves gold
Foil for casting gold 4 cm*1 m RocheNail
In addition to the designs themselves, we may need a top coat to secure the sliders or glue for the foil.
Top for designs Factor Lianail 10 ml
Glue for foil ARTEX 15 ml
Now let's look at how to make each of the proposed design options.
Slider designs:
- Those nails on which we will attach slider designs do not need to be covered with topcoat;
- Soak the pre-cut slider design in water, dry it on a napkin, then separate the film from the backing;
- Apply the base coat. We do not dry it;
- We plant the design on an undried base coat. In order not to damage the slider design when smoothing it over the nail, you can use a brush or silicone hoof;
- Dry the base coat together with the slider design in a lamp;
- Apply a topcoat to secure the sliders. Dry it in a lamp.
Stickers:
- If they are used, it is necessary to remove the sticky layer from the coating;
- Remove the sticker from the backing, cut it if necessary, and apply it to the nail plate;
- Cover with topcoat and dry in a lamp.
Foil:
- If you decide to use foil as a design, then after applying gel polish you do not need to use a top coat;
- We firmly press the matte side of the foil to the sticky layer of dried gel polish and sharply tear it off. Dry in a lamp;
- We apply the top coat and dry it again in the lamp.
TIP: if the stickiness of the gel polish is not enough and the foil does not print, then you should use a special glue for foil.
It's very easy to use. Remove the sticky layer from the colored coating, apply glue to the surface of the nail and wait until it becomes transparent. This means the glue has dried. Then we print the foil as described above, secure it with topcoat and dry it.
How to do a gel manicure at home
The popularity of gel polish is explained by practicality. This coating remains undamaged for 2 weeks. And today, even beginners can perform gel manicure at home, because everything necessary for the procedure is available in many specialized stores:
- lamp (LED or UV) - with its help, the varnish is dried very quickly, it will take a few minutes to dry completely;
- primer - a product that degreases the nail and promotes reliable fixation of the coating;
- base - levels the plate, making it perfectly smooth;
- color gel - the range of shades is very wide, you can choose a tone to suit every taste;
- top - final coating that guarantees resistance to mechanical stress;
- buff - a special flexible file that levels the plate and also serves to remove the decorative layer;
- nail polish remover - you will need a special product to work with gel; also purchase cotton pads and foil for easy removal of the coating.
No special training is required for manicure at home, just apply the listed products according to the instructions in the correct sequence and enjoy the look of well-groomed hands for a long time.
After a hygienic procedure - trimmed or untrimmed hardware manicure, which even beginners can handle at home with the help of this article, follow these steps:
- Apply a thin, even layer of primer;
- then use the base coat, drying it under the lamp (1 minute);
- Apply directly the gel polish of the selected color - like the previous layers, this one should be very thin;
- dry under the lamp (1-2 minutes);
- paint your nails with gel again, at this stage the layer can be made thicker, and put your hands under the lamp again (2-3 minutes);
- the finishing layer is top, it should also be dried, maybe a little longer (3-4 minutes).
A manicure with gel polish at home is ready - you can apply caring oil and enjoy the result.
How to paint your nails with regular polish
Source: @nailsbydannimoore
The base and top do not necessarily have to be from the same company. The base can be regular, which will protect the plate from the coloring pigment, or medicinal, which contains vitamins to strengthen it. The topcoat should be used as the last step, after waiting until the varnish has completely dried.
- Before applying the base coat, degrease your nails - wipe them with a cotton pad using nail polish remover. This will help remove natural oils or old coating residue that acts as a barrier to the first coat.
- Choose a comfortable position. You shouldn’t start painting with your hands suspended: put them on the table.
- Start covering your nails with a thin layer of base: put a small amount on a brush, moving from the cuticle to the free edge.
- For the first color layer, take an almost dry brush, that is, shake off as many excess drops as possible. The first layer should be thin. Swipe the brush in one motion from the cuticle to the free edge, then in the same motion along the sides. Don't worry if streaks or streaks form in the first layer. Let it dry for 5-10 minutes.
- For the second layer, take a little more decorative varnish, carefully stretch a drop from the cuticle to the free edge. Go back to the base and brush along the sides.
- If you can’t paint your nails evenly in the cuticle area, use a very thin brush.
In the second layer, you should already pay attention to the glimpses, since the coating should be uniform. If they are visible somewhere, take a small drop again and paint them over. Even distribution of varnish should be done quickly so that the coating does not have time to dry.
Before applying top coat, wait 10 minutes until the varnish is completely dry. If it doesn't dry enough, a rough or hard top brush can damage the finish and cause it to smudge. Apply the top coat as evenly as the second coat of varnish.
