Types and varieties
Today there are a large number of techniques, among which the following are considered especially popular:
- Dry method. It does not require long and tedious pre-soaking. It is used in cases where there are only a few hours left before an important event, and your hands have not yet prepared for the special event. But there is one contraindication: all necessary manipulations can only be performed on healthy and flexible nails. After processing, brittle plates will begin to flake even more and lose their visual appeal.
- Brazilian spa manicure. In terms of its technology, it is comparable to the previous version, but here you will need to first apply a special cream to your hands and put on gloves with a greenhouse effect. This way you can greatly facilitate the process, because it is much easier to work with softened dermis. In addition, the risk of breakage is reduced to zero.
- Wet method. The preliminary stage will be water procedures - baths with oils and lotions.
- Hot nail art. The girls apply a special product to their nails, which is preheated to 50 degrees. An electric bath is very suitable for these purposes. Such products are sold at any hardware store. At the same time, the cuticle becomes soft without any gel. It can be easily removed using an orange stick.
- Hardware. Many modern fashionistas buy such devices for home use. Thanks to this miracle unit with attachments, they significantly save their money and time, which can be spent on any other purpose than paying for the work of a master.
Advice! Nail design specialists do not recommend applying varnish to freshly treated nails (we are talking about a hot and wet manicure). The fact is that the nail plates, absorbing moisture, expand, and after complete drying they return to their original shape. Accordingly, the applied coating begins to crack under pressure and loses its aesthetic appeal.
Transition rules
The transition from the classic to the unedged method takes quite a long time. If certain conditions are met, the transition period can be significantly eased:
- you need to give the cuticle time to recover; you cannot trim it;
- the skin around the nail plate should be treated with oil twice a day, nourishing and moisturizing the cuticle;
- products to slow down cuticle growth allow you to do unedged manicures less often.
Manicure tools must be well sharpened. A suitable remover is selected individually. You need to take care of your hands and nails more often, nourish and moisturize your skin.
Every woman can do an unedged manicure herself, since the procedure does not require any special skills.
Advantages and disadvantages
Unedged manicure has a large number of positive aspects. To prove this fact, we present several arguments:
- Absolute absence of mechanical impact. No sharp tools are used when processing the plates, which completely eliminates the risk of infection with infectious diseases.
- No contraindications. Most people experience a decrease in the body's immune abilities, wounds take a long time to heal, and sensitive skin reacts to even the simplest actions with irritation and inflammation. Unedged manicure is a real godsend for those who suffer from similar ailments.
- Long lasting effect. After treatment, the cuticle grows back very slowly, so your hands will look well-groomed for several weeks.
- No complicated processes. Even uninitiated beginners can grasp the basics of European marigold design. In addition, the procedure itself does not take much time.
Now let's talk about the disadvantages, which are much smaller than the advantages. But without them it is impossible to build a complete picture for yourself.
- Those with rough skin are better off avoiding such experiments, since removing the cuticle will most likely not have the desired result.
- If you are doing the procedure for the first time, you should understand that your hands will not look very attractive during the first weeks. This is because your skin is already accustomed to frequent trimming.
- In the first days, hangnails may appear in the corners of the nails.
- Some products used to soften the dermis may cause allergic reactions. Before use, you should carefully study the composition; perhaps you will find ingredients in the list that cause you individual intolerance.
If you often resort to extensions, an unedged manicure simply won’t suit you.
Advice! If you want your DIY nail art to last for a long time, you need to apply a base, then apply varnish and seal the result with a topcoat.
How often should you do an unedged manicure?
Skin regeneration occurs differently in each person. It depends on the general condition of the body. However, in any case, an unedged manicure needs to be done less often than a regular manicure - about once every 2 weeks. For delicate skin, treatment once a month will be sufficient. So just watch your hands. They themselves will tell you that it’s time to repeat the procedure.
However, in any case, an unedged manicure needs to be done less often than a regular manicure - about once every 2 weeks.
Advice! To prevent your skin from becoming stained after removing bright nail polish, apply any cream, preferably a rich cream, to your hands before the procedure.
Choosing the right product
All products designed to soften rough dermis are called the sonorous foreign word “removers”. They are available in the form of various pencils, gels and liquids. The main components here are potassium or sodium hydroxide. They help dead particles to quickly break down.
Manufacturers add plant extracts that contain alpha-hydroxy acids to more gentle mixtures. They do not affect the deep layers of the skin, but only remove glue-like substances.
It's no secret that various forums constantly appear on the Internet where women leave their comments and reviews about this or that product. After analyzing the opinions posted, we can conclude that the most popular are mixtures like El Corazon and Shillac. According to customers, the keratinized cuticle after applying these miracle elixirs is destroyed in a matter of minutes and can be easily removed with an orange stick. In addition, they create a protective film that prevents the appearance of microcracks, which has a beneficial effect on the rate of burr formation.
Advice! The liquids described above are classified as potent, so they can only be applied once a week.
It should also be remembered that alkaline potassium and sodium hydroxides can cause dryness and an unpleasant feeling of tightness. Therefore, experts recommend not to ignore the manufacturers’ instructions, which indicate the optimal time for contact of substances with the skin of the hands. In addition, it is necessary to thoroughly rinse off the residue under running water.
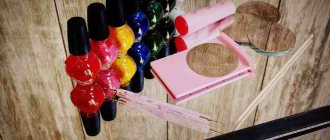
Preparing the tools
As noted earlier, an unedged manicure is a simple procedure, so even a novice nail technician can perform it. So, before completing the task, carefully place the following items on the table:
- Cream (moisturizing or nourishing);
- Nail scissors with rounded ends;
- Finger care oil;
- Pusher;
- Orange stick;
- Cuticle remover;
- Files with soft and hard abrasive;
- Buff;
- Biowax.
Necessary tools for the procedure
Let's proceed
When all the preparatory work has been done, it’s time to start implementing your plans:
- Remove old varnish.
- Choose a technique. If you prefer wet methods, apply a special cream to your fingers or put them in the bath for 20-30 minutes.
- Apply a special gel or liquid to the base of the nail plates. In most cases, a small drop on each finger is enough.
- Spread the liquid with an orange stick.
- After five minutes, remove any remaining product under running warm water.
- Cover the cuticles with nourishing oil.
- Using the same orange wood stick, push it to the very edge of the nail.
- Cut or file the skin around the plate with a diamond file.
- Now you should move on to sanding.
Advice! As mentioned earlier, do not try to apply decorative colored varnish immediately after treatment. Lubricate your hands with nourishing cream or a mixture of essential oils and rest a little. At this time, a large amount of useful substances will reach the surface.
Execution steps
Let us describe in detail and step by step how to perform an unedged manicure at home:
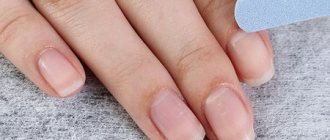
Depending on the technique chosen, the skin is steamed in water or cream or left dry
- Before the procedure, the old varnish must be removed.
- Depending on the technique chosen, the skin is steamed in water or cream or left dry.
- Cream or gel is distributed at the cuticle locations. A drop is enough for one nail.
- Now gently rub the product with an orange stick. It is more convenient to use the widest one (they are numbered by thickness).
- The time it needs to remain on the nails is always indicated on the packaging. As a rule, it is no more than 5 minutes.
- The gel or varnish is washed off with running water.
- Any nourishing oil is applied to the cuticle.
- With gentle movements of the orange stick, the cuticle moves to the very edge of the nail.
- The skin around the nails is cut or filed with a diamond file.
- All that remains is to file your nails and then polish them.
Any nourishing oil is applied to the cuticle. With gentle movements of an orange stick, the cuticle moves to the very edge of the nail
Advice! Do not apply nail polish immediately after treatment. First, lubricate them with any nourishing cream or essential oil and leave for a while. Let your nails be supported by useful substances.
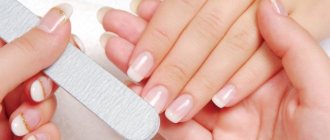
Polishing with buff
This stage is very important, since it is responsible for the aesthetic component of the manicure. After treatment, the fingers look well-groomed, and the nails acquire a natural shine. By the way, as a result of long-term use of gel polishes and tips for extensions, depressions, irregularities and grooves are formed on the surface. So, they are very easy to remove with the help of files with a soft abrasive.
What is a buff? Outwardly, it resembles a block rough on all sides. For the convenience of women, they are numbered as the size of the polishing particles increases.
- Polishing can also be done with special files. It should be softer than usual. The only drawback of most of them is the paper base. This is a serious contraindication, because such a product is very difficult to clean without water. To achieve the best result, you should carefully move along the plate from the center to its sides.
- After treatment, apply a layer of biowax, which contains silicone and paraffin, as well as a large amount of nutrients. Just pour a little product into the middle of the nail, and then rub it in with a buff.
- Biowax helps achieve perfect smoothness by plugging microcracks and depressions.
Polishing nails with a buff
Advice! By constantly performing the above manipulations, you improve blood circulation and accelerate growth. However, it is important not to overdo it here, because removing a thick layer can trigger reverse reactions.