Content
- What is ombre manicure on nails
- Design Benefits
- Disadvantages of ombre nails
- What techniques exist for creating ombre nails?
- Ombre manicure with brush
- Gradient with sponge
- How to do an ombre manicure: step-by-step instructions
- Gradient on nails with gel polish with a brush: step by step
- Step-by-step instructions for creating a gradient with gel polishes
- Expert opinion
[ads-pc-2][ads-mob-2]
If you like ombre manicure on your nails, then you are a girl with a bold character, ready to keep up with current fashion trends. Gradient design remains trendy in 2019, so your favorite manicure can decorate your fingers for a long time. The color palette of nails can be completely different: from bright flashy shades to neutral colors, which, by the way, can even be worn to work.
Ombre foam sponge
To bring this idea to life, you will need a regular foam sponge. It must be cut into small pieces so that it is convenient to take one at a time and apply it to the plate. Many girls complain that this method of creating a gradient greatly stains the skin around the nail. But we know how to make an ombre manicure with a sponge as clean as possible. To do this, before the procedure you need to cover the skin with tape.
Now let’s look at the step-by-step process of creating a degrade using a sponge:
Step 1
After preliminary preparation, apply one coat of a base color, such as white, to your nails. Dry your fingers in a lamp.
Step 2
Place spots of two selected varnishes on the foil, one of them is the base one, the one with which the plate was coated. Using a needle, mix the colors in the middle. Then thoroughly soak the sponge in the diluted varnishes, make 2 gradient prints on the foil so that there are no bubbles on the plate later.
Step 3
Apply the gel polish with quick, soft, frequent, springy movements.
Step 4
Having achieved the desired effect, all that remains is to cover the plate with top and remove the stickiness with a cleaner.
What is ombre manicure on nails
Manicure using the ombre or degrade technique remains one of the most popular trends in recent seasons. A fashionable gradient decorates not only nails; makeup is done in this style, hair is dyed, and clothes are made.
Gradient ombre manicure involves applying one or more colors of varnish with smooth transitions from light to more saturated shades. Usually two colors are used, but you can complicate the process and paint your nails in four shades, resulting in a unique and eye-catching design. If you apply more than four varnishes, the picture will turn out not entirely clear and inorganic.
“The color palette of nails can be completely different: from bright flashy shades to neutral colors, which, by the way, can even be worn to work.”
Lyudmila Ivanova
Which technique name is correct?
Both gradient and ombre inherently mean a transition from one color to another.
Bright style
Depending on how the change of tones is carried out, there are several variations of the fashion trend:
- on each nail there is a smooth flow of saturation or different shades, which is more correctly called ombre;
- a similar use of several tones, but with a clear boundary between them, which fits the definition of a gradient;
- painting each plate with a separate color, but the whole hand becomes a reflection of a specific range. The technique is also an example of a gradient.
Be that as it may, due to the use of different color schemes, the manicure acquires an individual signature, can be modified to suit any style, but at the same time does not burden itself with age or style restrictions. Both a young girl in a club and a business woman in the office can find their secret to perfect hands.
In a juicy style
In gray tones
Design Benefits
- Ombre manicure visually lengthens the nail plate by stretching from a less to a more saturated shade of varnish.
- Ideal for short nails.
- There are many options for creating a degrade that can be successfully combined with other designs. You can create a completely unique design for your nail plate that you won’t see on your friend.
- Using different shades of shellac, you can create a design for a holiday or everyday wear. Red, blue, and purple rich colors are suitable for a festive manicure. Calm nude shades will look harmonious with business-style clothes.
- The universal ombre manicure can be combined with other techniques, for example, French or moonlight manicure. The result is an unusual and original design.
- You can paint your nails at home or use the services of a nail artist. If you want to do an ombre manicure on your nails yourself, there is nothing complicated about it.
What does ombre go with?
- To create an ombre manicure, you have the opportunity to use any colors in any quantity, as well as implement a horizontal or vertical design.
- Ombre is a universal technique. This manicure is suitable for any age category, any clothing style and for any event in life. For example, if you use delicate pastel shades to create ombre, you will have no equal at a business meeting, but bright colors in ombre will be very relevant for a party or going out.
- The ombre color “stretch” will add zest when creating a moon or French manicure. French manicure is implemented in this way: from dark shades at the base we move to light shades at the tips, and moon manicure – from light shades at the base we move to the dark tips of the nails.
- Don’t forget to combine manicure with.
Disadvantages of ombre nails
- Painting your nails using a fashionable technique requires a lot of time and patience. In addition, when doing an ombre manicure, you need to apply the varnish extremely carefully, otherwise you will be dissatisfied with the result of the work.
- It is difficult to decide on the color scheme for an ombre manicure. On your nails, it’s better not to take risks and not choose colors yourself. Find a photo of the design you like and do a manicure based on it, or ask the master to repeat the effect from the picture.
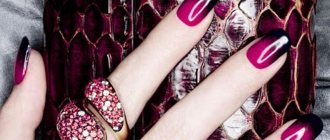
- When creating a complex manicure design: ombre plus rhinestones, for example, it is important not to overdo it. Nails with a gradual color transition, decorated with stones or stickers can look awkward, so be careful with your choice.
Nail design: ombre and degrade with special effects
Ombre nail design with gel polish is an independent nail art. At the same time, it can withstand decorative loads, that is, it can be combined with other designs. And if you find a reason to take your nails for a festive stroll, you can combine your favorite ombre with any current trend.
Let's talk about trends. It is not necessary to follow them, but if you want to keep up with the times and wave your arms with a fashionable manicure, you need to take into account popular opinion. Fortunately, it is not categorical and polyphonic.
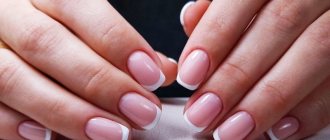
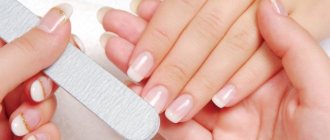
Ombre in French style
One of the options for a simple and elegant color tie is French ombre. The smooth transition of pink or beige to white looks gentle and unobtrusive. And, by the way, this particular ombre manicure will suit short nails favorably, optically lengthening them and creating the missing volume. You can experiment with colored tips or a lunar French theme by drawing a neat “smile” near the hole on a gradient substrate.
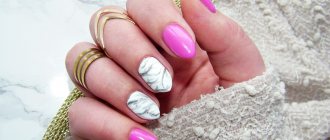
Ombre and glitters
No, rhinestones have not gone out of fashion and still decorate manicures for going out, but increasingly preference is given to finely dispersed shiny textures - for example, glitter. It also shines, is also spectacular, but does not create a strange “expensive-rich” feeling, as happens with rhinestones and stones. You can sprinkle a gradient with glitter or create one by stretching glitter on a colored background.
Ombre and rub in
An even more noble and discreet type of shiny manicure is with rubbing. You can decorate an ombre with rubbing pigment, or you can, as in the case of glitter, implement it. When creating an ombre by rubbing, pour a pigment of one color onto the free edge, and a pigment of a different color at the hole. Rub in with a sponge or brush and blend.
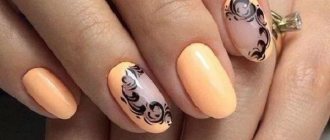
Ombre and stamping
The gradient design can be painted, but after painstaking stretching you want to rest. Thanks to the stamping technique, you can relax a little and at the same time decorate your nails with a spectacular design. Stamping is still relevant, and it cannot be otherwise. In an era of global time pressure, express designs do not go out of fashion.
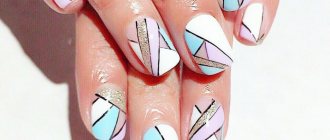
Ombre and geometry
Geometric motifs remain at the top of the popular list for the same reasons as stamping. The talent of an artist, as well as a lot of time, is not needed for design. Zigzag, stripes and other geometric elements, shapes and figures are drawn quickly, and in combination with ombre they look less categorical and give the nails the right amount of relaxation.
If you don’t have enough experience for art experiments, turn to professionals. They will do whatever you want, and you don’t waste time - watch every move so that you can do it exactly at home. Beautiful manicures!
What techniques exist for creating ombre nails?
There are three main techniques for applying varnish in ombre manicure:
- Using a sponge (sponge). To create a smooth transition, you can use a porous sponge to blend the colors. The varnish can be applied directly to it or transferred from the palette with a sponge.
- Using a brush. To do an ombre manicure on nails at home, you need to use a brush with natural bristles, since other tools will leave grooves when applying varnish to the nail plate.
- Using an airbrush device. A special device allows you to get perfect coverage, but purchasing it will not be cheap. Airbrushing on nails is done by professional nail technicians, so it’s better to do a gradient in a salon.
Nail art options
There are several types of ombre manicure. Some of them create a stunning look on the nails by smoothly transitioning shades of the same color, others play on contrasting tones, and others create an ombre effect on fingers painted in a similar palette. Ombre with sparkles looks interesting and original. To achieve this, shiny elements are applied to the top of the nail using a sponge on the base color. All types of nail art with gradient transitions have one thing in common - they look amazingly beautiful on the hands. Let's look at the features of popular ombre techniques.
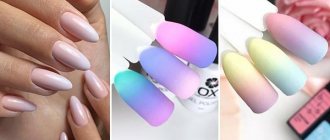
Smooth transition from light to dark
Color transitions using ombre technology can be carried out within one shade (from light to dark). This type of nail art can be horizontal (it is performed with a transition of colors from the base of the nail to its tip) or vertical (shades change into each other from left to right). For a gradient flow of colors, use either 1 varnish, which is diluted to obtain less bright shades, or 2 nail coloring products of a similar tone. For this type of manicure, scarlet and soft pink, light green and pale light green, light blue and turquoise are suitable.
If you want to make a gradient transition in one palette, then prepare several varnishes that are similar in color. Next you need to go through several steps:
- First, do a hygienic manicure and lubricate your hands with cream.
- Then paint the nail plate with a transparent base.
- On a sheet of foil, paint stripes with different varnishes that are similar in palette.
- Next, take a sponge and dip it in this blank of different shades and apply it to the nail, patting it lightly.
- To design each finger, you need to draw new stripes on the foil, dip the sponge in paint and reprint them onto the nail plate.
- After painting all your nails, let them dry thoroughly, and then use a cotton swab with acetone to remove excess paint.
- The last stage of this design will be to apply clear varnish to the entire surface.
Two-color contrast transition
To perform an ombre manicure, 2 contrasting colors can be used. To make a two-color contrasting transition, first choose two well-combined varnishes. So, lilac and yellow, dark blue and orange, light green and scarlet look harmonious together:
- The first stage of this type of gradient begins with completely painting the nails in one of the selected shades, which, according to your idea, will cover the tips.
- When the first layer dries, the sponge is moistened with a different color and applied from the base to the middle of the nail plate.
- Next, use a brush with nail polish remover to stretch the second layer to the length of the nail.
- When everything is dry, cover the surface of the nail plate with a hardener.
A two-color contrasting manicure looks elegant and bright, so it’s suitable for both everyday life and creating a festive look.
- Watermelon smoothie
- Types of false hair and methods of attaching them
- How to find a person by phone number
Transition of colors on each finger
The gradient transition of colors on each finger looks unusual, but harmonious, provided that the shades are chosen correctly. The technology of this nail art is that each finger of the hand is painted with a color specially selected for it, which differs only by a few tones from the shade of the others. In this case, a more saturated color is applied to the thumb, and the most delicate and light tone is applied to the little finger. The border between shade transitions is not clear, but blurred.
So, a gradient manicure made using 5 shades of beige (from brown to light nude) will look impressive on your hand. It will be easy to make a smooth gradient of colors on each finger at home. To perform this ombre technique, you need to choose one polish with a rich color. Let's take a quick look at how to make the transition from red to soft pink on your hand:
- First, degrease and cover all nail plates with base. Then paint the thumb red.
- Then pour a little scarlet varnish into a glass plate and add 1-2 drops of white thinner to it, stir. Use the resulting mixture to paint your index finger.
- Next, again add 1-2 drops of white thinner to the already lightened red varnish and paint the next finger with it. We do this every time before applying paint to the next nail. By adding a light product, we lighten the red tint, turning it first into a less saturated scarlet, and then into a soft pink.
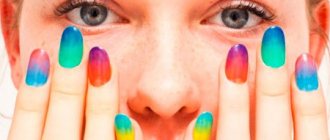
Multicolor Gradient
Rainbow nail art looks bright and impressive. To create this type of ombre, up to 5 colors can be used. The shades of varnishes are chosen either in the same or in a contrasting palette. To create a multi-color gradient, you will need a sponge on which strips of different varnishes will be applied one above the other, and then a sponge with paints will be applied to the nail and the overlay of shades will be adjusted using it. Detailed instructions for performing a rainbow manicure are given below.
Ombre manicure with brush
The following types of brushes are used to apply varnish using the degrade technique:
- With flat pile – suitable for horizontal gradients. Choose brushes with short and dense bristles. Place the strips of varnish very close to each other, and then brush the brush from bottom to top to blur the boundaries.
- With fan fibers – designed for vertical stretching of varnish shades. Such a brush should have long and soft bristles that look like a fan. Stretch vertical strips of varnish along the nail in the direction from one edge to the other.
How to choose an airbrush for manicure
Things to consider before purchasing a nail airbrush:
- Type. Simple devices control the flow of liquid, they are designed to treat one nail, and are suitable for teaching aerodesign. The dual-action airbrush regulates the flow of liquid and the amount of compressed air. It contains enough paint to paint all your nails. Thin lines are drawn with this tool.
- Equipment. Airbrushes are purchased complete with a compressor, so that you don’t have to look for a suitable one later. You will need special airbrush paints (varnishes), stencils, solvent and brushes, and cleaning fluid.
- Characteristics of the tool. Pay attention to the size of the nozzle and needle, container volume, type of tank, variable paint flow rate, external and internal spraying.
- Convenience. The noise of a working airbrush should not irritate, and its weight should not tire the hands of the master.
- Price. Inexpensive but high-quality models of Chinese airbrushes for nails - Fengda, Jas, TNT Air. The Japanese ones - Anest Iwata, and the Taiwanese ones - Sparmax (Aero-Pro) will cost more.
Before purchasing, check the pneumatic device for defects:
- switching the lever to adjust the jet should be smooth, without jerking;
- the substance (can be checked with water) is sprayed evenly, the applied stain is of the correct shape;
- After finishing work, there should be no paint left in the sprayer, which indicates the integrity of the nozzle and needle.
Gradient with sponge
Don't know how to work accurately with a brush? The ombre sponge technique is for you! This is a simple and effective way to create a fashionable manicure that any girl can master. There are two ways to apply varnish and do ombre:
- Using a palette. Apply shades of varnishes onto a previously prepared palette, immediately overlapping. Use a wooden stick to connect the borders. Touch the resulting blank with a porous sponge and transfer the pattern onto the nail.
- Immediately onto the sponge. Cover the surface of the sponge with the selected shades of varnish and imprint the product on the nail, moving the sponge along the nail plate to create an ombre effect.
“An ombre manicure visually lengthens the nail plate by stretching from a less to a more saturated shade of varnish.”
Lyudmila Ivanova
Which gel polish to choose for ombre
To perform a manicure using the color stretching technique, you do not need a large number of different varnishes. Even if there are only 2 types of varnish available, you can get several shades of different color intensities from them on the palette and make a chic nail.
The basis for a gradient manicure is traditionally varnishes of delicate pastel shades: pink, peach, beige and others.
In numerous photographs of ombre manicure, one can distinguish 2 ways of painting the end of the nail in terms of color:
- the first, when shades from the same set of colors are used as at the base of the nail plate, and
- the second, when the designer boldly experiments with other, brighter shades of the palette.
Using the second method, the master has the opportunity to implement a much larger number of design ideas. However, it should be remembered that in this case it is better to work with long nails, since the elongated nail plate allows you to effectively place up to 6 different colors.
On short nails, it is better to limit yourself to two shades of varnish, otherwise the manicure may smear and lose its unique beauty.
This season, the most popular is a gradient manicure made using gel polish, especially in combination with other interesting nail design techniques.
Using gel polish requires the presence of not only the usual tools for creating a manicure, but also some special devices, namely: an ultraviolet lamp, a nail polisher, a final coat and a solvent.
As for choosing gel polish by color, you can use up to 5-6 different shades, but the most popular is a gradient of 3 colors.
How to do an ombre manicure: step-by-step instructions
To make a luxurious gradient on your nails at home, prepare the following tools:
- basic white varnish;
- colored varnish in 2 or 4 shades (blue, purple or any other);
- porous sponge (sponge);
- water;
- scotch.
Step #1
Apply tape to the area around the nail for a neat manicure. The protective tape will help not to stain the skin when applying varnish using the ombre manicure technique. Instead of tape, you can use a special protective composition that forms a film that can be easily removed after completing the ombre manicure.
Step #2
Apply a base color to the nail in two or more layers - it can be either white, beige or clear varnish. Wait until the product is completely dry.
Step #3
Dip the sponge into the water and squeeze thoroughly. Cover the surface of the sponge with shades of colored varnish, ranging from light to dark.
Step #4
Using light touches, transfer the gradient from the sponge to the nail plate. Place the light shade next to the cuticle, the dark one at the tip of the nail. Repeat these steps on all nails. After you have coated the last nail with polish, start doing the ombre nail manicure with a second layer, starting with the first nail, which by this time is already dry. The more layered the application, the brighter and deeper the gradient will be.
Step #5
Remove the tape from the skin around the nail or, if you used a special protective compound, remove the film from your fingers.
Step #6
Secure the result with a finishing varnish. It can be a regular colorless shade, matte or glossy finish, or varnish with glitter.
Helpful tip: When creating an ombre manicure, instead of tape and a product to protect the skin around the nail from staining, you can use regular PVA glue or a face mask film. Such options are also quite effective, although unusual.
Types of gradient
There are several gradient designs. Fashionistas can choose any one, depending on the shape of their nails, mood and color preferences:
- Vertical coating. The color stretches smoothly from the left edge of the nail to the right or vice versa. This design visually lengthens the nail.
- Horizontal ombre. The transition from one color to another occurs from the base of the nail to its edge. Stretching from a dark shade to a light one looks advantageous.
- Geometric gradient. Lines or geometric shapes are applied to the nail. The drawing is done with a stretched color scheme.
- French ombre. Performed on the basis of a French manicure, the color turns into a transparent tone from the tip of the nail to the base.
- Original gradient. Each nail is coated with a shade one tone lighter. This transition can be done separately for each hand or on all ten fingers.
Gradient on nails with gel polish with a brush: step by step
Shellac provides a long-lasting coating that, if applied correctly, will last on your nails for more than two weeks. The technique of ombre manicure with gel polish is no different from the classic creation of a gradient with ordinary varnishes. The differences lie only in the features of coating the nail plate with shellac. If you have the necessary tools to create a long-lasting manicure, you can create a beautiful ombre nail design at home.
What you need to create a gradient manicure at home:
- tool for grinding and polishing the nail plate;
- degreasing liquid;
- primer;
- base coat product;
- finishing coating;
- two shades of ombre gel polish;
- liquid that removes the sticky layer;
- lamp for drying gel polish;
- gradient correction brush.
Required materials and tools
The main task when performing the degrade technique is to ensure the smoothest possible transition from one tone to another. To do this yourself, you can use improvised means, for example, a small piece of sponge, or you can purchase special brushes.
At the same time, some girls prefer to use a fan-shaped option, shading the colors with sweeping movements. Others claim that the best tool for ombre is a comb brush.
Each of the methods does not require large financial expenditures and can easily be tried at home.
Before you start designing your nails, you should prepare the following tools and materials:
- a set of matching manicure files;
- buff;
- nail scissors;
- palette of decorative shellac;
- base and top coat;
- a convenient brush, sponge or piece of sponge.
After this, you need to prepare the nail plate. To do this you should:
- Give your nails the desired shape.
- Treat your nails with a nail file.
- The surface of the plate must be sanded using a buff. Buff is a special file with a fine-grained surface. She carefully removes the top layer from the nail plate. This is necessary in order to make the surface rough. This way the decorative coating will be securely fixed on the nails.
- Remove cuticles and dead skin.
- The surface of the nails must be thoroughly degreased.
- Apply a base coat to each nail.
- To ensure maximum adhesion of shellac to the surface, each nail should be dried using an ultraviolet lamp.
Step-by-step instructions for creating a gradient with gel polishes
Step #1
Prepare the nail: shape it, remove the cuticle, sand it, apply a degreaser, then primer and base, dry the coating in a lamp.
Step #2
Apply base tone and dry under lamp.
Step #3
Apply gel polish with a brush like a rainbow, that is, from light to dark shade. Stretch the boundaries with the brush, trying to make the transition as smooth as possible. Do not forget to remove any remaining gel polish from the brush each time. Dry the nail in a lamp.
Step #4
Apply the shades in a second layer, again creating a neat gradient with the brush. Polarize the gel polish in a lamp.
Step #5
Gradient ombre manicure is ready! At the end, you need to cover your nails with a finishing compound, dry and remove the sticky layer. Enjoy beautiful ombre nails!
Tips: how to do ombre manicure on nails
To create a neat design on your nails, you need to know about some subtleties and secrets:
- Many people experience the appearance of bubbles when applying ombre nail polish with a sponge. To solve the problem, use a fine-grained sponge.
- You can reduce the number of bubbles if you first print a sponge with applied varnish on paper, and only then start working on your nails.
- The more layers of nail polish there are, the less noticeable the bubbles are.
- The transition of shades will be beautiful if you choose the right colors. Strongly bright shades are difficult to shade.
- To make the gradient more expressive, apply a base coat of white or the lightest pink color to your nails.
Mastering the technique of creating a gradient on your nails is not difficult. Try doing an ombre manicure on your nails - you will definitely succeed! Good luck!
How to do ombre with shellac
Shellac is often used to create a manicure with color stretching on the nails. Thanks to the durability of this varnish, the nail design acquires amazing stability and is preserved for a long time without any damage.
The use of shellac requires the availability of the necessary equipment for the procedure, namely:
- nail care kit;
- cotton swabs and liquid to remove excess nail polish;
- base varnish, several varnishes of different colors, finishing varnish;
- UV lamps for drying the coating;
- a special solution for degreasing the nail plate;
- sponge;
- toothpicks;
- a special liquid product for removing excess varnish.
Gradient manicure using shellac is performed in the same sequence as when working with gel polish.
Step by step it looks like this:
- polish the nails, remove the cuticle, straighten the nail plates with a nail file;
- degrease nails, apply base, let them dry;
- hold your nails in a UV lamp for 20 seconds;
- Apply a light-colored varnish to the bottom of the nail;
- Apply dark gel polish to the upper half of the nail;
- smooth out the color border using a brush;
- dry your nails in a UV lamp for about 3 minutes;
- fix the varnish with a topcoat and dry the nails again in a UV lamp for 3-4 minutes.
Experts do not recommend applying too thick layers of shellac, as this can ruin the entire effect of the gradient design. At the end of the procedure, be sure to remove the top sticky layer of shellac using a special liquid product.