Mirror manicure is not a new thing, some will say. Any good salon will be able to give you a high-quality manicure with a mirror effect, the only pity is that this service is quite expensive. Yes, “metallic nails” of a wide variety of shades have conquered women’s hearts. In addition, this particular manicure is recognized as the most fashionable this fall. We will not tell you about “metallic film or stickers” for nails, because this is an outdated way of creating such a manicure. The editors of WomanSovetnik have prepared for you a fascinating review of a new product on the beauty market - pigment for mirror manicure. After all, with it you can really create a high-quality, beautiful and neat mirror manicure at home.
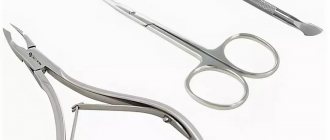
Looking for the right product on the shelves of beauty stores
Mirror pigment for nails is a very finely ground aluminum powder. It fits perfectly (or rather, rubs in) into a gel or varnish base.
The result - a mirror effect - works well even for girls who have never done professional manicure before.
It is important to understand that ordinary sparkles, even the smallest ones, cannot replace chrome pigment for nails. So if you want to buy just such a mirror powder, look for one of the following names on jars of products:
- Chrome Powder;
- Glitter Powder;
- Mirror Powder;
- Chrome Pigment and the like.
These are not brand names - they are variations of the product name.
Pearl rub
This manicure will look impressive not only on long, but also on short nails. You can apply pigment not only to gel polish, but also to regular polish. Thanks to its delicate shine, this type of nail design has won millions of fans. The nail coating can be done in one color or applied shades that are similar in color, but contrasting.
The undeniable advantages of this method are:
- ease of working with pigment;
- the base can be any color, but it is better to stick to the most natural shades.
Nail rub
It is better to apply the pigment with your fingers, gradually and gently rubbing it into the nail plate. In some cases, it is recommended to work with a special applicator that comes with the rub. Don't forget to seal the result with a top coat that has a glossy finish.
Mirror rubbing - fashionable manicure
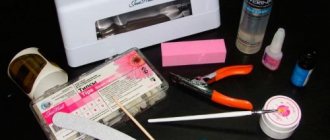
What do you need for a mirror manicure?
Before you get a metallic manicure, make sure you have all the necessary materials in your arsenal.
We will need:
- Mirror rubbing. We choose the color of mirror powder that you like most, because the main thing is that you like the result;
- Gel polish or gel without a sticky layer, not necessarily single-phase. If you only have gels with a sticky layer, you will also need to take a sticky layer remover;
- Top. There are also different tops for artificial and natural nails. We take the one that you need;
- Gel for extensions. We use it only if we plan to extend a little nail before doing a mirror manicure.
It is important to know: different gel polishes and gels are used for natural and artificial nails. You should not replace one with another if you want your manicure to last as long as possible.
How to achieve a mirror shine on your nails?
For a flawless nail art result in the form of a shiny manicure, you will have to apply maximum patience, a little skill, and most importantly, choose the right way to create it.
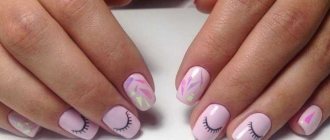
Multi-colored mirror manicure
How can you make glitter on your nails?
- Using a special varnish
- Using mirrored, multi-colored foil
- Applying nail rub
- Using pigments
- Also, a beautiful mirror nail design is obtained by using glitter powder
Glitter for mirror design of nail plates
Is the color of the coating onto which the powder will be rubbed important?
If you have already held a jar of mirror powder in your hands, then you have probably noticed that its pigment is translucent, that is, the shade of the coating into which the chrome powder will be rubbed will also affect the result. If your goal is gold or silver nails, choose a black coating, but if you take a colored coating, you will get a completely different result - a mirror-colored coating with a gold, silver or pearlescent tint (depending on the color of the mirror powder).
Watch the video, choose the color of the coating
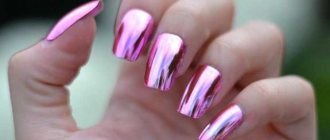
Beautiful manicure – nail design ideas with gold and silver “mirror” rub. Photo
The use of varnish and rub with shades of gold and silver to give nails a “mirror” shine has become a classic; such a manicure is universal and luxurious. Precious metals are great for implementing any design idea, be it a mirror, holography, or sparkles.
A manicure made with gold rub will add a special chic to any look and make it festive and noble. An even more sophisticated appearance is obtained in combination with beautiful rings on the fingers.
Rubbing with silver pigment is good because it has enormous transformation potential. On a dark base, silver gives the effect of wet asphalt or graphite, which is great for a strict look.
When used as a base with light gel polish, you get a delicate mirror, appropriate both for everyday use and for special occasions.
Holography with silver rub is perfect for the atmosphere of the New Year's holiday.
Black manicure with rubbing
Black polish color is the most popular for creating “mirror” nails. Any type of rub looks impressive on it - its shine is enhanced by a dark base.
Black color is a classic, it is universal and looks good on any length and shape of nails. And you can wear it, as they say, “both in the feast and in the world,” except that it is not entirely appropriate for a wedding dress.
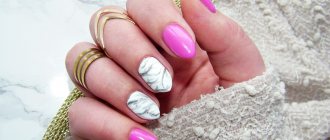
White, beige manicure with rubbing
White or beige manicure looks very elegant and delicate, and can be used anywhere.
He is extremely beautiful and at the same time unobtrusive. Light nails of any length and shape are good for a work environment, for a first date, or for going out.
Red, burgundy, pink manicure with rubbing
To create a bright feminine look, the colors of the red palette are perfect. At any time of the year they will create a festive atmosphere. Just remember that on very long nails you should choose more muted shades; with bright colors the manicure will look too provocative.
If you apply the Maybug rub on a burgundy gel polish, then such a manicure will attract attention with its brightness and boldness.
Silver pollen on a red background makes the image sophisticated, and gold pollen makes it look completely luxurious. A gradient manicure with a transition from burgundy to red will emphasize the passion of its owner.
Blue, light blue, purple manicure with rubbing
Manicures with rubbing in blue and all its shades are rapidly gaining popularity. This palette transforms nails of any shape and length, visually making the fingers thinner and more beautiful.
Cool tones emphasize the independence and self-sufficiency of the owner of the manicure. Nail designs in blue glitter are suitable for women who are determined and love to lead.
French manicure (“French”) with rubbing
"French" gives a huge selection of combinations with rubbing. You can make your nails mirrored and your smile classic white. A smile made with white or colored rubbing looks even more interesting. French manicure with a gradient looks very original.
Delicate “French” with silver or gold is suitable even for a wedding.
Manicure with rubbing and rhinestones
For evening dresses, a manicure with rubbing and rhinestones is perfect. Its owner will shine and become simply the queen of the ball.
You can decorate both the mirror nails themselves and alternate the shine of the rub and rhinestones on different fingers.
Manicure with rub and glitter
This option looks like a win-win for any holiday, especially if all nails are covered with rubbish and accent nails are covered with glitter. It is no less interesting to sprinkle large particles on the edges of the nail when it itself is mirrored. It is better to choose dark nail polish.
Mirror nail polish with glitter
The color of the glitter should be from the same color palette as the rub, otherwise the result may turn out too flashy (exceptions: gold and silver).
Wedding manicure with rubbing
Pearl rub is perfect for a wedding manicure. The soft, sophisticated look of the nails will emphasize the tenderness and innocence of the bride.
Rubbing on a French manicure is no less relevant for such a special occasion as a wedding. You can either fill the nail itself, or, conversely, highlight only the smile. It would also be appropriate to focus attention with glitter on one nail.
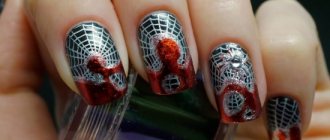
Manicure with a pattern (design) and rubbing – “Northern Lights”, “Chafer Beetle”, “Mermaid”, “Broken Glass”, “Metallic”
Manicure with rubbing in “Northern Lights” and “Chafer bug” can be confused. The first is characterized by its shimmer, and the “Chafer bug” provides beautiful shimmer. The “Northern Lights” is dominated by a cool range of colors – blue, indigo, emerald, violet. This manicure is best suited for the cold season.
The shades in the “May Bug” are almost the same, because ideally, nails in this design should really resemble the shell of this insect. However, many people rub the pigment into the red base and get excellent results.
The rub itself looks pale, beige-gray, so it is the base varnish that decides everything: depending on its color, you can get a rich and dark or, conversely, muted manicure.
The “Mermaid” rub, in addition to the main green color, contains sparkles of different shades, which provides an imitation of the scales on a mermaid’s tail. These nails with pearlescent tints look very beautiful. A more interesting design is obtained if you use the rub not on all fingers, but on accent nails.
The “Broken Glass” manicure design is extremely attractive. The effect of multi-colored fragments makes the nails bright and eye-catching. One of the main advantages of this manicure is its uniqueness, because it is impossible to arrange the fragments in the same way.
To get “Metallic”, you need to take both a rub and a base varnish with a metallic effect. Then the shine will be as bright as possible, you will get an almost real smooth metal surface.
Mirror nail polish and rubbing give a truly amazing effect. The manicure turns out elegant, interesting and always original.
However, since it greatly attracts attention, one should not forget that the hands must always be in perfect condition - well-groomed, with smooth skin, without burrs.
Mirror manicure with glitter step by step
- 1On the prepared nail (your own or an extended one), treated with a base (to even out the surface of the nail plate as much as possible), apply the appropriate gel or gel polish. If we choose gel polish: apply it in a thin layer, very carefully and quickly begin to dry so that it does not have time to spread. If the layer is too thick, it will not be possible to avoid the appearance of wrinkles on the surface during drying.
- 2In order for the mirror pigment to lay down as smoothly as possible, you should dry your nails much longer under the lamp;
- 3On perfectly dried nails, covered with gel polish or varnish, begin to rub in chrome powder. This can be done with either a fingertip or an eyeshadow applicator, a silicone brush, or even a foundation sponge.
- 4As soon as the entire nail looks like a mirror, use a soft fluffy brush to brush off all excess glitter. You need to clean especially carefully near the cuticle so that there are no unnecessary sparkles left there, which with their lonely uneven shine can ruin the entire manicure, because our goal is a shine like metal, and not a manicure with sparkles.
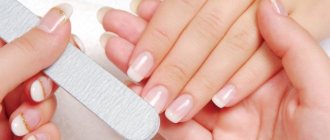
- 5To make your manicure look neater, you should file the edge of your nail; this will help smooth out the edge and remove excess glitter.
- 6We begin to apply the top. If you see that there are several sparkles on the top brush, carefully remove them so as not to spoil the manicure.
- 7Before the final drying of the manicure under the lamp, once again carefully inspect the surface of each nail for the presence of single loose sparkles. If there are any, carefully pick them up with a regular thin brush for drawing patterns on the nails.
- 8Dry your nails under a lamp. If the pigment on the nail is uneven, you can apply another layer of rub-in directly onto the topcoat and then “seal” the manicure again with another layer of topcoat.
Tip: Before each use of gel polish, we recommend shaking the bottle and mixing the liquid with a brush, since pigment settling occurs in most bottles. If we choose a gel, we apply a thicker layer, evenly distributing the mass over the nail plate.
Secret: rubbing will give a mirror shine only if you don't rub your nail too much. All movements should be smooth so that the already fixed sparkles do not move or roll down. It is most convenient to rub it on the nail plate with your fingertips, but along the edges and near the cuticle, a small sponge or a fairly hard brush can effectively apply mirror powder.
Secret: if you don’t want glitter to get into the jar with the top (after all, you can also use it for other manicures that should not have glitter), we recommend that you first select the required amount of top, place it on the palette, and then draw from there onto the brush and “seal” the nail with it.
Tips for use
When rubbing is used to obtain a mirror surface, the application is almost the same, but still has the difference that the product must be rubbed not into the sticky coating, but into the top or non-sticky varnish. Particularly small particles of powder will be perfectly fixed on a smooth surface, creating the necessary mirror effect. Afterwards, the nails are covered with a finishing transparent varnish.
The fact that the rub has some transparency should be taken into account when choosing the color of the base varnish.
The rub can be applied not only to the colored base, but also to the top coat. In this case, the manicure will be somewhat lighter, but will not lose its shine. How to use grout should be decided immediately when thinking about your nail design.
When doing a manicure with gel polish, you need to carefully ensure that it is applied perfectly evenly. There should be no lumps or bubbles in the layer. If you do a manicure with rubbing, if they are present, it will look extremely unattractive. To prevent unevenness, use a self-leveling agent.
You should not rub with great force when adding new glitter, as this will lead to the top layer being torn off by the resulting new one. Rub the pigment in with light pressure so that the glitter sticks to the coating, but does not peel off from it.
On a dark layer of the base varnish, the pigment can show through, and therefore it is recommended to apply the rub in 2 layers. This will prevent the appearance of bald spots on the nail plates.
After applying the rub, before applying the top coat, it is necessary to process the nail plate at the cut site with a file. This will remove any glitter that has fallen onto the end and will allow the nail plate to be fully sealed when applying the top coat.
Stylists recommend using chrome manicure only for holidays, when shine is appropriate and necessary. In everyday life, a chrome manicure looks somewhat strange and tasteless. If you still want to add a shiny surface to your nails, then use the rub to create a chrome effect on only 1-2 nails - no more. In this case, they will turn out to be a piquant accent in the image, and not its main component, which does not look good with a business suit.
Create a shiny effect using foil
Some girls resort to another nail design technique, giving their nails a shining effect using special colored foil and ready-made strips. A manicure with a mirror effect using strips is done as follows:
- Prepare your nails: remove the cuticle, length, make the desired shape.
- Degrease the nail plate, apply a base, remove the protective film from the sticker and apply with the sticky side.
- Gently smooth the surface of the nail with your fingertips, trim off the excess protruding edges of the foil.
- Using a spatula, distribute the strip evenly into all corners.
A design that imitates a mirror has a right to exist, but it has one drawback - film and foil last much less time than glitter. However, the effect is no worse, see for yourself.
Manicure with transfer foil
This type of mirror manicure is easy to perform and lasts on the nails for quite a long time. The base material is a thin layer of metallic paint on a film backing called transfer foil. During the process, the pigment is transferred to the nails, as a result they are covered with an even shiny surface. There are no brush marks on it. Transfer foil is available in various colors and is also available with designs.
Application details
Not all novice masters know how to apply mirror gel polish. It's simple. First you need to prepare your nail plates for your future manicure. Having given them the desired shape, the nails should be treated with a file and a buff. Moreover, the buff is used only to process the upper part of the plate. Using this device, the top fatty layer is carefully removed. Then the nails should be treated with a primer - a special liquid that will degrease the surface and remove small dust particles. After the primer has dried, the nails should be coated with a base compound that will ensure good adhesion of the shellac to the surface. Having completed the preliminary stage, you can proceed to applying mirror gel polish.
Advantages
The benefits of mirror manicure include:
- special appearance;
- durability;
- the ability to hide minor irregularities on the plates.
The rich shiny reflection visually makes the fingers and nails longer and the hands more graceful. Mirror nails are distinguished by their most uniform coating; no brush marks remain on them and reflective particles are invisible. This manicure can be done in any color, but it looks most beautiful with dark or pastel polishes.
Chrome manicure using gel polish
To perform a mirror manicure with gel polish, the top glossy layer must be removed and the nail plate sanded. Nails need to be degreased. Next, apply an acid-free primer, which must be allowed to dry. The base gel is distributed in a thin layer over the nails and their ends. Hands are placed in the lamp, the time is indicated in the instructions, then the dispersion is removed. Next, you need to cover your nails with mirror varnish, dry them in a lamp and wipe off the dispersion again. If you apply gel polish in a thick layer, then during drying it will become covered with bubbles and waves and become deformed. After this, the mirror nails are painted with a transparent finishing gel, polymerized in a lamp and the sticky layer is wiped off.
If you look at the photo, the mirror gel manicure looks simply amazing. Just don’t forget that before applying decorative varnish, you should always treat your nails with a base, without which even the best options will not hold up well.