Nail design is done by almost every girl who turns to a nail service specialist to create a manicure. However, there are not many options for unusual design of the nail plate, which is why many strive to create something unique by resorting to drawing.
A girl can paint on gel herself, since there are several simple options in the form of patterns or complete compositions, which are easy to recreate even in the absence of any artistic skill.
Features of gel polish
What is gel polish and how is it better than conventional decorative coatings? The explanation is in the name itself - the basis is two components:
Manicure with gel polish
- varnish , which covers and decorates the plate, creates a design on the nails;
- gel , which improves the adhesion of the substance to the surface and allows the manicure to look flawless for one to three weeks, does not allow any layer to chip.
It was this mix that allowed women to reduce the number of trips to the nail salon and refuse extensions , which destroy the nail plate. Despite the fact that working with gel polishes requires skills and special tools, many girls master the application technique at home.
The ability to create original designs on nails with gel polish opens up scope for personal creativity . The color palette of gel polish is wide, and to achieve a rich color it is often necessary to apply only one layer. Gel polish must be dried in a special lamp with UV rays.
Luxurious manicure
Unlike regular varnish, hybrid takes longer to apply . The procedure can take 30–40 minutes, especially if there are many layers and the nail will be further decorated. A single-color manicure with gel polish looks flawless, but some fashionistas consider this coating boring.
Applying the design requires time and careful drying of each layer so that the result lasts longer. The procedure is long but simple.
How and how to properly remove gel coating
To remove gel polish from nails, you need to use cotton pads, which must first be soaked in a special solution. They should be applied to the nail plates, wrapped in foil and fixed in this position for several minutes. Under the influence of the product, shellac softens, after which it will not be difficult to remove.
Do not try to peel off gel polish without first softening it. Of course, it comes off quite easily. However, as a result, unsightly irregularities may remain on the nails, which simply ruin their appearance.
Options for using gel polish in nail design
Gel polish can be used in the traditional way , that is, choose the desired color and apply it to your nails. The brighter the shade required, the more layers will need to be applied before finishing.
A French manicure can be achieved perfectly using gel polish if you cover the nail plate with a colorless or light base and apply white or colored gel polish to the regrown part of the nail.
The combination of matte and gloss is an original nail design idea. The main plate is coated with glossy gel polish, and the regrown part is given a matte effect. One shade or a combination of two colors is possible.
Technique based on the 3/2 principle , when three fingers are painted in one shade, and the remaining two are painted in a contrasting color. This manicure looks very beautiful, but it should fit the overall style of appearance.
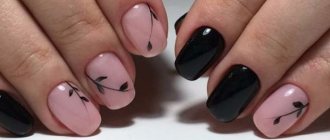
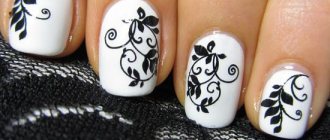
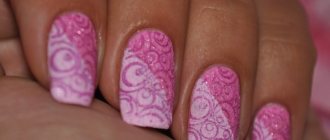
The use of stencils , stickers, and drawings on a plain background of gel polish is quite popular. Drawings make hands attractive and original.
Photos of fashion trends in gel polish manicure
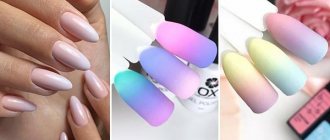
Using this product for nail design allows you to get many interesting and non-trivial solutions. This fact is confirmed by numerous photographs of nail art using gel polish. Using this coating, you can create a variety of patterns that will fit into any environment and help you achieve a sophisticated and original look.
Master class on nail design with gel polish at home
Tools and materials
To get a nail design result no worse than a salon design, you need to prepare the following tools and materials:
Tools and materials for manicure with gel polish
- manicure set for preparing the surface of the nail plate;
- UV lamp for drying;
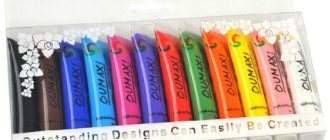
- tools for creating drawings (dots, needle, brushes, stencils - optional);
- degreaser or any alcohol solution;
- base (top coat) for gel polish, preferably from one manufacturer with a decorative coating;
- gel polish in the desired shades;
- finishing coating;
- consumables for drawings;
- nail polish remover with acetone.
Prepare a list of necessary tools in advance.
Applying gel polish to nails
- Wash your hands in warm water and soap and dry.
- Get a manicure - file your nails to the desired shape, slightly push back the cuticles.
- Degrease the plate with any alcohol composition.
- Apply a thin layer of top coat to the nail.
- Place in a lamp to dry for 120 seconds.
- Apply a thin layer of gel polish using a brush.
- Cure the coating in a lamp for 120 seconds.
- Apply finishing compound and dry.
Gel polish manicure process
When painting your nail, do not go beyond the boundaries of the plate. Some gel polishes are very liquid and flowing, keep this in mind when applying. If you want a bright manicure, apply the next layer. The number of layers depends on the desired color and saturation. Dry each layer in a lamp, and only then apply a new one.
This is a step-by-step instruction for a standard manicure using gel polish. Do you want to make designs on your nails with gel polish? Add a few steps to this sequence.
Popular manicure techniques: “abstraction”
An abstract nail design is perfect for beginners. It does not require special skills or a lot of time. This manicure can be romantic, extravagant, discreet, flashy. Everything will depend on the chosen colors and pattern.
For this manicure you will need:
- Varnish base.
- Several varnishes of different colors.
- Needle or toothpick.
- Cotton swab.
- Drying.
It's better to start with the simplest pattern. You will need two varnishes that are similar in color, for example, pink and lilac, white and blue, purple and red.
Before you do a spot manicure, you need to practice a little and choose the right tool.
Technique:
- The nail plate is covered with one of the varnishes.
- Without letting it dry, apply 3-4 dots in the center (depending on the length of the nail).
- Now these points are connected with a needle in one direction (from the edge to the hole, or vice versa). You can alternate. Make one finger from the edge, the second from the hole.
- The finished drawing is covered with a fixative.
There is another option where it is better to choose varnishes in contrasting shades. For example, black and red, black and white, yellow and green, blue and white.
The technique for doing it is as follows:
- Mentally draw a vertical line that divides the nail plate in half.
- Each half is coated with a different varnish.
- One color (black) should be applied to the ring finger.
- On the middle one - another (red).
- Three red dots are placed on the black half, and black dots on the red half.
- Now you need to draw a line with a needle from the middle of the point to the center of the nail, slightly lowering the line. And so on for all 6 points.
The fastest and easiest option would be:
- Cover the nail with base polish.
- Place dots of different sizes and colors in random order.
- Using a toothpick, connect all the dots (mix all the colors).
Tip: To make the abstract design look neat, all nails should be the same length.
Gel polish designs on nails
If a single-color palette for nail design seems boring, you can experiment like an artist, that is, make drawings on a single-color background. There are many options, but the specifics of application are not very different:
- Applying patterns with gel polish of other shades using special tools after the first layer has dried.
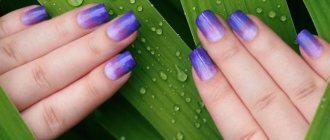
- Mixing two or more shades of wet gel polish.
Gel polish drawings
- The main tone is applied, usually bright or dark colors - red, black, blue, green and others. Dries in a lamp.
- The sticky layer is removed with a degreasing compound (cliner).
- Using a special brush or dots, a pattern is applied with a different color of gel polish and dried again.
- At the end of the process, the nail is coated with a finishing compound.
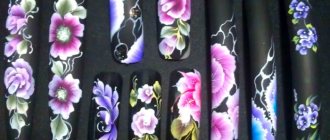
Try to make a bright Gzhel manicure by painting patterns with gel polish:
Mixing shades of gel polish on nails
- Painting with gel polish is carried out with a second layer, that is, after the base color has dried. It is not necessary to remove the stickiness.
- Using a thin brush, apply several colors of the hybrid in the form of stripes.
- We draw waves and cross lines at the junction of colors with a needle, brush or dots.
It turns out to be a variant of drawing on a wet layer. The technology of this design can be seen in videos shared by masters on the Internet.
If the gloss on your nails is tiring and you want to make your manicure matte, it is enough at the end of the procedure, when the finishing layer has been applied and dried, to lightly work with a soft sander from the edge of the nail to the cuticle. The shine will come off, but the gel polish designs on your nails will look amazing.
Mixed technique is very suitable for performing a gradient manicure, and how to do such a manicure - see the video tutorial:
Needle drawings
To make a beautiful design with a needle, you need to prepare gel polishes of several shades, needles with a ball at the end or for a sewing machine. Different needle sizes may be required. Large ones are convenient for drawing flower petals, and thin ones for drawing the smallest details.
First, you should completely prepare the nail for applying the design: apply the main tone and dry it completely so that the needle does not get stuck in it.
And then you can act in several ways, depending on what kind of drawing you want to make:
- Apply three multi-colored strips of gel polish side by side along the nail and use a needle to stretch the colors, performing zigzag movements across the nail.
- Place a drop of gel polish in the center of the nail, and another smaller drop on top. Using a needle, the colors are stretched from the center in the form of rays.
- Make several successive drops of gel polish, and then connect them with a needle.
Specifics of applying different patterns
Remember that to create different designs on your nails with gel polish, you need to know what to apply and with what. Some designs are created with special tools, and for some it is enough to mix shades correctly or apply a stencil, sparkles, or stones in a timely manner.
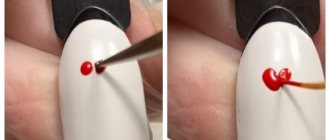
Using dots , you can apply dots of different diameters, which depend on the amount of varnish. Smooth lines can also be applied with this tool by drawing along a damp surface.
Many manicurists use a thin needle , which allows you to make thin lines and create more complex outlines, such as snowflakes or flowers.
Artistic brushes of different thicknesses help you create original designs on your nails. Monograms are formed with a brush or needle along the side of the plate or over the entire area. The monogram can be classic, reminiscent of a pattern on clothing. The usual intersection of stripes that form letters or symbols is possible.
Experienced manicurists create original three-dimensional designs with gel polish on nails, for example, a popular winter manicure - a sweater. This method requires perseverance and a lot of training. Volume is created using special powder of different shades.
Applying snakeskin is another way to draw the attention of others to your hands. You can create such a design using green, brown and marsh colored gel polish, dripping them gradually onto a colorless base. then you need to draw diagonal intersecting stripes along the nail. Place small dots or blots at their intersections. After drying, the effect of snake scales will appear.
The use of stencils expands the capabilities of beginners who have not yet gotten their hands on applying original designs on nails with gel polish. Just dry your nails together with the stencil and when applying the composition, do not get it on the stencil.
There are a lot of methods for nail design using a hybrid base. Fashion is constantly changing and offering new options. By learning the simplest drawings and understanding the specifics of designer manicure, any woman can become original.
Simple and easy for beginners
Of course, it is better to see various techniques “live” or at least on video. Even photos of successful projects, as well as tips from experienced craftsmen, will help a lot with this. Or you can use Impress hard nail polish. The best way to master the art of nail aesthetics is through special courses, and the simplest techniques can be presented as follows.
Step-by-step instructions for creating simple drawings:
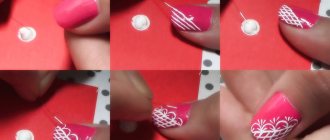
Applying flower petals
It’s very easy to apply flower petals with dots, then decorate them with additional decor, rhinestones and make the core a different color. The oblong petals are lengthened using brushes or a regular toothpick, which allows you to get attractive “commas”.
Spotted manicure
The now popular spotted manicure is also done using dots. You can use different colors, but don’t forget that each layer must be dried in a lamp.
Abstraction and pattern
A beautiful abstraction is obtained by combining several techniques. For example, you can apply several colored lines on the nail, and then use a toothpick or brush to “mix” the colors in a certain order. Additionally, you can use dots to create circles, which can also be mixed with the general background. You can find out about hand cream with urea in this article.
Drawing monograms on nails
Nail stencils will help you create even complex monograms with minimal artistic skills. Patterns and ornaments decorated on top with shiny varnish of a similar tone look very unusual.
Rainbow manicure
A rainbow manicure is obtained by using several tones of bright varnishes. To do this, several strips of colored varnish are applied to the base, placing them as close to each other as possible, but without mixing. Using a toothpick, draw one or more lines to help create the sunburst effect. The location of the “rays” can be varied, as well as the direction of the stripes.
How to draw the snake skin effect correctly - step by step
The snakeskin effect is also distinguished by its original design. To create the desired look you will need green varnishes. A special mesh is applied to the base coat, and then varnish is applied. After drying, the mesh is removed, leaving stains resembling snake skin on the nails. After removing the mesh, the design can be corrected with a thin brush. The second layer can be applied to the location of the mesh and be contrasting in tone. An easier way is to use a ready-made gel polish with a snakeskin effect. After application to the plate, it independently forms the required pattern.
Drawing on a manicure is always stylish and fresh. There can be a lot of options for implementation, especially since the modern beauty industry is constantly coming up with new techniques and materials for this. Our article will tell you how to master simple designs on nails. You can find out about cream for dry skin at the pharmacy in this material.
Original ideas for nail designs
Here are a few examples of current drawings made with gel polish, which can become the basis for your training.
Mixing shades
This design can be made by any novice craftswoman.
Manicure made with mixing gel polishes
- Prepare your nails according to the basic rules of manicure and apply the first layer of the main shade.
- Dry the surface under a lamp or in a chamber. If you need to make the shade brighter, repeat the procedure.
- Choose a second color. Apply it not to the entire plate, but, for example, only to the right side, filling part of the nail.
- Dry the gel polish. If you want to brighten the color, apply a second coat. At this time, you can make an original monogram using the wet gel using a brush or dots and adding additional color as desired.
- Finally, apply glass beads in any shape. Dry the coating and secure with a base coat.
Volumetric drawing in the form of flowers
The initial stages of a gel polish manicure are similar to the classic options.
Volume manicure
- After applying the main color, we begin to create a 3D design using acrylic powder, which is sold in specialized departments. Choose several shades to make the flowers bright.
- Using a thin brush, pick up a small ball of powder and gently place it on the nail plate.
- Wait until the gloss turns into a matte state. Start using your brush to form the petals of the flower. The shape of the petals can be round, elongated, with a torn edge. It depends on the flower: chamomile, lily, cornflower.
- Carefully continue to form the flower in a circle. To begin with, you can apply only one volumetric design in the center of the plate.
A voluminous manicure with flowers can be done without sculpting using velvet sand:
Classic jacket with monograms
Manicure with monograms
- We perform French manicure according to the standard scheme, choosing a white color or a bright shade as a base.
- Before the base coat, apply gel polish of a contrasting shade, for example, white on a transparent base, and draw a jacket in any shape: a classic crescent or original curls or dots. This design can be done on all nails or selectively.
There are many methods for nail design using gel polish. Fashion changes and offers new options. By learning simple drawings, you can diversify your manicure. Gel polish will strengthen the plate, and the manicure will last a long time.
More interesting articles:
Decoration
You can decorate a gel manicure in different ways. It all depends on the skills and imagination of the master. The easiest ways to give your nails a beautiful look are described below.
Rhinestones
The rhinestones are placed using tweezers onto the damp base coat. You need to gently press the jewelry onto the nail for 1-2 seconds.
And then dry it in a lamp. It is important to use only special rhinestones for nails so that they do not become deformed when drying.
Acrylic powder or sand
Using powder and sand, you can give the surface a rough appearance or, conversely, add shine. Depending on the desired effect, the base is applied on top of the jewelry or under it.
Sequins
Sequins come in small and large sizes. The smallest glitter looks like powder. It's called rubbing. They are applied with a brush onto a dried base. The result is an interesting mirror surface, which is additionally secured with a top coat. Large glitters are placed on the nail using tweezers.
Openwork
You can achieve an “openwork” effect in 3 ways. You can use tulle, stamping or sliders. Everything except the sliders must first be dried and then covered with the final layer.
Removing gel polish
Gel polish takes longer to remove than regular polish.
This procedure requires a special liquid, foil with sponges and 15 minutes:
- Sponges are soaked in nail polish remover and applied to the nails.
- Fingers are wrapped in foil to prevent the liquid from evaporating.
- After 15 minutes, remove the foil from 1 finger and remove the varnish with a wooden spatula.
It is important to remove the foil only before removing the varnish. If you remove it from all fingers at once, then while cleaning one, the rest of the varnish may harden.
Nail design is easy to learn. Beginners need to practice more and constantly improve their skills. Gradually, creating a beautiful manicure can grow from a hobby into a profitable business. The main thing is to follow all the rules for applying gel polish and choose high-quality material for the job.
Article design: Oleg Lozinsky
