- 65459
- 12-09-2019
- Author: Mysekret Team
- 0
Gel nail extension is the process of enlarging a natural nail using artificial materials (tips, forms). The procedure takes from an hour to two. You can do it in a salon, or you can do it yourself at home. We'll talk about how to properly grow nails in this article.
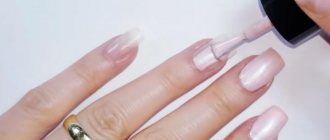
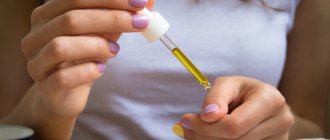
The CND Shellac set is what you need to cover your nail extensions with color.
Extended nails do not have to be covered with colored gel on top. Shells are often used for these purposes. There are more gel polishes and shades in the palette and it’s easier to work with.
What is nail extension
Modeling artificial nails is commonly called extensions.
Nail extensions involve keeping your own natural nails short and lengthening the free edge with a special material. In order for such nails to be strong and last until removal, in addition to the length, thickness is also taken into account. Artificial nails can be created to almost any length and shape. The classic and simplest shapes are almond, oval and square. The ballerina and stiletto are already more demanding of the master’s skills; not every master can make “arched almond”, “age”, “Gothic stiletto” and similar complex arched forms correctly. Mastering complex shapes requires a lot of practice and a perfect eye.
Extension technology step by step
The presented instructions tell you how to do nail extensions using classic (disposable) tips:
- Select templates of the required size and, for convenience, lay them out in front of you in the order of gluing.
- Glue the tips onto your nails using special glue and pressing the shape firmly, holding it from above and below.
- Using a tip cutter, cut off the excess length of the nails and file down the free edges.
- Apply camouflage on top, model the natural tubercle and shape of the nails, dry them under the lamp. To apply gel (or acrylic), use a special brush.
- Remove the sticky layer from the gel.
- On false nails, the camouflage lays flat, but you still need to trim it, removing thickness and length if necessary.
- Apply topcoat and colored varnish with decor as you wish.
Your manicure on tips is ready!
@seeyour.nails
What types of extensions exist?
List of the most common types of extensions in order of decreasing popularity:
Classic or salon nail modeling with gel on lower forms
This type is a basic, basic skill. It allows you to simulate strong nails of such shapes as: square, oval, almond, ballerina and stiletto. The lower templates do not limit the master in architecture and, if cut correctly, allow the template to fit any finger. It is this type of extension that this article is devoted to.
Acrylic (polygel) nail extension on top forms
Here the shape and architecture of the artificial nail is determined by the upper form into which the material is laid out. This template is placed on top of the nail and polymerized in a lamp, after which it is filed. It seems simple, but has a lot of pitfalls. In most cases it cannot replace the first type.
Acrylic or acrygel on the lower forms
Similar to the first, but the length and shape are laid out using a different material. Acrylic is losing popularity because it causes allergies, dizziness and vascular reactions in many artists and clients. It dries in the air, requires powerful local exhaust, ventilation of the room and is not suitable for use in most salons. Acrygel is laid out using the same technique as acrylic, but is harmless and polymerizes in ultraviolet light. However, it is more convenient to use when working with upper forms.
Gel on tips and liquid tips
Almost went into oblivion, because it is inferior in wearability to previous types of modeling.
Arched modeling on lower forms
A very interesting, creative type of extension, which is also called modeling of creative forms. It is distinguished by its longer length and pronounced arched shape. Not every girl will be able to wear such nails every day and not every master will be able to do them well.
Competitive modeling on lower forms
Competition nails must be perfect, but they are too fragile for everyday wear. Therefore, they exist as a separate direction to demonstrate the capabilities of the master.
Basic glossary of terms that a beginner encounters when building
While studying the instructions for gel nail extensions and watching videos on the same topic to learn the nuances, you will come across several popular terms. Let's look at and explain each of them.
Base, camouflage and finishing gel. Modeling systems can be one, two or three component. Depending on this, they include one or more types of gel.
- The basic one will be required for the first stage - forming the base of the artificial nail. It is translucent and has the densest texture of the three.
- Camouflage has a delicate pink color and a less dense texture. It is needed at the stage of form modeling and architecture creation.
- The finishing one is the lightest in texture and serves to final consolidate the already obtained extension result.
Acid and acid-free primer is a must-have product for extensions.
The primer lifts the nail scales, degreases it and ensures stable adhesion to the gel. For extensions with a gel system, it is recommended to use an acid-free primer, and with acrylic – an acidic one.
The product also prevents the development of fungus and pathogenic microflora between the natural surface and the artificial material.
Tips and forms for extensions. The lower forms are thick stencil stickers with markings, which are sold in rolls of 500 or more pieces. Disposable. They are placed and secured under the natural nail to form a free edge using gel and a brush.
The top forms are reusable. Gel is applied to them, then pressed onto the nail and dried in a lamp. Next, the form is removed and the architecture is already formed on the created substrate using a camouflage agent.
Tips are plastic overlays that are used as a base or substrate for extended nails. Sold in sets of different shapes and sizes. They are selected for each nail, then attached with gel to the free edge and after that, the further architecture of the plate is built on their basis.
What is required for salon (classic) gel nail modeling
Gel
There is a huge selection of different modeling gels on the market. We have a separate article about how gel differs from gel polish and why they are not interchangeable. In short, the gel should be hard after polymerization, hold its length and shape well, not sag, spring, or bend.
Gels are:
- single-phase or three-phase. In a three-phase system, the base, sculpting (builder) gel and finish are produced separately. In a single-phase system, the gel can be used both as a base and for laying out length and volume, and does not require covering with a finish. Which, in general, is very doubtful. Typically, a single-phase gel is used as the second phase, and gel polish is used as the base and top.
- liquid, medium and thick. Liquid: base and top. Medium and medium-thick, as a rule, produce sculptural or single-phase gels, since they need to be laid out at a certain thickness. Jelly gels and soufflé gels are produced in thick and very thick forms. Such materials are needed for laid-out French and when it is required that the material does not spread.
- transparent, camouflage and colored. Transparent: base and top. Camouflage - constructing and single-phase gels. Colored ones are needed for laid out jackets and various designs.
If you need to buy the most versatile material, then pay attention to single-phase camouflage gels for strengthening and modeling nails. They can be combined with gel polish bases and tops without fear of material conflict.
Lower forms
They are a template that is placed under the nail and on which the material is laid out. In classic extensions, the template is placed according to the growth of the nail, that is, straight. It is allowed to place the template slightly upward - 3-5 degrees, but we strongly do not recommend placing the template with a downward slope. Not on every hand it is possible to place the shape correctly with a pounce, so below in the article there is a paragraph on how to correctly cut them and adjust them to the individual characteristics of the hands.
The lower forms can be:
- paper, laminated or plastic. Paper templates are soft, wrinkle and tear easily. To confidently lay out “squares” on them, you should use metal seals that are glued to the back side and prevent the form from sticking together. Then these seals are bent to the shape of a tube, matched to the width of the nail. Laminated templates are already tougher, and the most dense and expensive are plastic ones.
- universal or for special final shape. There are templates that, when installed, are folded as best as possible for a specific nail shape: on some it is convenient to model a stiletto, and on others a square.
- with and without markings for cutting. Often the markup is not very helpful, but for beginners it can serve as a hint.
Brush
The brush for laying out the gel should be dense and well-filled. You can choose a square or oval synthetic brush from size 4 to 6. The larger the nails and the greater the length, the larger the drop of gel you will have to pick up with a brush. Therefore, select the size of the brush according to the volume of extension. Also, some masters use a thin striper brush to level the gel and more conveniently distribute it in the cuticle area.
Files
Files for modeling sawdust should be selected based on the amount of work. Beginners often need to cut off a lot of excess length and thickness; a coarse abrasive of 100-150 grit is suitable for this. To file the surface in the nail cavity and bring the architecture to perfection, choose a softer abrasive of 180-240 grit. This will reduce the risk of injuring the skin and cutting through excess.
In most cases, a boat or crescent shaped file is suitable. You can also use a regular oval one. If you are not working with very dense, filing-heavy materials, then you most likely will not need a special file for artificial nails. You can use the same file that you used to file the free edge of the natural nail plate.
*Equipment and tools for manicure
In order for artificial nails to last for a long time without detachments on the cuticle side, it is necessary to perform a manicure or at least thoroughly clean the pterygium.
- Manicure should be done dry, without soaking your nails in water. Gel, like acrylic, is afraid of water, and detachments can occur. Because of this, they used to even do manicures and nail extensions on different days. You can choose a hardware, combined, file or European manicure. If you are just starting to learn extensions, then it is better to split the manicure into two stages: first, clean the pterygium and push back the cuticle, then perform nail extensions and surface filing, and then cut off the cuticle and sand the rollers . This will help avoid sawing through the skin around it.
- You can clean the pterygium with a sharp pusher, a corundum block or a 180 grit buff. The more carefully you do this, the less sagging in your work and detachments in your socks.
What manicure is suitable for a schoolgirl?
A beautiful children's manicure is not only about nails decorated with intricate designs and all kinds of rhinestones. Well-groomed and neat hands of a teenage girl with a minimal amount of varnish and decor look very stylish and elegant. Let's look at several types of school manicure that would be appropriate within the walls of an educational institution.
Manicure with transparent coating
Ideal for girls of primary school age. Enhance the natural beauty of healthy, strong nails with clear polish. How to properly paint a little schoolgirl’s nails at home? Everything is very simple. Applying varnish to a child’s nail plate is carried out in the same way as for an adult.
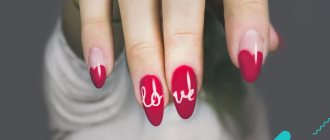
First you need to cover your nails with a base and then with decorative varnish. All this can be secured with a quick-drying coating. Marigolds like those in the photo below will not attract undue attention and will not be a reason for a reprimand from the teacher, even in a school with a very strict dress code.
Add a little glitter to the surface of the nail, and the schoolgirl’s manicure will shine with new colors. Such beautiful nails will not contradict the strict requirements of the school and will be an excellent addition to the discreet image of a diligent student. Look how a shiny manicure looks in the photo.
Manicure in pastel colors
For a girl, light varnish colors are best, which will only emphasize her elegance and fragility. On short nails, a monochromatic coating of pink, white, peach and beige shades looks very cute and touching. Restraint and moderate severity are always in fashion. In addition, plain pastel nail art is a popular trend in 2014, so you can create not only a simple, but also a stylish manicure.
French manicure
An excellent choice for high school girls. The world-famous classic nail design is universal; it would also be appropriate for going to school. French manicure harmonizes perfectly with any outfit, including a school uniform, and testifies to the refined taste of its owner.
Provided that school rules allow the application of all kinds of designs and patterns on the nails, you can complement the decor with a French manicure or highlight the smile line not with white, but with some other pastel shade. A classic or decorated jacket can be made at home, spending a little time and effort on it. You can see examples of elegant design in the photo.
Newspaper manicure
Newspaper print is a very unusual solution for decorating children's hands. Numbers, letters, mathematical formulas or musical notes printed on the nails are fully consistent with the school theme. Such an original design will arouse admiration from your classmates and even interest from some teachers, who will probably give you a pleasant compliment. If you like stylish nail art, be sure to read the article on how to do a newspaper manicure. You can see some cool designs in the photo.
Manicure with drawings
A manicure for attending school should be discreet and discreet. If the school administration allows the use of patterns when decorating the nails of their students, then you can give free rein to your imagination and experiment. However, do not forget that an educational institution is not a place for bright, flashy nails with provocative pictures. It is best if it is a standard jacket with a small pattern or a design in the form of a flower, butterfly or bow on a background of light or transparent varnish.
As a modest manicure for an exemplary student, you can decorate not all nails, but only one, focusing attention on it with the help of a simple ornament. A picture drawn with a thin brush or special stamping will reflect the character of a teenage girl, distinguishing her from her peers
Interesting manicure ideas for school, from which you can choose the appropriate option for yourself, are presented in the photo.
You can learn how to make a beautiful and simple manicure at home using varnish and a regular ballpoint pen by watching the interesting video lesson that we have prepared for you. Dear girls, stick to the golden mean in your manicure, try to avoid flashy colors and designs, but do not forget about your sense of your own style. Always be the most beautiful!
Algorithm for classic nail extensions on lower forms
1. Preparation of the nail plate. At this stage you should:
- if there is gel polish, then it needs to be removed, leaving 5% of the base on the NP;
- reduce the length of natural nails to 0.5 mm;
- give your nails an oval shape so that there are no corners - they will interfere with the installation of templates;
- clean the pterygium or perform a manicure;
- degrease the nail plate and remove dust.
2. Application of primer and base:
- An acid-free primer is applied only to the bare nail, to the area closer to the cuticle and along the side walls, since it is from this side that detachments can occur. The primer dries in air for 30-120 seconds;
- The base is applied with a thin rubbing layer and polymerized in a lamp. Choose the most sticky base and do not level it.
These two stages are performed on all 10 fingers. Next, before the sawdust stage, we perform steps 3-5 sequentially on each nail separately.
3. Pattern substitution:
- the template is tried on and cut for each nail separately, so that it stands straight, and not down or up;
- the template should become a continuation of the nail, clearly hitting the growth points;
- the template should curl into an arch and be the same width as a nail, and not like a finger;
- the ears of the template should not be glued together on top of the finger, they remain on the sides;
- the template is glued to the finger, not the nail, so the length is not necessary at all.
4. Lay out the backing:
- the substrate is a thin layer of single-phase or sculptural gel, with which we, as it were, outline the length and shape we need - so that we can cut less later;
- there is no need to make it too thick, a thickness of 0.5 mm is enough;
- The backing is laid out overlapping the tip of the nail by 2 mm. There is no need to apply it to the entire natural nail;
- carefully inspect and coat the growth points with gel so as not to get cracks there later
- Having checked for compliance with all of the above, we polymerize the substrate in a UV lamp for 60 seconds.
5. Lay out the architecture
1. Having collected a small amount of sculptural or single-phase gel onto a brush, first carefully and carefully apply it to the natural nail plate and substrate, as if we were painting them with colored gel polish. Avoid getting the gel into the sinuses and skin;
2. Do not polymerize, take an additional large drop of material onto the brush and place it on the nail. Place the brush in the upper third, let the gel drip onto the nail and distribute the material using pushing and pulling movements. We push it towards the cuticle, sinuses, then slowly pull it towards the center and towards the tip. You can do this with zigzag movements. It is extremely important to lightly touch the gel with the brush, but not touch the nail. Imagine that you want to spread a thick layer of whipped cream on a cake: if you press, it will squeeze out from the sides under the spoon. And here it’s the same - we move the brush without pressure, smoothly and slowly.
3. Lay out the volume so that the maximum thickness is in the middle of the nail bed, the minimum thickness is at the tip, at the cuticle and on the sides. You can turn your hand down to let gravity help collect the droplet in the middle of the nail bed, pulling the gel away from the edges. When we have achieved the correct architecture, we polymerize it in a lamp.
4. You can add or remove excess material before polymerization. If after polymerization it is discovered that the apex has shifted or the gel has sagged, then this stage should be repeated, and the excess thickness on the sides should then be removed by sawing.
6. Having laid out all 10 nails, remove the stickiness and move on to filing artificial nails.
When filing, we need to give the nails the same length and shape, and remove all unnecessary bulges and irregularities. If you see that a hole is clearly visible somewhere, then on the contrary, you need to add material into it according to the scheme in point 5. The lack of material cannot be corrected with sawdust.
7. Carefully remove dust and finish the manicure if necessary.
8. Cover with gel polish and complete the design.
There is no need to apply a base or primer to artificial nails. You can immediately apply colored gel polish onto the gel. If you did your nail extensions with camouflage gel, you can immediately cover them with a top coat. We polymerize the materials in the lamp for the time specified by the manufacturer.
9. Apply oil and cream at the very end of the procedure.
Required materials and tools
Extension on forms takes place in three enlarged stages: preparing your own nail plate, working with gel, design.
Tools for the initial stage can be found in the arsenal of any girl who is accustomed to doing her own manicure:
- disinfectant for hands and tools;
- file for natural nails (240 grit);
- pusher, wire cutters, scissors, orange stick;
- anti-dust brush.
Materials and tools for working with gel must be purchased at a professional store:
- buff coated 120 grit;
- nail degreaser;
- paper towels;
- cardboard or plastic forms;
- brushes for working with gel (artificial bristles);
- primer (bond, ultrabond), base (if a two-phase gel is used);
- modeling gel;
- UV lamp with a power of 36 W or more (preferably with a timer);
- liquid remover (or rubbing alcohol) and lint-free wipes;
- file for artificial nails (100 and 180 grit);
- top gel (finish coating).
These materials are enough to create classic transparent gel nails with a varnish finish.
For design, French manicure, color coating you will additionally need:
- gel camouflage;
- colored gels (especially white);
- acrylic paints;
- brushes for painting on nails;
- mica, foil, pigments, broths and other design elements.
How to file extended nails correctly
There is a special scheme for cutting artificial nails quickly. Following it will allow you not to return to previous stages and not waste time.
- Length. First, give the nails the same length. We make the ring and index fingers exactly the same, the middle one - if it is a little wider - we make it a little longer, up to 1mm, and the little finger a little shorter - up to 1mm. The thumb can be made longer up to 2mm. At this stage it is good to give an approximate shape, especially if you had to significantly shorten some nails. With each shortening, the thickness increases. If it’s a square, then we cut out a square; if it’s an almond, then we’ll narrow it down right away, and bring out the peaks at the end.
- We file along the surface of the cuticle and nail sinus area. There are often small irregularities in the gel; our task is to smooth them out. To avoid damaging the skin, use an overhead grip and cover the client's cuticles and side ridges with your own fingers.
- We cut the longitudinal arch . We remove all protruding elements if they are not in the middle of the nail bed. In the middle of the nail bed we should have a bulge - the highest point of the longitudinal arch - the apex. We cut everything else down, using a file over the entire surface. The file is pressed to the nail from above, the movements are wide. We move in a fast and frequent zigzag from the cuticle to the tip of the nail until the tip is less than 1mm in thickness. At the cuticle we tilt the file away from ourselves, and below the apex we tilt it towards ourselves. This is necessary so as not to cut off the apex.
- We perform similar manipulations on the left . We need to reduce the thickness of the side walls to 0.5mm, no more than 1mm. In order for the file to be on top of the nail and for us to file quickly and conveniently, we turn our hand to its side. We make circular movements with the file, imagining that we are filing a tube.
- We remove the thickness on the right to 0.5 mm in the same way, but by turning the hand to the other side.
- We lighten the side walls of the nail, narrow its free edge without losing strength. To do this, place the file vertically and, using chopping movements from top to bottom, cut off excess material from the sides of the extension.
- We finalize the final shape of the modeled nails.
Difficulties in placing lower forms for extensions and how to solve them
Difficulties arise due to the fact that the templates have a universal slot for a finger, semicircular and of a certain width. While the smile line, its depth and the position of the growth points can vary from finger to finger. On one finger there will not be enough slot depth for the template to fit into the ingrowth points. On the other, on the contrary, it will cover the growth points, but will lag behind in the center of the nail. In addition, the side bolsters will prevent the template from curling into an arch, which will prevent it from curling under the nail. If this is neglected, then artificial nails will turn out flat and brittle, since without an arch they lose the ability to absorb loads.
When cutting a template, you can use a pen to mark the width for which you want to make a recess and the places where you are going to make cuts.
So, how to cut out shapes:
- The nail bed and hyponychium are elongated, protrude far forward and the template does not reach the ingrowth points. This most often occurs on the index fingers and in those women who have been wearing gel polish or extensions for many years without a break. In this case, you need to cut the template in depth to the distance that is not enough for the template to contact the growth points, measuring the recess also along the width of the nail.
- The nail bed and hyponychium are straight and the template is oval, so it lags in the center. This is more common on the ring fingers and in those women who have not worn gel polish or extensions for a long time. In this case, you should straighten the template slot, from a round one to make it more square, the width of the nail.
- The side rollers are too convex, stretching the form and preventing it from curling into an arch along the width of the natural nail. Cuts made from the growth points perpendicular to the template slot will help here. They need to be made at least 7mm deep, covering the entire thickness of the roller. They work on the same principle as a slit on a long skirt: the slit reveals the template, the rollers are placed in the slit, and the template is folded under the nail.
Why is correction needed and when to do it?
This procedure is necessary to restore the aesthetic appearance of nails or repair them (eliminate cracks or detachments). Even if you handle your manicure with care, after about 3 weeks you will still need to make corrections. The reason is that over time, the border between regrown nails and the extended material becomes noticeable.
What are the dangers of untimely correction? Moisture getting into the gap between the detachment of the gel material and the nail plate provokes the development of a fungal infection.
Step-by-step description of nail correction
- Treatment with an antiseptic and removal of decorative coating . To remove varnish, use products that do not contain acetone.
- Filing the gel layer . Typically, a milling cutter or a file with a high degree of abrasiveness is used for this. After filing, the nail plates are cleaned with a special brush to remove any resulting dust.
- Nail shape correction . This stage also includes the treatment of the cuticle: the master pushes it back with a pusher, treats it with a remover and then carefully removes it. The master also corrects the shape of the nails with a file or a milling cutter.
- Treatment with a degreaser . This ensures high-quality adhesion of the gel coating to the nail plate and avoids material detachments.
- Application of modeling gel . Each layer is dried in an ultraviolet lamp. When the gel coating is completely dry, the master removes the sticky coating on the surface of the nails with a lint-free cloth.
- Decorative design . For the base, gel polish or regular coating is used. If the client wishes, the master will decorate the nails with paintings, stickers or decorative stones.
- Applying nourishing oil to cuticles.
On average, the procedure takes 1.5-3 hours.
Mistakes when modeling nails
Too lazy to cut out the template
So he stood up with a downward angle. Accordingly, the nails turned out to be pecking downward claws. Such nails will experience overload, fall off faster and may take your natural nails with them. At a minimum, they will cause microcracks in the natural nail plate with the risk of developing mold or mildew.
Or the template stands more or less straight, but there are no cuts, which is why the nails turn out flat. If you build up a square shape, it will be visually very ugly, and the corners of such nails will break very quickly. Almond and oval are a little more tolerant of the lack of an arch. Even salon nail extensions should be a little “arched”.
They did not check and did not apply gel to the growth points
Soon chips and cracks will appear in this area, and the artificial nail may break off completely. The 2mm zone above and below the growth points is stressful, that is, it experiences maximum loads. If not covered with material, it will be mobile, the thin layer of gel will quickly chip.
Placed the apex in the middle of the nail, not the nail bed
As the nail grows, the entire mass of the gel will move towards the free edge. After just 2 weeks it will weigh more than the part of the gel that adheres to the natural nail plate. This will create additional leverage, the extension will fall off faster and there is a very high risk of injuring natural nails. It is not uncommon for cracks to bleed and the introduction of fungus due to a drop in local immunity.
Advice from professionals
Scroll:
- Use materials purchased from professional stores.
- Work carefully with the natural nail, without scratching or thinning it.
- Accurately follow the extension technology for specific materials.
- Study the recommendations of the cosmetics manufacturer regarding application thickness, polymerization time and wearing characteristics.
- Remember that too thick a layer of gel can lead to detachment of the artificial nail and damage to the natural one.
- Do not bite, cut or pry artificial nails with sharp objects.
- Give the nail plate a rest once every 3-4 months.
It is possible to extend nails with gel on forms using step-by-step instructions at home, however, if you doubt the quality of the materials used or the accuracy of the technology used, it is better to visit a professional and “peep” the secrets of his work. It is wiser to do the initial extensions in a salon, and deal with regular corrections yourself.
Most Frequently Asked Questions
Extended nails peel off the cuticle
- The pterygium was poorly cleaned when preparing the nail plate.
- There was cream, oil or other cosmetics with film-forming agents on your hands, and degreasing turned out to be insufficient.
- There may have been cuticle injuries and hemostatic agents were used. They also need to be thoroughly washed with a degreaser.
- The base was applied at a large distance from the cuticle, and the sculpting gel was placed as close to it as possible. Do not extend any solid material beyond the base when applying.
I feel pressure on my fingers and want to tear off my artificial nails
The material puts pressure on the ligaments, which seem to pull the nail apparatus towards the bone phalanx. If you have high sensitivity, avoid long lengths; alternate nail extensions or strengthening them with hard materials with a thin gel polish coating on an elastic base.
I often do nail extensions. The nails have become narrower and the nail bed has lengthened. This is bad?
No, it's almost a natural process. After polymerization, the gel hardens and tightens the ligaments of the nail apparatus, while taking on mechanical load from the outside. Therefore, natural nails take on the original shape given by nature. They would always look like this if they did not experience stress in everyday life.