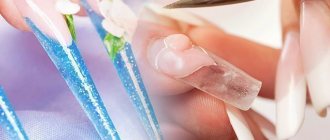
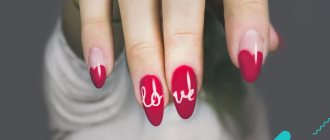
The answer to what forms for modeling nails are is probably well known to all manicurists. The forms are stands or templates used for extending the nail plate with acrylic, and quite often with gel. They allow you to conveniently and quickly lay out modeling material and create the desired length and shape beyond the edge of the nail. The forms are placed under the free edge of the nails, creating its continuation.
A special advantage of such templates over their main competitors, tips, is that the surface of this product contains a scale with numbers. It is responsible for the desired length of the nail and allows you to accurately navigate during the application of modeling material.
What is nail extension
Modeling artificial nails is commonly called extensions.
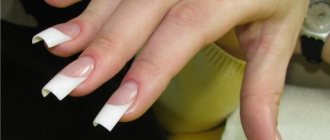
Nail extensions involve keeping your own natural nails short and lengthening the free edge with a special material. In order for such nails to be strong and last until removal, in addition to the length, thickness is also taken into account. Artificial nails can be created to almost any length and shape. The classic and simplest shapes are almond, oval and square. The ballerina and stiletto are already more demanding of the master’s skills; not every master can make “arched almond”, “age”, “Gothic stiletto” and similar complex arched forms correctly. Mastering complex shapes requires a lot of practice and a perfect eye.
What types of extensions exist?
List of the most common types of extensions in order of decreasing popularity:
Classic or salon nail modeling with gel on lower forms
This type is a basic, basic skill. It allows you to simulate strong nails of such shapes as: square, oval, almond, ballerina and stiletto. The lower templates do not limit the master in architecture and, if cut correctly, allow the template to fit any finger. It is this type of extension that this article is devoted to.
Acrylic (polygel) nail extension on top forms
Here the shape and architecture of the artificial nail is determined by the upper form into which the material is laid out. This template is placed on top of the nail and polymerized in a lamp, after which it is filed. It seems simple, but has a lot of pitfalls. In most cases it cannot replace the first type.
Acrylic or acrygel on the lower forms
Similar to the first, but the length and shape are laid out using a different material. Acrylic is losing popularity because it causes allergies, dizziness and vascular reactions in many artists and clients. It dries in the air, requires powerful local exhaust, ventilation of the room and is not suitable for use in most salons. Acrygel is laid out using the same technique as acrylic, but is harmless and polymerizes in ultraviolet light. However, it is more convenient to use when working with upper forms.
Gel on tips and liquid tips
Almost went into oblivion, because it is inferior in wearability to previous types of modeling.
Arched modeling on lower forms
A very interesting, creative type of extension, which is also called modeling of creative forms. It is distinguished by its longer length and pronounced arched shape. Not every girl will be able to wear such nails every day and not every master will be able to do them well.
Competitive modeling on lower forms
Competition nails must be perfect, but they are too fragile for everyday wear. Therefore, they exist as a separate direction to demonstrate the capabilities of the master.
What is required for salon (classic) gel nail modeling
Gel
There is a huge selection of different modeling gels on the market. We have a separate article about how gel differs from gel polish and why they are not interchangeable. In short, the gel should be hard after polymerization, hold its length and shape well, not sag, spring, or bend.
Gels are:
- single-phase or three-phase. In a three-phase system, the base, sculpting (builder) gel and finish are produced separately. In a single-phase system, the gel can be used both as a base and for laying out length and volume, and does not require covering with a finish. Which, in general, is very doubtful. Typically, a single-phase gel is used as the second phase, and gel polish is used as the base and top.
- liquid, medium and thick. Liquid: base and top. Medium and medium-thick, as a rule, produce sculptural or single-phase gels, since they need to be laid out at a certain thickness. Jelly gels and soufflé gels are produced in thick and very thick forms. Such materials are needed for laid-out French and when it is required that the material does not spread.
- transparent, camouflage and colored. Transparent: base and top. Camouflage - constructing and single-phase gels. Colored ones are needed for laid out jackets and various designs.
If you need to buy the most versatile material, then pay attention to single-phase camouflage gels for strengthening and modeling nails. They can be combined with gel polish bases and tops without fear of material conflict.
Lower forms
They are a template that is placed under the nail and on which the material is laid out. In classic extensions, the template is placed according to the growth of the nail, that is, straight. It is allowed to place the template slightly upward - 3-5 degrees, but we strongly do not recommend placing the template with a downward slope. Not on every hand it is possible to place the shape correctly with a pounce, so below in the article there is a paragraph on how to correctly cut them and adjust them to the individual characteristics of the hands.
The lower forms can be:
- paper, laminated or plastic. Paper templates are soft, wrinkle and tear easily. To confidently lay out “squares” on them, you should use metal seals that are glued to the back side and prevent the form from sticking together. Then these seals are bent to the shape of a tube, matched to the width of the nail. Laminated templates are already tougher, and the most dense and expensive are plastic ones.
- universal or for special final shape. There are templates that, when installed, are folded as best as possible for a specific nail shape: on some it is convenient to model a stiletto, and on others a square.
- with and without markings for cutting. Often the markup is not very helpful, but for beginners it can serve as a hint.
Brush
The brush for laying out the gel should be dense and well-filled. You can choose a square or oval synthetic brush from size 4 to 6. The larger the nails and the greater the length, the larger the drop of gel you will have to pick up with a brush. Therefore, select the size of the brush according to the volume of extension. Also, some masters use a thin striper brush to level the gel and more conveniently distribute it in the cuticle area.
Files
Files for modeling sawdust should be selected based on the amount of work. Beginners often need to cut off a lot of excess length and thickness; a coarse abrasive of 100-150 grit is suitable for this. To file the surface in the nail cavity and bring the architecture to perfection, choose a softer abrasive of 180-240 grit. This will reduce the risk of injuring the skin and cutting through excess.
In most cases, a boat or crescent shaped file is suitable. You can also use a regular oval one. If you are not working with very dense, filing-heavy materials, then you most likely will not need a special file for artificial nails. You can use the same file that you used to file the free edge of the natural nail plate.
*Equipment and tools for manicure
In order for artificial nails to last for a long time without detachments on the cuticle side, it is necessary to perform a manicure or at least thoroughly clean the pterygium.
- Manicure should be done dry, without soaking your nails in water. Gel, like acrylic, is afraid of water, and detachments can occur. Because of this, they used to even do manicures and nail extensions on different days. You can choose a hardware, combined, file or European manicure. If you are just starting to learn extensions, then it is better to split the manicure into two stages: first, clean the pterygium and push back the cuticle, then perform nail extensions and surface filing, and then cut off the cuticle and sand the rollers . This will help avoid sawing through the skin around it.
- You can clean the pterygium with a sharp pusher, a corundum block or a 180 grit buff. The more carefully you do this, the less sagging in your work and detachments in your socks.
What can you replace at home?
The most versatile materials for creating templates for extensions at home are plain paper, tracing paper or foil. When creating shapes at home with your own hands, pay attention to the shape of natural nails. It is also advisable to mark the desired length of the nails to be extended on the homemade form.
Thanks to nail extensions, every girl and woman can have the perfect manicure – regardless of the shape and condition of natural nails. Templates can be made from different materials, have certain features in their application, and can be disposable or reusable. With their help you can create nails of classic and avant-garde shapes and any length.
Article source: https://manikurus.com/naraschivanie/shabloni
Algorithm for classic nail extensions on lower forms
1. Preparation of the nail plate. At this stage you should:
- if there is gel polish, then it needs to be removed, leaving 5% of the base on the NP;
- reduce the length of natural nails to 0.5 mm;
- give your nails an oval shape so that there are no corners - they will interfere with the installation of templates;
- clean the pterygium or perform a manicure;
- degrease the nail plate and remove dust.
2. Application of primer and base:
- An acid-free primer is applied only to the bare nail, to the area closer to the cuticle and along the side walls, since it is from this side that detachments can occur. The primer dries in air for 30-120 seconds;
- The base is applied with a thin rubbing layer and polymerized in a lamp. Choose the most sticky base and do not level it.
These two stages are performed on all 10 fingers. Next, before the sawdust stage, we perform steps 3-5 sequentially on each nail separately.
3. Pattern substitution:
- the template is tried on and cut for each nail separately, so that it stands straight, and not down or up;
- the template should become a continuation of the nail, clearly hitting the growth points;
- the template should curl into an arch and be the same width as a nail, and not like a finger;
- the ears of the template should not be glued together on top of the finger, they remain on the sides;
- the template is glued to the finger, not the nail, so the length is not necessary at all.
4. Lay out the backing:
- the substrate is a thin layer of single-phase or sculptural gel, with which we, as it were, outline the length and shape we need - so that we can cut less later;
- there is no need to make it too thick, a thickness of 0.5 mm is enough;
- The backing is laid out overlapping the tip of the nail by 2 mm. There is no need to apply it to the entire natural nail;
- carefully inspect and coat the growth points with gel so as not to get cracks there later
- Having checked for compliance with all of the above, we polymerize the substrate in a UV lamp for 60 seconds.
5. Lay out the architecture
1. Having collected a small amount of sculptural or single-phase gel onto a brush, first carefully and carefully apply it to the natural nail plate and substrate, as if we were painting them with colored gel polish. Avoid getting the gel into the sinuses and skin;
2. Do not polymerize, take an additional large drop of material onto the brush and place it on the nail. Place the brush in the upper third, let the gel drip onto the nail and distribute the material using pushing and pulling movements. We push it towards the cuticle, sinuses, then slowly pull it towards the center and towards the tip. You can do this with zigzag movements. It is extremely important to lightly touch the gel with the brush, but not touch the nail. Imagine that you want to spread a thick layer of whipped cream on a cake: if you press, it will squeeze out from the sides under the spoon. And here it’s the same - we move the brush without pressure, smoothly and slowly.
3. Lay out the volume so that the maximum thickness is in the middle of the nail bed, the minimum thickness is at the tip, at the cuticle and on the sides. You can turn your hand down to let gravity help collect the droplet in the middle of the nail bed, pulling the gel away from the edges. When we have achieved the correct architecture, we polymerize it in a lamp.
4. You can add or remove excess material before polymerization. If after polymerization it is discovered that the apex has shifted or the gel has sagged, then this stage should be repeated, and the excess thickness on the sides should then be removed by sawing.
6. Having laid out all 10 nails, remove the stickiness and move on to filing artificial nails.
When filing, we need to give the nails the same length and shape, and remove all unnecessary bulges and irregularities. If you see that a hole is clearly visible somewhere, then on the contrary, you need to add material into it according to the scheme in point 5. The lack of material cannot be corrected with sawdust.
7. Carefully remove dust and finish the manicure if necessary.
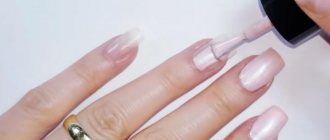
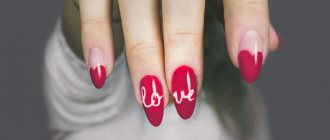
8. Cover with gel polish and complete the design.
There is no need to apply a base or primer to artificial nails. You can immediately apply colored gel polish onto the gel. If you did your nail extensions with camouflage gel, you can immediately cover them with a top coat. We polymerize the materials in the lamp for the time specified by the manufacturer.
9. Apply oil and cream at the very end of the procedure.
How to restore nail plates after removing the coating
Extending nails step by step for beginners requires following all the rules. However, the procedure does not go without a trace. With regular manipulation with gel or acrylic, natural nails become thinner and brittle. This is why experts advise taking a break between procedures every six months.
To make recovery happen faster and better, you can use the services of beauty salons, special purchased products, or prepare homemade nail baths.
Salon procedures include the following:
- Paraffin baths. They cope with the detachment of the nail plate, because paraffin in this case will play the role of a filler. In addition, the procedure nourishes the cells with beneficial microelements.
- Sealing. It is carried out with a mixture of honey and wax, which, when hardened, form a film on the nails. The result is immediately noticeable visually.
- Strengthening with biogel . Using this material, you can leave a thin coating on your nails, helping to protect the nail from external factors.
If you don’t have time to visit beauty salons, you can purchase a special product and apply it to your nails yourself at home.
Among the most popular cosmetics are:
- Trind "Keratin Nail Restorer" . The main component of the product is keratin. It penetrates the inner layers of the nail and restores it. The product should be applied 2 times a day.
- The ship "Kalyon ". Helps not only restore nails, but also promotes their accelerated growth. After application, a pearlescent coating remains. The recovery course lasts from 2 to 3 weeks.
- Complex "IBX" . It includes varnish and base coat. After each use of the products, nails should be dried in a special lamp.
If you have a limited budget, you can also restore the nail plate.
To do this you need to use the following recipes:
- Oil bath with chamomile. Mix a warm decoction of the flower with olive oil in equal proportions. Stir well and dip your fingers into it. After 15 min. stick your hands out and wipe with a towel.
- Leave-in mask. To do this, you need to purchase vitamin E capsules at any pharmacy. Before going to bed at night, open the package and distribute the vitamin over all nails.
- Berry mask. For it you should prepare currants, cranberries and rowan. Crush everything and apply to your nails. After 15 min. remove excess with a napkin.
- Lemon bath. Cut a small slice from the fruit and carefully wipe your nails and the skin around them. In 20 minutes. rinse your hands with cold water.
In addition to the procedures, it is important to pay attention to nutrition. It must be complete. During nail restoration, you cannot follow mono-diets. It is necessary to eat foods that contain a lot of vitamins B, C and E.
How to file extended nails correctly
There is a special scheme for cutting artificial nails quickly. Following it will allow you not to return to previous stages and not waste time.
- Length. First, give the nails the same length. We make the ring and index fingers exactly the same, the middle one - if it is a little wider - we make it a little longer, up to 1mm, and the little finger a little shorter - up to 1mm. The thumb can be made longer up to 2mm. At this stage it is good to give an approximate shape, especially if you had to significantly shorten some nails. With each shortening, the thickness increases. If it’s a square, then we cut out a square; if it’s an almond, then we’ll narrow it down right away, and bring out the peaks at the end.
- We file along the surface of the cuticle and nail sinus area. There are often small irregularities in the gel; our task is to smooth them out. To avoid damaging the skin, use an overhead grip and cover the client's cuticles and side ridges with your own fingers.
- We cut the longitudinal arch . We remove all protruding elements if they are not in the middle of the nail bed. In the middle of the nail bed we should have a bulge - the highest point of the longitudinal arch - the apex. We cut everything else down, using a file over the entire surface. The file is pressed to the nail from above, the movements are wide. We move in a fast and frequent zigzag from the cuticle to the tip of the nail until the tip is less than 1mm in thickness. At the cuticle we tilt the file away from ourselves, and below the apex we tilt it towards ourselves. This is necessary so as not to cut off the apex.
- We perform similar manipulations on the left . We need to reduce the thickness of the side walls to 0.5mm, no more than 1mm. In order for the file to be on top of the nail and for us to file quickly and conveniently, we turn our hand to its side. We make circular movements with the file, imagining that we are filing a tube.
- We remove the thickness on the right to 0.5 mm in the same way, but by turning the hand to the other side.
- We lighten the side walls of the nail, narrow its free edge without losing strength. To do this, place the file vertically and, using chopping movements from top to bottom, cut off excess material from the sides of the extension.
- We finalize the final shape of the modeled nails.
Difficulties in placing lower forms for extensions and how to solve them
Difficulties arise due to the fact that the templates have a universal slot for a finger, semicircular and of a certain width. While the smile line, its depth and the position of the growth points can vary from finger to finger. On one finger there will not be enough slot depth for the template to fit into the ingrowth points. On the other, on the contrary, it will cover the growth points, but will lag behind in the center of the nail. In addition, the side bolsters will prevent the template from curling into an arch, which will prevent it from curling under the nail. If this is neglected, then artificial nails will turn out flat and brittle, since without an arch they lose the ability to absorb loads.
When cutting a template, you can use a pen to mark the width for which you want to make a recess and the places where you are going to make cuts.
So, how to cut out shapes:
- The nail bed and hyponychium are elongated, protrude far forward and the template does not reach the ingrowth points. This most often occurs on the index fingers and in those women who have been wearing gel polish or extensions for many years without a break. In this case, you need to cut the template in depth to the distance that is not enough for the template to contact the growth points, measuring the recess also along the width of the nail.
- The nail bed and hyponychium are straight and the template is oval, so it lags in the center. This is more common on the ring fingers and in those women who have not worn gel polish or extensions for a long time. In this case, you should straighten the template slot, from a round one to make it more square, the width of the nail.
- The side rollers are too convex, stretching the form and preventing it from curling into an arch along the width of the natural nail. Cuts made from the growth points perpendicular to the template slot will help here. They need to be made at least 7mm deep, covering the entire thickness of the roller. They work on the same principle as a slit on a long skirt: the slit reveals the template, the rollers are placed in the slit, and the template is folded under the nail.
Mistakes when modeling nails
Too lazy to cut out the template
So he stood up with a downward angle. Accordingly, the nails turned out to be pecking downward claws. Such nails will experience overload, fall off faster and may take your natural nails with them. At a minimum, they will cause microcracks in the natural nail plate with the risk of developing mold or mildew.
Or the template stands more or less straight, but there are no cuts, which is why the nails turn out flat. If you build up a square shape, it will be visually very ugly, and the corners of such nails will break very quickly. Almond and oval are a little more tolerant of the lack of an arch. Even salon nail extensions should be a little “arched”.
They did not check and did not apply gel to the growth points
Soon chips and cracks will appear in this area, and the artificial nail may break off completely. The 2mm zone above and below the growth points is stressful, that is, it experiences maximum loads. If not covered with material, it will be mobile, the thin layer of gel will quickly chip.
Placed the apex in the middle of the nail, not the nail bed
As the nail grows, the entire mass of the gel will move towards the free edge. After just 2 weeks it will weigh more than the part of the gel that adheres to the natural nail plate. This will create additional leverage, the extension will fall off faster and there is a very high risk of injuring natural nails. It is not uncommon for cracks to bleed and the introduction of fungus due to a drop in local immunity.
Is it possible for pregnant women to get nail extensions?
Each girl must independently decide whether she should perform such a procedure or should refuse it. Experts believe that the latter option is more preferable.
Among the main reasons for refusing extensions are usually noted:
- Possibility of allergic reactions. During pregnancy, a woman's body becomes more susceptible. After all, during extensions, many products are used that can cause irritation even in normal conditions.
- Hormonal instability. During pregnancy, a whole restructuring occurs in the female body. Therefore, even if the procedure was performed in compliance with all recommendations, the manicure can quickly become unusable.
- First trimester. The beginning of pregnancy is the most important stage. Therefore, it is better to avoid using all chemicals, including those used in nail extensions.
If a pregnant girl does not want to give up extensions, then biogel should be used as the main material. It is less toxic and does not harm nails. It is better to increase the period between procedures and visit the specialist no more than once a month.
Nail extensions are an excellent solution for those who want to quickly get high-quality results in the form of a beautiful manicure.
This procedure is quite expensive. But even with modest capabilities, you can admire your own hands using the step-by-step instructions for beginners described above.
Article design: Svetlana Ovsyanikova
Most Frequently Asked Questions
Extended nails peel off the cuticle
- The pterygium was poorly cleaned when preparing the nail plate.
- There was cream, oil or other cosmetics with film-forming agents on your hands, and degreasing turned out to be insufficient.
- There may have been cuticle injuries and hemostatic agents were used. They also need to be thoroughly washed with a degreaser.
- The base was applied at a large distance from the cuticle, and the sculpting gel was placed as close to it as possible. Do not extend any solid material beyond the base when applying.
I feel pressure on my fingers and want to tear off my artificial nails
The material puts pressure on the ligaments, which seem to pull the nail apparatus towards the bone phalanx. If you have high sensitivity, avoid long lengths; alternate nail extensions or strengthening them with hard materials with a thin gel polish coating on an elastic base.
I often do nail extensions. The nails have become narrower and the nail bed has lengthened. This is bad?
No, it's almost a natural process. After polymerization, the gel hardens and tightens the ligaments of the nail apparatus, while taking on mechanical load from the outside. Therefore, natural nails take on the original shape given by nature. They would always look like this if they did not experience stress in everyday life.
Which coating lasts longer?
Each of the above materials, if not damaged during wear, is durable.
As a rule, the coating simply grows back along with the natural nail plate. Therefore, it is better to make corrections at least once every 3 weeks. Otherwise, the manicure will not look neat.
Tips from professionals: Nail rub - what it is, how to use it. Instructions