Basic glossary of terms that a beginner encounters when building
While studying the instructions for gel nail extensions and watching videos on the same topic to learn the nuances, you will come across several popular terms. Let's look at and explain each of them.
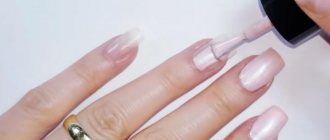
Base, camouflage and finishing gel . Modeling systems can be one, two or three component. Depending on this, they include one or more types of gel.
- The basic one will be required for the first stage - forming the base of the artificial nail. It is translucent and has the densest texture of the three.
- Camouflage has a delicate pink color and a less dense texture. It is needed at the stage of form modeling and architecture creation.
- The finishing one is the lightest in texture and serves to final consolidate the already obtained extension result.
Acid and acid-free primer is a must-have product for extensions.
The primer lifts the nail scales, degreases it and ensures stable adhesion to the gel. For extensions with a gel system, it is recommended to use an acid-free primer, and with acrylic – an acidic one.
The product also prevents the development of fungus and pathogenic microflora between the natural surface and the artificial material.
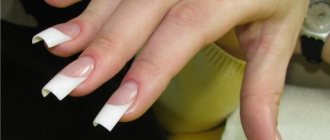
Tips and forms for extensions . The lower forms are thick stencil stickers with markings, which are sold in rolls of 500 or more pieces. Disposable. They are placed and secured under the natural nail to form a free edge using gel and a brush.
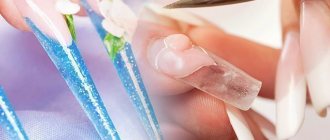
The top forms are reusable . Gel is applied to them, then pressed onto the nail and dried in a lamp. Next, the form is removed and the architecture is already formed on the created substrate using a camouflage agent.
Extensions on top forms with examples and instructions
Tips are plastic overlays that are used as a base or substrate for extended nails. Sold in sets of different shapes and sizes. They are selected for each nail, then attached with gel to the free edge and after that, the further architecture of the plate is built on their basis.
Nail extension with tips: materials, step-by-step instructions and nuances
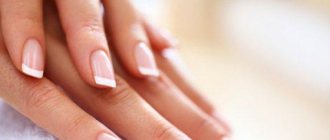
What is nail modeling?
Nail modeling is the process of artificially giving nails the desired length and shape. A special material is applied to the nail, which in its chemical composition resembles the substance used for dental prosthetics in dentistry.
Girls all over the world resort to this service, because this is one of the most reliable ways to make their nails stronger, of the required length, with the necessary decorative elements. But, having decided on such a procedure, you must remember that behind the artificial beauty lies the suffering of your natural nail plates. They subsequently require long-term recovery, because... After removing the manicure coating, they peel off and break.
Is it possible to do modeling for yourself?
In the desire to save money on nail art specialists or simply try themselves in a new creative endeavor, many girls do nail extensions and design on their own. Is it possible? Quite.
But we still advise you to seek help from professionals or at least take special nail modeling courses. The fact is that this process is quite cumbersome, requiring special knowledge and high concentration. Even the most detailed instructions and videos will not be able to fully explain to you all the intricacies of the procedure, and yet inattention can lead to serious damage to the nail bed.
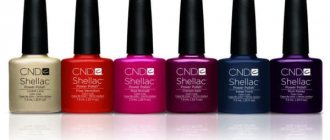
Types and brands of extension gels, how to choose the best option
Before buying a gel you should decide:
- Will it be a one-component, two or three-component system. It will be easiest for a beginner to master one or two-component.
- The second criterion is drying in a UV or LED lamp. Different brands can polymerize under different types of radiation. There are UV gels, biogels and LED gels. The first two are dried in a UV lamp.
When choosing a brand, you should study the reviews and recommendations of experienced craftsmen, and then try several options to choose the most suitable one for yourself. To get started, take a look at popular brands: Kodi, RuNail, My Nail, PNB, IBD Gel, Masura, Naomi, Formula Profi. They provide professional level quality.
About the ban on arched nail extensions with gel
No matter how sad it may sound, however, not everyone who wants to have such beauty can afford something like this. This is due to the fact that there are some contraindications to the use of both arched nail extensions and similar procedures in general, even taking into account all the advantages of this method. There is a list of factors under which such procedures are prohibited:
- Any infectious or inflammatory processes in the body;
- The use of various medications, especially antibiotics;
- Taking a course of chemotherapy;
- Various hormonal imbalances;
- Pregnancy.
It is also worth noting that the condition of the client’s nails can be very different, and it certainly affects the final result. Any mechanical defects in the client’s nails can give a short-term and unsatisfactory initial result.
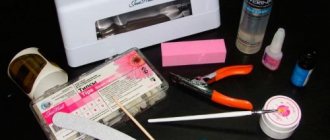
Basic starter kit for extensions
To successfully perform modeling, a beginner will need a set of materials and tools. You can assemble it yourself or purchase a ready-made one recommended. To build you will need:
- UV or LED lamp, a combined option is possible
- Milling machine with a set of attachments
- Basic and camouflage gel for extensions
- Primer acid-free
- Base, finish
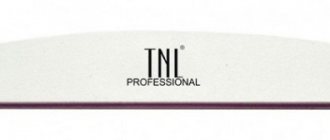
Base coatings: types, selection criteria, review of the best - Files for natural and artificial nails, polishing buffer
- The brush is medium and thin for correcting corners
- Forms and types, depending on the chosen technique
- Degreaser, dehydrator
- Liquid for removing the sticky layer, lint-free wipes
What is the sticky layer and means for removing it - Clip-clamp for arch formation
- Dust brush
- Pusher or orange stick.
Features of arched extensions
Thanks to a high-quality and thoughtful manicure, the girl always looks well-groomed and beautiful. Arched modeling is an extension, but an unusual one, since it is distinguished by its features and secrets. Thus, a person who is a professional manicurist is able to create a perfect unnatural nail using special tools and appropriate materials.
The technology for such extensions can be acrylic or gel. It depends on the choice of the client, as well as on the professionalism of the master. Extensions, in turn, can also be of different types. It is done on special forms (tips) directly on the nail plate itself. The last procedure is great if a person’s nails are weak and fragile. In some cases, special molds are used to shape the nail.
In the above technologies, not only grace, individuality, and beauty play an important role, but much also depends on the strength of the nails that were processed by the master.
For this reason, it will not be possible to carry out this procedure on your own, since it is necessary to have the appropriate skills. It should also be taken into account that each person’s hands have different individual parameters, and the design of the arch must be done in such a way that the natural and artificial plates are resistant to external influences.
As a rule, this procedure is carried out once a month, which is its peculiarity, since a regular manicure is done every week. However, the modern rhythm of life does not always allow this to be done on time. However, extended nails require correction, which is associated with the natural growth of the plate. In this case, you need to contact a specialist, who, in turn, will grow the nail using the original material.
However, before modeling a nail with gel, you should follow the rule: if this procedure is to be carried out in the near future, then a trimmed manicure must be carried out two days immediately before the extension itself.
Compliance with this requirement also applies to such manipulations as oil wraps and paraffin therapy. On the day when the arch extension was carried out, it is not even allowed to use hand care cream, since the nail plate can actively absorb oils. This will prevent adhesion to the artificial material.
After the arch extension has been carried out, it is necessary to perform some actions in order for the manicure to look well-groomed and beautiful. If you are tired of the usual French paint and decided to add new colors, then you should use only those products that do not contain acetone. It is not recommended to come into contact with chemical compositions that contain the above substance. And in order to correct the shape, you need to use files for grinding and polishing, which are designed for the care of artificial nails. Scissors or tweezers will not work in this case.
To soften the cuticles, you need to take a cream or oil with a moisturizing effect. With such careful but simple care, your manicure will always look perfect.
Instructions for gel extensions at home
Let's consider two popular extension techniques - on paper forms and on disposable tips.
Extension on forms step by step:
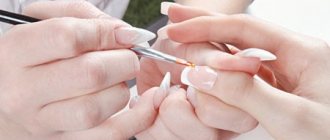
- Use an orange stick or pusher to carefully push back the cuticle. You can pre-cut or combined manicure
- Use a diamond cone tip to remove the pterygium. This stage is very important, since uncleaned pterygium most often becomes the cause of detachments
- Using a file, we completely remove the length of the nail, polish the surface, removing only the shine
- Degrease
- Apply primer and dry
- We set the forms and fix them
- Using a brush, apply the base gel in a layer of medium thickness, paying special attention to the areas of the cuticle and contact with the free edge of your nail. Distribute using trampling and leveling movements
- Make a shape and choose the length. It’s better to immediately make it 1-2 mm longer, then the excess can be removed with a file
- Dry in a lamp for 30-60 seconds until the nail plate begins to warm up.
- We take it out, fix the bend of the arch with a clip-clamp and send it to the lamp to dry for another 60 seconds.
- Apply a second layer of camouflage agent. We form the thickness, apex and fold zone, dry in a lamp for 60 seconds
- We take it out, clamp the arch again with a clip and send it to dry for another 60 seconds.
- Removing the sticky layer
- We file down the thickness and shape, grind
- Apply gel polish, finish without a sticky layer
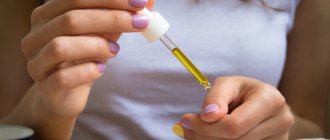
- We treat the cuticle with nourishing oil.
Extension on tips step by step:
The main stages will coincide with the technology of extension on forms, with the exception of working with tips.
- We process the cuticle area, remove the pterygium
- We select tips of the desired shape and size, if necessary, file them down immediately so that there are no gaps between your nail and the artificial overlay
- One at a time, apply the tips to your nail and use a base gel to connect the edges, dry in a lamp for 120 seconds or in accordance with the instructions for the gel
- Apply a camouflage agent, form an apex, a fold line, dry in a lamp for 60 seconds
- We take it out, use a clip to form an arch, and dry it for another 60 seconds.
- Remove the sticky layer, file it down, sand it
- Apply gel polish, top coat, cuticle oil
Brands of modeling gels
There are many manufacturers producing modeling products. One of them is the British brand Infinity.
The plant for the production of modeling nail gels from Infinity is located in the USA.
The products are characterized by amazing transparency, which allows them to be used for aquarium designs and creating the effect of crystal nails.
The weighting agents included in the composition significantly reduce the amount of dust during sawing. They do not contain methacrylic acid, therefore they are completely safe for health.
Another popular product is Pro Tec single-phase gel.
It has a medium viscosity texture and applies well in two layers. Available in six shades, which allows you to choose the optimal shade for your specific skin type. It removes defects well and lengthens the nail plate.
Modeling gel for nails Bio Gel
- IBD Builder Gel Natural is a popular product for creating an elegant manicure. Does not harm the nail plate, provides a beautiful shine, and protects against cracking.
- Irisk Smoothing Natural is a self-leveling gel, affordable, available in various versions.
- CNI Strong is a product with a high degree of viscosity, has a hypoallergenic formula, and is safe for sensitive skin.
- EzFlow Edge it is a translucent gel that strengthens the nail plate and protects it from brittleness.
- LadyVictoryAG-03 – combines well with other gel products, has a dense consistency, self-levels, and does not have an unpleasant odor. This is the best choice for French manicure. Moreover, its cost is more than affordable - on average from 260 rubles.
- OPI Axxium Sculpture Gel Clear is easy to use and allows you to create flexible and durable artificial nails. Suitable for French manicure.
Modeling gel for nails Giorgio Capachini
Today it is not difficult to buy modeling nail gel
It is presented in all specialized stores. The master only has to make the right choice based on his quality requirements and financial capabilities.
A convenient, inexpensive and high-quality product is Giorgio Capachini nail modeling gel. It is single-phase with medium viscosity.
Perfect transparency ensures a beautiful result. Polymerizes in a lamp in two minutes.
The formula does not contain acids, so the gel is safe for health. Used for ultra-strong extensions, including pedicures.
Step-by-step instructions for correcting already grown nails
The recommended intensity of correction is once every 3, maximum 4 weeks. You should not tighten it, as the growing edge begins to “peck”, the area of the apex or the highest and strongest point shifts and the risk of injury to the extension and your own nail increases.
During correction, there is no need to completely remove the material if there are no visible detachments. This will save both time and consumables.
The correction is performed in accordance with the following steps:
- We remove the old gel polish (if necessary) and the top layer of the extended nail along with the length using a diamond cutter or file
- Remove dust and degrease
- Apply an acid-free primer to the grown edge of the natural nail.
- Next, using base and camouflage gel, we form a new edge on the forms or tips.
- Dry each layer in a lamp for 2 minutes
- Remove the sticky layer and file the mold on top
- We cut out our nails and level the material from below with a diamond cutter
- We seal the transition from our nails to the extended nails with a base or top coat in the lower part. This will help avoid detachments and snags during further wear.
- We apply gel polish and make a design
- We treat the cuticle with nourishing oil.
These simple recommendations and step-by-step instructions will help even a beginner cope with extensions.
It will take patience, inspiration and 2-3 hours of your time. What stages do you think will be the most difficult? What difficulties have you already encountered while growing and how did you manage to overcome them? Share with other beginners in the comments. Comment
About nail care after arch extensions: rules
In principle, there is nothing difficult about caring for such a manicure, the main thing is to stick to some points and everything will be fine.
Some tips:
- Observe the edges of the nails and, if necessary, file them with a special nail file;
- Regularly moisturize the cuticle with various oils;
- Avoid any direct contact with chemical substances, especially acetone;
- For the first three hours after the extension, limit hand contact with water;
- It is recommended not to subject your nails to any mechanical stress in the first couple of days after the procedure to avoid damage.
When performing various tasks around the house or household, it is advisable to use hand protection in the form of rubber gloves; this will help preserve the attractive appearance of your manicure. If you visit a sauna, you need to be as careful as possible, since at elevated temperatures such a manicure can soften, and this in turn increases the risk of damage or deformation.
Is it possible to extend nails with camouflage gel?
Nail artists use two types of extensions - using acrylic and gel. At the same time, gel extensions have a number of significant advantages. This material does not harden when used; it needs to be dried under a special lamp, and this allows adjustments to be made without much effort. In addition, the gel coating is breathable, due to this, this method is considered the most gentle.
There are many types of gels for performing extensions. They differ in color, consistency and application method. Among such a large number, it is worth highlighting camouflage, which, unlike others, allows you to create the most natural look of extended nails.
Classification of UV gels
Ultraviolet gels are divided into three types:
- Basic (algesic) gels that provide adhesion between the natural nail and the material.
- Modeling gels that allow you to shape the nail or adjust its shape.
- A final coat that seals the layers and provides better shine to the nails.
If all three types of gels are used in the nail coating process, such a system is called three-phase. If there are only two gels (base and finishing) - two-phase. The simplest system is single-phase coating. In this case, modeling nail gel and base coat are not required.
Expert advice
Experienced masters have created a small list of recommendations that can be called the secrets of a flawless manicure. The rules are as follows:
- Trimming manicure should be carried out at least three days before the modeling procedure.
- On the day of the procedure, you should not use fatty nourishing creams.
- To correct the shape, it is prohibited to use scissors; you can only use a nail file, but under no circumstances a metal one.
- It is necessary to take care of the cuticle and apply a nourishing cream.
Modeling nails using special materials is a rather difficult process for a master. The resulting result will allow a woman to gain self-confidence, look beautiful and impeccable, because hands are the calling card of every lady.