Not all ladies have naturally strong, long nails, so they go to a salon or get their nails done using tips at home. There were two extension technologies, the use of plates or molds. But another one has appeared called liquid tips. Each has its own pros and cons, so on the question of which is better, the opinions of the masters differ.
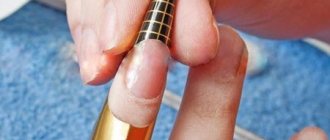
First of all, you should understand what tips are. The forms are a Teflon or paper template that is installed under the nail plate, as if continuing the free edge. An artificial nail is laid on top of it with acrylic or gel. After polymerization, the template is removed. Pros of using forms:
- Ability to adjust the growth direction of natural nail plates
- The resulting plates look like natural nails; tips for extensions will not give such an effect
- Less filing
- More convenient for French manicure
There are also disadvantages:
- The template may come off during operation if it is not installed securely
- If the template is placed incorrectly, then the modeling will be of poor quality.
- Not suitable for springboard nail shapes
Nail tips are usually made of plastic and have a curved, elongated shape. They stick to natural nails and cannot be removed. For French manicure, there are special short plates with a holder, but most professionals use ordinary ones for French manicure. Some consider durability to be a plus, but this is debatable; it is also more convenient to use records at home.
There are also disadvantages here:
- If, during gluing, empty space (bubbles) is formed between the artificial and natural nail plate, then such a nail will not last long
- It takes a long time to select a plate for each nail so that the width completely matches
- Not recommended for nails that grow towards the bottom
The choice of material depends on the experience of the master, since it is somewhat more difficult to work on Teflon templates and on the personal preferences of the specialist and the client.
These two types were the only ones into which the extension was divided. But in 2010, he presented the latest technology called liquid tips, which greatly simplified the work.
Types of tips
Tips are plastic overlays or template forms that are used by masters as a substrate or as a stencil for forming an artificial nail plate.
This is the most convenient and popular extension option for beginners. It is also popular among experienced craftsmen, especially if it is necessary to reduce time and simplify the procedure. There are several varieties of tips, each with its own peculiarity in operation and design nuances.
To form an artificial nail plate, acrylic, gel, biogel and acrylic acrygel, which is a combination of gel and acrylic, can be used. Acrylic dries in air, and gels dry in a lamp.
Tips-tips
These are plastic nail tips with a convenient transition zone for high-quality adhesion along the smile line. Disposable. They are attached using a special glue that comes with them or can be purchased separately.
They come in different sizes within one set. It is necessary to select it individually for each nail, and, if necessary, pre-file it in width so that it perfectly matches the width of its plate. After gluing, the length is cut and filed. Next, everything is covered with camouflage extension material to create an outwardly complete nail plate.
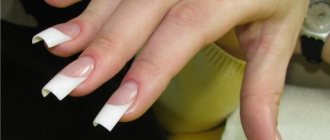
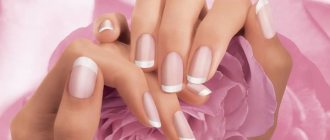
White tips are very convenient for extending French manicure. This is a ready-made perfect smile line; you just need to cover the nail with a thin layer of base or camouflage gel or acrylic, and then with a top coat to add shine.
Camouflage nail gel - let’s figure out what it is and how to use it correctly
Upper forms
Upper forms - used for working with acrylic, gel, acrylic and biogel. The material is applied to the form, pressed against the prepared nail along the entire length under the cuticle or from the middle of the plate, then dried in a lamp and filed.
The top molds are made of a dense material compared to the more flexible liquid molds, and have a more curved design. Thanks to this, they allow already from the first layer to form a convex stress zone or fold zone, which is subject to the greatest loads when worn. The top forms are reusable. On average, they are enough for 100-250 extensions.
Liquid tips
They are used for extensions with all liquid materials, hence their name. Often opaque, with a matte surface. They have short “removal handles” at the ends. Unlike top forms, liquid patterns are more flexible and flat. They do not immediately form a stress zone, but only create the first base layer. Then you need to paint the architecture manually - with camouflage gel or acrylic using a brush.
When working with liquid tips, the material is applied to a mold and pressed against the nail plate. Smile lines are already drawn in the form, which is very convenient for beginners when laying out a French jacket. After drying in a UV or LED lamp, the tip is removed and the plate is filed down. Liquid tips are also reusable, like the top forms.
Depending on the desired result, you can work with any of the three types of tips. Try everything one by one to choose the most convenient and practical for yourself.
Collection of photos of nails extended using tips
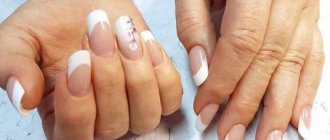
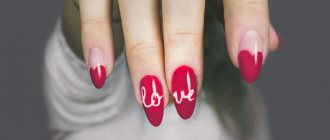
Neat and durable tips, modeled with tips and strengthened with gel, look great if decorated with a beautiful design. An experienced specialist, having done the extensions, will intuitively select for you the appropriate nail art that will give you elegance. The laconicism of a lunar manicure or the classic severity of a French manicure are not inferior in beauty to an aquarium nail design coated with transparent gel. Volumetric compositions, abstract drawings or a simple monochromatic coating on tips - the choice is yours. Our photo gallery will give you creative inspiration and help you decide on a design.
Continuing your training, watch another video lesson on how to extend nails using liquid tips. This unique innovative technology opens up more possibilities, allowing you to save time on the nail modeling procedure. Enjoy watching, dear girls. Don't forget that a beautiful manicure is the highlight of your look !
Basic set of materials
In addition to the templates themselves, you will need:
- glue for extensions
- length cutter
- sawing machine
- UV or LED lamp
- file and buff
- pusher
- tassel
- lint-free wipes
- material to choose from: gel, biogel, acrylic, acrylic in base and camouflage shades
- degreaser/dehydrator
- acidic or acid-free primer
- base
- top or finish to add shine
- varnish and decor as desired.
Shape or tip – what to choose
There are two types of nail extensions, each with obvious pros and cons. In a beauty salon you will be offered the right to free choice, but if you are doing extensions at home, you should decide in advance which technology suits you best.
- Extension on forms.
Lengthening the natural nail plate. As a rule, it looks more natural and requires less time. This extension is not recommended for girls with short nail plates, otherwise the gel will not hold. The recommended length for gel extensions is at least two millimeters. This extension method should be performed by experienced craftswomen, since beginners most likely will not be able to work with the gel without outside help. - Extension on tips.
Lengthening the nail plate by gluing plastic tips. Ideal for girls with short nail plates. As a rule, extensions using tips are more durable. This method is recommended for beginners, since it is much easier with glued tips. They have a static shape, and it will not be difficult to lay out the gel on them.
Watch this video, it will complement your knowledge!
Preparing the nail plate
This stage is the same for all types of extensions using tips and consists of the following mandatory steps:
- Manicure . Before extensions, you need to do a trimmed, hardware or combined manicure to remove the cuticle and remove the pterygium. They are most often the cause of detachments of artificial material.
- Filing the top layer of the nail . To improve adhesion to the artificial material, it is important to remove the top layer of the natural nail. Don't get carried away, it will be enough just to remove the natural shine. Experienced masters use either a buff or a file for natural nails for this.
- Degreasing and dehydration . First, apply the cleaner to a cotton pad and remove the dust after filing. Then apply a special degreaser to your nails with a brush.
- Application of primer . This product lifts the scales of the nail plate and ensures adhesion of the artificial material. After applying the primer, wait until it is completely dry, otherwise peeling may occur in the future. When working with gel, an acid-free primer is used, and when working with acrylic, an acidic one is used.
- Applying the base . The base is applied in a thin layer under the cuticle, especially if the extension occurs not on the old layer of material, but on your own nail plate. Dries in a lamp. The sticky layer does not need to be removed.
Now let's move on directly to the extension procedure with various tips.
Preparing nails for extensions
- Use nail polish remover to remove old manicure from nails.
- Wash your hands thoroughly with scented soap or gel and rinse off the foam with tap water.
- We dip our fingers into a bath of hot water - this will allow us to painlessly remove cuticles and hangnails.
- After six to ten minutes, remove your hands from the water and dry them with a towel.
- Using nail scissors with rounded ends, carefully remove cuticles and hangnails. If you feel your cuticles hardening again, dip your fingers in warm water for a short time.
- After treating your fingers, rub a few drops of essential oil into the areas where you cleaned. In addition, I advise you to additionally use a moisturizer, which will make your hands soft and give them a pleasant smell.
- Finally, use a nail file to trim your nails and give them the desired shape.
Extensions using tips - step-by-step instructions
- We select templates according to the size of each nail
- Glue the tips with glue onto previously prepared nails
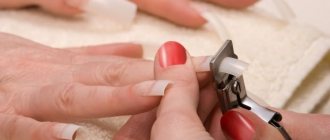
- We remove the length with a tip cutter and file the edges
- We apply camouflage gel with a brush, build the architecture, and dry it in a lamp. When using acrylic, apply the material in a translucent or pink shade and distribute it evenly with a brush, wait until it hardens
- Remove the sticky layer from the gel
- We file down the length and thickness
- We apply a top coat or decorative varnish and design as desired
pros
- The fastest extension option
- The ideal smile line with French extensions
- A simple and convenient way for beginners to practice
Minuses
- Sometimes nails peel off due to poor-quality glue or incomplete adhesion of the artificial nail.
- Template blanks still look artificial; experience and skill are needed to achieve naturalness in their design
- Gel and acrylic can bleed at the tips, making the nails excessively thick in these areas; additional filing and understanding of architecture are required to achieve a natural result.
French manicure extension technology with gel
What you will need:
- gels (basic, several modeling),
- Ultraviolet lamp,
- cuticle remover,
- polishing file,
- tips or forms for extensions,
- stencil for forming the edge of the nail,
- gel polishes for French manicure,
- primer
- degreaser.
- Nails must be prepared for the procedure; to do this, they must be wiped with a degreaser. It is also necessary to work with the cuticle, using a special stick, it needs to be pushed back.
- Further preparation for extension involves grinding the plate. To ensure that the tips are firmly attached to the nail, you need to carefully treat the top layer by removing it.
Do not sand the plate too hard, as this can cause serious damage. After this, you need to remove all accumulated dust using a special brush.
Apply degreaser to the nail surface again. If the liquid dries quickly, then subsequently you should not keep it under the lamp for too long. After this, a base coat is applied to the nails.
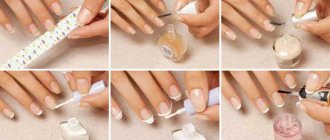
Now you can start directly building up. If you are doing French nail extensions on forms, then take it and attach it tightly to the nail. Then apply the base coat to the nail and place your finger under the lamp for 2 minutes. Many people prefer to do nail extensions using French style tips, as this material makes the nail more natural in appearance.
Apply the base color to the nail using gel polish, starting from the base and working towards the tip of the nail. Try to apply the gel carefully; if it gets smeared, correct the problem. Then you will need to put your painted nail under the UV lamp again.
If the color is not intense enough, you can apply a second layer and dry it again under the lamp.
After this, you will need to form a smile zone. Take the nail polish of the desired color, apply a stencil and draw a smile. You can also use special paints or permanent gel for this.
- Use a file to give your nail a beautiful shape. Use a special buff to polish the smile areas so that it looks even.
- Apply fixing gel to the nail and dry it in a lamp.
- Work again with the degreaser, remove the sticky layer from the surface of the nail.
Over time, the nail plate will grow and you will need to adjust it to make the French manicure look attractive.
If you do French helium nail extensions correctly, this manicure will last for a long time. In fact, it is quite difficult to do French-style gel nail extensions at home, especially if you are new to this business. It is better to entrust it to an experienced master; this will provide you with a beautiful manicure for a long time.
Article on the topic:
Extensions on the upper forms - step by step instructions
- We select the shapes according to size, slightly file the width at the side rollers, if necessary
- Using a brush, apply acrylic, base gel or acrylic into the mold, spread it in a thin layer and apply it to the nail. It is necessary to apply the form slightly from the tip to the cuticle so that the material is not squeezed out at the cuticle
- Remove excess material with a brush
- We send it to dry in a lamp or air dry (for acrylic)
- Removing the upper forms
- Using a brush, apply a layer of camouflage acrylic, gel or acrylic, and build the architecture of the nail
- Dry in a lamp for 2 minutes, acrylic in air until it hardens
- We cut the length and width
- Apply top or finish, dry in a lamp
pros
- Easy to use
- Nails are more durable than nail tips due to the absence of an additional grip zone along the smile line
- Reusable
- Due to the characteristic volume in the stress zone, it can be formed already at the first stage of working with acrylic, base gel or acrylic
Minuses
- When extending very long nails, they may initially have a “pecking” shape.
- The absence of a drawn smile line in the inner part of the form, which is inconvenient when forming a jacket
A detailed description of the extension technology on the upper forms with instructions for popular designs:
Extensions on top forms with examples and instructions
Types of tips and tips for choosing
Tips translated means “tip”. These are plastic blanks in the shape of a nail, which differ in size and shape. In essence, these are peculiar templates that will give the desired shape to the modeling agent in the process of increasing the length. They will also correct the convexity of the nail plate, preventing the effect of pecking nails and excessively large convexity.
By purpose
It is a mistake to believe that all tips are the same. In fact, they may differ in color and purpose, because they are selected in accordance with what the final manicure technique will be. Transparent options and templates of natural color are intended for building up and further covering the created base with gel polish. If a French design is planned, they differ in thickness. Compared to other varieties, they are thinner.
The line also includes varieties with colored backgrounds and ready-made designs. These are, in fact, ready-made solutions, although if desired, the former can be decorated with some kind of print, and the latter can simply be coated with transparent varnish. In addition, the options can be universal, with sufficient bending and large bend. The bending of the frame is necessary to ensure that the extended nails look beautiful and natural.
By shape
The shape of modern tips is variable. On the shelves of brands you can find different options for every taste. Today there are 5 types of tip shapes.
- In the classic version, these are blanks with a natural and smooth bending shape. As a rule, they are sold in sets at affordable prices. Such varieties are often used by nail service professionals when performing nail extensions on clients.
- Other options include straight tips that do not have a contract zone. For this feature they are called non-contact, they are extremely convenient for performing French. These varieties are also inexpensive, and buying them today is not difficult. On average, a package of one hundred pieces will cost 150 rubles.
- When you need to create a special narrowed shape, you buy tapered tips. They can be used in building and shaping stilettos, bridgette shapes and cat nails.
- Many people want to make an “American” uniform. In this case, you need to buy curved tips.
- The last variety is tips for the shape of almonds. These products allow you to build the correct almond shape in a short time. They are characterized by different lengths and may or may not have a contact zone. Their cost is approximately the same as the cost of blanks for stilettos (about 150 rubles for 50 pieces).
According to manufacturing materials
Nail extension tips are made from different materials. For example, one of the quite popular solutions today are the so-called liquid varieties. These are reusable options that are made from special polymer raw materials and are characterized by a flexible structure. For beginners, this is the most convenient and easiest way to do nail extensions. It does not require a large number of tools and materials, although it does not do without a special drying lamp, which is usually used when working with gel polish and gel.
Tips are made from plastic, nylon and polyflex. Each type of material has its own nuances. For example, plastic products are considered quite durable and preferable for work. Plastic is temperature resistant, easy to clean, and convenient during the extension process. If you need to extend your nails with gel, then it is better to choose options from polyflex. Such solutions are quite flexible and resistant to acetone. As for nylon varieties, they are not suitable for beginners, since they can be problematic in fixation, but it is worth noting that nylon holds its shape well.
Liquid tips extensions step by step
- Selecting liquid tips by width
- Apply material for building up the base layer to the inside, distribute, remove excess along the edges
- Apply the form to the surface of the nail, press slightly
- We remove the excess squeezed onto the surface near the cuticle and side ridges with a brush.
- Dry in a lamp or air dry if it is acrylic
- Removing liquid tips
- Apply a second layer of camouflage with a brush, forming the architecture of the nail
- Dry in a lamp for 2 minutes or in air (for acrylic)
- Apply top or finish
- We make the design with varnish as desired
pros
- Durable, flexible, comfortable shapes
- Reusable, will last up to 250-300 uses
- The presence of markings of the smile line in the inner part for the convenience of forming a jacket
- It is convenient to remove using the special “tips” on the sides of the tips
- Indispensable for practice for beginners
- Allows you to create natural nails that do not differ in appearance from natural ones, unlike tips.
Minuses
- Unlike the upper forms, they provide a flatter base-plate, without a reinforced stress zone
If you have never tried to grow your nails yourself, then tips are the ideal material for beginners.
Start with the adhesive tips and then move on to the top molds or liquid tips. Ready to get started? Write to us in the comments if you have any questions. Comment
Acrylic
Acrylic is a durable, quick-drying material. Acrylic nails are elastic; after extensions, the nails turn out thin and look natural. When using acrylic at home, you need to choose a well-ventilated room, as the substance has a specific aroma.
Extension tools
Before you move on to creating an artificial nail using tips, you should check if you have all the tools at hand.
List of materials:
- extension material – acrylic;
- primer or degreaser;
- liquid for dissolving acrylic - monomer, volume of at least 50 ml;
- set of tips;
- brush for applying acrylic powder;
- nippers for cutting tips;
- file with abrasiveness from 100 to 180 grit;
- lint-free wipes;
- buff;
- alcohol or other disinfectant;
- a jar with a lid will be needed for the monomer;
- dust removal brush;
- glue for tips;
- oil or cuticle softener.
After purchasing all the necessary materials, you can start creating beautiful nails.
Instructions
Before you start doing any manicure, you should wash your hands well with antibacterial soap. If this is not possible, then the skin of the hands is treated with a disinfectant, alcohol or antiseptic.
Extension process:
- File the free edge of the natural nail.
- Remove cuticles using an orange stick.
- Use a nail file to remove oily shine from nails.
- Choose the right tip for each nail; the contact area should cover less than half of the nail plate.
- The numbering of tips starts with the number 1 and ends with the number 10, the first size is the widest, then the width decreases.
- Arrange the tips after selection in order.
- File down the edge of the contact area on each frame.
- Degrease the nail plate.
- Apply glue to the contact area and distribute it evenly.
- The tips should be held at an angle of 45 degrees to prevent the glue from spreading.
- Apply the tip so that the stop line is in contact with the tip of the natural nail.
- Press the frame onto the nail plate and hold until it holds firmly.
- Adjust the length of the free edge using a cutter.
- Using a file, give the frame the desired shape.
- Use a buff to reduce the boundary between the tip and the natural nail, so that when you run your finger along the plate you don’t feel the bumps.
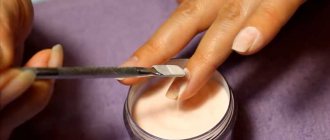
- Mix acrylic powder with monomer until a plastic mass is obtained.
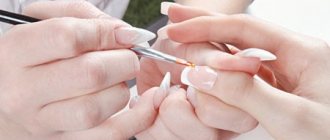
- Using a brush, evenly distribute the acrylic mass along the entire length of the nail.
- You can remove excess thickness with a nail file.
- Apply a fixative to the nail.
After the fixative has completely dried, the nails can be covered with a single-color varnish or a special design can be created. For beginners, it is better to use colorless acrylic for nail extensions with tips, and a light pink color is suitable for French manicure. Extending nails with tips using acrylic is a very easy and simple procedure.
How to do French nail extensions
Gel nail extensions are the most convenient and therefore this method is often used not only in a salon, but also at home.
Instructions for French nail extensions:
- Disinfect your hands.
- Treat your nails. To do this, you need to clean them of varnish, push back the cuticle, trim the free edge with a file and sand it.
- Degrease your nails with a lint-free cloth and remove excess moisture by applying a dehydrator. The entire nail, including the end, is coated with primer.
- Nail extension begins with fixing a special template form. It needs to be slightly squeezed and placed under the edge of the nail, leaving no gap. The end of the form should match the width of the base of the nail plate. Next, the nail is carefully covered with a base layer of gel, and the desired length and shape of the edge is formed. After preparing the base substrate, you need to carry out the polymerization process with an ultraviolet lamp for 2 minutes.
- Apply a natural-colored camouflage gel to the base of the nail plate and distribute it over the entire surface of the nail with smooth movements. After the gel is carefully distributed and all defects have been eliminated, repeat drying under an ultraviolet lamp for 2 minutes.
- After drying the base layer, you need to make sure again that there are no unevenness or other flaws. If there are any, then a second layer of camouflage is applied and dried again at the same time.
- When the defects have been eliminated, it is necessary to remove the sticky dispersion layer using a special lint-free cloth and get rid of the template form.
- The surface, bottom and sides of the nail are sawed off, giving it the desired shape. In order for the “smile” area to be smooth and clear, and the paint not to spread, the free edge of the nail must be sanded with a buff with 180-240 abrasiveness.
- Draw a “smile” line. This can be done with any material - gel polish, special paint or permanent gel. First, you need to use a thin brush to draw the outline of the “smile” line, which determines its shape. Its ends should fit into the ingrown nails. Then carefully paint over the outlined edge and end of the nail with strokes and dry it under a lamp for 2 minutes.
- A layer of pearlescent gel is applied to give a glossy shine, if necessary.
- Wear the finishing gel from the tip to the cuticle, avoiding contact with the skin and be sure to treat the end of the nail. Dry under an ultraviolet lamp for 2 minutes.
- Remove the sticky layer with a degreaser or a lint-free cloth. Apply oil to strengthen the cuticle.
What you will need
It is impossible to start practicing without having tools and materials at hand. The modern market offers a huge number of them, making it difficult to choose. Helen's introductory lesson will be a real find at the first stage of learning. The author will briefly talk about the types of lamps (ultraviolet and LED lamps), the types of gels, highlighting the necessary and replaceable ones, the differences between single-phase and three-phase, for which camouflage is needed. Beginners will learn the main criterion for choosing a forming sticker, the purpose of the primer, types of files and their characteristics, the difference between liquid layer remover and alcohol, lint-free wipes from cotton pads, and why a pusher is needed.
We must not forget about a number of contraindications that should be taken into account when contacting a specialist or practicing independently. It is necessary to make sure that the client does not suffer from disorders of the digestive and endocrine systems, fungal diseases, or have allergic reactions to the components used. During pregnancy, lactation, chemotherapy, or undergoing antibiotic treatment, extensions are contraindicated.
January 31, 2020
