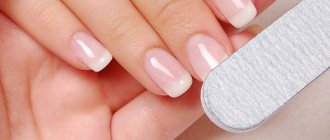
A beautiful manicure distinguishes any girl, showing her well-groomed and femininity. But sometimes you really want to diversify your manicure, make it more sophisticated, add some zest. Drawings on your nails made with a needle will help you with this. Making such drawings is not difficult, but the result will exceed all your expectations.
Even beginners can use this technique, and below we will tell you how to properly do a manicure with a needle, provide step-by-step diagrams of nail designs and talk about the intricacies of such a manicure.
The advantage of needle drawings
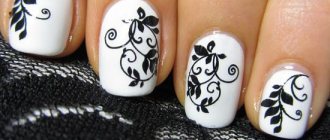
Using a needle, complex intricate patterns are created on the nails that cannot be painted with a brush, no matter how thin it is. The most popular patterns made with a needle are lace, geometric shapes, natural patterns, various lines, snowflakes, cobwebs, and hieroglyphs.
Patterns on nails with a needle
The popularity of this method of nail decoration is due to several factors:
- simplicity and accessibility of the method: you can draw with a needle at home;
- a variety of design schemes, the ability to independently come up with a plot for nail art;
- the method does not require professional equipment;
- Doesn't take a lot of time.
Simple schemes of interesting images for beginner nail designers
There are many ways to make designs on the surface of your nails using a needle. However, many patterns and methods of nail design are very difficult to do for amateurs and novice designers.
That is why professionals recommend starting with the very basics and first learning how to make the simplest circuits. For example:
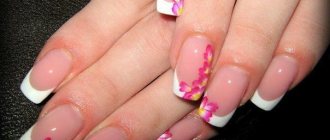
- Flower. To create such a plot, you need to use several decorative varnishes, one of which will be used as a base, and the other for drawing a flower. First you need to paint the surface of your nails with colored varnish, then put a dot in the corner with a needle, and five or six more dots around it. Without waiting for the varnish to dry, you need to draw a thin needle from the edge of the point to the center point. After such simple movements, beautiful floral patterns will appear on your nails.
- Simple lines and graceful tints. Another way to create an interesting design for beginners. To do this, you need to place dots in the center of the nail plate and stretch them in both directions with gentle movements. The result may be tiger prints and cute white and black zebra stripes.
- Star. This drawing can be completed in just a few seconds. To do this, after painting the surface, apply a small blot on the nails in the very center, then draw a needle from the center of the blot 6 or 7 times in different directions.
You need to remember that absolutely any patterns and prints need to be drawn carefully, but quickly, since it is quite difficult to work with dried varnish and nail design may not work in this case.
- Cobweb. An unusual pattern that is ideal for beginners. To implement it, you should place points on all surfaces in a chaotic order, then connect them together in a random order. As a result, a small cobweb will appear on the nail, which can be decorated with shiny rhinestones or other equally interesting decor.
- Zigzags. This drawing can also be made at home with a regular needle. To do this, you need to draw two parallel lines with colored varnish using a toothpick or a thick needle. Then carefully connect them with a thin needle, thereby creating colorful zigzags. This design looks very interesting with the use of several decorative means and the use of glitter.
- Necklace. This original manicure using a needle is also very easy to do at home. To do this, it is enough to place 5 or 6 points along the edge of the nail plate, evenly alternating them with each other. Then connect them together with a needle. The necklace pattern looks more colorful and prettier in several colors, but one color palette. Therefore, when placing points, you should alternate them.
- Shell. This pattern looks interesting and unusual, especially if you choose the right contrasting shades. For example, a classic black and white combination, or beige and chocolate, or red and black can fully reveal the essence of this image. To do this, you need to use a thin brush to apply arcuate lines to the inner edge of the plate. Then stretch from the edge of the nail with a thin needle to the parallel edge.
Nail painting needle
Manicure needle
Professionals use a special needle with a handle for convenience. It can be found in cosmetic stores. But a worthy alternative is a homemade sewing needle. To complete the design, you can attach a pencil or a wooden stick to it.
The length of the needle depends on personal preference. It is more convenient for some to draw while being as close to the nail as possible, while for others it is the opposite. Try different needles and find the size that works best for you.
When choosing a needle, you should pay attention to the desired line thickness. For thin needles, use a smaller needle; for thicker ones, vice versa. If the drawing is quite complex, it is better to stock up on a set of needles.
Recommendations and tips for performing a manicure with a needle
- Before you start drawing with a needle, it is worth practicing a little on a hard surface, for example, on glass or an old mirror. After all, this manicure technique requires maximum speed, otherwise the varnish may harden, and, therefore, the planned design may not work out.
- In order for the patterns and smooth lines to be clear, you need to hold the tool evenly in relation to the surface of the nails.
- Do not press the needle too hard, as this can easily damage the surface of the nail plate and make the design sloppy. In addition, you should always remember not only the beauty of the manicure, but also its health.
- To make the lines of the drawings smooth and graceful, you should only make rounding movements, since sharp strokes can distort the plot.
- Don’t be lazy after drawing, clean the needle from the varnish, as the remnants of the previous layer can spoil the entire drawing or plot.
You should know that it is best to remove remnants of colored varnish with a napkin or a piece of soft cloth. But it is best not to use cotton wool or hygienic cotton pads. After all, after using them, small fibers may remain, which significantly complicate the drawing process.
- In some situations, the needle can be replaced with a thin brush.
- In order for the design to look beautiful and complete, all creative work must be done on a thick layer of varnish. However, with the use of a huge amount of varnish, the drying time also increases. Therefore, it is recommended to use only a high-quality topcoat, thanks to which you can fix the entire design for a long time.
Of course, all of the listed patterns can be made with a toothpick or a thin brush, but only with a needle can you easily and quickly draw the smallest details and correct small plot elements. In addition, this non-traditional nail is a tool at hand at any moment, which cannot be said about expensive professional tools for decorating manicures.
What varnishes are suitable
To create designs on your nails with a needle, you need to prepare varnishes in several colors. You can take contrasting colors. The main thing is that the varnishes should be fresh and not too thick . Varnishes from the same company mix well, and their designs turn out smoother.
For a complete manicure, you need to prepare both a base coat and a top coat. To correct an unsuccessful drawing, you should have nail polish remover or a corrector marker on hand.
Training in using a needle in manicure
And although theoretically everything seems very simple, not everyone can create a design that will look really high quality using this method. The thing is that there are a lot of nuances and little things that become known only in the process of work. That is why below we will discuss how to draw pictures and make patterns on nail polish with a needle, consider photos, diagrams and videos about how this process is performed.
The biggest difficulty for beginners when applying nail polish with a needle is in what order to apply the dots and how to connect them. And most importantly, how to do all this so quickly that both varnishes do not dry out. In general, if the pattern is performed in the correct sequence, then there is no need to rush. The following diagrams will tell you how and in what order to draw fragments of a pattern on your nails with a needle.
https://youtu.be/56cGQcjEFPA
To conclude the topic, you can watch a video about how drawings are made on nails with a needle. In this tutorial the master performs a very simple design ideal for beginners. The whole process consists only of applying drops and “pulling” them to an imaginary line. This is where you should start your training in this technique.
In this video we draw a rather complex pattern on our nails with a needle. A beginner is unlikely to be able to repeat this. However, after repeated training, it is possible to create more complex ornaments and designs. The secret here is that very fine needles are used for the design, and both varnishes are quite liquid. In addition, the base is applied very thinly, which allows the needle to slide easily across the plate.
https://youtu.be/lazx0bwBaZ4
Drawing with a needle on nails: step-by-step instructions
The process of painting nails with a needle
- First you need to prepare your nails . Make a bath, remove the cuticle, treat it with special oil. Apply base coat.
- Apply the first varnish - the basis for the drawings. The layer should be quite dense.
- After the base has completely dried, you need to start creating images . Follow the pattern you choose or come up with your own design. Use different needles to draw lines of different thicknesses.
- The result should be secured with colorless varnish .
Schemes for applying patterns with a needle
Before you start painting, make sure that the base is completely dry and has sufficient density, otherwise the needle will simply get stuck in the varnish.
“Wet” drawing technique
Painting nails with a needle
This technique involves working with varnish that has not yet dried . With its help, you can create beautiful gradient designs.
To create patterns using this technique, it is necessary to apply a second and immediately fresh layer of varnish of a different color to the first dried layer of varnish. Then use a needle to create patterns by mixing two colors.
An example of nail design using the “wet” technique of painting nails with a needle is presented in this video tutorial:
“Dry” technique
This is a standard painting technique and involves drawing designs with a needle onto a dry base coat.
For beginners, it is advisable to draw using the “wet” technique.” It is more convenient and requires less experience.
Tips for painting with a needle on your nails
- In order not to smudge the drawing, start working with your little finger.
- You should also draw starting with the “non-working” hand (right-handed - with the left, left-handed - with the right).
- Be careful when pressing the needle: you can easily damage the nail plate.
Drawing technique
There are two main techniques for applying images with needles:
- Dry . Apply drops of varnish to the already dry varnish, creating beautiful stains on the surface using a needle.
- Wet . Apply the drops directly to the wet varnish, quickly using the needle.
Of course, the first technique is preferable for beginners due to its simplicity. But in the case of the wet version, you need to have time to create a certain pattern before the varnish dries. In the case of gel polishes, the task is simplified - they will not dry without a special lamp.
The application scheme is very simple. Apply drops of varnish of the desired color to the main background. Start moving the needle from the middle of the drop beyond it, drawing some kind of pattern. In this way you can create circles, lines, figures of eight, flowers, leaves. You can paint with several colors of varnish at once - this way the result will be more impressive.
Materials and tools
Before you start drawing on your nails with a needle, you should prepare all the necessary tools and appropriate material. To make your manicure beautiful, you need to give preference to high-quality cosmetic products.
Regardless of the complexity of the drawing, some attributes will be required for the job.
- Needle. It can be purchased either in a specialized store, or you can take a regular one, which is used for sewing. If you plan to use a sewing needle, you need to choose the right thickness and diameter, and also attach it to a plastic handle using plasticine for convenience.
- Varnish in different colors. For the main coating, it is advisable to choose bright and saturated colors, since the pattern on them will be clear and expressive. In addition, stylists recommend purchasing varnishes of the same brand - when mixed, they will be more durable and provide good adhesion to each other.
How to make drawings using “wet” varnish
Drawings on “wet” varnish require speed and high precision. That is why, before starting nail art, you should carefully consider the future design . You shouldn’t limit yourself to diagrams from the Internet, because unique designs you come up with yourself can look much more interesting.
- A velvety coating can be applied to a pattern of “wet” varnish. Simply pour a special nail flock onto the coating, wait a few minutes and brush off the residue with a dry brush. As a result, the drawing will acquire an unusual texture that is pleasant to the touch.
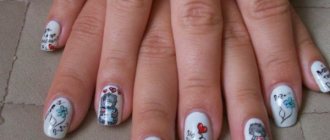
- With “wet” varnish you can create not only floral patterns, but also small scenes - New Year’s motifs, an unusual safari design, or cute drawings of animals.
- Try to add small strokes - special painting varnishes with a long and thin brush are ideal for this. Thanks to such nuances, the drawing will look more “alive” and textured.
You need to know that for beautiful, blurry lines you should select products with a certain structure. For example, a perfect drawing will never be achieved if the varnish is too liquid.
How Eskimos build an igloo (5 photos) » Trinixi
It's no secret that people, since ancient times, began to use materials that were nearby for their needs. Those who live in forested areas have long built their houses from wood, but if there is clay nearby, people create bricks from it and build brick houses. What then can the Eskimos do if they have nothing nearby but snow? Of course, build your homes from snow and ice.
Igloo, translated from Inuktitut (as most Inuit Canadian dialects call it), means “winter dwelling of the Eskimos.” The igloo is a dome-shaped building with a diameter of 3-4 meters and a height of approximately human height. They build it from what is at hand, and in the winter tundra the only building materials at hand are snow... An igloo is built from snow or ice blocks compacted by the wind. If the snow is deep, the entrance to the igloo is made in the floor, and a corridor is dug to the entrance. If the snow is not deep enough, you have to make an entrance in the wall, and an additional corridor of snow blocks is added to it.
Alone, an Eskimo builds a spacious snow hut for his entire family in three quarters of an hour. The strongest snowstorm is inaudible in the hut. The snow bricks grow together tightly, and the hut freezes over as it heats up inside. They say that igloos can even withstand the weight of a polar bear.
How can you breathe under the snow? Fine. After all, if the entrance to the needle is located below floor level, then the outflow of heavy carbon dioxide from it and the influx of lighter oxygen in return are ensured. In addition, this arrangement of the inlet does not allow warm air to leave the home - it is known to be lighter than cold air. However, for ease of breathing, a ventilation hole is punched in the vault with a needle.
As a result of heating, the internal surfaces of the walls melt, but the walls do not melt. The colder it is outside, the higher the heat the igloo can withstand from the inside. After all, wet snow loses its heat-protective properties and allows the cold to pass through more easily. Having made its way through the thickness of the block, the frost freezes the inner surface of the walls, which has begun to melt, and the temperature pressure outside and inside is balanced.
In general, the thermal conductivity of a snow dome is low, and it is easy to maintain a positive temperature in a hut; often the heat generated by sleeping people is sufficient for this. In addition, the snow hut absorbs excess moisture from the inside, so the igloo is quite dry.
Today, igloo huts are used in ski tourism as emergency housing in case of problems with the tent or a long wait for better weather. However, polar travelers did not immediately learn how to build igloos. For a long time it was believed that only a native Eskimo could build an igloo.
Canadian Vilhjalmur Stefansson was the first to learn how to build an igloo in 1914. He wrote about this in his book and in articles, but even from them it turned out to be difficult to learn how to do it. The secret of building an igloo was the special shape of the slabs, which made it possible to build the hut in the form of a “snail”, gradually tapering towards the vault. The method of installing the slabs also turned out to be important - resting on the previous ones at three points.
The Eskimos skillfully transform their winter settlements into a complex complex of snow buildings and, in bad weather, can visit neighboring huts without going to the surface. Rasmussen, in his book “The Great Sleigh Road,” talks about snow villages with covered passages between igloos, entire architectural ensembles erected by the Eskimos with amazing speed, and large hut-houses.
“The main housing could easily accommodate twenty people for the night. This part of the snow house turned into a high portal like a “hall”, where people cleared the snow off themselves. Adjacent to the main dwelling was a spacious, bright annex where two families lived. We had plenty of fat, and therefore 7-8 lamps were burning at a time, which is why it became so warm in these walls of white snow blocks that people could walk around half naked to their fullest pleasure.”
The interior of the igloo is usually covered with skins, and sometimes the walls are also covered with skins. Fat bowls are used for heating and additional lighting. The Eskimos cover the bed with a double layer of reindeer skins, the bottom layer being laid with the flesh side up, and the top layer with the skin side down. Sometimes old skin from a kayak is placed under the skins. This three-layer insulation serves as a comfortable soft bed.
Sometimes igloos have windows made of seal guts or ice, but even without that, the sun penetrates into the igloo directly through the snow walls with a soft light of different shades. At night, one candle lit in the hut brightly illuminates the snow-white vault, and at the joints of the bricks this light breaks through a thinner layer of snow.
Outside, in the freezing darkness of the night, the igloo glows with a web of blurry lines. This is truly an extraordinary sight. It’s not for nothing that Knud Rasmussen called the igloo “a temple of festive joy among the snowdrifts of the snowy desert.”
From here
trinixy.ru
Start of the lesson
A fairly simple object at first glance is a needle. Drawing for young children should be like this. However, it is worth noting that it will be difficult for the baby to draw a straight line right away. To develop this ability, you will have to practice. A drawing lesson doesn't have to be boring. Therefore, you can draw a picture together with your baby. Let him repeat all your actions.
First you need to draw two straight lines. They should start at one point and then diverge slightly towards the edges. Then they need to be connected in a semicircle. Ask your child what this shape reminds him of. It looks like a drop, a ray, etc.
Igloo - traditional Eskimo dwelling
An igloo is a typical Eskimo residence. This type of building is a building that has a dome shape. The diameter of the dwelling is 3-4 meters, and its height is approximately 2 meters. Igloos are usually built from ice blocks or wind-compacted snow blocks. Also, the needle is cut from snowdrifts, which are suitable in density and also in size.
If the snow is deep enough, then an entrance is made in the floor, and a corridor to the entrance is also dug. If the snow is still not deep, the front door is cut into the wall, and a separate corridor built of snow bricks is attached to the front door. It is very important that the entrance door to such a dwelling is located below the floor level, since this ensures good and proper ventilation of the room and also retains heat inside the igloo.
Lighting comes into the home thanks to snow walls, but sometimes windows are also made. As a rule, they are also constructed from ice or seal intestines. In some Eskimo tribes, entire villages of igloos are common, which are connected to each other by passages.
The inside of the igloo is covered with skins, and sometimes the walls of the igloo are also covered with them. To provide even more lighting, as well as more heat, special devices are used. Due to heating, part of the walls inside the igloo may melt, but the walls themselves do not melt, due to the fact that the snow helps remove excess heat outside. Thanks to this, the home is maintained at a temperature that is comfortable for people to live in. As for moisture, the walls also absorb it, and because of this, the inside of the igloo is dry.
The first non-Eskimo to build an igloo was Villamur Stefanson. This happened in 1914, and he talks about this event in many articles and his own book. The unique strength of this type of housing lies in the use of uniquely shaped slabs. They allow you to fold the hut in the form of a kind of snail, which gradually narrows towards the top. It is also very important to consider the method of installing these improvised bricks, which involves supporting the next slab on the previous brick at three points simultaneously. To make the structure more stable, the finished hut is also watered from the outside.
Today, igloos are also used in ski tourism, in case emergency housing is needed, if problems arise with tents, or if it is impossible to continue further in the near future. In order for the skier to be able to build an igloo, special instructions are given before the trip.
vamvigvam.ru
Igloo - Eskimo dwelling (description for children)
Far from the Arctic Circle live a northern people - the Eskimos. They are engaged in hunting and fishing. This type of activity does not allow them to stay in one place for a long time. They often move from one territory to another and therefore do not have a permanent home.
Eskimos can be found in Chukotka, Alaska, Canada and Greenland. In the summer they live in tents, and in the winter they build temporary houses out of snow. These winter shelters are called igloos. They are built from snow bricks and ice blocks. It is very important that the snow for construction is dense and does not crumble.
The Eskimo hut looks like a dome with a diameter of 3-4 meters and a height slightly higher than human height. At the very top there is a hole for ventilation and ventilation. A door is cut out on the side, but windows are usually not made, since the snowy walls let in light. Even on cloudy days you can read while in your home, and on sunny days the brightness is such that it blinds your eyes. In the evening, they light a candle or a lamp with seal oil and then the air warms up, the snow melts, but does not drip, since the walls absorb water.
If the snow is high, then the needle is cut out directly from a snowdrift compacted by the wind. Then a door is cut out in the floor, and a snowy corridor is dug into it. It is very important that the entrance to the snow dome is below floor level. This allows you to retain heat longer and ensure ventilation of the room. The floor inside the home is covered with skins, and sometimes the walls are also covered with them.
The igloo is reliably protected from wind and frost. Even without heating, a snow house is always dry and warm. The thermal conductivity of snow is very low and, moreover, it absorbs moisture well, which allows you to maintain positive temperatures in the hut for a long time. Under the influence of strong winds and snowstorms, the snow bricks grow together and the walls become even denser.
It doesn't take much time to build an igloo. One experienced Eskimo can build a snow house for the whole family in an hour. The tundra is full of snow, which means there will be no problems with building materials. There are entire villages of ice houses connected by tunnels. Residents can visit each other without going outside.
Currently, igloos are used by polar explorers, tourists, and skiers as emergency shelter or if a tent, for example, breaks down. But it is not possible to build a traditional dwelling for the northern people right away. It is believed that only an Eskimo living in the tundra can build a real igloo.
dokladiki.ru
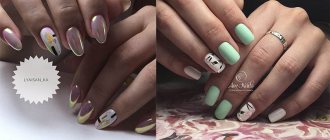
How to decorate long nails
Long nails give complete freedom of imagination. Any pattern will look harmonious on them. The use of various decorations is encouraged, for example, nails with an original pattern and complemented by a tiny piercing on the free edge look stylish and unusual.
In any case, you shouldn’t limit yourself - constant bold experiments will help you choose the most suitable design that will maximally reveal the bright personality of the owner.
How to draw a needle with a pencil step by step
The needle is a nanotechnological device for manually splitting atoms, piercing space and mastering and using the ancient Sumerian technique of cross stitch. Main signs: sharp, polar and always lost in a haystack, where no one finds it. A haystack is not always included in the package, but can be found in the wild environment of a Russian village.
Having justified its purpose, needle technology began to be used in the field of mass production of clothing, which very sharply increased the technological development of mankind among other animals. Clothing based on balls of superglue and snot began to decline sharply from the market. Now we are all sitting on the needle, because there is no other technology for sewing pants.
Well-known devices:
- Gypsy needle is a regular needle enlarged in size;
- An igloo is not only a case, but also the property of the Chukchi who live in it;
- A syringe without a needle is a waste of money;
- The eye of the needle is designed as an ideal means of training attention and accuracy. The most skilled jewelers and surgeons spent ten hours a day poking threads into the eye;
- Murder with such an object is considered the most cruel after murder with a spoon and a bag of nuts;
- Chuck Norris uses it instead of a toothpick.
Try drawing it: