Durability, bright shades and even ease of application. Yes, it's all about gel polish. And thanks to these advantages, many beauties can no longer imagine a manicure without using shellac. A few years ago, such a procedure was possible by default exclusively in the salon. But today everything can be done quite easily and relatively quickly on your own at home. MAKEUPSTORE has laid out all the nuances of applying and removing gel polish.
Layers of the natural nail plate
You need to understand which nails can be done with any type of manicure, which of them will take a little longer to work on, and with some you can’t do anything at all. It depends on the condition of the natural nails.
Dorsal - a layer that affects the adhesion between the polymer artificial material and the nail plate.
Everything works out due to its presence. If you degrease poorly, then poorly raise the scales of the dorsal layer, leaving shiny smooth areas, then most likely there will be no adhesion in places. The dorsal layer guarantees good adhesion of the material to the nail plate.
The presence of material detachments may be due to the following reasons:
- Improper preparation - poorly sanded surface with shiny areas;
- The nail plate can be very mobile, and the material chosen is too hard, so there is no shock-absorbing membrane between the nail and the hard material.
Intermediate or soft keratin . Nails with such a top layer will already have poor adhesion; nail strengthening is a must. If you have such nails in front of you, then do the following:
- Shorten the length;
- We use a primer;
- Strengthen your nails by straightening them.
Ventral . For marigolds with a ventral top layer, any type of manicure is in principle contraindicated. There is no coupling, it cannot be covered, a recovery period is required.
Learn more about the structure of nails, which affects their growth and healthy appearance.
A little about the subtleties
That's probably all about how to apply gel polish at home. The technique is quite simple, you can read about it on many resources. There are a lot of videos devoted to this topic. So why do problems arise? One of the most common mistakes made by beginners is combining products from different brands, when the top, base and gel polish belong to several manufacturers. The fact is that both decorative and auxiliary coatings are developed as one system. An impeccable result can only be guaranteed if all products are used comprehensively and belong to the same TM. Of course, very often you can observe good compatibility of nail products from different brands, but it is impossible to predict the result in advance. Therefore, at first you should not experiment.
You can make sure you follow the step-by-step instructions by watching a video on how to apply gel polish at home. The video, prepared by a professional master, is always meaningful and informative. If you want, it’s easy to find a special master class or a good article. But it’s best to undergo training, and then you will be able to comprehend all the intricacies under the guidance of real professionals. Good luck!
Instructions for painting with gel polish on nails
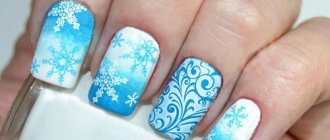
Using dots greatly simplifies the task of creating designs on nails. This thin stick is an excellent option for beginners who are learning to make clear and beautiful drawings. With its help you can carefully draw any monograms or ruffles. The technique for using dots when applying gel polish will be as follows:
- Take a dots of the appropriate size;
- Dip the tip into gel polish;
- A small dots will allow you to draw the smallest details; here it can act as a brush. The pattern is drawn starting from the center. In this case, the instrument is moved as if pushing the gel a little;
- The completed design must be covered with a top coat.
Compared to the option described above, a more difficult task will be to apply gel polish in the form of a pattern using a brush. You are already familiar with the plan for the basic gel polish coating of the nail plate and painting with dots. In the case of a brush, everything happens similarly. Only, in addition to other tools, you will additionally need a brush with medium and long bristles.
The difficulty with applying gel polish yourself with a brush is that the polish can be liquid, which can cause it to smudge. And if the pigmentation density of the varnish is low, then the patterns may not be visible at all. It is important to remember these points, therefore, in order to achieve an ideal result, you need to buy gel paints or varnishes with a high level of pigment.
Leveling technology
- First layer. The applied first layer of base coat must be cured in a lamp if:
Nails are thin or damaged, and applying too much material can burn them. Apply the base using trampling movements. When leveling healthy nails, there is no need to dry the first layer, it remains damp;Several bases are being connected: the plastic one is used first, and the more rigid one is covered on top;
- Drop installation. At an angle of 45 degrees, the drop is placed on the nail with a brush and pulled to the sides towards the lateral sinuses and downward according to the “left-right-center-down” pattern. The result should be a beautiful, even funnel;
- Contraction of volumes. As soon as a funnel is formed, we begin to pull the material from the funnel area to the free edge of the nail plate;
- Marigold flip at an angle of 45 degrees to the parallel of the table so that the distributed material is collected at the apex, the highest point of the natural nail.
- Polymerization in a lamp.
For the leveling process, you can replace the base coating with biogel and follow the same scheme. It is also important when distributing the material to move the brush over it gently, without pressing.
