A small number of girls do not know what gel polish is, since well-groomed and neatly decorated nails are the main trend in recent years. To make their hands look feminine, they are ready to visit a nail service every month for manicure correction.
However, there are relatively new pigments that are also used in salons, but they are less common. Thus, not all women know what shellac is, although the composition has good characteristics regarding the wear resistance of the manicure and the adhesion strength of the decorative coating to the plate.
Main advantages
The coating is popular among lovers of complete nail care due to a number of properties:
- Easy to apply, almost like regular varnish;
- You can wear it freely for about a month;
- The delightful glossy shine remains for the entire period of wear;
- It is much easier to remove than gel, even at home;
- Removal is carried out with a nail file or liquid;
- Treats nails more carefully than extension gel;
- Strengthens weak plates;
- Together with it, you can use medicinal compounds if necessary;
- Huge variety of brands and color palettes.
This type of coating is quite expensive, especially in Moscow stores. On the other hand, the quality of the product justifies the price.
How long does shellac last when applied correctly?
Based on the fact that each woman does a different amount of work with her hands, and generally has a different attitude towards her hands and caring for them, it is impossible to say exactly how long shellac lasts.
All a woman can do after application is take care of her hands and monitor the condition of her manicure. Proper execution of the manicure itself also plays an important role. If everything is done carefully, consistently, in accordance with the requirements, then the shellac will not sag.
This problem is especially relevant for owners of very long nails.
How to prepare your nails for a manicure
Shellac at home for beginners is a procedure that cannot be started without preparing the nails. Here's a quick guide:
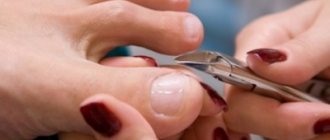
- First, let's remove the cuticle. Before the procedure, it is advisable to make a special bath. It will soften the skin, making the task easier. If the cuticle has grown too much, it will be useful to use professional oil and nail clippers. If not, move it with an orange stick.
- Now we process the nails. Shape them and treat them with buff to improve grip. You can clean your hands of nail dust with a dry cloth. It is important to thoroughly treat the sides with a degreaser.
Please note that after applying it, it is better not to touch your nails, otherwise the adhesion to the nail will deteriorate. If there is no degreaser, it is permissible to take wet wipes.
Instructions for those who are trying shellac coating for the first time
Step-by-step instructions will teach you how to perform a single-color manicure using Shellac coating. Once you get the hang of it, you can try more complex design options.
Instructions on how to make shellac at home:
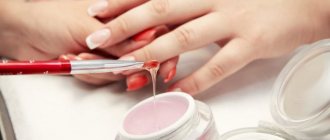
- First, we apply a base coat designed to protect the nails. First you need to paint the edges, then the middle. Then seal the tip of the nail. This will help the layers adhere better and achieve a thin application. This method is suitable not only for the base coating, but also for any other coating. It will take one minute to dry in the lamp.
- Apply the base in the same way, without coloring the tip. Try to stick to a thin layer. It takes one or two minutes to dry. If you notice that the gel polish is swollen, you will have to start all over again.
- If everything went well, it’s time to apply another layer of base. This will make the tone more saturated. The layer should be slightly thicker than the first. But if you want a translucent effect, then you can skip this point. Dry in a lamp for a couple of minutes.
- The top coating is the topmost and thickest of the layers. You need to dry it like the last one - only two minutes.
- Remove the resulting sticky layer with a sponge or lint-free cloth. Instead of a special remover, you can use regular alcohol, but then the manicure will become matte, not glossy.
The tutorial for applying shellac at home is very simple. However, don't worry if it doesn't work out the first time. Practice is key here.
It is worth noting
General opinions vary as to what affects the strength of shellac. Some people think that it is better to wear special rubber gloves when cleaning the house - they protect your hands from water and aggressive detergents. But some people think that this has little to do with the strength of shellac and that this coating holds up well even without such protection.
However, gloves protect not only the polish, but the skin of the hands and the nails themselves. Contact of chemicals on bare skin causes dryness and itching at best, and irritation and allergies at worst. In addition, such exposure causes the skin of the hands to age faster, and, as you know, hands can tell a lot about a woman’s age. As for shellac itself, it has a porous structure, so that particles of detergents and cleaning agents can get inside through it, negatively affecting both the nail plate and the coating itself. Thus, the gel polish is destroyed from the inside and loses its strength.
In any case, using protective gloves while working around the house can extend not only the life of the coating, but also the youth of your own hands.
What is best to avoid while wearing shellac?
This type of manicure looks expensive and luxurious. Although, with all the durability and correct extension technique, it is not difficult to ruin it.
There are several rules to follow to keep your manicure intact:
- For the first 24 hours after applying the coating, try to avoid any contact with water or steam;
- It is not recommended to tap your nails, try to open lids with them, or apply any similar stress;
- Throughout the entire wearing period, routine cleaning and, especially, using cleaning products, is best done only with special gloves.
It is worth noting
Under no circumstances should you dilute shellac with anything, much less add nail polish remover to it.
Despite the fact that visually the consistency of the product will become similar to the previous one, such a coating will already be very weak and can behave quite unpredictably. Moreover, in this case, it is generally impossible to find out how long shellac lasts. If you are planning to apply the coating yourself, you need to be very careful when choosing the manufacturer of the gel polish itself, base and top. It is better to choose proven companies, even if they are a little more expensive.
Removing shellac at home
- Wash our hands with warm water and soap;
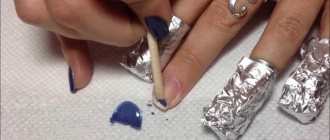
- We take cotton pads, separate them and cut them in half. We also cut the foil into pieces to make it easier to wrap your fingers;
- We moisten semicircles of cotton wool in a solvent liquid and apply them to the nail plates, trying to ensure that the solvent does not get on the skin around them. This can cause irritation or even allergies.
- Wrap the cotton wool on top with foil. This is done not only to better fix the half-discs, but also to ensure that the solvent does not evaporate ahead of time.
- Now you need to wait about fifteen minutes. To speed up the process, you can gently massage your nails under the foil, trying not to move the cotton. This will help the liquid penetrate deeper and remove the coating better.
- Now we remove our protective layers, step by step, in the order in which we wrapped them. First foil, then cotton wool. There is no need to try to remove everything in one fell swoop. Now you can remove the covering. This can be done in a single layer, sometimes you may need an orange or regular plastic manicure stick. If in some places the coating does not want to come off, you will have to repeat the procedure with cotton wool and foil. If it didn’t work the second time, it means the layers came out thicker than necessary. Then you will have to use a nail file.
After removing the coating, all that remains is to lubricate the record and skin with oil to protect them from drying out.
How do nails react to shellac?
Shellac coating should not cause significant harm to the nail plate, provided that the process was performed correctly, with strict adherence to all instructions, even by a novice master. The condition of your nails after a manicure depends entirely on how correctly you performed the procedure.
If you remove the artificial one without preparation, then long-term nail restoration cannot be avoided. They thin out and become very brittle.
After each removal of the coating, it is recommended to give your nails a rest from any manicure for at least a few days. You can and even need to make healing baths and use various strengtheners.
Shellac nail extensions should not scare you with their complexity. This option, moreover, is ideal for women in the last stages of pregnancy, when it is not possible to go to beauty salons. If shellac is done correctly, the coating will help strengthen your nails and allow them to grow to the desired length.
Application technology and tools
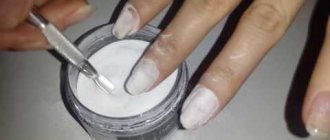
A regular edged or combined manicure is first done. The nail plate is given the desired shape. Next, the nail is processed with a file with a fine grain fraction or with a special machine. This allows for better adhesion of the material. The durability of the coating largely depends on the quality of this operation.
After polishing, the nails are disinfected, degreased and the base layer is applied. It is necessary to give the plate hardness and protect it from harmful components of the second layer. The thickness of the layer is small, the application is uniform. Separately, you should paint the tip from the inside. Dry the layers in an ultraviolet lamp. The time varies depending on the number and power of lamps. On average it will take about 30 seconds.
The next two layers are colored. Each is cured under a lamp. The coating should not be voluminous and thick, which negatively affects its durability. Insufficient drying time will lead to rapid peeling of the material during wear.
The final stage is applying the top and drying it. Moisturizing cuticles with oil.
How to take care of your nails when shellac is removed
Nails with this coating look bright and shine beautifully even in photos. Despite all the advantages, it also has certain disadvantages.
After removing the artificial coating, nails often become thinner and brittle. Therefore, they require special care. Here are a few options to consider:
- Sealing nails is one of the popular procedures performed in salons. The composition based on honey and wax perfectly restores the plate.
- Berry mask. Those berries that contain a lot of vitamin C are perfect for cooking. These are lingonberries and black currants. You can choose one or mix several types. Make a paste out of them, apply briefly to your nails, and then rinse with plain water.
- Many people know about the benefits of iodine mesh. Why not use it to strengthen your nail plates? Of course, it doesn't look very nice. Therefore, it is best to make a mesh of iodine at night, so that it has time to be completely absorbed.
- It is necessary to restore nails not only from the outside, but also from the inside. To keep them strong and healthy, first of all, you need to eat well. Consume more meat, fish, seafood or dairy products - anything that contains proteins or fatty acids.
- Olive oil. You just need to pour the oil into a small container and dip your fingers in there for a few minutes. If you do this every day, the effect will not be long in coming.
- Sea salt baths. A couple of tablespoons of this salt should be dissolved in one liter of plain water, and put your hands in it. It is advisable to do this procedure a couple of times a week to speed up the effect.
- Lemon juice is another good option for restoring and whitening nails. It needs to be rubbed into the plates, not dipped. Leave it on for a few minutes, then rinse off.
Manicure ideas
You can create different types of manicure using shellac.
To make your manicure beautiful, you need to choose colors that will harmonize with each other. You should not choose glossy and matte varnishes at the same time.
It is better to take coatings of the same texture. It is better to draw a smile by hand without using stencils, because they can remove the previous layer. Each applied layer must be dried thoroughly.
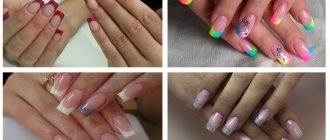
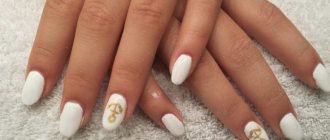
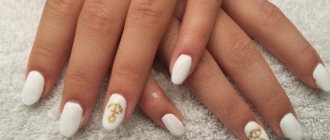
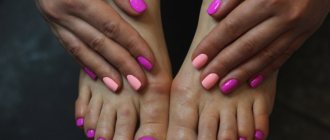
You can make designs on your nails, glue rhinestones, and stickers. Ombre manicures and moonlight manicures have become especially popular lately.
Ombre manicure is a smooth transition of colors along the nail plate. Moon manicure is something similar to a French manicure, but the smile is located at the base of the nail.
