A manicure that makes the nail plate stronger and can maintain a neat and new appearance for a long time is the dream of almost every woman. Modern technologies in this area have stepped forward, making it possible to quickly and affordably make a special strengthening coating using acrylic powder.
The material can be used for extensions, or applied to increase the strength of shellac on your natural nails. In the latter case, the manicure will look more natural due to the application of a thinner layer. Read on to learn how to use an acrylic hardener, what materials are needed for the procedure, and what subtleties there are in covering nails.
Acrylic powder: properties and varieties
Acrylic strengthens nails by increasing the thickness and density of the coating, so the manicure lasts many times longer. If you apply it correctly, there will be no peeling or bleeding onto the cuticle or side ridges of the nail, which affects not only the aesthetics, but also the durability of the coating.
Advantages of acrylic powder:
- universal hypoallergenic material that suits almost everyone;
- Acrylic has excellent wear resistance. Reduces the risk of breakage and deformation;
- ease of use, time saving;
- a large selection for modeling and performing three-dimensional designs.
For the correct selection of material, a correct understanding of the final desired result is necessary.
| Type of acrylic powder | Properties | Result |
| Transparent | Extra fine grind. Doesn't stand out on natural nails. | Used for base coating, forming the free edge of the nail, aquarium design. |
| Matte | Perfectly hides imperfections and visually evens out. | Used as a base coat for building and strengthening. |
| Camouflage | A material with a denser texture, not transparent, flexible, lends itself well to modeling. The color resembles the natural shades of the nail plate. As a rule, it has flesh tones with a pink undertone. | Hides unevenness and yellowness, evens out defects in the nail plates, strengthens the nails. |
| Finish | It can be modeled well with any tool, and after drying it has a glossy shine. | Suitable for modeling top, glossy coatings. |
| Colored | Wide choice of shades. Can be used without a fixative and does not weigh down the nails. | Carrying out any design, creating the effect of “sugar nails”. |
| Neon | Bright rich colors, dense texture. | Used for sculpting. Often used for youth manicure. |
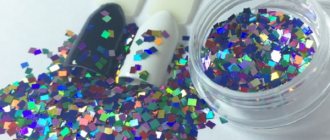
| Glitter powder | Transparent or colored powder with added glitter. It comes in different grinds and textures. | Used for the finishing layer or bright designs and volumetric modeling, it helps to maximize your imagination. |
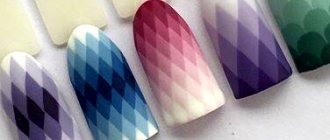
Nail design
Acrylic powder is widely used for sculpting; you can create three-dimensional shapes on your nails, give the design a convexity, the effect of sugar or velvet sand. Not everyone can do sculpting, but creating the “sugar” effect doesn’t require much effort.
Apply a thin layer of acrylic powder with glitter onto the gel polish using a brush and spread evenly over the surface of the nail. Let it dry. Depending on the size of the grains of sand, you can thus give your nails a “sugar” or “velvet” effect.
To give your nails a matte tint, you need to purchase matte powder. Follow all the steps of applying gel polish sequentially, then apply powder to the nail using a brush. After uniform distribution, dry under a UV lamp.
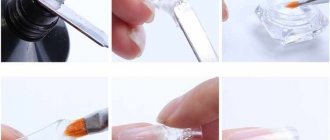
To create a three-dimensional pattern without modeling, you should perform a number of steps:
- prepare the nail plate, do a manicure and push back the cuticle;
- treat each nail with an antiseptic;
- degrease the nail plate;
- carefully remove shine from nails using a sanding file;
- apply a layer of primer;
- let dry for a few minutes;
- apply base gel;
- dry under an ultraviolet lamp;
- apply the desired color of gel polish;
- dry;
- remove the sticky layer;
- apply a second coat of varnish;
- dry;
- remove the sticky residue again;
- using a brush, draw the desired pattern;
- dry;
- without removing the sticky layer, cover with acrylic powder;
- dry under a UV lamp;
- remove the remaining powder with a brush.
The effect of acrylic to strengthen nails
Many nail technicians prefer to apply acrylic powder to strengthen their nails. Acrylic, penetrating microcracks together with the gel, bonds any damage like cement under the influence of ultraviolet rays. The nails are strengthened and some serious “breakages” can be corrected.
This will also be an excellent solution for those whose shellac does not last longer than 1-2 weeks; with acrylic powder you can extend this time by 1.5 - 2 times.
The addition of acrylic makes the nails hard, but at the same time they remain quite elastic, making them less likely to break. There is no healing effect here; strengthening occurs thanks to an additional protective layer. The manicure does not end with the application of acrylic powder. After this, you need to go through the remaining steps.
But such nail strengthening has undeniable advantages:
- lasts longer than a regular manicure or shellac;
- looks natural, without the increase in volume that occurs during extensions;
- microcracks and damage are eliminated;
- prevents the formation of bubbles encountered after gel coating;
- protects nails from any external factors, including ultraviolet radiation and household chemicals;
- makes it possible to grow your nails to the desired length;
- easy to correct;
- simplicity of the procedure.
Contraindications
You can often hear about the dangers of acrylic on the human body. But only the vapors are harmful, so the powder is toxic until it dries. The only contraindication is individual intolerance. The material has been tested in dental offices for years, so it does not cause any significant harm.
Allergic manifestations were found in less than 5% of clients. However, acrylic has a pungent and unpleasant odor, so it is recommended to use it only in well-ventilated areas.
Disadvantages of the procedure
Strengthening nails with acrylic also has disadvantages. Firstly, this procedure is not therapeutic. You must work with this material carefully, as it dries quickly. In addition, this composition has a strong unpleasant odor. Under such an artificial coating, air does not flow to the nail plate.
The disadvantages of acrylic include its rare, but still possible, chipping. The material is almost impossible to remove with any solvents. Only the cutting process gives the result.
Tools and materials for the procedure
If you have a complete set for shellac coating, all that remains is to additionally purchase the appropriate powder.
Applying acrylic powder to strengthen nails for the first time, without relevant experience, will be more difficult and you will need to prepare a whole list of materials. It is recommended to purchase materials from official representatives in order to be confident in the quality of the product and get the predicted result.
So, the list of materials:
- standard manicure set;
- cuticle preparations;
- abrasive files and buffs;
- dehydrator;
- antiseptic (pharmacy grade will do);
- primer;
- bonder;
- acrylic Powder;
- dust brush;
- modeling gel or colored shellac;
- base and top coat;
- LED or UF lamp;
- lint-free napkins and orange sticks.
It is important to always keep safety in mind, so tools must be cleaned and disinfected regularly. It is also better to treat your hands with an antiseptic before starting the procedure.
Features of the material
You may be interested in:Very beautiful French jacket: the best ideas, fashion trends
Many masters notice that their clients can wear the coating for different periods of time: some for several weeks, and some girls wear the varnish for only a couple of days. Here, of course, everything depends on individual characteristics, but the problem can be solved using the same acrylic powder.
The powder will fill even the smallest cracks, level the surface and improve the adhesion of the coating to the nail plate.
Instructions for strengthening nails with acrylic powder step by step at home
It will not be easy for beginners to carry out this procedure at home. For the gel you need a special lamp. For those who perform gel manicure on their own, the procedure does not require additional skills and can be easily performed at home. But, it is important to strictly follow the instructions to prevent chipping and peeling.
It is required to consider in detail all the stages of strengthening nails with acrylic powder, including initial preparation and work with gels. The procedure is carried out in several steps.
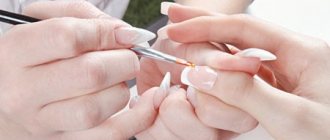
Preparation
Before starting any action, it is recommended to treat your nails, hands and all tools with an antiseptic. Do not neglect this stage.
Artificial turf is worn for a long time, so the slightest infection that gets under the lining can lead to the development of microorganisms. In addition, many “troubles” can be transmitted through poorly disinfected tools.
Then the nails are prepared, given the desired shape, and a hygienic manicure is performed. The cuticle should be removed, pushed back well and the plate should be cleaned of the pterygium (the area in front of the cuticle). The most common reason for peeling of any coating lies in insufficient nail treatment.
Next, sanding is done with a soft file or buff, and the resulting dust is cleaned with a brush. At this stage, the gloss is completely removed so that the coating adheres well, but does not lead to cuts. This will lead to discomfort and increase the risk of infection in the nail bed.
Primer application
After polishing and brushing, the nails must be degreased by wiping them with a cotton pad soaked in a liquid intended for this purpose (dehydrator or degreaser).
Now apply primer to the entire nail plate. It will prepare the basis for further steps, equalize the pH balance and remove excess moisture from the surface of the nails. The primer also improves adhesion to artificial turf. It has a liquid texture and dries almost instantly in the open air. For working at home, it is better to choose an acid-free primer.
To achieve a better effect, you can apply additional bonder and let it dry thoroughly.
Bonder prevents peeling of artificial materials. It has a denser texture and resembles glue, which is why it is called “double-sided tape.”
The gel-like structure is distributed evenly, but it is important to ensure that it does not ooze; it is also recommended to “seal” the edges of the nail with it.
If you use both products, then the primer will be a preparatory step and is applied before the bonder.
Some bonders only dry under a lamp, so you need to follow the manufacturer's instructions in each individual case.
At first glance, both drugs provide good adhesion, but they act differently:
- the primer forms a film through which chemicals from subsequent layers of manicure do not penetrate into the body, and also cleans, degreases, disinfects and regulates the ph balance;
- The bonder is quite elastic, it holds the layers together as much as possible, preventing detachments and cracks.
Therefore, you should not choose between these completely different means; they do not replace each other. You don’t have to use them, limiting yourself to proper filing and a degreaser, but for a long-lasting and aesthetic manicure it is better to use both products.
Applying the base layer
To strengthen nails, it is recommended to give preference to silicone thick consistencies or rubber bases.
Apply the base layer as soon as the primer or bonder (if used) has dried. In order for the base to be distributed evenly, it is advisable to apply the first layer on 4 fingers (from the little finger to the index finger) and dry it in a lamp. Then do the same with the second hand.
After this, the base is applied separately to the thumbs, making it easier to dry the nails and the gel does not run down the edges. It is necessary to ensure that when applying the coating does not get on the cuticle or on the skin on the sides, there will be detachments in these places. If the gel has run, it can be carefully removed from the skin with an orange stick before polymerization.
Application of acrylic powder
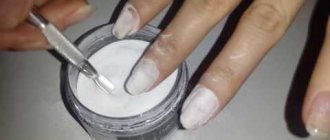
Apply acrylic powder to strengthen nails directly onto the base or shellac before the last layer dries. Having covered your nails, you should immediately sprinkle them with a dense layer of powder, leaving no voids.
You can sprinkle the entire nail only on the stress areas (central area and side edges). You can simply dip your nail into the powder and tap the edge with your finger so that the excess falls off. The coating dries under ultraviolet light for a couple of minutes.
Now you need to brush off the excess. If the surface is uneven, it should be sanded.
Fixation with base coat or gel polish
Apply gel polish in 1 or 2 layers on top of the hardened acrylic, drying each one in a UV lamp.
If only strengthening was planned, without applying a color coating or decoration, then the acrylic must be secured with a base coat before using the finish.
In both cases, a top finishing coat is applied, which is also dried in a lamp. The top protects nails from ultraviolet radiation and creates a glossy shine; it can be applied in 1 or 2 layers.
After strengthening your nails with acrylic powder, you can do a manicure.
If the topcoat leaves a sticky layer, then after the lamp it is removed with a cotton pad soaked in a degreaser. An alternative is acetone-free nail polish remover.
When should you use gel polish with powder?
Gel polish with powder is chosen by those who have one of the following nuances or problems:
- nails are thin, brittle, peeling, very bending;
- long natural length;
- you need to perform extensions with artificial materials;
- The gel polish coating quickly flies off and peels off due to the characteristics of the body;
- the tip of the nail is broken or there are other defects that cannot be hidden by a regular color coating.
In addition, the material is used for:
- aquarium and knitted designs;
- designations of drawings or their details;
- decorating individual stripes and figures in geometry;
- creating a velvet or “sugar” surface.
Watch the video about three ways to strengthen nails with acrylic powder:
Cost of the procedure in salons
If the procedure seems complicated or you don’t have the complete kit needed to do it at home, then it’s easier to do it in the salon. After all, the master will be able to perform a professional manicure, strengthen your nails, and give a pleasant hand massage. Also in the salon you can learn about the latest in the nail industry and choose a design from a large selection.
The cost of strengthening nails using acrylic powder ranges from 500 to 2000 rubles. It all depends on the region, quality of materials and level of craftsmanship. In addition, many salons offer a low cost for the procedure, and you will additionally need to pay for a manicure, base coat, shellac and design.
For example, a nail strengthening service will cost 800 rubles, and together with a manicure and shellac coating it will cost 1,800 rubles.
What are the advantages of this tool
Acrylic powder is a modern material for nail art and manicure, which has a lot of advantages:
- Using this material, a woman has the opportunity to have well-groomed hands. Nails, even with extensions, look as natural as possible.
- Wide range of applications, versatility in solving a wide variety of problems.
- Easy to apply and use. Acrylic powder can be applied in a beauty salon, in a nail bar, at home with a private master, or independently at home.
- The product is also easy to remove; the surface of the nail plate is not damaged in the process.
- An incredibly large selection of colors - from transparent to the most pigmented bright red and black. This makes it possible to implement any design, no matter how original it is.
- The structure is quite porous, which allows the nail plates to breathe under the dense polymer coating.
- Protecting fabrics from the effects of negative environmental factors - ultraviolet rays, dirt, frost, chlorinated water and household chemicals.
- Composition safe for nails. The use of acrylic powder does not cause allergic reactions, chemical intoxication or other complications in 95-97% of visitors to beauty salons. This material can be used for manicure by women of any age, even teenagers and pregnant and breastfeeding mothers. However, during pregnancy and lactation, it is advisable to do an acrylic manicure not on your own, but in a salon, after making sure that the master will use only high-quality material with a safe composition.
- Optimal consistency - the powder does not spread over the surface of the nail, does not clog into the side rollers, does not flow onto the cuticle, which not only spoils the appearance, but also reduces the quality and durability of the manicure.
- Increased strength of the material, which not only helps protect nails, but also extends the “life” of the manicure. For a long time, the coating made of acrylic powder does not split, crack, delaminate, or undergo other damage. Therefore, a woman can count on the fact that a manicure made with acrylic powder will last as long as necessary, and will look great all this time.
- If acrylic powder is used, you can always repair or correct the manicure. If the surface of the polymer coating is damaged for some reason (cracked, chipped), you can sign up for correction and correct the defect.
- As the nails grow, corrective measures can be carried out without removing the main layer of coating. Thanks to this, the nails experience less stress and are not subject to unnecessary stress.
- To use acrylic powder, you do not need to have a special drying lamp. This distinguishes this material from shellac and gel polish, which are also used to strengthen nails and manicure.
- The consumption of acrylic powder is quite economical. Experts say that 20 grams of powder is enough to carry out 20 to 30 procedures to strengthen or extend nails. Half of this amount of the drug is enough to make from 10 to 15 colored Frenchies.
- The powder is available in packages of different sizes, which is very convenient both from an economic point of view and in terms of ease of use. Small jars are suitable for use at home, while large jars are an excellent solution for salons with high customer traffic.
- Working with acrylic powder does not take much time. Hardening, that is, polymerization of the material, takes a few minutes, especially if you use powder marked high speed, which dries faster than others. However, you have to work with such material very quickly; it must be used by people with appropriate qualifications.
How long does acrylic powder last?
Thanks to the special cementing properties of acrylic, any manicure using it will last 2 times longer.
That is, correction of gel polish, for example, will be required in 3-4 weeks. If the procedure is performed correctly, there will be no chips or peeling.
It is not recommended to wear nails longer, especially long ones, because the overgrown free edge becomes heavier, and the nail plate at the base of the nail remains unprotected and vulnerable.
As a result, the “center of gravity” shifts and the risk of injury increases significantly.
Are there any disadvantages to acrylic powder?
Before use, many ladies may have a question: is it harmful or not to apply this coating, which strengthens, under gel polish. If everything is clear about the advantages of acrylic technology and its benefits, consider the existing disadvantages:
- If you suffer from various types of fungal diseases, diabetes mellitus, or herpes infection, you should refuse the procedure, as it is contraindicated in this case.
- Acrylic powder does not treat weak, brittle nails, but only creates a protective barrier to prevent damage.
- “Repair” of nails should be carried out no later than 3 weeks, otherwise the condition of your own nail plate will worsen.
- A manicure will cost more than a simple polish, and you will also need to have special devices and an ultraviolet lamp on hand.
- Acrylic has a specific, pungent odor; you will need to ventilate the room and wear a protective mask.
- Strengthening must be carried out in strict sequence, according to these instructions or the lessons in this article.
Wear a mask before the procedure.
Also, it is important to consider that low-quality, cheap products can lead to disastrous results, for example, to the appearance of tubercles and uneven layers. Therefore, you need to choose trusted manufacturers; which one is better can be found out from customer reviews. Top brands that are popular include acrylic powder kodi, rio pro, formula pro, runeil, pattern, ezflow, powder, carving, colorful.
Cody powder
How to remove acrylic coating?
To remove acrylic you will need a special liquid. Finding it won’t be difficult, but not everyone knows how to use it correctly. To begin with, it is better to file down the free edge of the nail to the desired length. Then remove the topcoat with a highly abrasive file (at least 180 grit).
Now wrap each nail with a cotton pad containing acrylic or gel remover and secure with foil on top. Periodically check that it does not move away or put on special holders. Remove no earlier than after 10 minutes.
The acrylic will subsequently soften and can be easily removed with a softer file and an orange stick.
The second method of removal is to file each nail without softening the acrylic. This method is also used quite often, but it will require more time and patience. Only the top layers are removed with a highly abrasive file; closer to the natural nail, you will need to switch to softer files or a buffer so as not to injure the nail plate.
Removing artificial coverings traumatizes nails, so after the procedure it is better to protect them with special care products.
Quite simple procedures need to be implemented to strengthen your nails with acrylic powder. The quality of execution of all stages affects the final result. That is why it is recommended to do everything carefully and follow the instructions provided.
Application will not cause difficulties for those who already apply shellac themselves. The technique is simple, but gives an amazing result in the form of beautiful and durable nails, increasing the time until the next correction.
Author: Tatyana Zhukova
Article design: Mila Friedan
Possible options for removing acrylic manicure
If your nails are extended, the preferred way to return them to their original state is to file them down. To do this, you can use regular abrasive files or resort to cutting using a special device.
If you used acrylic powder as a coating to strengthen your nails, then you can remove it using a more harsh method - by soaking it with a special solvent. You can first cut off a thin layer of coating so that the solvent acts faster. Then you need to act like this:
- Take five cotton pads and cut each one in half.
- Soak the discs with a special acrylic-dissolving liquid (you can buy it where you purchased the powder).
- Apply half of the disc to each nail, making sure that the cotton wool soaked in liquid does not come into contact with the skin of your fingers.
- Secure the discs with pieces of regular foil. Or use special nail tips for this purpose. Wait 10-20 minutes.
- Remove one disc and treat the nail with a soft orange stick, removing any remaining product from the plate. Only after this can you begin to cleanse the second nail and all subsequent ones. Those nails that are awaiting treatment should be under the disc and foil (tip).
- After the procedure for removing the acrylic layer is completed, you need to wash your hands and apply a restorative agent to the cuticles and nails.