Fashionable red nail polish
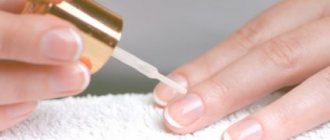
Manicure using gel polish is becoming increasingly popular. The secret of this lies in its brightness and convenience. Not only is it beautiful, but it also saves a lot of time. But it happens that the product has not yet run out, but has already thickened. Therefore, many people are interested in how to dilute gel polish? After all, you don’t want to throw the product away, but it’s impossible to use it in this state.
Why does it thicken
Gel nail polish begins to thicken due to the fact that the polymerization process begins in it. This can be caused by placing the bottle of the product under ultraviolet rays. Therefore, when using gel polish, it is recommended to leave it at a distance of at least 20 cm from the UV lamp. Then its rays will not be able to negatively affect the quality of the coating.
After completing the procedure for using it, you should wipe the neck of the bottle. Choose a lint-free napkin for this. It should first be moistened with remover. Then you will remove the remaining coating, thereby being able to tightly close the varnish lid. Otherwise, if it is not tightly closed, oxygen will penetrate inside the bottle, which will trigger the beginning of the thickening process.
Gel polish can also thicken due to improper storage. It is recommended to put it in a cool, dry place where the sun's rays do not penetrate. A special case or bedside table will do. Do not store the varnish in a warm place, this will cause its quality to deteriorate. Also, don't leave it on the manicure table or just on the shelf. All this will lead to thickening of the product.
How to dilute
Gel polishes have made life much easier for girls. You no longer need to renew your manicure every day or be afraid that household chores will ruin it. The coating lasts a long time and pleases with its beauty. The big disadvantage of the product is its tendency to thicken. Therefore, the question arises: is it possible to dilute gel polish? This can be done, you just need to use an effective tool.
To dilute the product at home, use the following methods:
- Alcohol. One of the products that will help dilute thickened gel polish. You can use any liquid that contains alcohol. It could even be vodka. The coating looks smooth, but after 6 days it will begin to chip. Therefore, you can use this method, but only once. Otherwise, the wear quality of the coating will be irretrievably lost, and will be replaced by a dull appearance of the varnish;
- Top. Another means for diluting gel polish is a top coat. It is necessary to add a small amount to the bottle and mix thoroughly. By covering the nail with this varnish, you can make sure that the quality of wear remains at the same level. Color and texture uniformity are preserved. The method only has a negative effect on saturation. A dissolving topcoat can be used, but not for brightly colored varnishes, where saturation plays an important role;
- Remover for removing gel polish. Some believe that you can dilute gel polish with this very product. However, the result will be uneven dilution. And when coating the nails, changes in the structure of the product become noticeable. After 3 days it becomes completely unusable. Therefore, it is not recommended to dilute the gel polish with remover if it has thickened. The quality of the product will suffer greatly. It is not suitable for further use. After a few days it completely separates in the bottle;
- Diluent. Thick varnish can be diluted with a special product for this purpose. Just add a few drops to the bottle and you will get a liquid coating as if it were new. Due to the fact that the product is designed specifically for these purposes, it does not affect the quality of the varnish. The color and wear remain the same. The cost of the solvent is higher than the price of gel polish. But you can save money with it. After all, you don’t have to constantly buy new coating because of the thickness of the old one. You will be able to fully use the varnish that you already have.
Shellac in the classical sense is a natural organic compound of animal origin, although in a number of sources it is also understood as substances of plant origin. We mentioned it in the publication Paint and varnish materials for wood: types and features, where we indicated that translated from Sanskrit the word “varnish” (lakh) means “one hundred thousand.” This probably refers to the huge number of insects that “occupy” food trees (up to 150 per 6.5 cm2). And the word shellac has a mixed origin “English-Sanskrit” (according to other sources “Dutch-Sanskrit”) sell lac is actually a copy of the French phrase laque en écailles, meaning “varnish in flakes” or “varnish in thin pieces (parts)” .
Shellac is a waste product of the lac bugs Laccifer lacca or Kerria lacca. Initially, insect secretions were used to produce bright, permanent dyes for fabric and leather. Actually, until the 1870s. insects were cultivated precisely for this purpose until aniline dyes replaced shellac dyes.
Shellac dye
The history of shellac: it's a phoenix
The first mention of shellac can be found in the Mahabharata, where the legend of an entire palace built from shellac is described. Note that the age of the Vedas ranges from 2500 (late) to 3500 years. The first “European” mention of lacquer dye dates back to 250 - the Roman Claudius Aelian wrote about it in his “Natural History”. In her 1844 book A Treatise on Art, Mary Philadelphia Merrifield cites a 1222 source for a Spanish artist who recorded the use of shellac as a pigment in paint production. However, only after Marco Polo's journey to India did Europe appreciate the uniqueness of shellac. In 1534, a detailed description of the process of cultivating lac bugs and the technology for obtaining the finished product was published. You can also find references to the use of shellac in the processing of musical instruments. And by the middle of the 17th century. artists and cabinetmakers began to actively use it.
However, shellac received recognition as an excellent finishing coating only in the mid-19th century. When Henry Perkins invented aniline dye, the demand for natural dyes, including lacquer and cochineal, began to decline. But at the same time, the popularity of shellac as a varnish itself was growing. Factories for its production began to open in both Europe and the USA. The best shellac was produced in Germany. Back in the 1830s. technologists have found that it can be made almost colorless by treating the solution with chlorine and then re-precipitating the resin. The resulting pale straw-colored product was superior in purity and transparency to all oil varnishes. Of course, this fact served as a factor in the growth of demand for shellac and made it the most popular protective coating not only in furniture production, but also in house construction.
Shellac quickly gained popularity, but just as quickly lost it with the advent of cheap synthetic products such as nitro varnishes in the 20s and 30s. 20th century, although up to the 50s. it was actively used in interior decoration.
Oddly enough, it was shellac that gave birth to nitro varnishes and polyurethanes - chemists sought to create an artificial or synthetic product that would replace shellac. In the 20s They discovered that if nitrocellulose was dissolved in a mixture of strong solvents, they could produce a material that applied easily, dried quickly, and produced a finish almost as beautiful as shellac. This seemed to be the beginning of the end. And in the 50s. The first oil-based polyurethanes appeared. These products drove shellac out of the market, and most manufacturers closed their factories. From the 60s until the 90s. shellac was practically forgotten.
Now he is experiencing a rebirth. Aggressive marketing deployed against shellac no longer works. Many myths have been debunked, and in return we have come to understand the uniqueness of this product. But more on that later.
Why is shellac so expensive?
Because the process of obtaining commercial shellac is long and labor-intensive, despite mechanization, and global production volume is relatively small. The main supplier, India, exports about 14,400 tons per year, while the industry employs about 3 million people. The second major supplier is Thailand, but this country exports semi-finished products.
Shellac source
Kerria lacca are small (1-2 mm adult and 0.5 mm larva) insects, and they live only 6 months, during which they eat, reproduce and... defecate. From their pores they secrete a secretion that serves as protection against predators. Lac beetles parasitize 400 species of plants, including acanthaceae, legumes, birch, mallow, walnut, cucumber, rue, etc. At a certain time, the larvae take a liking to the branches, gnaw through the wood to the vascular tissue of the plants, treat the holes with wax and begin to eat and secrete secretions.
In the last stage of their existence, they organize a “death festival” - they literally feed themselves until they die. During this period, lac bugs are especially productive; females secrete especially a lot of secretions to protect their offspring (during this period, the female lays about 1000 eggs). The product hardens in air, forming a hard, durable crust over the swarm. But each insect has its own protective “chamber”. In females it is round, it has only 2 openings - the respiratory and anal. Before laying eggs, the female shrinks in size, opening these holes so that the offspring can leave the chamber. Males have an oblong chamber and have a hatch through which they exit after reaching sexual maturity.
According to various estimates, to obtain 1 kg of shellac you need 50,000-300,000 insects.
Lacquer beetles on a tree
Dry shellac production process
As a rule, shellac is collected once a year. Some characteristics of the finished product, including color, depend on the time of collection, the breed of the food plant, and the exact time of collection (before the larvae leave, during it, or after it).
Before harvesting, before the larvae emerge, approximately 25% of the branches are cut off and part of the branches with broods (broodlac) are transferred to a new food base. When the larvae hatch, millions of branches covered in a resinous substance, called “sticklac,” are sent to processing centers. Sometimes the crust is beaten locally with hammers and the so-called “bread or grain varnish” (grainlac) is obtained.
Stick shellac
Grain shellac
In the centers, the stick varnish is scraped off the branches, and then it and the grain varnish are ground in burr mills, obtaining earthen varnish. Of course, the crushed material is heterogeneous in composition; in addition to resin, it contains insect remains, twigs, bark, and debris. To remove the largest impurities, the resin is sifted.
After processing on a sieve, the mixture is placed in large containers about 70 cm high with a serrated inner surface. A working ghasandar climbs into this container and rubs the resin against these teeth with his feet (!) to destroy large granules, remove dye, insect remains, and small debris from them.
The crushed mixture is washed in several waters and as a result the so-called “seed varnish” or “seedlac varnish” (seedlac) is obtained, because visually the granules really resemble seeds from pale lemon to dark red in color. This semi-finished product contains only 5% impurities. Seedlac is laid out to dry on a concrete floor. It is from this that commercial shellac is then obtained, manually, mechanically processed and bleached. However, seed varnish is also sold - it is popular among restorers. And the water, to which the bodies of insects and the pigment washed out of the granules give a bright scarlet color, is used to obtain food coloring.
Handmade shellac
This primitive and very ancient method is still used by small Indian factories. The entire process is performed by three people. First, the grain varnish is poured into long and narrow bags. Really long and narrow, let's say - from 7.5 to 12.3 m long and 6.5 cm in diameter.
The leader in the process, the karigar, sits next to the coal stove, which is called a bhatta, and the assistant holds the other end of the bag and slowly turns it. Karigar holds the heated end of the bag and squeezes the molten resin through the fabric, periodically working the bag with a spatula; the assistant “pours” the still unmelted grain varnish in the direction of the karigar and twists the bag.
Karigar at work
The molten resin flows onto the furnace stone moistened with water, from where it is collected in several stages into another round bag, which is rolled to make the mass homogeneous.
The resulting varnish is handed over to the bhilwaya - it is this person who shapes the sheets. If you think that the varnish is simply poured out and leveled, you are mistaken. There are no easy ways here.
Bhilwaya takes a palm leaf and applies the molten resin to a vessel filled with hot water. Then he removes the resulting slab measuring approximately 0.7 x 0.7 m and half a centimeter thick. He takes this piece, stands by the fire and begins to pull it out, using all four limbs and even his teeth. As a result, you can get a thin sheet measuring about 1.5x1.2 m. After drying, it is crushed into pieces.
Bhilwaya
In the second option, the wax that has flowed onto the stove stone is removed with a spatula and transferred to a flat surface, forming a “sausage”. Disks with a diameter of 2.5-8 cm, the so-called, are cut from it. "button shellac" Until the product has completely hardened, the manufacturer’s stamp is applied to each “button”.
Machine made shellac
There are two main methods: the heat treatment method and the extraction method.
In the thermal processing method, granular varnish is scattered on steam-heated sieves and hydraulically pushed through a fabric mesh or fine sieve. The filtered product is placed in a steam boiler, then the molten mass is dropped onto a roller mill and thin sheets of resin are rolled into thin sheets. After drying, the sheets are broken into flakes. This is dry, pure shellac, ready for sale.
Using the extraction method, three types of shellac are obtained: wax-containing, dewaxed and dewaxed bleached.
Waxy shellacs are made by boiling the raw material in alcohol (an hour or so) and then filtering it. The pure melt is rolled into sheets and flakes as described above. This is how dark varieties of shellac such as garnet are made.
Dewaxed shellacs are obtained either by dissolving in cold alcohol of high strength, or by boiling in alcohol of lower strength. The solution is passed through a press filter to remove wax, and then evaporated in vacuum evaporators. Next is rolling sheets and obtaining flakes. This is how dewaxed lemon and pomegranate shellacs are made.
The process of obtaining bleached dewaxed shellacs at the first stage is performed in the same way as the previous one. But after the press filters, the solution is passed through carbon filters to remove the darkest pigment. By changing the quality of the grain varnish, the amount of activated carbon and the time of its contact with the solution, light grades of shellac are obtained - from light amber to extremely pale straw. For example, “light”, “super light”, “ultra light” (Blonde, Super Blonde and Ultra Blonde).
And as long as it is dry, it can be stored for quite a long time (warranty period is 2 years). In the USSR, there were technical conditions for this product: TU 84-226-71 natural shellac (unbleached). The product should be plates (scales) from yellow to light brown. Mass - without visible foreign impurities, without rosin, loose (without clumping), density at n. u. 1.08-1.2 g/cm3. The proportion of insoluble impurities (when diluted) should be no more than 2.4% by weight. But cereal isn't the only product.
Shellac wax
What kind of shellac is there?
Most of the red dye is removed from the grain varnish during the cleaning process, but the shellac remains orange. Kusmi shellac is very light, but it is very expensive, and it is produced so little that it is simply not available for commercial purposes. To obtain light colors and transparent varnish, shellac is bleached. This process has not fundamentally changed for a century and a half.
The seeded varnish is dissolved in alkali - an aqueous solution of sodium carbonate. It is then filtered to remove debris and insoluble dye. The resin is then bleached with a sodium hypochlorite solution until the desired shade is obtained. Shellac is precipitated with dilute sulfuric acid, filtered again, washed, dried in vacuum chambers and crushed.
The final product has a grainy consistency. Thus, the oldest American company (founded in 1849 by a native of Germany who was engaged in bleaching shellac) produces special grades of shellac “Pure shellac “Bull's eye” (amber) and BIN® (transparent). Both varieties contain 3-5% wax, which gives them a “milky” appearance when diluted, but the dry film is transparent.
Bleached shellac
How and how long can you store shellac for wood?
Manufacturers offer not only dry shellac, but also one that is completely ready for use. However, experts recommend carefully looking at the date of manufacture: in the solvent, shellac begins to chemically change and after six months it becomes virtually unusable. However, manufacturers have developed additives that they add to the product to extend its shelf life up to a year (or even up to three years, as they promise). The composition is kept secret.
Expired shellac does one of two things: it either doesn't dry completely or it "dents the next coat of protective coating." At the same time, coatings made from diluted shellac, which are less than six months old, demonstrate better moisture resistance. Therefore, it is much safer to buy a dry product and dilute it yourself in the required quantity.
But dry shellac, although it lasts longer than diluted shellac, still does not last forever. When exposed to moisture, it reacts with itself, forming alcohol-insoluble polymers. Moreover, dewaxed varieties are more susceptible to this. But you can extend the life of dry shellac up to 3 years by placing it in an airtight container, and the container in a cool place. A refrigerator will do just fine.
In hot weather, shellac can stick together. If it's fresh, just break the resin with a hammer. Still, a cool room with a constant temperature of 14-18 °C is the best option.
The easiest way to verify the suitability of dry shellac is to prepare a small amount of solution for testing. If after three days a gelatinous undissolved mass remains in the container, it means that shellac is no longer suitable for use. Testing ready diluted shellac is no less simple: apply a small amount to the glass. High-quality shellac will dry quickly.
How to dilute shellac varnish for wood
The ideal solvent for shellac is good old ethyl alcohol. But more often they talk about denatured alcohol. This is the same ethyl one, but with toxic additives. Typical option: 95% ethyl alcohol + 4% methyl alcohol + 1% methyl isobutyl ketone. Why denatured alcohol? Yes, for the same reason as in Russia: so that there is no temptation to drink it. Depending on how thick the varnish you want to get, you need to dilute a certain amount of shellac in a certain volume of alcohol.
In the English-speaking sector, the term “slicing” is used; we will use our native “weight”, because we are talking about mass. So, foreigners usually talk about cuts: 1 cut, 2...5 cuts. In the table we give the recipe translated into the values we are used to. BUT! Since Americans stubbornly cling to their small-town measurement systems, we round the values to the nearest gram. 1 cut is 1 pound of shellac to 1 gallon; 2 cuts - 2 pounds to 1 gallon, etc.
| Number of cuts, lbs per gallon | Weight in grams per 1 liter of alcohol |
| 1 (basic option) | 120 |
| 2 | 240 |
| 3 (almost universal option) | 360 |
| 4 | 480 |
| 5 | 600 |
The basic version of shellac concentration in alcohol is suitable for sealing, raising pile for sanding. An even lower concentration is used for light priming, for example to protect the material from pigment penetration. The concentration of 360 g/l is suitable for almost any work; it is a universal and most common option. Non-standard “thick” concentrations are more often used to obtain non-standard coatings. Several thin coats of shellac provide a much better end result than several thick coats. Thick layers of shellac do not adhere well to the base and to each other, i.e. may peel off. And of course, a thick layer will hide parts that do not need to be hidden, such as carvings.
Shellac is known for being fast and fast to work with. You have to be really fast. To reduce the rate of solvent evaporation, other alcohols can be added. In addition to ethanol and methanol, the product is soluble in butyl and propyl alcohol. Methanol evaporates the fastest, followed by ethanol, butyl and propyl alcohol. These last two, as well as fire retardants, can be added in small quantities to ethyl alcohol as retardants. But remember: all these additives are toxic.
If you plan to apply a topcoat over shellac, choose dewaxed varieties.
Real advantages and disadvantages of natural shellac
Any paint coating has both advantages and disadvantages. As for shellac, its disadvantages are greatly exaggerated. So, the advantages.
- Safe. Shellac is an absolutely safe product. You can even eat it, but whatever, you probably ate it, because they cover enteric tablets, sweets, chocolate (additive E 904). It is used in Eastern medicine, and recent Western studies say that Asians are not fools; shellac can really be effective in the fight against tumors. Shellac can be used to cover just about anything you can think of, including children's toys, not to mention furniture.
- Effective. It has excellent adhesive properties - it can even be applied to smooth plastic, not to mention rough, porous wood. You can work with a brush, spray gun, fabric sponge. Compatible with dyes and pigments. Dries to touch in just 15 minutes. The coating is completely ready in no more than a day. Perfectly amenable to grinding and polishing.
- Reliable. Shellac is resistant to UV radiation - it does not fade or fade slowly, does not turn yellow, does not darken, unlike nitro varnishes.
- Beautiful. Emphasizes the wood texture and has a good shine. Quite a wide range of colors.
- Defender. Shellac is an excellent sealant. It is able to “seal” even the smell of urine! It solves common problems with certain contaminants "bleeding" through layers of paint. It will seal out oil, dirt, silicone, wax, tannin and even resin.
- Vapor-tight. No, we were not mistaken. In terms of resistance to moisture penetration through itself, shellac is superior even to polyurethanes.
- The ability to prevent the penetration of moisture vapor into the structure of the wood is very important because it reduces the instability of the geometry of the product. The resistance to vapor permeation of shellac is higher than that of polyurethane, phenolic, alkyd and nitro varnish.
- Repairable. New layers “melt” into the old, providing an excellent result. Scratches and chips can be eliminated. You can completely remove the old layer with ordinary denatured alcohol, i.e. without toxic solvents.
Of course, shellac has its drawbacks, but as for the most important thing, “it doesn’t dry out,” we have already removed these objections above. Expired shellac does not dry out. And now about other shortcomings.
- Shellac does not tolerate alcohol (even if it is excellent whiskey), alkalis, or ammonia. Therefore, protect it from them, and at the same time from acetone, hair styling products and other chemicals. And of course, do not try to clean with ammonia. But these substances and many other coatings are not tolerated.
- Insufficiently resistant to water - white spots form. BUT! A fresh coating of young dewaxed shellac resists this factor much better. Most paint and varnish coatings are not resistant to water.
- Not resistant to scratches. Yes, this product has a low molecular weight. But you can increase resistance to this factor by treating it with wax.
- Low temperature resistance. Well, how low... depending on the variety, the melting point is 75-150 °C. Not so little. Of course, you shouldn’t put the pan off the stove, but tea at a temperature at which you can drink it won’t harm the shellac. However, hot cannot be placed on most (if not all) surfaces.
- Expensive. Yes, it's not cheap. Of course, lower varieties with a dark color are cheaper. Light shellac is more expensive.
Useful tips
It was already noted above why the varnish thickened, what led to this, how this can be avoided. But there are a few more recommendations that will help you avoid questions about what to do if the varnish has become thick and how you can dilute it.
A component of the product that provides a liquid consistency that is lighter than the varnish itself. Therefore, when you open the bottle, it evaporates, rising upward due to its lightness. It is important to shake all bottles regularly. This will help the components mix with each other, then delamination will not occur. Before opening the polish, you should also shake it. Then there will be no need to find out how to dilute the gel polish.
One of the features of gel polish is that it lasts longer than regular polish. This applies not only to the coating on the nails, but also to the product itself in the bottle. It can maintain its liquid structure and not thicken for several years. Of course, for this it is important to ensure the correct conditions for its storage and use.
If it is still not possible to preserve its liquid, use special diluents to dilute it. They will not harm the composition, leaving the color and structure in the same good condition. If you use a top coat for these purposes, be sure to choose it from the same brand as the polish. Otherwise, the coating may deteriorate greatly. Alcohol should only be used as a last resort when nothing else is available. It significantly affects the quality of the coating. The polish stays on your nails for much less time. It is better not to use acetone for these purposes at all. This will cause the varnish to bubble, curl, lose durability, and take longer to dry under the lamp.
Causes of thickening
One of the main components contained in each coating is formaldehyde . It plays the role of a fixative and must be added. The higher the concentration of formaldehyde, the sooner the consistency will thicken . This process is called natural thickening. Typically, more expensive products contain less formaldehyde, while cheaper ones contain more.
There are a number of other reasons for thickening and drying:
- Frequent use . If the product is used frequently, then during the period of application, when the bottle is opened, the solvent evaporates and thickening occurs.
- Rare use . In cases where the product, on the contrary, is used very rarely, its components separate and the consistency becomes thicker. A low-quality product under such conditions can dry out in 1.5-2 months.
To make the varnish thicken more slowly, you need to keep it in a cool environment. The ideal place is the refrigerator.
If you have a whole collection of different coverings, they will take up too much space in the refrigerator. Therefore, you can use a special decorative box to store them. All varnishes should be stored in an upright position and with the lid tightly screwed on.
Photo of nail polish coating
Even more photos at the link: Gel polish photo.
