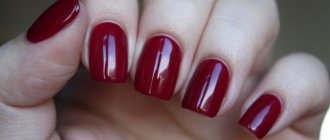
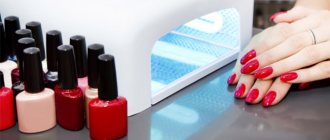
There are always a lot of questions about nail art; can gel polish be coated with regular polish?
Of course, modern manicure is performed mainly with shellac. A certain color spectrum, and most importantly durability, and the ability to implement interesting ideas for decoration make such coatings leaders. But ordinary ones also have their advantages, the main one of which is an affordable price. You can put together a whole collection of colored and nude bubbles. But it is not always possible to purchase a helium composition every time. Another advantage of such combinations is the limited palette of high-quality helium compositions. Finding a compromise between variety and pricing is quite simple.
Can gel polish be coated with regular polish? If we consider it as a decorative option, but the base will still have a more reliable composition, why not. This decor will last for about 7 days. But this is still better than working for 2 hours, drawing patterns with ordinary varnish, only to end up with fragments on the free edge the very next day. With modern compositions, this effect will not work, even if you perform a manicure at home. The only concern is the financial issue.
Buying cheap Chinese bottles means putting yourself at risk of allergies, but for a well-known brand with impeccable quality, you will have to pay 3 or even 5 times more. You can also apply regular drawings; you get interesting three-dimensional 3-D compositions.
Preparation
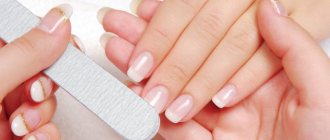
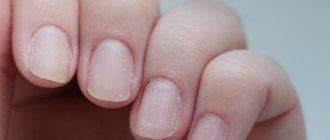
Whatever decoration method is chosen, it is important to get your hands in order. Beautiful and well-groomed, they will tell everything about their owner. Therefore, it is necessary to eliminate all defects, always maintaining an ideal condition. Hygienic manicure goes through the following stages:
- push back the cuticle with a spatula, do this to the maximum distance, because the coating is quite durable and the base will last about 3 weeks, cut in a single line so as not to leave hangnails, you can also use a special grinding machine;
- file down the top keratin layer with a buff; if there are delaminations or a very thin sensitive plate, it is better to first strengthen it with salt baths and oils, and only then proceed with color design;
- Use a brush to remove sawed-off dust particles; additionally, you can wipe with lint-free wipes;
- treat with primer, covering with a thin layer, and wait about a minute; it is important not to touch the plates during this period in order to further ensure the strongest possible fixation;
- then it’s the base’s turn, spread in a thin, even layer, paying special attention to the free edge, and cure in a UV lamp, usually the manufacturer specifies 1-2 minutes;
- use lint-free wipes to remove the sticky layer; there are no other analogues, but cotton pads can seriously ruin your manicure;
- then cover with colored gel and dry in a lamp for 1-3 minutes; if the shade seems too faded, apply another layer; an important rule is to polymerize each separately;
- and at the end the plates are covered with topcoat, dried, and the sticky layer is removed with napkins.
That's it, the helium manicure is ready to be decorated with regular varnish. It is not recommended to apply a layer of colored gel without a finishing coat; the appearance will not be very good, and the practical properties will also be disappointing. Any manicure does not like the first day after active actions with water, so all housewives and lovers of relaxation near bodies of water should wait. When decorated with regular varnish, the design will last about a week, but a durable color coating, of course, will delight everyone.
Manicure design with gel polish at home
It’s easy to learn how to use this manicure product yourself at home. You just have to try a few times, and then everything will go like clockwork. However, in addition to a little skill, you will need the following:
- degreaser or acetone;
- alcohol;
- base – base coat;
- a fixative as protection, and it will also add shine;
- manicure brushes;
- colored varnish;
- UV lamp.
It is better to buy a lamp, if it is not available at home, with a power of at least 36 W.
It will allow for high-quality drying of all layers.
Statistics say that 70% of women, having tried a new gel product, continue to use this product. With a little practice, you will easily and quickly create masterpieces of gel manicure.
- We prepare our hands with relaxing baths. Add orange or lavender oil to the bath. We work on the cuticle and nail area of the fingers.
- We make the nail plates the same length. Do not leave any cracks or layers on your nails, otherwise the polish will crack quickly.
- We degrease the nails. Remove the top glossy layer using an abrasive buff. Do not touch your nails, as the procedure will have to be repeated. If you have weak nails, you can use a primer that will nourish and strengthen the plates.
- Cover the nails with base and dry for about 2 minutes. You should not cover your nails with gel without a base.
- When everything is dry, apply a thin layer of colored varnish. It is important to make thin layers; thick ones will take a long time to dry and may crack when drying. Dry for 2 minutes under the lamp.
- Repeat the layer of colored varnish and dry.
- We cover the nails with a protective finishing layer. It will fix the polish and add shine to your nails. Be sure to dry it under a lamp.
- After the nails are dry, wipe them with a cotton swab dipped in alcohol. This removes all excess from the nails.
French
Not only the classic pink and white palette, you can use any contrasting combinations, in one palette, and even in one color, using matte and glossy finishes. A very simple technique that always looks stylish and impressive. This is done as follows:
- you need to cut strips of adhesive tape, it is better to use painter’s tape than stationery tape, giving the shape of a smile with curved nail scissors, you will need 10 pieces in total, according to the number of nails;
- then secure it in such a way that the free edge with the gel remains sealed, and the free area, right up to the cuticle itself, is covered with regular varnish;
- wait until it dries, this may take about 20 minutes;
- then cover with topcoat and cure in a lamp, remove the sticky layer.
Using adhesive tape, you can create stripes and also use it as a stencil for drawing stars, symbols, figures and other ideas.
Applying varnish to other surfaces
Varnishing, as a process of creating a protective layer, is also used on other surfaces. It can be metal, plywood, paper, self-adhesive film. Is it possible to coat the film with varnish?
It is possible if there is a need for it. The main thing is not to make a mistake with the varnish, so as not to damage the top decorative layer of the film and prevent the surface from cracking after drying. For example, nitro varnish, for all its advantages, has significant limitations on its use, but acrylic varnish is a more universal product.
Ombre
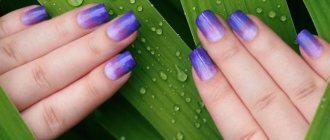
Designers are creating coats and cardigans where similar transitions are used, hairdressers are improving their coloring of curls, and manicurists are improving their nail design. It’s easy to create at home and choose bright, rich colors for spring and summer, and a calm, warm palette for autumn-winter. The gradient is made like this:
- first you need to prepare a tool, it can be a piece of foam sponge or a cosmetic sponge, the second one is more suitable as it has a denser structure;
- then you need to choose 2-3 varnishes of a suitable range, that is, the transition should be smooth, for example, if the base is red, you can take lemon and orange, for blue - pale pink and purple, it is worth remembering that the free edge always remains helium, it should be either the lightest or darkest in the composition;
- apply regular varnish in strips to the foam rubber, print first on paper to remove excess;
- then transfer to the nail plate, leaving a distance of several millimeters from the free edge uncovered;
- when pressed repeatedly, the borders of the stripes shade themselves;
- clean blots from the skin and cuticles; for this it is convenient to use a cotton swab soaked in removing liquid;
- wait 20-25 minutes until the regular varnish dries;
- then treat with top coat and cure for 1-2 minutes in a lamp.
Read more in our article “How to make ombre nails with gel polish?”.
Benefits of shellac
Shellac is a mixture of gel and varnish, which is loved by fashionistas all over the world and is in the top coatings for manicure along with acrylic and biogel.
- Gel polish does not harm the nail plate due to its natural resin base. On the contrary, it strengthens thin and flaky nails, and hard ones become softer when used.
- There are no formaldehydes or monomers in the composition. It does not have a strong odor and does not cause allergies. It can be used by pregnant and lactating women.
- The coating lasts two weeks and is resistant to chips and various cleaning agents. Therefore, a visit to a manicurist can be made twice a month.
- A large palette of colors gives a lot of scope for imagination and experimentation.
- Due to its structure, gel polish does not chip. Therefore, there are many design options for shellac nails: a regular French manicure or various patterns.
- This is the only material that does not fade from exposure to water and sun.
- After removing the gel polish, the nails do not flake or break.
Fashionistas are often interested in another question: is it possible to cover extended and acrylic nails with shellac? The unequivocal answer is yes. These are the main advantages that allow shellac to be in the top nail coatings.
Shellac
Ladybug
You can create multi-colored funny circles, imitate water bubbles, place them chaotically, or set the direction of the spiral and then increase it. There are a lot of ideas for such decor, the main thing is to have a special tool - dots. It is similar to a crochet hook, only the tip is in the form of a metal ball, the dimensions of which help to make circles of various diameters. A very simple technique is done like this:
- dip the dots in regular varnish, and then make an imprint on the ready-made helium coating;
- after the invented ornament is implemented, you need to wait for it to dry, so that this happens faster, you can put a bottle of varnish in the refrigerator before decorating;
- then cover with topcoat and cure in a UV lamp for 2-3 minutes.
For decoration, it is always better to choose contrasting colors so that the mugs stand out well against any background, use 3-5 shades or stick to 2 close ones, for example, a nude palette.
Do not throw away bottles with multi-colored coatings. A rich color palette and texture allows you to realize all your fantasies. Can gel polish be coated with regular polish? If solely for decoration, using interesting color schemes - of course. It is important not to forget to cover with a finishing topcoat. On such a strong base, and even with a protective coating, nail art will last about a week, and then you can start applying designs and ornaments again.
How to remove gel polish from nails
To remove this product, you must use special solvents or acetone liquids. So, we will need:
- gel remover;
- sanding file;
- orange sticks;
- cotton pads;
- foil;
- grinder.
- Cover your nails with nail polish remover. We cut each cotton pad into 4 pieces, soak them in liquid and apply them separately to all fingers.
- Then wrap your fingers in foil and leave for 15 minutes.
- Remove the pieces of foil. We work with one finger at a time. It's better to start with the little finger, because there is less varnish there than on the other fingers. After removing the foil and cotton wool, remove the residue from the nails with an orange stick. If the coating does not want to come off, you can apply a cotton swab with alcohol again. But to prevent this from happening, just hold your fingers near the heat before removing the foil.
- Using a grinder, remove any remaining gel and file any uneven surfaces on the nail surface using a nail file.
- We make nourishing hand baths using creams and finger massage.
Now you can safely prepare your hands for your next manicure! After all, you already know how to use gel polish, what it can be combined with and how to remove this polish.
There are a lot of gel polish design ideas. You can use other people's ideas or come up with something of your own.
Have fun experimenting with your nail designs!
What happens if you cover regular varnish with topcoat?
Those who, ignoring the warnings and recommendations of nail technicians, nevertheless decided on a non-standard combination, need to know what will happen if a top coat is applied to a regular polish. There are several options:
- The coating will come together like an accordion during the drying stage in the lamp.
- Within a few days the manicure will peel off.
- The coating will last for some time, but no more than a week.
The latter scenario is possible provided that the recommendations for creating an unconventional design are followed.
Attention! Nail technicians claim that such experiments cause significant harm to the nail plate. After unsuccessful attempts, the nails split, break, change color, and sometimes tubercles appear on them. Before attempting to combine incompatible cosmetic products, you need to weigh the risks and the expected benefits of the result.
Other types of manicure techniques with a combination of heterogeneous cosmetic products are presented in the video.
