Update date: 09.09.2019 14:10:02 7845 Share:
Author: Anna Etkind
*Review of the best according to the editors of simplerule.ru. About the selection criteria. This material is subjective in nature, does not constitute advertising and does not serve as a purchase guide. Before purchasing, consultation with a specialist is required.
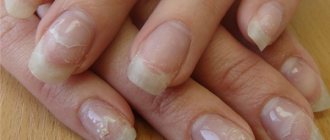
Speaking about high-quality manicure, one cannot fail to take into account extensions as one of the most popular options. A very easy-to-use material for creating luxurious nails is gel. It allows you not to worry about broken nails (which simply won’t happen) and forget about the need to constantly renew your nail polish. This type of extension makes it possible to create ideally shaped nails and at the same time strengthen the natural nail plate. Single-phase and three-phase gels are usually used in work. How are they different from each other and what are their advantages? Our experts have the answer.
So, the number of steps, layers and phases are three different things.
If you perform a simulation in three steps, but from one jar, it will still be a single-phase simulation. This is one phase - one material. These things must be sorted out in your head and not confused under any circumstances. Because you can make a fundamental mistake when purchasing material. You come to the store and say - I need three-phase material. But in fact, you are working single-phase. Transparent gel can be either single-phase or three-phase. This knowledge can help you select the right material and avoid mistakes when combining different materials.
Participate in the marathon “How to create a flow of clients for manicures” https://vip.grandnail.com/marafon-potok-klientov. Whoever completes the marathon to the end will receive a guaranteed gift and a pleasant surprise!
I invite you to go:
my course
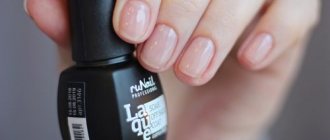
Single phase gel
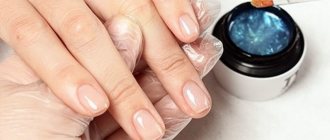
Single-phase gel polish is the easiest to use, single-component material. As the name implies, it has one phase. That is, the “delivery package” includes a single bottle of gel.
This single-phase varnish is good to use at home - if, of course, you have a lamp to cure it. But it is important to pay special attention to nail preparation. Single-phase gel polishes do not contain too many bonding substances, so if they are not degreased sufficiently, the applied manicure may simply fall off.
In addition to ease of use, single-phase gel polishes are also characterized by a low price. That is why they are well suited for people who are not ready to spend kilos of money on a professional manicure or simply like to frequently change the style and decor of their fingers.
Advantages
- Low price. Moreover, such materials are often sold in sets of several colors;
- Easy to use. You can even apply it at home, if, of course, you have a special lamp for curing;
- It just comes off. Often, to remove single-phase gel polish, you don’t even need to cut off the varnish coating.
Flaws
- Weak adhesion and low strength. Because of this, the “decoration” may fall off or come off at the most inopportune moment;
- Nail plate preparation is required. Before applying it, it is advisable to very thoroughly degrease, sharpen, remove cuticles, and so on;
- The difficulty is in creating a two-color or openwork pattern. Single-phase varnishes do not allow you to decorate the nail plate.
On the other hand, this is an ideal option for beginner manicurists. The combination of low price and ease of application makes this material suitable for use in any conditions, including in the absence of a special office or appropriate high-class facilities.
How to choose gel for nail extensions
If you want to make even, smooth, beautiful nails, be sure to use only high-quality materials in your work. To ensure that your purchase is successful and you don’t have to listen to clients’ complaints about your work, you should consider some important points before purchasing:
Initially, decide which system will be convenient for you to work with - one, two or three phase. If you are just practicing extensions, take a complex single-phase UV gel
If you are already working at a professional level, try good three-phase systems. Pay attention to which lamp and at what power the product you choose hardens. It is better to choose materials that dry quickly in a UV lamp - these are easier and easier to work with, and they are usually odorless. Check what viscosity the composition you are going to buy has
Very thick materials will be difficult to work with, and liquid ones can constantly flow down the surface of the nail plate, complicating the modeling process. When purchasing products for gel nail art, choose certified products from trusted manufacturers. When ordering UV gel online, ask the seller whether he guarantees the quality of the product he sells, discuss in advance the possibility of a return or exchange if the quality of the product received is unsatisfactory. If you buy phases for extension separately, and not in a ready-made set, take materials from the same manufacturer, because they are designed for joint use and will combine better than products from different companies. Please note that one jar lasts a long time, so before purchasing, pay attention to the production date and maximum shelf life. Don't buy something that's only good for a couple of months, because most of it will just have to be thrown away. This is especially true for those who like to buy cosmetics at sales, where stale products are often sold.
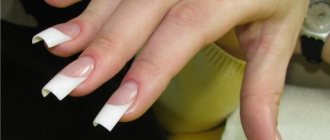
Three-phase gel
Three-phase gel requires a thoughtful, leisurely approach to decorating or extending nails. But at the same time it ensures high reliability and durability of the decor.
As the name implies, the structure of a three-phase gel includes three substances. The first is a bonding agent. It is applied directly to the nail plate and provides high adhesion to other materials. That is why the varnish lasts a very long time, and it is problematic to break it - unless, of course, it is applied in openwork patterns or does not lengthen the nail plate many times.
The second is modeling paste. It is characterized by increased viscosity and is intended directly for building up and creating a manicure shape. And finally, the third is decorative material. It is he who is painted in one color or another.
Three-phase gels are characterized not only by a relatively high complexity of application, but also by a long working time. But with them you can create a truly impressive manicure! Modeling paste in the hands of a master can take on absolutely any shape, it can be processed with a milling cutter and other tools, and the finished appearance depends on its tone - whether it will be colored uniformly or become opalescent.
However, the disadvantages of a three-phase gel are not limited to the difficulty of applying to the nail plate. It is also characterized by a high price! Therefore, this gel polish is not very suitable for home use - it is easier and cheaper to order its application at a manicure salon.
So, let's summarize.
Advantages
- High strength, reliability and durability. “Holds on” reliably and survives even strong mechanical impacts;
- Allows you to create truly complex and unique design solutions, including opalescent shades;
- Suitable for repeated lengthening of the nail plate - although, of course, the strength is somewhat reduced (due to the laws of mechanics, the “lever effect” and internal stresses).
Flaws
- Expensive compared to the alternative;
- Difficulty and duration of application;
- Requires highly qualified craftsmen and the use of special equipment.
Of course, the bonding agent and modeling paste are almost universal, and therefore suitable for use with various decorative varnishes, which somewhat reduces the price of the set. But at the same time, for many fans of home manicure, the cost of three-phase gels remains quite high.
Application: step-by-step instructions
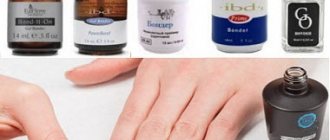
The strengthening process takes more than one hour of work. Necessary equipment and tools for this:
- UV/LED lamp for drying material;
- primer/ultrabond;
- gel/polygel;
- color coating (gel, gel polish);
- finishing coating;
- manicure machine (milling cutter);
- set of manicure tools, brushes;
- degreasing/disinfecting products;
- napkins (lint-free).
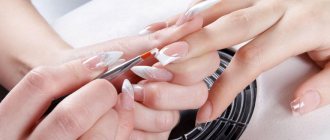
Preparation for strengthening coating
This is an important stage on which the wear life of the material depends.
First, the nail plate is completely cleaned of the old coating (if there was any).
Next, the manicure begins, where the cuticle is carefully removed and the pterygium is cleaned. Manicure should be performed cleanly, using a device with cutters or manicure scissors.
Important. There is no need to make cuts both on the skin and on the nail itself, otherwise an allergy may occur when drying the material.
Using a soft file, the gloss is removed from the natural nail and given shape.
After a manicure, dust is removed from hands and fingers are disinfected
If your nails are naturally wet, use a dehydrator. The plate itself must be dry before coating.
Application of material
At this stage it is important to do everything correctly so that you don’t have to redo it
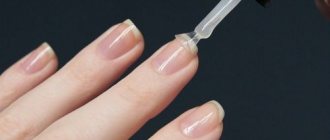
- Primer is applied to the prepared nail. It provides adhesion between the surface of the plate and the gel. It is preferable to use acid-free compounds so as not to damage the natural nail. The primer air dries for about 1 minute. After this, you should not touch your skin or hair with your fingers, because the nail plate is degreased.
- Then the base coat is applied in a thin, rubbing layer. If the system is single-phase, then you can do without a base. The gel is placed on the plate in a small drop. Then, using a brush, the distribution begins with smooth movements. Applying the gel requires knowledge of the architecture of the nail plate. There should not be a lot of material near the cuticle.
It smoothly, from thin, moves to dense, near the middle. At the tip of the nail the layer becomes smaller and the end is sealed. The same result is obtained if you turn the nail over, then the gel itself takes the desired shape. - When everything is lined up, the hand goes into the lamp to dry. The time is set differently: in UV - about 2 minutes, in LED - about 50 seconds. But here the power of the lamp itself is also taken into account. With this distribution, a durable structure is built; this coating can be worn for a long time. Correct technique eliminates detachments and chips.
- If unevenness is visible after drying, you can make a small filing to make the surface of the nail more even.
- Further, if desired, you can apply a color coating and create a design. The final step is to apply the finishing coat. It can be glossy or matte. All layers are dried in a lamp.
- At the end of the process, the coated nail is wiped with a cloth soaked in a special liquid to remove stickiness. In general, the handles are ready. The manicure is forgotten for several weeks.
Contact with water must be limited on the day of application (minimum 2 hours), the gel does not handle moisture.
Master class “Strengthening natural nails with gel”:
Pros and cons of single-phase and three-phase systems
A single-phase system has the advantages of less labor and material costs . This method of expansion is convenient for beginners and makes the cost of the services provided more affordable for a large number of clients. But meanwhile, such a system does not guarantee long-term wear of nails. This is due to the fact that with single-phase extensions, as a rule, the use of a primer is not provided, which means that the adhesion of the artificial coating to the natural nail plate will be slightly weaker.
Also, the coating can be poorly dried due to one, but sufficiently thick layer. This option is suitable if there is no need to wear nails for a long time, and they are done for a one-time appearance: to a wedding, party, performance, competition.
The three-phase system is most in demand among professional craftsmen. The use of several types of materials, each of which performs its own function, increases the wear time of the artificial turf and provides a greater guarantee. For the master, as well as for the client, this technique requires large material costs. This procedure takes more time than single-phase extension. A primer is used under the base layer, this improves the adhesion between the gel and the nail. After the base layer has dried, a builder gel is applied. it is applied in such a layer that in the stress zone (the end zone of the natural nail) the thickness of the gel is sufficient to protect it from breaking.
After this, the master applies colored gel to the artificial nail. The extension is completed by applying a finishing layer, which provides a mirror-like shine to the nails and maximally secures all previous layers.
Nail extensions, both with a single-phase system and with a three-phase system, must be carried out by a qualified specialist, taking into account compliance with the extension technique. The client has the right to ask the master to extend his nails either using a single-phase gel or using a base and top coat. Consumables must be of high quality and fresh, then the risk of chipping and swelling of the artificial turf is almost eliminated.
Beauty and fashionComment