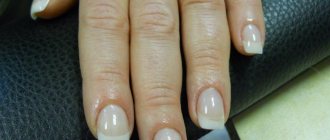
What is biogel
Initially, acrylic appeared, then it was replaced by ordinary gel, but they began to treat it with caution. I didn't like the fact that it couldn't be removed by soaking it. Then the usual gel was replaced by biogel.
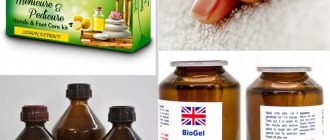
Biogel is a material made from natural resin, before polymerization it has a liquid consistency, can be removed by soaking, and can be used on any nail plate.
What the polymer may contain:
- vitamins A, E and other groups;
- silk proteins;
- keratin.
Manufacturers add other substances necessary for nails. This significantly improves the quality of the plate, helps restore and grow it.
How is it different from other coatings?
Gel polish, shellac and gel have common points - they last a long time, use a lamp for polymerization, and can be used on different lengths of nails. The differences between biogel and other coatings are fundamental; in terms of characteristics, these are completely different materials. To conduct a comparative analysis, you can look at the table. Shellac and gel polish are very similar, so let's put them in one column.
All about shellac - properties and comparison with other coatings, how to do a manicure
| Biogel | Shellac, gel polish | Gel | |
| Consistency before polymerization | liquid | liquid | thick |
| Consistency after polymerization | flexible | flexible | hard |
| Package | jar with screw cap, bottle with brush | a bottle with a brush, like a regular polish | jar with screw cap |
| Compound | polymer gel of plant origin with useful and medicinal additives | gel+varnish | polymer gel |
| Removal | maceration | soaking and/or filing | sawing down |
| Base coat | no need to use | mandatory for use | not used |
| Smell | No | No | No |
Compound
The chemical composition of the gel polish base is focused on efficiency and safety at the same time. In this regard, it is recommended to use rubber compounds. They act most sparingly.
Rubber base is the same product that is applied under colored gel polish in a three-phase system. But it has a set of operational advantages. To give it a thicker consistency, manufacturers introduce rubber into the formula.
This gives the product unique properties:
- Comfortable application. There is no spreading, so you can treat 4 nails at once and start drying.
- More noticeable alignment. Important when there are creases and grooves.
- Strengthening fragility.
- Completely eliminates the appearance of cracks due to elasticity.
- Effective protection against coloring pigments.
- No shrinking effect at the edges.
- High-quality drying without bald spots.
Wearability is approximately the same for bases with any composition: from 3 to 4 weeks. The polymerization time is also the same: LED lamp - 30-60 seconds; UV lamp - 2 minutes.
The difference lies in the operational nuances. For example, rubber products tend to bubble. Therefore, the bottle cannot be left open. The brush must be very carefully immersed in and pulled out, otherwise the bristles will bend. The application itself is performed in 3 touches - from the center to the cuticle and then to the edges.
Nail extension and strengthening
Nail strengthening is often done with biogel; the material in this version performs at its best. It copes with all the manufacturers' claims. The plate thickens, all defects are hidden, and even very thin nails that have suffered damage after careless extension or removal can be restored to an attractive appearance. It is for this purpose that they often resort to strengthening with biogel.
As for extension itself in the classical sense (increasing length), this material is not suitable. It is too flexible, movable, the artificially created edge will be very soft and uncomfortable to wear.
With biogel you can build up the corners to give a shape to some nails and bring the manicure to a uniform look. The material is also suitable for restoration. If you need to lengthen the plate, then it is better to choose polygel. It is harder, allows you to make an arch, and consists of a gel with acrylic powder.
Extensions on top forms with examples and instructions
Lamination of nails is also often done with biogel. The material copes with its task perfectly, is used economically, and is gentle on the nails.
Nail lamination - procedure and review of products
Indications and expected results
Bioreinforcement shows good results due to the materials used, a simple execution algorithm and an affordable price. The procedure has gained trust among salon clients for its many advantages. She helps:
- make natural thinned nails strong;
- restore a damaged plate after an unsuccessful manicure (incorrect gel removal or poor extension);
- even a longitudinal crack can be discreetly removed without cutting off the length of the free edge;
- make the bed resistant to household injuries by increasing the thickness;
- grow the free edge or chipped corners;
- restore a beautiful, neat, neat look to your hands.
Note! Bio-reinforced nails do not require additional color coating to hide the silk patch. The main task is restoration or compaction.
Who is suitable for reinforcement?
The procedure will provide invaluable assistance to people who have visible damage to the nail plate: cracks, breaks, chips, peelings. In this case, you can maintain the length without filing, changing or shortening the shape.
Bio-reinforcement will also become an indispensable assistant for those whose nails are naturally weak and thin. Growing natural nails can take a long time, and the procedure will allow you to avoid unpleasant incidents on the way to this goal.
Note! Bio-reinforcement of nails with silk is the best option for strengthening the plate for allergy sufferers who cannot use special varnishes, acrylic or polymer gels in everyday life.
How long does it last?
The biogel coating can be worn for 2-3 weeks. In this case, it is important not to file off the free edge, since the end is sealed. Otherwise, chips will appear on the tips, as is the case with gel polishes. You won't be able to shorten it yourself until you remove it. For this reason, you should not initially cover overly long nails; after 2-3 weeks another 3-5 mm will be added.
As far as wearing comfort goes, this coating is not much different from other types. When generously applied, biogel is thin, lightweight, does not require getting used to, and allergies are extremely rare.
On jars of biogel there may be information that the material does not interfere with the breathing of nails. In fact, this is marketing eloquence; the plate consists of keratinized cells that absolutely do not need oxygen.
Nail structure and growth: what healthy nails and skin should look like, care rules
Base functions
It is the base that is in direct contact with the nail plate and, simply put, it holds the gel polish. The base coat is the most important layer, which ensures reliable adhesion of the material to the nail.
Therefore, it is so necessary to choose a high-quality base that will not harm the nails and will perform its main functions:
- Reliable adhesion (adhesion of the material to the nail plate);
- Long lasting manicure;
- Protection of the nail plate from colored pigments of gel polish;
- Strengthening the nail;
- Leveling unevenness, masking defects;
- Giving an aesthetic appearance to the nail plate.
A properly selected base will do all of the above, and the manicure will delight you with durability for 2-4 weeks.
But the appearance of detachments, chips and cracks directly informs you that the base was chosen incorrectly and does not match the type of nail plate.
Advantages
There are not many durable materials for strengthening and restoring the nail plate. Biogel stands out against their background; it really has many advantages.
Pros of biogel:
- The material is suitable for any nails: dry, thin, soft, damaged, long and short, with a curved surface. It allows you to get away from these problems.
- Aligns, thickens, restores the natural plate, helps to grow length and correct shape.
- Biogel can be used for feet. If you bought this particular material, then you don’t have to look for a replacement, spend money and buy a regular gel or varnish.
- It looks natural, does not form a large thickness, or any bumps or reliefs when growing.
- During operation, no dust is generated, there are no unpleasant odors, in comparison with the previously popular acrylic. Clean and neat procedure.
- You can make various designs, including simply painting your nails with regular polish.
If you do not make a complex design, then a basic biogel coating will take on average 15-20 minutes. It will take a little more time if your hands are shabby, have overgrown cuticles, or have old coating.
Flaws
There are practically no contraindications to the use of strengthening biogel for nails. Contrary to popular belief, the material can still cause allergies. It occurs rarely, not always specifically to the polymer; sometimes the reaction occurs to the additives included in the composition. Therefore, a product from one manufacturer may be suitable, but from another it may cause itching, redness on the skin, detachments and other unpleasant manifestations.
Disadvantages of biogel for natural nails:
- The material requires careful wearing; durability decreases with prolonged contact with water, household chemicals and other aggressive products. He doesn't like alcohol.
- Nails are not as strong and hard as when coated with acrylic or regular gel. If layers are applied thinly, they can also break.
- The cost of coating in a salon is high; you will have to visit a specialist 2 times a month, when with some other materials you can go for up to four weeks.
Some disadvantages are relative. For example, a biogel manicure can be done not only in a salon, but also at home. The procedure is quite simple; you do not need to take special courses to master it. Often, an allergy occurs not to the coating itself, but to the means for removing the coating, or a skin reaction is caused by the dispersion layer getting on the cuticle during removal. It is important to do this carefully, moving from base to tip.
Kinds
- Basic . Transparent material creates the effect of a natural plate with a slight healthy shine. Excellent for healing and repairing damage.
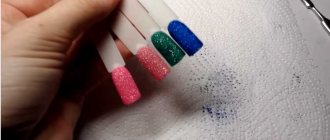
- Colored biogel . The properties do not differ from the basic type, it can be used together with it, this option makes the manicure more interesting, and is used for drawings and other designs.
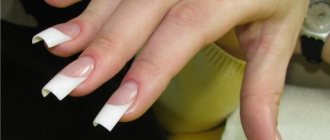
- Royal Sealer . Often used as a top coat for French manicures. Contains bleaching agents that remove yellowness. Transparent manicure retains its attractive appearance for a long time.
- Sculptural . In addition to natural resin, it contains shellac, which is opaque and is used for designs and marking out the free edge.
- With UV protection . The properties do not differ from the classic transparent bio-coating for nails, but protects against the harmful effects of ultraviolet radiation. Can be used as a finishing coat.
Step-by-step instructions for strengthening nails
Persistence does not depend on the day of the menstrual cycle, pregnancy and other myths. Treatment of nails with biogel can be performed for absolutely any condition of the plate; there is no need to grow the length or shorten it. The main thing is to prepare all the necessary materials and equipment in advance.
Required materials and tools
Polymer materials require drying in a lamp. Suitable for UV and LED. As for power, it is advisable to use at least 36 W. Otherwise, the material will polymerize slowly, the process may be delayed, or the gel will not harden at all. We coordinate the drying time with the information on the biogel packaging. On average, the process takes from one to two minutes. In LED lamps with a power of 48 W or more, 30-40 seconds are often enough.
Lamps for manicure, pedicure: types, features, popular brands
Choosing a hybrid lamp for manicure and our rating
What you need for work:
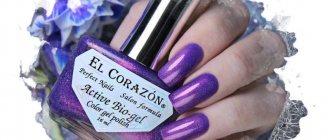
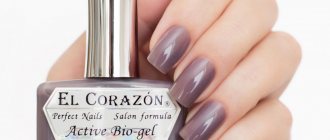
- biogel, brands RuNail, TNL, IRISK, EL CORAZON have proven themselves well;
- buff for polishing;
- degreaser, TNL brand is suitable, you can take Bluesky or any other manufacturer;
- file;
- primer, Bluesky and other brands listed above are suitable;
- aniseptic, you can take regular Miramistin;
- cuticle oil from any manufacturer;
- brush;
- napkins;
- top, it is advisable to take the manufacturer that is used for the main coating.
Since biogel is a soluble material, you need to use the same top coat so that you don’t have to cut off the top layers and then soak the base when changing manicures.
Preliminary preparation
Like any other durable coating, therapeutic biogel for nails requires a prepared surface. Otherwise, it will not hold on, and the manicure itself will not please you with a neat appearance. Under no circumstances do we soften the cuticle in water; we work on a dry surface or use special softening agents.
How to properly prepare your nails:
- We remove the old coating, if present.
- Push back the cuticle with an orange stick. If necessary, trim with tweezers.
- We separate the pterygium, clean the side ridges from crusts and dirt.
- We shape the free edge, file it, shorten the length if necessary.
- Wash your hands with soap and wipe dry. We do not use any cream before strengthening.
You can do the preparation with a device, it quickly and easily removes the pterygium, saves time, here it is important to take into account the condition of the natural plate and your own experience.
Strengthening
At each stage, it is important to pay attention to the cleanliness of tools and materials; you cannot check the quality of drying with your fingers, since they contain natural fat. The preliminary preparation of the plate, which is described above, should not be neglected.
How to strengthen nails with biogel:
- Treat your hands with an antiseptic. Miramistin or its cheap analogue Chlorhexidine is usually used.
- Buff all nails. There is no need to file down anything, we just remove the shiny layer from the plate. We pay attention to the areas and ends adjacent to the cuticle.
- We wet a napkin in a degreaser and wipe the nails. We are working with one hand for now.
- We lubricate the tips of the nails with primer; this product is often not used.
- Sometimes biogel for nails is used with a base, but this is not necessary. Take a brush, pick up some polymer, and apply a thin layer onto a fat-free plate. We seal the end.
- Place your hand in the lamp and dry it for 40 seconds to two minutes.
- Apply a second layer and dry again. Repeat as desired until you get the desired thickness. Or after two layers we apply a color coating and make a design.
- We complete the strengthening with a top. Dry for 2-3 minutes. Wet a napkin in a degreasing agent and remove the sticky layer.
- All that remains is to lubricate the cuticle with oil, which will moisturize the skin around the nail, give it a well-groomed appearance, and emphasize the neatness of the manicure.
Layers should be applied thinly and each layer should be thoroughly dried. If you apply it thickly, the material will not be able to harden even in 4-5 minutes, it will become rubbery, and small pits will appear when pressed.
How to strengthen nails under acrylic gel polish?
One of the most popular methods of strengthening at the moment is the use of acrylic. With its help you can not only grow your nails, but also strengthen them.
Instructions:
- To carry out the manipulation, the nail surface is prepared in a standard way. That is, the old coating is removed, the regrown part is cut, the pterygium is removed, after which a layer of degreaser is applied, and the remaining dust is removed.
- Next, you need to apply a layer of primer, and after drying, coat the surface with a base. Thus, the base serves as a kind of substrate for reinforcement with acrylic. If you are reinforcing with this solid material, the base must be applied in a very thin layer. There is no need to bother with alignment. Now a ball of acrylic is placed in the center of the nail using a spatula.
- Please note that to strengthen it you need very little, much less than to build it up. Your task is to tighten the material from the center to the side rollers, cuticle, and free edge, so that the maximum of the product ends up in the center of the nail, the apex zone.
- Smoothing the surface can be done by wetting the brush in a degreaser, base or top. Once you are satisfied with the leveling option, you need to dry it in a lamp. If you are very good at this material, you have a lot of experience working with it, then perhaps there is no need to carry out sawing. But in most cases, light sanding is carried out using a buff.
- Now you can use a flame cutter or a bullet to carry out processing in the area of the cuticle and side ridges, this is done in order to reduce the amount of material in this area to nothing. Only after this can the cuticle be removed.
- It is best to do this using a ball cutter and additionally polish it with a silicone grinder. As you can see, any of these methods will not work in all cases. For weaker nails, hard materials such as gel and acrygel are chosen, and in the case of hard nails, strengthening can be done using a dense rubber base.
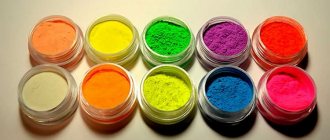
Acrylic Powder
Design options
The transparent coating creates the effect of a natural nail with a slight shine. It looks boring. You can use a simple varnish on top, but there is a problem with removal. You have to use liquids, but they dissolve not only regular varnish, but also the previously strengthened plate, reduce the durability of the entire manicure, and you have to change it more often.
What nail designs are suitable for biogel:
- French manicure , also known as French manicure.
An ideal solution, especially when using a special anti-yellowing coating. Design options for a French jacket - a selection of ideas - Drawings with brushes, stamping . They require certain skills, but they look interesting, you can come up with a picture yourself, paint all the nails or focus on one or two fingers.
- Stickers . An excellent alternative to drawings, they are quickly applied, you can choose any colors, pictures, and do not require the purchase of additional materials.
- Ready-made beads, rhinestones, confetti, foil intended for manicure. Application is easy and helps you quickly and easily create a beautiful design.
What is manicure, its types and popular nail design options
What is base alignment? Problems that may arise during alignment
As mentioned above, the base not only provides reliable adhesion of the natural nail to the artificial material, but also allows you to level the nail plate.
Alignment is the hiding of defects in the nail plate (irregularities, tubercles). Thanks to alignment, we get a perfectly shaped nail.
How is leveling done?
In most cases, alignment is done as follows:
- The first thin layer of base is applied, which is essentially a primer.
- Apply a second layer of base, which is evenly distributed over the nail, fading away in the area of the side ridges and cuticle, forming an ideal shape.
But in some cases, craftsmen perform leveling without applying the first thin layer.
How to shoot
The coating requires soaking. They often use ordinary nail polish remover for this, but it is better to purchase a special product. The brand does not matter; removers from TNL, De lakrua, and Severin do an excellent job with the material.
What else is needed to remove the coating:
- cotton pads or napkins;
- orange sticks or pusher;
- foil or special caps, clothespins for fixing.
You can purchase ready-made pieces of foil with a fixed napkin, which is moistened with the product. You can also find soaking bags on sale.
How to remove the reinforcement:
- Apply a special product to a cotton swab or a piece of disk. You need to wet it well, but the drops should not run off.
- Apply cotton wool to the nail plate and fix for 15-25 minutes. The exact time depends on the coating itself and the liquid used. You can check it periodically.
- Use an orange stick to scrape off the material and clean the nail. If the biogel does not come off well, continue soaking.
Sometimes, to speed up the soaking process, the top layer is slightly filed, which can be done. If you use a rough file, this will take no more than two minutes.
Polymer removers are aggressive and corrode the skin around the nail, so it is recommended to pre-lubricate these areas with cream or oil.
Removing reinforcing fabric
Removing the reinforcing fabric is as quick as attaching it. To do this, you will need a file with an abrasiveness of 180/220 grit, as well as liquid for soaking gel coatings.
Using a buff or file, you need to remove the top glossy layer from the plate, and then moisten it in removing liquid; cotton glue can be removed with an orange stick.
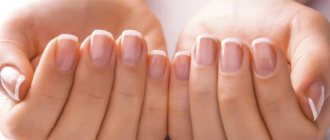
Bio-reinforcement of nails is a useful procedure that increases the strength of the plate with natural materials or hides visible damage. The result is beautiful, well-groomed hands in 15 minutes.


