Natural beauty never goes out of style. The colors inherent in nature are universal and always relevant. Not every girl can afford a bright, extravagant manicure every day. There are different reasons, for example, dress code or personal beliefs. Well-groomed nails of a natural color, on the contrary, are always appropriate and go with any accessories and clothes. French has not gone out of fashion for decades.
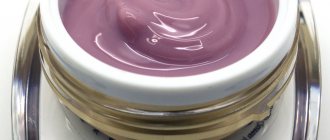
Camouflage translucent gel polish
Gel polish in natural shades is called camouflage. Let's take a closer look at the color variety, design options and features of camouflage gel polish coating.
Classic camo design
The classic design is by far the most popular camouflage design for any nail length. It is created using green, dark green, marsh green, black, light for spots and similar shades. The location of the camouflage pattern does not matter, so they can highlight at least all the nails at once.
Amazingly themed manicure for February 23rd!
Manicure technique with camouflage
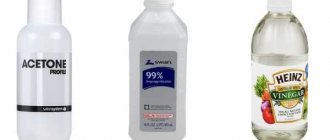
Before applying camouflage gel to your nails , the plates are prepared. Here everything goes according to the standard scheme. The cuticle, pterygium, and skin ridges are corrected. Then the plate is cleaned of dust and skin particles. The stage ends with degreasing and applying primer.
Let's look at the step-by-step process of nail extensions with camouflage gel.
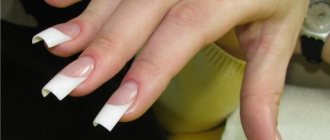
- Remove the mold from the adhesive backing. If necessary, adjust it to fit the natural nail (cut, round). The central parts of the base and the nail should match. Set the workpiece aside for now.
- Spread a drop of camouflage for French manicure evenly in the center towards the free edge, and then towards the cuticle. Do not allow the composition to flow into the “sinuses”; to do this, step back from the cuticle and side ridges by 1-2 mm.
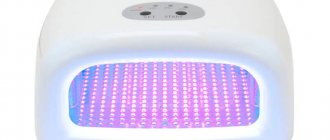
- Dry the nail in a UV lamp for 2-3 minutes (the time depends on the chosen brand) and immediately apply the blank butt to the nail. The line of the form should continue the free edge of the nail. Press evenly onto the substrate for 10-15 seconds and dry again in the lamp.
- Remove the sticky layer and file the edge of the nail into the desired shape. Brush off sawdust with a brush. Apply 2 layers of camouflage gel with an angled brush. Dry each application for 2-3 minutes in a lamp.
- Now apply a tacky finish, spread evenly and dry. Remove the uniform and apply camouflage to match the natural skin tone of your hands. Complete the extension by polymerizing the top coat.
Once the application technique is mastered, you can experiment. Add designs and ornaments, decorate your smile with glitter, sequins or colored gel polish.
Camouflage in gray tones
Camouflage can be not only in green tones, but also in gray. This option is cooler, fresher and will beautifully complement any nail shape. The design is combined with a simple plain coat of varnish or gel polish, making it easy to create at home.
Types of camouflage gels
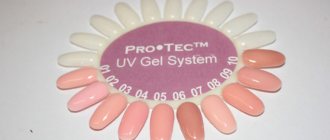
These extension materials are classified as colored gels. But their palette is represented by natural beige, peach, ivory and flesh-pink shades. According to the method of application, they are divided into three types:
A single-phase composition is suitable for home use. The remaining types are used in salons, but with experience, you can extend your nails at home using multi-stage camouflage gels.
Characteristics of camouflage gels
Single-phase material has the thickest gel consistency. 2-5 minutes are enough for polymerization; the exact exposure depends on the composition. Basic properties:
- models the surface well and does not spread when applied;
- you will have to work hard to lay it out evenly on the plate;
- the frozen surface is easy to file;
- The gel does not tend to bubble.
Novice craftsmen prefer single-phase materials in their work. It is these camouflage gels that are used to strengthen nails .
Creating an accent
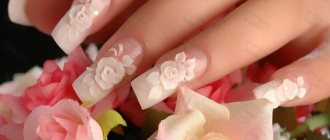
The accent is created on one or two nails to highlight it. Emphasis prevents the creation of a too vulgar and tacky manicure, but at the same time attracts attention. The design is very interesting, simple and easy to do at home. Instead of drawing a camouflage pattern yourself, you can use equally realistic stickers.
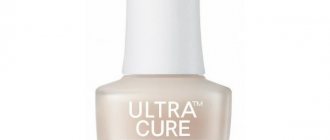
What is a camouflage base for nails, what is it for, how to choose it?
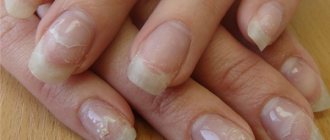
Such a product appeared in the nail art industry relatively recently, a little later than the first gel polish or shellac. Just 5-7 years ago, extended nails, which were lengthened using gel or acrylic, were quite popular. Nowadays, naturalness, nude manicure and classics are at the peak of popularity, so many girls have given up having their nails done and are doing a manicure with gel polish, while strengthening the nail plate with a base.
What to do if you want to get a French manicure and you have natural nails with a short nail bed? How to lengthen the nail bed and hide the ugly color of the plate? Many girls get out of this situation by using regular gel polish in beige or pink shades. But the fact is that such a coating does not look very beautiful, because a French manicure should be as natural as possible.
Advantages and areas of use of the camouflage base:
- Regular gel polish is quite highly pigmented, so it completely covers the nail plate. When it grows back, the regrown part of the nail is quite clearly visible. Many manufacturers have found a way out of such situations and have created camouflage bases especially for manicurists, as well as girls who adore classic French manicure.
- The product is nothing more than a regular nail base with the addition of a small amount of pigment. Accordingly, the surface of the nail is tinted, acquiring a pastel, natural shade, but the coating itself is translucent. It helps eliminate minor defects and hide the blue or yellow tint of the nails.
- Accordingly, with this base you can not only paint your nails, but also improve the adhesion of the natural nail to the artificial material, that is, gel polish, and perform leveling. The properties of camouflage are absolutely the same as those of a regular, transparent base for applying gel polish. Only it differs in its color.
- Now many companies sell a variety of bases; they can be white, milky, cream, or pinkish. Black and white bases are also available. This greatly simplifies the application of rubs, or in the case when a base is needed for a manicure. That is, in such cases when a magnetic design, volumetric inlay or lace manicure is used.
- The most popular are camouflage bases in beige and nude shades to create a French manicure, the popular French gradient or Baby Boomer design.
- It is worth noting that the camouflage base can be used both to improve the adhesion of the natural nail to the gel polish, and for leveling. In this case, you can even perform drip leveling, when a large drop is placed on the nail, distributed to the free edge and to the cuticle, then the nail is turned over to form a beautiful apex, and dried in a lamp.
- Many manicurists have noted that a camouflage base is ideal if you use stained glass or light translucent, slightly pigmented varnishes. In this case, the design seems brighter and richer. At the same time, the natural nail does not show through, which helps save time and the number of layers of application. Even lightly pigmented varnishes need to be applied to a camouflage base in a maximum of two layers.
Glitter Camouflage
Camouflage can be made shiny. This is an unusual mixture of bold and formal style, with shiny materials that make the design festive. It’s worth experimenting with glitter to find the right fraction and color.
Matte camouflage
Matte is a very deep, dignified and impressive manicure. The matte top gel removes any shine from the nail plate and the camouflage looks more strict, but at the same time does not lose the depth of its color. Matte is well suited for long nails of any shape, and all because it seems to hide vulgarity and the manicure turns out to be successful.
Camouflage gel polish: features of selection and use
Camouflage gel polish has recently appeared on the nail product market. Literally 7 years ago, acrylic or gel were used for nail extensions. Currently, natural beauty is in fashion, therefore, when creating a nude manicure, nails are strengthened and lengthened with the help of a base.
Natural shades are universal and relevant, suitable for any dress code and are practically indistinguishable from the natural color of nails. This is an ideal solution for thin and flaking nail plates. The beauty industry is developing, and now you can find camouflage bases of various types and purposes on the market.
When using this manicure, the nails gain access to oxygen, despite the fact that they are covered with an artificial base. This allows you to wear a manicure for a long time without fear for the structure and quality of your natural nails.
Another unique thing is that the camouflage looks almost invisible in appearance. The shade of the base is matched to the color of the skin or nail.
The gel formula has a beneficial effect on the structure of the nail plate, allowing you to avoid the so-called rest time, when the nails need to be allowed to rest, taking breaks in extensions.
Owners of dark skin are recommended to use beige, pink and peach tones of camouflage bases. For fair-skinned people, translucent tones in a pink palette are better suited, for example, the Laque base would be an excellent option. The palette of gels allows you to get different shades from ivory to dark beige due to the thickness and consistency of the material.
The most popular method of using camouflage gel is to create a classic jacket. Today, a “smile” is painted using colored gels or made several shades darker than the base, creating a light ombre effect.
Camouflage bases are presented in a wide range of neutral colors, so choosing something to suit your taste will not be difficult.
Camouflage gel protects the nail plate from mechanical influences and fungal diseases, strengthens them and allows them to breathe, and the nails acquire a mirror-like shine. The polymer coating is worn for a long time and has a safe effect on the health of the nails. Camouflage gel allows you to remove cracks and give your nails any shape.
The camouflage base is ideal when using light-pigmented varnishes. It creates an excellent substrate for subsequent color, as well as for rubbing in, which saves time.
However, this product is not without its drawbacks.
- Allergic reactions. If a person is prone to allergies, then it is better to avoid this type of manicure.
- If the gel is used incorrectly, there is a risk of damage to the nail plate. Incorrect use of the UV lamp can lead to microburns, since the gel during polymerization becomes very hot in the first few seconds.
- When removed, the horny plate may be damaged if the procedure for removing the built-up layer is not carried out according to technology.
- If the nail is broken and chips and cracks appear on its surface, it is necessary to “repair” the nail, otherwise, due to a sufficiently strong coating, the natural nail may suffer due to tearing, and this will lead to pain.
- Correction. Artificial nails need to be re-grown every 2-3 weeks, as the gel is highly pigmented. If this is not done, then the regrown part of the nail immediately becomes clearly visible.
- High price.
There are currently three phases of combining bases available. Each type has its own properties and technology of use. The option is selected based on the effect that needs to be achieved in the manicure.
When designing with camouflage gel, a dark color scheme is used, creating a transition between the nail bed and its free edge. In a French manicure, camouflage gel is used together with a white classic gel, where a “smile” is first laid out and after polymerization of the light base, the nail is covered with camouflage gel.
For pronounced defects of the nail plate and changes in its length, very thick camouflage bases are used. The thick and dense consistency hides all imperfections, evens out the nail and gives it strength.
Single-phase is a “3 in 1” manicure. This type works independently as a base, color and topcoat. It is the simplest way to correct nails and is easy to perform. This base is as close as possible to the natural appearance of nails. The gel dries faster than regular varnish. It has a dense texture and is flexible in creating any shape on the nails. It is popular in nude manicure.
There is also a two-phase gel. This manicure takes longer to complete than a single-phase manicure. The consistency is medium in density, which requires applying two or three layers to achieve the desired result. With such a gel, the master takes more time. The main feature is that each layer must be applied thinly, otherwise the gel will not be able to fully polymerize in the lamp, which will lead to chipping and separation of the material from the nail.
Three-phase is the application of the base in several layers. This technique is presented in the form of a base, sculpting and finishing gel. The structure of camouflage is liquid, making it easy to layer. Particular attention should be paid to bubbles while using the base - there should not be any. Finally, the three-phase base is secured with a thin layer of single-phase gel.
Using gels for other purposes and violating the technique will lead to a short-lived coating.
- Prepare your hands for the procedure.
- Use a soft buff to walk over the surface of the plate, sand and remove dust.
- Give the nail the desired shape.
- Take the nail extension form and attach it. The center of the shape should coincide with the center of the native nail plate. Fix the form.
- Use a brush to grab a small amount of the product and distribute it evenly over the entire surface of the plate and the mold. It is necessary to maintain indentations from the side ridges and from the cuticle so that the gel does not flow beyond the nail.
- Polymerization in a UV lamp for about 2 minutes.
- Remove the dispersion layer and give the workpiece the desired shape.
- Remove excess dust.
- Apply camouflage gel polish in several layers, curing each layer in a UV lamp for 2 minutes.
- Remove the mold and apply fixing gel.
The procedure for using a single-phase gel is performed as a regular manicure on the finished length of nails. When extending the plate, molds are used.
Reviews about camouflage bases are mixed. Most often, women complain of allergic reactions caused by these drugs. At the slightest violation of the technology, detachments, cracks and bubbles appear, which makes the coating short-lived. Sometimes the color of the coating from the same jar of gel turns out to be different in tone. This is most likely due to the thickness of the applied layers.
Different brands have different textures of gels, and due to their density, it is not always possible to successfully apply it evenly on the nail. Some bases polymerize in a lamp faster than the time stated by the company.
Among the advantages of the buyer are the color palette and affordable price, which allows you to experiment with designs.
Masters note the remarkable viscosity of gels when modeling and extending nails, which makes work easier. The color palette does not stand out with any special colors. Material consumption is average. The durability of camouflage gels is increased - up to 4 weeks.
Among the disadvantages of the master are allergic reactions. When used frequently, masks do not help against allergies. Some companies cannot be purchased in a professional store.
Camouflage gels are an ideal and universal remedy for problematic nails of lovers of nude manicure. For all their shortcomings, these funds have their fans.
To learn how to do a manicure using camouflage gel polish, see below.
vplate.ru
Warm camouflage
Warm camouflage is made in warm colors: yellow, orange, emerald, fuchsia, red, peach, beige and others. These colors create an unusual version of camouflage, which nevertheless looks very beautiful and profitable. Warm execution of the master is often combined with cool colors, which creates an additional accent.
Camouflage French
If you are tired of the classic French jacket, then feel free to agree to the camouflage design in its modification. This French manicure is very rare, and therefore can attract attention to your manicure from the outside. Creating a camouflage design with a French manicure is limited only by the imagination of the master, which makes it possible to create an amazing manicure for every day or for a holiday. The abundance of rhinestones and decor is a perfect addition to the camouflage jacket.
Pros and cons of camouflage gel for extensions
Like any manicure product, camouflage gel has its advantages and disadvantages.
The advantages of camouflage nail extensions include:
- obtaining a smooth and as natural as possible nail surface;
- strengthening the stratum corneum of the nail plate;
- preventing the appearance of fungal diseases (the gel contains special antifungal components);
- this coating is breathable, which makes it completely safe for the nail;
- the extended coating is practically no different from the natural one;
- long service life, of course, with adjustments.
Disadvantages include:
- high price;
- periodic adjustments at least once every 3 weeks;
- if the built-up layer is damaged or chipped, immediate replacement is required;
- a complex removal process, which, if performed incorrectly, can lead to damage to the stratum corneum of the nail;
- ability to cause an allergic reaction.