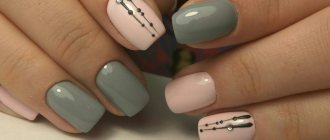
Where to start preparing for work?
Of course, it’s worth getting all the necessary materials:
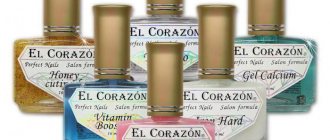
- Base coat is a clear strengthening or nourishing varnish.
- Varnish of the desired color.
- Removal fluid.
- Cotton pads and cotton swabs.
- Hand cream.
- Tassels.
- File and buff.
Now, as it would seem, the question of how to do a manicure with regular varnish at home should not arise, however, when doing it for the first, second, or even fifteenth time, problems still arise that can be solved by following the instructions given below .
The most important thing is that this kind of activity should take place a long time after taking a shower, bath or simply washing dishes. The thing is that moisture on the nails prevents the material from applying properly. In this regard, the result obtained will not please the hostess.
The process of creating lace nails
But how to learn to draw a lace pattern on your nails, because it requires real skill. There are several options for doing this manicure.
For those who have learned to handle a brush and acrylic paints well, you can paint on your own:
- Apply varnish to the nails, which will be the background of the picture. It can be either light or transparent, or dark. Wait to dry;
- You need to paint with the thinnest brush. On the basis of a contrasting color, lace is created, the pattern of which will be the result of your own imagination;
- Fix the finished dry drawing with colorless varnish.
To create such a pattern, you can use lace fabric:
- First of all, you need to prepare the basic material. Cut out pieces from the fabric, the shapes of which are identical to the nail.
- Apply a colorless varnish, it will be the background of the picture, and wait for it to dry a little.
- To make it more convenient to distribute the fabric on the nail plate, you should use a toothpick.
- Next, the fabric is coated with colorless varnish. Wait a little for it to be absorbed and apply again to fix the design.
The simplest and fastest version of this manicure are water stickers with lace of a wide variety of patterns.
How to prepare your nails for a manicure?
It is necessary to erase traces of the previous varnish from the nails, if any, and begin to create the desired shape for them.
Choosing the shape of the nail plate is easy; it is important to adhere to several criteria:
- Oval nails are suitable for those with long fingers, giving them a graceful and graceful look.
- For wide nails, a round nail shape is perfect; besides, it is durable and, due to its slight protrusion beyond the contour of the finger, rarely breaks off.
- Round nails will be very useful for ladies with thick fingers. However, in this case, you should abandon the square shape - this will shorten your fingers even more and make them coarse.
- Square ones will be much more appropriate for women with thin and long fingers. Pointed nails are also suitable for them.
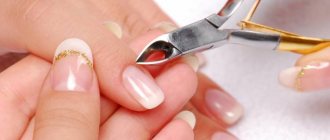
Next, having decided on the shape, you need to look at the condition of the skin around the nails - if it is dry, you should take a bath and soften the cuticle, and then carefully trim it.
Having sharpened the nails to the desired shape, the surface of the nail plate is sanded and polished with a file and buff. The resulting dust is washed off and the nail is degreased (alcohol is also suitable for this).
Preparation
Manicure is a cosmetic procedure for caring for nails and hand skin . There are several types:
- Edged . This is a classic technique in which the hands are immersed in water with sea salt, soap or other emollient for a few minutes. And then they cut off the rough skin around the nails and remove the cuticle. The procedure is recommended for severely neglected but not damaged nail plates.
- European . A more delicate technique that does not use cutting tools. European manicure is suitable even for nails with diseases or injuries.
- Hardware . A modern method that is used in salons and beauty salons.
- Combined . A technique combining hardware and edged manicure.
For carrying out the procedure at home, trimming and the European method of nail care are suitable.
The types of manicure are described in the video:
Tools
Before you start a manicure, you should make sure that you have all the necessary tools and materials at home. The standard set for trimming equipment consists of:
- Files for shaping.
Reference! For natural nail plates, especially those prone to splitting, it is better to choose a glass file. It will carefully seal the small scales that make up the nail without damaging them. - Tweezers (nippers) for removing cuticles.
- Manicure scissors.
- Buff for polishing.
- Spatulas used to push back the cuticle.
European manicure requires fewer devices:
- file;
- orange sticks used to remove cuticles;
- pumice to remove rough skin;
- buff.
Manicure tools are described in the video:
Preparing the surface of the nail plates
Before applying nail art, nails should be properly prepared:
- Wash off the old coating using nail polish remover and a cotton pad . To remove it, it is better to use a liquid without acetone - it is safer for the nail plates.
- Polish with a buff . On the flat surface of the nails, the decorative coating applies more accurately and lasts longer.
- File carefully .
The file needs to be moved only in one direction from the side edge to the middle. If your nails are wet, it is better to wait until they are completely dry, otherwise filing will damage their structure. Attention! When choosing a shape, it is better to focus on the natural outlines of the nail plates: this way your hands will look more natural and harmonious. - Apply cuticle cleaner . When the skin around the nail becomes soft and pliable, carefully push it away with an orange stick or remove it with tweezers.
- Degrease the nail plate with a special product . This way the coating will last longer.
Base for plain varnish
Base (base) is a cosmetic product that is applied to the nail plate before painting. To ensure a high-quality manicure, be sure to use a base . It has a number of advantages:
- smoothes the nail and hides its imperfections;
- increases adhesion between the nail surface and varnish;
- strengthens and protects the nail plate from the coloring pigments of the decorative coating.
When choosing a base, you should adhere to a few simple rules:
- Purchase products that contain vitamin supplements or other nutrients, such as proteins or silk.
- If your nails are uneven, then it is better to choose a thick base for varnish, which will certainly hide all the defects.
- When purchasing, pay attention to the expiration date of the product. After its expiration, the base coat should not be used - it can harm the nails.
The base for the varnish is applied after degreasing the nail plate in one thin layer, being careful not to get on the cuticle and the area around the nail. After the base has dried well, you can begin painting.
Top coating
Top coat (fixer, finish coat) is a cosmetic product that is used to cover finished nail art to fix it and protect it from external factors. With a top, the manicure lasts much longer . Many topcoats additionally have a drying function.
Attention! Manufacturers often produce a base, base and top coat at the same time. If you use all the products from the same brand, the manicure will be of better quality.
When purchasing a topcoat, you should pay attention to its consistency, density and tone. A high-quality fixative does not smear nail art, preserves the color of the varnish and contains vitamins or other useful additives.
Before applying the top coat, you should study the instructions for the correct use of the product. Because some fixatives are designed for a wet nail surface, others are applied when the polish is already dry. To fix the nail art, one thin layer of topcoat is enough.
How to start direct painting?
It is very important that the elbow does not hang down; support is needed; a table is best suited. This is important because it is difficult to do such work while suspended, and the final result may suffer greatly.
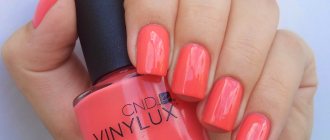
At the very beginning, a base is applied - a transparent coating that promotes a better connection of the varnish to the nail, preventing the colored varnish from being absorbed. This will allow you to remove the coloring agent after some time without turning your nail yellow, red or purple.
It is better to start applying the color layer with your working hand - left for left-handed people and right for right-handed people. What is important is that you need to start with your little finger. This will make it much easier to achieve the result without spoiling the already applied coating in the process.
It is better to warm the tube or bottle of varnish in advance in your hands or shake it (not too much). Do not overdo it with shaking, because the resulting bubbles can subsequently spoil the quality of the work being performed even before it begins.
If, upon reading, the reader thought that this is all there is to know about how to do a manicure with regular varnish, then no. There are a couple more nuances.
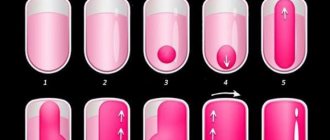
You need to paint this way: take a little viscous liquid onto the brush, leave some of it on the neck of the bottle and draw the brush from the middle of the nail plate to the end and back to the hole. Then go along the sides and finally paint the main middle part of the nail.
If varnish remains on the skin, you can wipe it off with a cotton swab dipped in the solution or with the nail of the other side and immediately wipe it on a cotton pad soaked in acetone.
If the varnish becomes faded, you can also apply a second or third layer. When the nails are dry, take a clear setting varnish and apply it using the same technique discussed above.
Nail design black matte
If you are already tired of bright colors, then give yourself an elegant monochromatic matte finish in black. This style will be relevant in autumn and winter. To complement the fashionable duo of black coating and matte top, you can choose shining decor: sparkles, foil, rubbing, confetti or rhinestones. Use stamping, slider, artistic painting, and gradient techniques to highlight one or two nails with an original pattern. The “liquid metal” design is also popular. This is when a drop of shiny top is applied to a piece of foil - it looks beautiful on black nails.
What to do if the varnish does not dry?
This is a standard problem with all conventional varnishes - they often take a very long time to dry. For each layer to dry thoroughly, it takes, on average, 10 to 30 minutes.
If you don’t want to wait a long time, special sprays or liquids distributed over the plate using a brush can be useful.
It is also possible to use a drop of vegetable oil within a couple of minutes after applying the varnish; this greatly increases the speed of drying of the varnish.
Even taking a regular hair dryer and turning it on without the heating option, you can easily speed up the drying process.
How to make an unusual manicure?
Of course, the Internet is full of manicure ideas with regular varnish, but some of the simplest ones will be written here:
For this option, use a newspaper. The nails are covered with a strengthening transparent layer and then with white varnish. After letting it dry for 10-15 seconds, pieces of newspaper are moistened in water and immediately applied to the nail, pressing down slightly. Immediately after, a layer of clear varnish is applied.
The gradient effect can be achieved with an ordinary small kitchen sponge. To do this, it is dipped in several varnishes of different colors. The surrounding skin is protected with PVA glue or cling film with a nail shape already cut into it. After making the prints, the nail is covered with transparent varnish.
Using a toothpick, you can make some kind of pattern on your nail. Having applied a little varnish of a color completely different from the main one, it is applied to the nail at different angles and distributed in an unusual way over the surface. For example, the thickest points are at the edge and decrease towards the middle of the nail.
Black manicure: fashion trends
If we talk about fashionable manicure, then first of all you need to take into account the length and shape of the nails. After all, black varnish is a difficult material for creativity; you need to know how to handle it. Otherwise, there is a risk of looking vulgar, gloomy or even funny. But if you learn how to handle refined, but capricious color, then the image will turn out to be mega-stylish.
Length. Black manicure looks best on short and medium lengths. On long nails, charcoal shades will appear too shocking. Designers do not advise getting carried away with the long length of the plate if dark varnish will be applied to it in the future.
Form. Square and pointed nails are becoming a thing of the past. Currently, the trend towards everything natural is gaining momentum. Nail outlines that are as close to natural as possible are in fashion. Therefore, preference is given to an oval shape with a medium length. Last but not least is the so-called “soft square” or sqoval: a square shape with rounded corners. Sharp “peaks” were replaced by soft almond-shaped nails.
Fashionable design. Black manicure is now so popular that thousands of incredibly beautiful combinations have been invented. But they all follow fashion trends. Among the most popular options:
Plain. Some will say that it is boring to simply use a single-color varnish. But in fact, black is beautiful in itself. Now the emphasis is shifting from flashy decor to luxury and sophistication of color. Therefore, monochromatic manicure is coming into fashion. To get into the trend, it is enough to paint your short nails with a beautiful, high-quality resin-colored varnish.
Pink + black. Today, the most fashionable combination of colors in nail art. The tenderness of powdery shades smoothes out the aggression and onslaught of black. Transparent inserts in the negative space style are often added to this combination.
Different textures. Dark nail designs can be of different textures: matte, glossy, sand, velvet. You can mix several different textures in one rhinestone look and then you’ll get another fashion trend – multi-texture.
Gold and silver. Nothing decorates a black manicure better than gold or silver designs. Geometric lines of gold and silver on a dark background make a good statement. To make your nail art more sophisticated and elegant, you can add shiny kamifubuki or decorate one or more nails with silver glitter.
Lace. Nowadays, femininity inspired by the Victorian era is in fashion. Openwork patterns drawn or printed on a charcoal background are a must have for an evening outfit.
Gradient. Ombre coloring is embodied not only in clothes, accessories and hairstyles. In nail art, the gradient is also becoming more and more relevant. Transitions from soot to other colors create a stylish and unusual composition in manicure.
French. The black and pink jacket is an undoubted hit of recent seasons. Particular attention is paid to the smile. Now it is not only straight, but also triangular, beveled, rectangular, wavy.
Geometry. For lovers of minimalism, a black design combined with a geometric pattern is suitable. Multifaceted shapes, clear lines, stripes - all these techniques are actively used nowadays to create a stylish nail design.
What are the defining advantages of such a varnish?
Short application time.
Great choice - no need to combine nail design with clothes, since the color can be changed at any time. You can even do a manicure for the holiday - a New Year's manicure with regular varnish is a good idea, since there are plenty of examples on the Internet, both in photos and in tutorials.
Less damage to the nail plate - there is no need to heavily grind and polish the nail, or expose it to the rays of a UV lamp. Gel polish, on the other hand, means long wear and therefore firmly connects to the plate, thinning it.
Types of black manicure
Today, a huge number of different types of black nail designs have been invented. A varied palette makes it possible to choose the right option for any occasion: an evening out, a business meeting, a romantic dinner or a party with friends.
Black French
French has long become a classic of nail art. The designers decided to breathe new life into it and made us look at the French design in a new way. Now different types of black jacket are in fashion:
White and black gloss in manicure. The black and white combination has always been considered the standard of style. And to make the composition even more elegant, you can add a guipure pattern in dark colors to a white background.
Gloss and matte shellac. Monochrome nail art is considered the most relevant at the moment. A matte French jacket with a glossy smile, made in black tones, has been a hit in recent seasons.
Black and pink jacket. As already mentioned, this manicure option is considered the most trendy. Most often, pink takes on the main role, and black acts as a smile. Strengthening the role of dark colors in the design of nails is quite simple: you need to paint one of them in a solid charcoal color or add black lace patterns on one or more nails.
A black French jacket can be complemented with pebbles of the same color, kamifubuki, silver or golden glitter.
Striped
Stripes of different manicure colors will perfectly complement black nail art. A striped pattern will dilute the severity and restraint of a dark color. Among all types of design, it is the easiest to do. Templates and special tape will help you realize a fashionable idea. Transparent, nude stripes or lines in metallic shades - gold and silver - will look especially stylish. The trend is a combination of white, black, nude or transparent stripes.
When creating a striped design, it is important to remember that it has the ability to distort proportions. Longitudinal lines will visually elongate the nail plate. And transverse ones, on the contrary, will visually make the nail wider.
Marble
The effect of the pattern on the marble evokes a slightly cool mood. But, despite this, textured veins on the main background of the manicure give nail art a special aristocracy. Black varnish is ideal for creating a “stone” composition. It is taken as a base, and the veins are painted gray, powdery, and white.
If you want to get away from two-color asceticism, you can “mix” a marble pattern with a monochromatic charcoal color, silver stripes and golden decor. The “stone” texture under rose quartz looks great on several nails in combination with smooth dark nails. The veins can be painted with silver glitter and the black and silver marble can be combined with one or two nails painted in varnish with metallic glitter.
Leopard manicure
Leopard print is constantly at the top of trending patterns. But you need to know how to handle it. He is as cunning as the predator from whose skin he was copied. The main rule: there should be a little leopard print. It is enough to use the area of one or two nails for a predatory design. Drawings drawn with different textures of dark varnish - matte and glossy - are very relevant. Nowadays it is common to add a print to a French or moon pattern. Therefore, you can safely complement the black and powder French jacket with leopard spots.
Advice. It is better to choose plain clothes for leopard print nails. Another option is to combine a predatory print in nail design with a similar pattern in clothing. It is better to avoid combinations with other fashionable images. The presence of flowers and leopard spots in one nail art does not look very good.
Lunar
Moon manicure in the color of a raven wing is original and mysterious. New trends add an additional touch of originality. Now the following variations of the lunar jacket are fashionable:
- Wide pink holes on a raven background. Both varnishes are glossy.
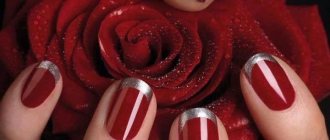
- Silvery holes and dark background.
- Single-color design, where the base is matte and the holes are glossy.
- Resin-colored arches on a nude surface. You can add a little sparkle by drawing a line of silver or gold down the center of the arch.
- Powder or white background with black holes.
- Triangular transparent arches in negative space style on a dark base.
Gold foil strips are often added to the latter option. Then nail art goes from laconic and everyday to festive.
Matte
The matte texture is beautiful in itself. It creates a light velvety visual effect. You can simply apply it to your nails in a single color and your branded manicure is ready. The matte texture can also be an excellent basis for interesting design solutions.
- Alternation of textures. You can combine different textures in one nail art. The idea looks impressive when several night-colored varnishes with different textures are used at once: glossy, velvet, grainy and matte.
- Nude and rhinestones. The interweaving of a rich and strict raven color with a delicate nude is a win-win option. One option: all nails are painted charcoal with a matte texture, only the middle nail is different. It is made in a glossy nude, on top of which a subtle pattern of dark lines is applied. You can complement the composition with small silver rhinestones along the pattern and holes of the index fingers.
- Flowers and geometry. The black tone emphasizes fashionable floral prints and geometric lines. And if it is also matte, then the effect of luxurious velor with a pattern will appear.
- Rhinestones. The matte texture combines perfectly with shimmering rhinestones. The experiment will be successful if the holes of the matte manicure are decorated with silver stones.
Recently, nail design has become fashionable, in which the decor matches the color of the main background. Therefore, without a shadow of a doubt, you can use broths, kamifubuki and rhinestones in resinous shades.
Glossy
The glossy surface looks like a thin shiny glaze. Despite the high demand for matte textures, smooth and mirror finishes do not lose their relevance. On the contrary, every season new variations of nail art with a smooth texture appear. The most successful designs for black gloss:
- Ombre.
- Marble.
- Craquelure.
- Multi-colored dots in holes on a general dark background.
- Pearl decoration on the ring finger.
- Matte patterns on a glossy surface.
- Transparent negative space combined with gloss. Geometric lines and shapes look especially impressive in this design.
Top positions in fashion are now occupied by monochromatic, rich black nail art with a glossy surface. A prerequisite for it is short or medium length. Nail shapes should be soft, oval.
Black manicure with rhinestones
For those who do not like discreet monochromatic solutions and are not delighted with various prints on nails, there is a great solution - to use rhinestone decor. Combined with deep raven tones, the glittering stones create a stunning shimmering effect. A scattering of stones can cover the entire plate or only frame the edge of the hole. A fresh idea from designers is to use one stone on each nail, skillfully tying rhinestones to a geometric or floral pattern.
