What is nail plate alignment?
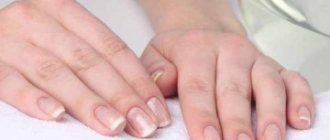
Each of us has a different nail structure. Lucky are those girls whose hair is perfectly even and smooth. But some young ladies have a hypersensitive plate (irregularities, detachments, tubercles). In addition to everything, during manicure, nails are often subjected to various treatments: filing, polishing, removing gel polish with a machine, etc., which also has a bad effect on the condition of the nails.
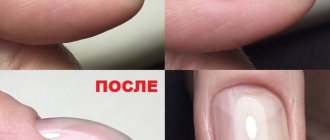
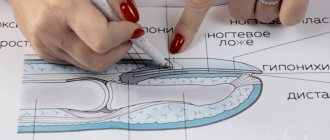
Alignment and strengthening are necessary in order to give the nail the correct architecture. It will also get rid of varnish runs, waves at the end, various bumps and dents. The first layer is a primer, it hides all the irregularities. The second layer is evenly distributed over the nail, smoothly disappearing in the area of the side ridges and cuticle, forming an ideal surface.
This procedure is simply necessary and has a number of advantages:
- Leveling strengthens the nails, and the coating lasts for several weeks before correction.
- The ability to create the correct nail architecture. When adjusted, the nail will grow in the right direction.
- Simplicity and accessibility. In order to make strengthening, you do not need to buy additional products. A simple procedure takes about 10 minutes.
- It is important to do leveling when removing the coating with a device, so that when cutting, a base layer remains. A thin layer of the product will cover and protect the nail from mechanical stress.
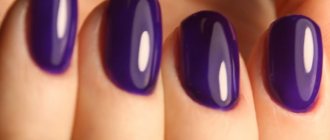
- Static and beautiful. The smooth surface gives beautiful and even highlights from different light sources.
Why do irregularities appear?
Ribbed, wavy and thin nails are always a problem. With such nails, any manicure does not look very neat. Most often we do not think about the true cause of our deplorable condition.
It is worth paying special attention to this issue, because nails are an indicator of our health. For example, if your nails are covered with a groove near the cuticle, then you should take a course of vitamins to saturate your body with useful microelements. Ribbed plates appear as a result of microtraumas, and also cause fungus, psoriasis or other problems in the body.
Nail care at home
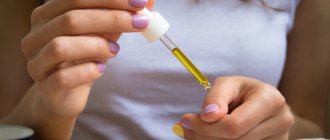
But it is important to remember that no expensive and well-known product can replace basic but necessary home nail care. In various training videos you can easily find tips on straightening the nail plate using a variety of baths and oils. For example, with the help of a special massage using lemon and strengthening oils, it is possible to heal and straighten any nail plate. It is also necessary to carry out moisturizing procedures using various creams at least once a week. The main thing is to make the necessary efforts, then your nails will always look well-groomed and neat.
If you follow the advice in this article, you can easily and quickly achieve a great-looking nail even at home, by understanding how to straighten the nail plate using the latest tools.
What to equalize
Aligning the nail plate is not difficult. Here it is necessary to take into account the specifics of the material. Suitable for strengthening nails:
- base for gel polish;
- biogel;
- extension gels.
It is important to remember that any product that forms the basis of the manicure should be very thick. Liquid bases or gels are not suitable. They will simply flow off the nail rather than forming it.
How does the procedure work?
Before the session begins, the master selects a tool that is suitable for providing the service. Despite the fact that many people recommend doing it only with a special gel because of its thickness and the density of filling defects, there are other options for designing the nail plate:
- Strengthening biogel;
- Gel for extensions;
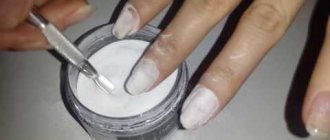
- Acrylic Powder;
- Base.
The compositions have different structures, which is why the characteristics of their distribution differ, so the master can choose a suitable analogue, which depends on the initial state of the nail plate and convenience.
First you need to prepare the tools and consumables that you will need for the work, except for the fixing base:
- File;
- Pusher or orange stick;
- Nail scissors;
- Buff for polishing;
- Cuticle remover (or hydrogen peroxide);
- Degreaser;
- Primer;
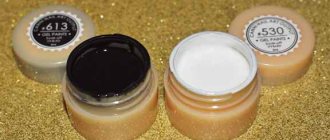
- Gel varnishes: base, color pigments, top;
- Decor (optional).
To dry the result, prepare an ultraviolet or LED lamp. It is also recommended to pre-treat all instruments with an antiseptic if you use personal reusable instruments.
Manicure begins with basic correction of the nail plate:
- Use a file to adjust the shape of the free edge.
- Apply the remover to the keratinized epidermis.
- After a minute, use a pusher or an orange stick to push back the cuticle and cut it off with nail scissors.
- Use a buff to remove the gloss from the surface and run it along the end.
- Treat the nail with a degreaser.
- Apply primer and let it dry.
- Apply the first layer of gel. It should be thin enough and cover only small depressions and irregularities. Dry it in a lamp.
- Apply a large drop of gel composition to the central part of the nail plate, and then gradually distribute it over the entire area. For convenience, you can use a thin brush. To avoid bleeding, turn your finger face down for 7-10 seconds, this will allow the foundation to flow towards the center and form an even coating. Dry the layer.
- Perform a decorative manicure by applying a base, colored gel polishes, and top coat.
- Remove the sticky layer from the top coat. This can be done with a degreaser or cleaner.
The actual alignment of cosmetic defects on the nails usually takes about twenty minutes, so it does not greatly increase the duration of the procedure. But the absence of bumps and depressions will ensure tight adhesion of the nail to the varnish, preventing its premature removal.
Leveling the nail plate with a base
The base should be thick, it is advisable to choose a rubber one. The thicker it is, the easier it will be to strengthen the nail. More liquid products run faster to the side rollers. You need to keep an eye on this.
What bases are suitable:
- Kodi;
- Komilfo;
- Lovely Base;
- NeoNail;
- Adore Professional.
Strengthening technique:
- Prepare your nails for work.
- It’s good to scoop up a drop of the desired size with a brush and apply a thin layer of base.
- Place a drop in the apex area (almost near the cuticle). Pull it to the cuticle and stretch it in 3 movements. The first is in the center, the second is on the right edge, the third is on the left edge. Don't be afraid to ruin something. The base brush is very soft, it will not be able to push through the drop, so movements can be bold.
- Use the corner of the brush to form the architecture of the nail.
- Turn the nail over, seal the end and dry thoroughly.
Video instruction: Base leveling technique
Leveling the nail plate with biogel
The choice of most girls is biogel. It has a thick consistency and dissolves well. Many manufacturers produce special biogels for thin nails. This is a real salvation for problematic nails that suffer from detachments. You need to choose a soft brush with a rounded shape and long bristles. It should practically not touch the nail. The product should stretch only due to surface tension.
Which biogels are suitable:
- Bio Stretch Gel (BSG);
- Atica TM;
- Creator;
- Yoko;
- El Corazon.
Remember that to level with biogel, you also need to apply a base.
Strengthening technique:
- Apply a thin primer layer of basic biogel using a brush to prepared, fat-free and slightly buffed nails.
- Rub the base well, especially in the area of the side rollers, under the cuticle and seal the end.
- Dry the layer. In terms of time, the biogel dries like a regular gel polish: 30 seconds in an LED lamp and 2 minutes in a regular UV lamp.
- The second leveling layer must be applied to a well-dried primer layer. Saturate the brush with material gel and scoop a drop of a suitable size onto the tip.
- Place in the center of the nail about a millimeter from the cuticle.
- Push the brush forward a little towards the cuticle.
- When the drop lies along the cuticle, pull the material down to the tip. Without pressing, distribute the biogel over the nail, not reaching the end of the free edge, so as not to touch the dispersion layer and not violate its integrity. This will distribute the material more evenly.
- It is necessary to work on the side zones. You need to stretch the material from the droplet to the tip closer to the rollers.
- Turning the nail sideways, form a longitudinal line. Using the corner of the brush, lightly grab the layer of biogel and pull it down along the nail in long, even lines.
- Near the side rollers, the thickness of the gel should be minimal.
- The result will be a small volume along the center line of the nail from the cuticle to the tip with the highest point somewhere between the center and the cuticle at about 1/3.
- Turn the finger over and seal the end.
- Dry the layer in a lamp.
Before applying a colored layer, regardless of whether you need to cover your nails with colored gel polish or gel, you need to remove the sticky layer. This is necessary so that the color layer lays down well and evenly.
C-curve nail
It is necessary to ensure that the transverse bend has a beautiful rounded shape without excess materials on the sides. This is especially true when working with liquid materials. To avoid such an error and eliminate all irregularities, you need to turn your finger nail down.
Applying gel polish
After preparation, you can begin to apply nail polish. It is important to take care of good lighting and place the necessary materials at hand. As an instruction, we will consider applying Cat's Eye gel polish. A special feature of the coating is the presence of metal particles, which, when interacting with a magnet, form a pattern on the nails.
- Treat your nails with primer and wait for it to evaporate.
- Apply a thin layer of base, dry in a lamp (time depends on the product and lamp power).
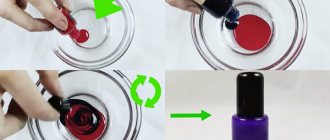
- Shake the bottle of varnish so that the metal particles disperse evenly. Apply the first layer of varnish and dry in a lamp.
- When applying the second layer, bring the magnet closer to the nail and hold it for 15 seconds at a distance of 1-2 mm from the nail plate. Advice! Experts recommend painting and drying each nail one at a time.
- Apply top coat and dry in a lamp.
- If the top has a sticky layer, carefully remove the film.
Gel polish set
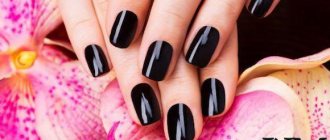
Manicure with gel polish Cat's eye is ready. It is better to use a glossy topcoat; the magnetic pattern will look more effective. You can use sparkles or rhinestones for additional decoration. The technology for applying single-color gel polish is done according to a similar scheme.
There is nothing complicated about applying gel polish yourself. The main thing is to choose the right materials and not rush. You can get a beautiful manicure without going to the salon. Watch our video for beginners, where each step of the wizard is explained step by step.
Leveling the nail plate with manicure gel
An ideal option for those whose nails begin to curl unevenly as the length of the free edge grows. Using the gel, you can strengthen and correct the nail plate.
What gels are suitable:
- Cosmoprofi;
- Kodi;
- CNI;
- Irisk.
If you are leveling your nails with extension gel, it is important to remember that it does not dissolve. It just needs to be cut down.
Strengthening technique:
- Disinfect your hands and file the surface with a buff.
- Coat your feet with an acid-free primer for better adhesion.
- Using a flat brush, rub in a thin layer of gel base.
- Leave the layer to dry in a lamp for a few minutes.
- Use a brush to take a drop of manicure gel and place it in the middle of the nail.
- Push it closer to the cuticle, to the side ridges and carefully level it.
- If most often deformations occur on the free edge, then you need to pay attention to it and carefully level the gel there.
- Dry the layer in a lamp.
- Using a medium-hard file, carefully file all the irregularities of the nail: the side ridges, at the cuticle and the free edge. It is also necessary to trim the end.
Now your nails are perfectly smooth, and the color coating will lie on them flawlessly!
Alignment methods
If the cause of the defect lies in negligence in performing a manicure yourself, then it can be easily eliminated. This requires a little effort and a sufficient amount of time. Microtraumas, cuts, bruises, and damage can cause crumbling, lamination, and deformation.
Damage to the root of the nail occurs as a consequence of careless removal of the cuticle, tearing and biting of hangnails, which, in turn, can lead to damage to the skin around the nails by all kinds of bacteria. To avoid such unpleasant moments at home, you need to do an unedged manicure.
The best way to enrich the skin and nails with minerals is a warm bath with the addition of sea salt and subsequent moisturizing with olive oil and calendula, as well as a light massage of the fingers and nails.
Various oils used for baths have an effective effect on moisturizing and strengthening nails. Depending on the concentration, they are used as a means for massaging the nail plates.
It is advisable to use a gel base coat before applying decorative varnish. It will serve as a leveling agent, protect nails from the harmful effects of varnish and will serve as a protective film for a long time. You can replace the base gel with a polish that has the same composition.
The basis for such developments should remain the basic principles of proper care, especially after extensions. So, it is necessary:
- constantly strengthen your nails with a nourishing massage;
- after warm baths, soften your fingers with moisturizers;
- Do a manicure once every ten days;
- remove cuticles with special means;
- sometimes rub lemon, black and red currant juice into your nails;
- use nail polish remover without acetone;
- Polish once a month;
- apply medicinal varnishes and gels.
In pursuit of a perfect and incredibly attractive appearance, do not forget about a neat and elegant manicure. To create it, girls use a variety of varnishes and techniques. For example, an incredibly popular way is to create nail designs using gel polish. In order for it to fit correctly and last a long time, you must first get your nails in order. This means that you need to get rid of unwanted hangnails and cuticles, and you also need to straighten your nails.
Not every woman naturally has smooth and strong nails. Sometimes, due to improper care of your hands, they become deformed and various irregularities and cracks appear. Nail care should not be limited to home methods; some procedures can only be done with professional help. But straightening the nail plate is now available to everyone. There are a huge number of different means and methods of performing this procedure.
Life hack: how to make perfect highlights
After we have learned how to level the nail plate, we should learn one more secret. You won't get the perfect highlight without a round lamp. Its appearance directly depends on the light source. With a regular lamp it will be anything: square, angular or oblong. But a beautiful round glare can only be obtained from a round lamp. In its absence, forming it will be very problematic.
In order to get it, a regular round table lamp will do. After applying the strengthening, the nails can be held under a regular lamp for 20-30 seconds, and then sent to polymerize.
Causes of the appearance of bumps on nails
Unevenness occurs due to various reasons:
- fungal infections of the nail plate;
- deformation of the nail plate under the influence of pathogenic microbes;
- improper hand care;
- inaccurate cuticle removal;
- serious problems with the body.
Straightening the nail plate should not be limited to cosmetic procedures at home. First of all, it is necessary to establish the true cause of the defect, undergo the necessary examination and pass the appropriate tests.
