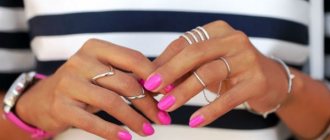
It is difficult to say what exactly is the basis of a proper manicure. This includes the quality of manicure accessories, materials, as well as workmanship. The overall appearance of the nails will depend on how smoothly and accurately the layer of varnish is applied.
The most difficult area to work with is the cuticle area, both for professionals and for those who do manicures at home. One wrong move and the manicure will be ruined, and re-painting requires additional time, which, unfortunately, not everyone has.
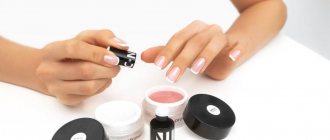
It is important to consider the tricks and secrets of the professionals that they kindly shared. In particular, this applies to how gel polish is applied under the cuticle. The tips are simple and they will definitely help you create an amazing manicure on the nails of beautiful women.
Important little things
The main nuances that it is advisable for everyone who is going to apply gel polish to become familiar with.
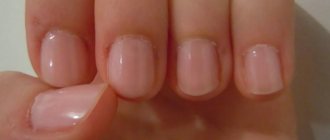
- It is necessary that the nail plate be carefully prepared. In order for the coating to be perfectly smooth and even without having to redo it, you need to treat the nail plate by polishing it. There should be no roughness or irregularities; if any are detected, the procedure must be repeated. The cuticle and side ridges need to be treated most thoroughly. A sign of a good manicure is smooth sides, smooth skin, and the absence of cracks and burrs.
- Before painting your nails, it is extremely important to fulfill one more important condition. Use an orange stick or pusher to push back the cuticle, do it carefully and slowly. This will ensure that the polish is applied closest to the base of the nail. This simple action can make your manicure look fresh and tidy. Once the painting is completed, the cuticle will return to its original place. The border of the polish will be covered, which means the new part will be less noticeable as the nail grows.
- You should not stop at just one chosen application method. Girls who were unable to create the perfect manicure at home on the first try quite often decide not to do it anymore and turn only to specialists. However, painting your nails is a task that absolutely any representative of the fair sex, who has neither talent nor artistic abilities, can cope with. It is important to choose exactly the method that is convenient and acceptable. Yes, you will have to experiment a lot and have a lot of patience. However, this activity – decorating your own fingers – is quite exciting and interesting. If ideas don’t appear on their own, you can look them up on the Internet or ask your friends.
These simple tips will help you avoid many problems. By honing your skills over time, you can achieve incredible success. Then you will not only be able to save on going to a beauty salon for a manicure, but also enjoy and enjoy your own skills.
Which is better – edged or hardware manicure:
We are constantly looking for the most gentle ways to get our hands in order. The aggressive trimmed manicure was replaced by the European one, with its careful processing of the cuticle without removing it. However, this technology is not suitable for everyone.
Hardware manicure is the next step towards the development of the nail industry. Its undoubted advantages:
- The cutter carefully removes only dead skin particles without damaging the cuticle, as often happens when trimming with tweezers. As a result, there is no danger of wounds with further possibility of infection. Not only thin, but also denser cuticles are effectively removed, leaving the nail hole smooth and neat.
- To perform a classic manicure with high quality, hands are first steamed in a bath, which provokes the spread of fungal diseases. Hardware treatment is performed on dry skin, so it is much more hygienic.
- After gentle removal with a cutter, the cuticle grows longer and does not become rough, as with a trimmed manicure.
- Problematic nails are treated delicately: brittle, flaking, uneven, damaged by improper extensions. As a result, any gel polish then fits and lasts much better on them.
- The skin around the nails looks healthier and more well-groomed. You can also use a cutter to remove calluses from your fingers if they have formed from work.
- The procedure is easy to carry out at home. It is enough to go through video training, watch relevant lessons and step-by-step photos from professionals, and then practice a little to achieve tangible success. The machine for hardware manicure is so easy to use that high-quality nail treatment will not be a problem even for beginners.
- All necessary operations are performed in 30–50 minutes. For a trimmed manicure, the master will need 1.5 hours.
Machine processing is often called the improved European method. Problems can only arise if the nails are in very poor condition. It will not be possible to bring them back to normal in one session.
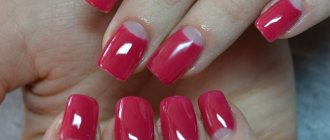
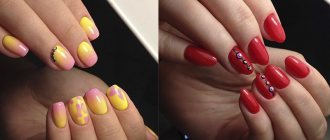
Perfect application of gel polish: what is the secret?
It is known that gel polishes have taken root well and are very popular among many hundreds of thousands of women. Most nail technicians and lovers of home manicures have learned how to do this type of manicure efficiently and correctly.
Without a doubt, gel polishes are one of the best inventions in the nail industry. This is a popular and fashionable service, used by representatives of all ages and professions. Simple, convenient, fast process. This is a big savings in money and time, which is always in short supply.
The shine lasts for several weeks, creating the feeling that the manicure has just been done. It is safe for the nail plate, and also does not contain substances that can cause an allergic reaction on the nails or the skin around them.
It does not crack, does not chip, and with all this splendor, regardless of whether the nails are long or rather short, it looks very natural and is an undoubted adornment of ladies' hands.
So how to achieve the perfect result when applying gel polish under the cuticle?
Absolutely every technique described below is unique in its kind and deserves special attention. Qualified nail service specialists use them in their own work with clients. To find exactly what is close to your heart, you need to try out each technique. This is both experience and passion.
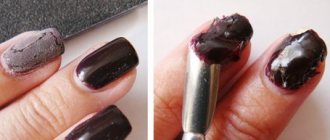
How to reshape a nail with a brush
The simplest and easiest method, which is usually used by beginners. Any craftswoman can apply it, painting the nail evenly and without touching the cuticle and side ridges.
- First, you need to place the brush as close to the cuticle as possible sideways, draw a line along the edge of the nail on both sides in turn. Usually, the center of the nail plate after such manipulations has a rich, well-painted color. If this is not the case, you need to paint the center again.
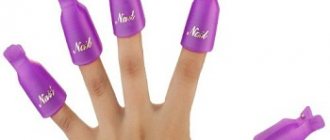
- If you have a UV lamp, you need to dry the first layer for 2 minutes. If an LED lamp is used, 30 seconds will be enough.
- Apply a second layer in the same way, then dry.
As you can see, this is a very simple method of applying gel polish. Thanks to this simple method, you can carefully perform all the steps, the main thing is that the varnish brush is good, not too thick, too thin or short. In general, the most convenient.
Tested for myself
The expert’s skeptical attitude did not stop me from trying the fashionable “under the cuticle” manicure. I found a salon on Instagram that has been practicing this type of coloring for a long time, and made an appointment with the best artist for November 25th. My goal was to see a clear difference between classic and popular technology. To do this, I had to do both types of manicure and test them for 4-5 weeks.
At the salon it immediately became clear that the cuticle coating would cost 10% more than the classic one. The markup includes the cost of the work of a specially trained master (and courses on this technique are really expensive). In addition, painstaking, almost jewelry-like work using this method takes more time from a specialist. It's no surprise that he tries to make up for the time spent per client.
The master was surprised by my request to paint the nails on my right hand “under the cuticle”, and on my left – with the usual “butt” method, but fulfilled my strange wish. True, at the end I couldn’t resist making a value judgment: “It turned out ugly on the left one, the gaps are visible!” All the way home I meticulously peered into the lavender surface, but did not find any significant difference between my hands.
1 / 2
But, what’s most surprising in my experiment is that I didn’t notice any noticeable differences between the classic “butt” and the newfangled “deep manicure” technique as my nails grew!
1 / 2
As time went. Hangnails appeared, the nail plate grew, and the gap increased almost evenly on both hands. Well, okay, on the right hand it was smaller by a fraction of a millimeter. However, the weather did not do this, and already on December 5, that is, 10 days after the procedure, the nails of both hands required emergency care.
I continued the experiment, shyly hiding my hands in polite company. On December 16, 22 days after the procedure, the picture looked completely deplorable. The nails had grown so long that the white hole was almost completely exposed. But a little more than 3 weeks have passed - according to the specialist, this is the standard period of wearing gel polish.
1 / 2
Warning questions: no, my nails do not grow faster than those of the average girl. In general, for a healthy adult, the growth rate of fingernails is approximately 1 mm per week or 3–4 mm per month. I was not too lazy to take measurements with a ruler. After a month, the regrown part on the left hand is 3 mm, on the right - a little less. I fit well into the average range.
1 / 3
On December 22, having waited exactly 4 weeks after the procedure, I finally complete my experiments. Their outcome disappointed both me and my colleagues. Like all modern women, the pace of our lives is incredibly fast: we build a career, raise children, play sports, travel, make acquaintances. Having well-groomed hands is a must do for us, but how can we squeeze a manicure salon into our schedule?! Reducing the number of visits there seemed to all of us a tempting prospect. It’s a pity, but the maximum acceptable interval between visiting a specialist is still no more than 2 weeks
And it doesn’t matter how your manicure was done: “butt” or “under the cuticle”. My experience has clearly shown that the difference here is not fundamental at all.
Method two: using a thin brush
Another method, the benefits and convenience of which are divided between two camps. For some, it is universal, simple and reliable. Others can't cope and find it incredibly difficult. This is a great puzzle that you can solve and join one or the other.
- To begin with, you need to apply a drop of varnish to absolutely any convenient surface.
- Use the thinnest manicure brush to grab a little varnish.
- Slowly and carefully cover the area of the nail that is next to the cuticle. After painting there will be something similar to a translucent hole.
- Now, armed with a regular brush, you need to paint the entire nail.
- As expected, dry in a UV or LED lamp.
- Next, apply the second layer. It is worth paying special attention to the cuticle area. If it is neat and even, well painted, then we can assume that everything was a success.
These methods are most suitable for those who are not professionals, but amateurs in nail decoration. They are quite simple and convenient, but their versatility creates the effect of going to a professional nail technician.