Live broadcast recording:
Kraft bags are packaging material for instruments to be sterilized. Many craftsmen do not understand the purpose of this paper bag. Here are some erroneous answers from craftsmen to the question: “Why are craft bags needed?”:
- Put down the instrument if you don’t have a pencil case and need to go on a trip;
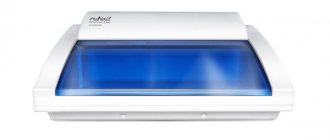
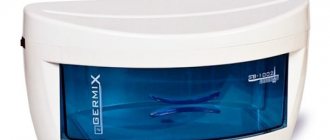
- Fold the instrument and put it in an ultraviolet disinfectant so as not to put one piece at a time.
- To prevent dust from getting on the instruments.
What are Kraft bags or sterilization bags? This is packaging material for sterilization and storage of instruments.
Types of packaging bags
Kraft bags are so called because they are made from dark kraft paper. And sterilization bags can be made of bleached paper (white). Packaging bags can be of 2 sizes: small 75 by 150 mm, and large 100 by 200 mm. We select the size depending on the size and quantity of the tool. If you are a manicurist and pedicurist, then you may need a large package. Small packages are suitable for lash artists.
What to look for when choosing packages
- What field do you work in?
- For what instruments?
- What type of sterilizer will the processing be carried out in?
Why is it important to store your tools properly?
If you save on buying a protective case for your devices or try to do without it altogether, then their appearance will quickly change for the worse. Practice shows that tools deteriorate 80% faster not during operation, but when stored incorrectly.
You also need to pay close attention to the equipment while working. For example, carelessly moving the pliers along the surface of the table can leave a notch on their cutting surface. At first, the damage may seem invisible, but already during the process you will notice that cutting ability has deteriorated.
This also happens when cleaning the workplace, so it is better to place a cotton towel or a special manicure base under all manicure/pedicure attributes.
Rules for using craft bags ⠀
1 Before use, carefully inspect the gearbox; damaged packaging must not be used.
⠀
2 Check the date of manufacture and expiration date of the package (matching dates). Expired ones cannot be used. We also carefully read the storage conditions for packages.
⠀
3 We check the presence of the indicator and its compliance with the color specified in the instructions.
⠀
4 Write a list of contents on the package, even if it is transparent. Also the date and time of sterilization. Signature of the person who laid and processed the tool. If there is no column, write by hand on the seam. If there is more than one sterilizer, write the number.
⠀
5 Sterilization is carried out according to the established regime, according to the selected type of sterilizer.
⠀
6 Packages with sterile instruments are stored without unpacking in dry and clean cabinets, avoiding moisture, dust and direct sunlight. The following conditions are recommended: temperature +10-+30 degrees, air humidity no more than 50%.
⠀
7 If moisture gets on a craft bag, it is considered unusable, even after drying.
⠀
8 The shelf life of sterile instruments in paper packages is no more than 30 days.
⠀
9 If, when opening, not all of the processed instrument is used or the package after sterilization was damaged when removed, you must write the time and date of opening the package and, without removing the unnecessary instrument, put it in the UV cabinet for storage. It must be used within 6 hours.
⠀
Otherwise, re-sterilize. If a bag of instruments falls on the floor, it must be re-sterilized.
⠀
10 Tools should be placed with sharp edges in the bottom of the bag.
⠀
11 To control sterilization, it is necessary to insert an internal indicator.
⠀
12 When sealing the bag, you must squeeze out as much air as possible and seal the bag strictly along the dotted line. Otherwise, the seal will be broken.
⠀
13 It is important to place the bags in one layer in the device. Do not put them in a pile under any circumstances, because... the movement of air and steam and the uniform heating of the surface are disrupted.
⠀
14 Also, you cannot place bags on the bottom of the sterilizer, because air and steam must circulate from above and below.
Disinfection and sterilization of instruments
1.PLACEMENT OF TOOLS IN THE PROCESSING ROOM
It is assumed that all tools in the processing area are dirty, even if they have not been used. Therefore, they must undergo a full cleaning (disinfection) cycle.
Personnel safety
Touch a contaminated instrument only while wearing protective gloves or using special tweezers.
Place the tool carefully, do not throw it.
Instruments should be placed in an appropriate container (eg tray) and disinfected and cleaned as soon as possible. If tools are thrown carelessly into one pile, they can be damaged.
Separately and immediately clean instruments of sealing materials and corrosive substances.
Instruments used to work with sealing and aggressive substances must be cleaned immediately and separately. Excluded
using a steel brush or sandpaper. Disinfection and cleaning in an ultrasonic bath is recommended.
2. DISINFECTION AND CLEANING OF INSTRUMENTS IN THE STERILIZATION ROOM
Basically, all instruments must be disinfected before sterilization. Disinfection is required primarily in order to protect staff from infectious agents carried by patients. In addition, disinfection must prevent the spread of infectious pathogens.
2.1 MANUAL DISINFECTION AND CLEANING
During manual cleaning, instruments are placed in a combination solution with proven disinfecting and cleaning properties.
When using drugs, you should strictly adhere to the manufacturer's instructions regarding concentration, exposure time and, if necessary, temperature. Incorrectly chosen concentration and exceeding the exposure time can lead to damage to the instrument. It is strictly forbidden to leave instruments exposed to the solution overnight or on weekends.
Prepare fresh solution daily.
Freshly prepared disinfectant and cleaning solutions should be used throughout the day. If they are used for a longer period of time, the following problems may arise:
* danger of corrosion due to increased content of dust and proteins;
* danger of corrosion due to increased concentration due to evaporation;
* reduction in the effectiveness of disinfection, which is associated with contamination.
Tools must be completely covered with the solution.
For this reason, you should not overload the soaking tub.
Rinse thoroughly with water and dry instruments immediately.
After disinfection and cleaning, instruments should be rinsed manually or mechanically. Rinse with clean, sediment-free, desalinated water to avoid water stains. Next, the instruments must be thoroughly dried. Preference is given to drying with a gun using compressed air, which is a very neat and efficient method.
2.2 ULTRASONIC CLEANING
Using ultrasound, you can carefully and efficiently clean tools that are sensitive to mechanical processing.
Preparing the bath
* the bathtub must be filled to the appropriate level;
* when using disinfectants and cleaners, it is necessary to control the temperature and concentration;
* instruments must be completely covered with the cleaning solution;
* instruments during ultrasonic treatment should be placed only on lattice trays so as not to limit the field of action of ultrasound. Solid surfaces prevent ultrasound penetration;
* severe contamination of the ultrasonic bath container reduces the efficiency of the process and contributes to corrosion. Therefore, the solution should be regularly updated as it is used. The criterion for replacement is contamination determined visually. In any case, it is preferable to change the solution more often;
* it has been verified that treatment for approximately 3 minutes at a frequency of at least 35 kHz is sufficient for sterilization.
Rinse thoroughly with water and dry instruments immediately.
After ultrasonic treatment, instruments should be washed manually or mechanically. Rinse with clean, sediment-free, desalinated water to avoid water stains. Next, the instruments must be thoroughly dried.
3. CHECKING, CARE and PACKAGING BEFORE STERILIZATION
Cleanliness check
In accordance with the rules, instruments that have undergone mechanical or manual cleaning must be visually clean. They should be free of traces of blood and other contaminants, such as skin residue. To avoid scratches or wear, instruments should only be inspected after they have cooled down. Wear and damage to the surface finish of tools can cause metal corrosion.
Reasons for staining
Among other factors, the following reasons may cause staining:
* insufficient mechanical or manual cleaning and rinsing;
* poor water quality;
* unsuitable cleaners, disinfectants and care products;
* non-compliance with instructions on the dosage of cleaners, disinfectants and care products;
* failure to complete any stages of the processing process (for example, new instruments were not cleaned of factory preservatives before the first sterilization).
Discard damaged instruments to protect intact ones.
Serviceable tools must not come into contact with damaged surfaces (for example, rusty tools or tools with damaged nickel or chrome surface layers). Damaged instruments should be sorted so that contact does not lead to corrosion of undamaged instruments.
4. STERILIZATION
Sterile instruments protect clients! Sterilization does not replace cleaning!
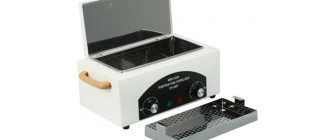
Hot air (dry heat) sterilizer:
It is important to load the sterilizer correctly.
Maintain the temperature at 180C, but not higher!
The recommended temperature of 180C should be maintained, without exceeding this value, as a result of which influences that destroy the instruments can be avoided. Even if the recommended temperature of 180C is exceeded for a short time, the strength of the tool decreases. This can cause tools to lose their value.
Strictly follow all steps of the sterilization process.
All stages of the sterilization process must be strictly followed. Under no circumstances should the device door be opened while the sterilization process is already in progress. Before sterilizing with hot air, it is recommended to refrain from using surface care products, because As a result, stains may form.
5. STORAGE
Storing non-sterile instruments
Improper storage of tools can cause corrosion. Therefore, they must be stored dry and protected from dust. To prevent the formation of moisture (condensation), sudden temperature changes should be avoided. Direct contact with chemicals can destroy the metal or cause moisture, leading to corrosion.
6. NEW TOOLS
New instruments must be sterilized before use.
New instruments received from the manufacturer must undergo a full sterilization cycle. It includes the complete removal of protective coatings (films). Cleaning, washing, care, inspection and sterilization are carried out in the same way as described above for used instruments.
How to put a tool in a bag
We first open the tool and fold it with the cutting part into the bottom of the bag. When you take it out, you won't get hurt. And also you will not touch the sterile part of the instrument, because... immediately grab your hands. When sealing the bag, you need to run your hand over the bag to remove excess air.
To process instruments, place them in a packaging bag with the sharp edges facing down.
If you have any questions, you can write them to our technologist Olga Volkova.
Determining the cause of tool malfunction
Often blades lose their functionality not due to dullness, but to the formation of play in the connecting element. In this case, the manicure tool needs repair.
If the wire cutters or scissors do not form an even strip of cutting edges, you need to remove the backlash, which can also be present on new devices when manufactured by an unscrupulous manufacturer.
If there is a connecting bolt on the tool, everything is simple: you need to tighten it using a Phillips or flat-head screwdriver.
If a limiter in the form of a metal pin is used as a fastening element, then you will have to use a hammer and knock it on both sides. When doing this, you need to be careful not to damage the cutting edge.
Cleanliness of hands and workplace
In addition to tools, it is necessary to process the work area: the table and everything that is on it.
Don't forget to keep your hands clean. Hands must be sanitized before manicure and after each client. The requirements for hand cleanliness are the same as for medical workers: treatment with an antiseptic, then washing with soap. Rubbing your hands with alcohol dries out your skin. To soften the skin, you can treat your hands with glycerin or lanolin, or use sterile or disinfectant wipes.
Compliance with the rules of disinfection and sterilization of manicure equipment will help you avoid the danger of introducing or contracting an unpleasant disease yourself. Don't skimp on your own safety.
We recommend visiting our Manicurist Forum , where you can ask questions or chat about interesting topics!
Storage organization
Not all cases and bags have enough compartments inside to store all types of tools. In this case, manicurists have to use large “common” compartments. To organize the space for those who use a manicure bag that has too few compartments, there are special plastic cases for storing tools.
The cheapest of them cost about 50 rubles and are made of plastic. These small drawers are designed to store files, trimmers, etc. Larger boxes can be successfully used for storing varnishes and gels. Such containers are also indispensable for storing instruments after sterilization.
Disinfection methods
After the manicure, the cutters are treated with a brush or napkin to remove saw cuts, skin flakes, and dust. Only after this do they begin disinfection. There are two methods to choose from:
- chemical - special disinfectants will be required;
- physical - incandescence, boiling, ultrasonic or ultraviolet treatment.
We disinfect with special solutions
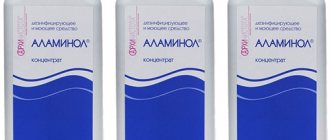
Disinfection is effective when using certified solutions - Optimax, Estilodez, Alaminol, Gigasept. They are divided into safety classes, are provided with detailed instructions for use and contain anti-corrosion additives.
They are used not only in the beauty industry, but also in medical institutions, as they have a powerful antimicrobial, antibacterial, and antiviral effect. Professional disinfectants are suitable for home use.
Treatment of manicure instruments with Optimax solution at home :
- Pour a liter of cold water (or tap water) into an enamel container or plastic processing box;
- add 45-50 ml of product and stir thoroughly;
- We immerse the cleaned cutters in the solution for 15-20 minutes.
- After the time has passed, lay it out on sterile napkins.
It is important to strictly observe the dosage of the chemical reagent and the exposure time. If the conditions are violated, the cutters will either be poorly processed or their service life will be reduced. And yet, rotating nozzles cannot be disinfected and sterilized by wiping or spraying - only complete immersion in solutions.
Physical methods
How to disinfect manicure tools at home if there are no special solutions? We immediately warn you against all kinds of hand sanitizers and hydrogen peroxide. The effect is weak, but it’s easy to ruin the cutters.
Use simple boiling:
- clean the cutters with a brush, rinse with detergent, and place on a napkin;
- Fill a deep saucepan with water so that the tools are covered by 2 fingers, bring to a moderate boil;
- Using tongs, lower each cutter into boiling water, after 15 minutes remove the container from the heat.
- We take out the nozzles and let them swell on a sterile napkin.
After disinfection, pre-sterilization cleaning occurs. The cutter is washed in running water with detergent and dried with a napkin. This step neutralizes chemical residues. drugs and the most persistent contaminants.
