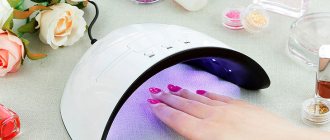
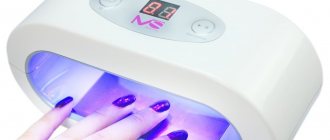
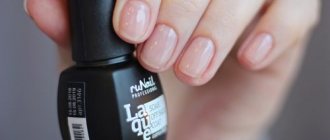
Ice (LED) lamps are small devices that use LED light bulbs to dry LED gels, some biogels, colored gels (not all) or any gel nail polish.
Each lamp is large enough to fit the nails of one hand.
And some models can accommodate two hands at once.
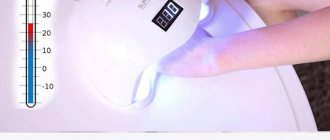
In this case, you do not need to leave your fingers under the lamp for a long time.
Ice lamps for nail extensions are considered a safe method compared to UVA/UVB curing because there is no risk of skin cancer from LED bulbs. Some gel manufacturers even create their own nail extension lamps.
LED nail dryers have many advantages over UV models.
- Firstly, they work much faster - it takes from 10 to 90 seconds to polymerize one layer of gel polish, as opposed to 1-3 minutes in a UV lamp for nail extensions.
- They are durable (LED lifespan is 50 thousand hours). The service life of one bulb in a UV lamp is from 1500 to 2000 hours.
- Ice lamps for nail extensions are more effective because they use a very small amount of energy.
- They don't get hot like UV lamps, so there's no risk of burning your hands.
- The best benefit is that the ultraviolet rays emitted by ice lamps are a tiny fraction of what UV lamps emit.
- LED lamps are environmentally friendly - they do not release any toxic chemicals into the environment when disposed of.
Disadvantages of ice lamps for nail extensions:
- LED lamps tend to be slightly more expensive than their UV counterparts.
- No matter how good the lamp is, eventually the time will come when you will have to replace it entirely, and not just buy a new light bulb as is the case with a UV lamp.
- Some gels do not harden in an ice lamp. It's all about the length of the emitted waves. Thus, in lamps with UV rays, fluorescent light is emitted in a wide range, and the gel hardens in any case. But LED devices do not provide enough light, so not every gel has enough light for polymerization.
We recommend: Is it necessary to dry the primer in a lamp, application features and types of primers
Types of lamps for manicure
- classic UV lamps . Many people think that this type of drying is becoming obsolete. Indeed, they are bulky, take longer to dry the varnish than other, more modern devices, and the light bulbs need to be changed on average once every six months. However, they also have advantages: such dryers are “omnivorous” (they polymerize extension gels, gel polishes, acrylics), are affordable and easy to care for. They are still good for beginners and home manicurists.
- LED dryers operate using LEDs. Such lamps ensure uniform polymerization. In addition, the LEDs have a service life of 50,000 hours and are designed to last at least 5 years. However, the emission spectrum of such lamps does not allow drying all types of materials. They are ideal for those artists who work only with gel polish and biogel.
- LED+UV combines the advantages of the first two devices. This solution ensures fast and high-quality polymerization of any coatings for shellac and nail extensions. But you need to remember that the UV elements in hybrid devices also need to be replaced frequently, otherwise the drying efficiency may decrease.
- CCFL+LED . In them, the LED elements are supplemented with a CCFL spiral tube that emits ultraviolet light. It is filled with gas, so it does not heat up, consumes very little electricity and practically does not wear out over time. Such devices are the most advanced, providing quick and effective drying of nails without requiring replacement of consumables. But they are also the most expensive.
Popular questions and answers about nail extensions
Every day, nail extensions are rapidly developing and improving: new craftsmanship technologies are being discovered, more professional materials are being developed, new original ways of nail design and modeling their shape are emerging. Of course, many masters have questions about how to properly grow nails using one or another means, how one method differs from another, and which means are more convenient and practical to use.
Our Nayada Nails studio has prepared this page for you, where you can learn the intricacies of nail extensions and, in particular, the tools and equipment necessary to create a flawless manicure. This is where you can find answers to the most popular questions about gel or acrylic nail extensions. We publish only the most current information regarding the most important nuances that every master needs to know. We hope that this will benefit you and help you improve your skills and abilities.
General issues
What is the difference between gel and acrylic extensions?
The main difference, first of all, lies in the materials. In the first case, a gel is used for extensions - a gel-like substance, which hardens only under the influence of ultraviolet rays in a special lamp. Acrylic is a system consisting of two main components - powder and liquid. For the client there is no visible difference between acrylic or gel nails; if you do not see the manicure modeling process, the result will be indistinguishable. But in order for a master to be able to master these two extension techniques, he needs to undergo training. These systems are completely different, and each of them requires specific knowledge and skills.
There is a misconception that gel extensions have become more widespread due to the fact that gel is a more useful material, and acrylic contains harmful components and spoils natural nails. In fact, the popularity of gel extensions is justified by another factor - you can master this technique yourself without studying at school. Acrylic extensions are a more complex and time-consuming process. It is very, very difficult to master this technique on your own, because the science of modeling has stepped far forward, new subtleties and features of extension have appeared. And if you go to a good school, you only need weeks to learn, while trying to master the knowledge on your own can take years.
Which type of extension is better?
Acrylic and gel are one big family of polymers. They can be compared to meat: there is beef, and there is lamb, but both remain meat. So it is with gel and acrylic coatings - both are polymers.
The difference between the coatings is as follows:
- Acrylic nails are more durable and harden quickly in the open air, without requiring additional tools. However, when working with acrylic, certain knowledge and skill are required: the ability to quickly give nails a beautiful and neat shape before the material has time to harden. Also, when mixing acrylic powder with monomer, you must clearly know and follow the technology.
- Gel extensions harden (polymerize) only in a UV lamp. The structure of this coating is not as durable as acrylic, but this does not prevent you from creating beautiful and quite durable nails from it. The gel is not a two-component product like acrylic; the material is produced ready for application.
A competent specialist is able to make beautiful and durable modeling from any of the above means. The final choice depends only on the personal preferences of the customer.
How long do nail extensions last?
If technology is followed and quality materials are used, nail extensions can be worn for many years. Today, when this service is already 35 years old, we can say that the products do not spoil natural nails or thin them. The nail plate feels great under the coating, grows superbly, and does not change color or thickness. Nails do not need to breathe or rest, since nails are a dead structure. However, in order for the extended manicure to maintain a beautiful and aesthetic appearance, corrections must be carried out regularly. Over time, the natural nail plate grows and the manicure loses its attractiveness. The frequency of this procedure depends on the rate of nail growth. On average, adjustments are necessary every 3 weeks.
Why is correction needed?
Correction is a procedure necessary to maintain the aesthetic appearance of a manicure for as long as possible. The nail plate gradually begins to grow, and over time you can notice the border between the cuticle and the place where the material is applied. During correction, the master carefully removes part of the artificial coating and fills the free strip of the overgrown nail with acrylic or gel. Then the nail plate is carefully leveled with a file, and the length of the growing nails is adjusted.
How often is correction of extended nails necessary?
There is no clear deadline; it will be individual for each client. The regularity of the procedure depends on the growth rate of the natural nail. On average, correction is necessary every 3 weeks. In total, 4-5 corrections are allowed, after which it is recommended to remove the old material completely and remodel the nails.
Is it harmful to have nail extensions?
If all extension technologies are performed correctly, the procedure is completely safe and does not deform the nail plate. Moreover, natural nails under artificial material are not subject to negative environmental influences. For example, many home cleaning products contain degreasers and disinfectants, which are very aggressive to the skin of the hands and, of course, to the nails. Nails become dry, brittle, and peeling. Artificial material is an ideal protection for damaged nails. This can be compared to dental procedures: just as crowns are placed on damaged teeth to protect them, the nail plate can be additionally strengthened with gel or acrylic. Moreover, in dentistry, polymers are used for fillings in the same way as in the nail industry. Therefore, we wear acrylic and gel not only on our nails, but also in our mouth.
Are there any contraindications for nail extensions?
Like any cosmetic procedure, nail extensions, whether gel or acrylic, have a number of contraindications. First of all, the procedure cannot be performed for certain diseases and injuries of the hands and nails, namely: fungal and viral infections, damage to the side ridges and cuticle (upon the recommendation and discretion of the specialist), as well as very deep onycholysis. Diabetes, blood clotting disorders, and psoriasis-affected nail plates and ridges are also limitations. During the period of taking antibiotics, undergoing chemotherapy, during pregnancy and breastfeeding, there is a possibility that the material will not have good adhesion to the nails. The procedure itself will not cause harm to health. However, the listed factors can affect the adhesion strength of the material to the nail plate, and the extended nails simply will not hold on.
Should I cut my cuticle?
The procedure itself is delicate and requires certain skills, so it is recommended to remove the cuticle only from professionals. It’s easy to injure delicate skin on your own, and without proper disinfection, this can cause infection. If removed incorrectly, it is easy to damage the nail plate. At home, it is better to avoid cutting the cuticle, it is better to soften it with special products and move it to the base of the nail with an orange stick.
How long can you make your nails?
Marigolds can be grown to any desired length - it all depends on personal tastes and preferences. However, when choosing the length, it is necessary to take into account the everyday factor - for example, when caring for an infant, you should not make your nails too long. The most optimal length is considered when the free edge is equal to half the length of the natural nail plate.
What design can be done on extended nails?
Girls who want to amaze others with a fashionable and stylish manicure can choose for themselves one of the proposed types of designs:
- French (French): the nail plate is covered with the most natural-colored material, while white color is applied to the tip of the nail.
- aquarium: “pictures under glass” effect;
- artistic painting: all kinds of patterns and designs are painted on the nails with a thin brush;
- volumetric: protruding elements are made on the nail plate, nails are decorated with rhinestones and gold leaf.
Today the manicurist has a huge number of offers. Which one you prefer depends only on your tastes and wishes.
About acrylic extensions
What tools and materials will you need when working with acrylic?
In order to carry out acrylic extensions at home, you will need the following materials: antiseptic, degreaser, dehydrator, acid-free primer, acrylic liquid (monomer, liquid), acrylic powder, transparent finishing gel. Necessary tools: buff, file for natural nails (180-240 grit), file for artificial nails (180-100 grit), container with a lid for liquid, natural kolinsky brush. If extensions are carried out using tips, then you will also need special glue.
How to extend nails with acrylic?
The entire extension process consists of several stages:
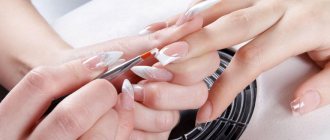
- Preliminary preparation: disinfection, correction of the shape and length of the free edge, removal of the cuticle, cleaning of the side rollers.
- Treatment of natural nails: filing the surface of the nail plate. The nail is carefully processed with a soft 240 grit file, removing the top gloss.
- Covering with disinfectant, dehydrant, and primer: while the primer dries, forms are installed on the nails.
- Modeling the length and shape of the nail: a small amount of liquid liquid is poured into the working container. The tip of the brush is dipped into the monomer, then gently into the powder, creating a small ball of acrylic powder on the brush. The ball is placed on the nail plate, after which the shape and length of the extended nail is modeled with a brush.
- Acrylic is a self-hardening material that does not require additional drying in a UV lamp. It hardens on its own within 3-7 minutes.
- Adjustment and polishing: after the material has completely hardened, the molds are carefully removed. The surface and free edge of the nail are treated with a nail file, then polished using a buff.
- Consolidation of the result: finished nails are covered with a finishing gel, which will give the nails brightness and gloss.
It is recommended to carry out the procedure in a well-ventilated area with an exhaust hood.
How to properly mix powder with liquid liquid?
Both components are mixed directly on the brush. A small amount of monomer is poured into the container, after which the brush is dipped into it. Then carefully, with one side of the brush, take a small amount of powder. Acrylic, upon contact with liquid, immediately gets wet and becomes a soft and plastic ball. It should be remembered that the state of the acrylic ball changes with every second - when it reacts with oxygen, it begins to harden. Therefore, you only have a few minutes left to apply the material and shape the future nail.
Is a UV lamp necessary when drying acrylic nails?
When applying acrylic nail extensions, you do not need a lamp. The monomer, in contact with acrylic powder, quickly hardens in air and without exposure to ultraviolet rays. It is enough to wait 5-10 minutes. However, if you decide to fix the finished result with a finishing gel or top coat, the last layer must be dried in a UV lamp.
Can I remove acrylic nails myself?
Removal of acrylic coating should only be carried out by a professional! When removing nails, you need to follow no less rules than when extending them. It is on compliance with all the subtleties of technology that the condition of the nails will depend. When performing the procedure yourself, it is much easier to damage your nails than to preserve them. Therefore, only a trained person should remove extended manicure.
How does a master remove nails?
A master with good education and extensive practice will not dissolve nails with special liquids in 90% of cases. No matter how high the quality of artificial turf remover liquid is, any of them contains acetone, which is a polymer solvent. And the most budget-friendly liquids contain cheap solvents instead of acetone, often not even cosmetic ones. Acrylic does not dissolve quickly, during which time acetone dries out the nail plate and the skin of the fingers very much. Nails become fragile, brittle, loose and flaking. A competent specialist removes the material using a special device that carefully cuts off the acrylic from the nails without injuring the nail plates at all.
Is it dangerous to remove material with a device?
A highly qualified master makes up to 95% of all sawdust using a machine, has extensive practice and well-developed fine motor skills. Filing nails with a machine is much more difficult than with a regular file. Removing material with the device takes on average 7-10 minutes. Today this is the most modern and safest method, but of course in capable hands.
Is it possible to use gel polish top and finish gel with acrylic extensions?
Can. However, these products polymerize only under the influence of ultraviolet rays, therefore, a UV lamp is required for this. You should also take into account that the gel cannot be dissolved in the remover, so artificial nails can only be removed mechanically.
Can I use polish or gel polish remover when removing acrylic nails?
Traditional nail polish remover has a slightly different composition and is not designed for long-term contact with the nail. This may damage the natural nail plate or may not soften the acrylic enough. A remover designed for removing shellac is also quite suitable for removing acrylic nails. However, it will take more time to completely soften the material - about 15-30 minutes. Or maybe much more - depends on the thickness of the material.
How long does acrylic nail extension take?
The exact amount of time depends on the individual structure of the nail plate, the modeled length and shape and, of course, the complexity of the future product. The simplest extension takes about 1.5-2 hours. Design work with a complex pattern can take 3-4 hours.
What care is needed for acrylic nails?
Caring for extended nails is simple and not much different from standard hand care procedures. The skin must be moisturized with oil to soften the cuticle. The length can be adjusted as necessary using an artificial nail file.
About gel extensions
What do you need when doing gel nail extensions?
During the procedure you will need the following materials:
- disinfectant,
- dehydrant,
- primer
- clinser,
- gel of the desired shade.
The tools in your arsenal should include files for natural nails (180-240 grit), a file for artificial nails, a grinder, a gel brush, tips or forms, and an ultraviolet lamp.
How to extend nails with gel?
The procedure begins with disinfection - this is a mandatory stage of extension, which in no case should be skipped. Then the cuticle is moved back or removed with a pusher or an orange stick, and the lateral sinuses are cleaned using a hardware method. Then the nails are cut or filed to the required length. An important point is that the free edge should be at least one or two millimeters. The nail plate is filed with a file at an angle of 90 degrees until there is no gloss left on it. The nail becomes slightly rough - this is necessary for better adhesion of the material to the surface. Next, the treated plate is degreased and dried with a special composition. After the products have completely dried, the templates are inserted. Using a special brush, the shape and length of future nails are modeled with sculptural gel, after which this layer is dried in a UV lamp. The sticky layer is removed using a cleanser, the forms are removed, and the nails are dried on the reverse side. Then, using an artificial nail file, the free edge is corrected and the surface is polished. The nails are coated with finishing gel and the finish is polymerized in a lamp. After this, you can paint the finished nails with varnishes, decorate them and decorate them with patterns.
What are the differences between single-phase and three-phase gel? Which one is better to choose?
The three-phase system involves the use of three drugs with different properties at once:
- the base coat fills in unevenness and roughness on the nail plate,
- the length and shape of future nails are modeled with sculptural gel,
- The finishing gel fixes the finished structure, gives the manicure shine and a beautiful look.
In a single-phase system, all these functions are performed by one composition. Due to this, the procedure becomes simpler, faster and more profitable. But it should be remembered that the strength of a three-phase gel is significantly superior to a single-phase one.
Can I use gel, base and topcoat from different brands?
Despite warnings from manufacturers that products from different brands will give lower-quality results, many professionals often use gels, tops and bases from various companies. In most cases, all these means are quite harmoniously combined with each other. However, the extent to which all these materials are compatible can only be understood in practice, which is why the quality of the finished manicure may suffer.
Is it possible to use the same dehydrator, bonder and degreaser for gel extensions as for acrylic extensions?
Products that are used exclusively for preparing nails are considered universal. They are not the main components of the system and do not necessarily require drying in a lamp.
What is sculpting gel?
Sculpting (modeling, constructing) gel is a viscous substance that quickly becomes hard under the influence of ultraviolet rays. Used in the second base of nail extension. The modeling gel is used exclusively with the base and finishing gel.
What is camouflage gel used for?
Camouflage gel is available in a wide range of naturally pink or beige shades. The name of the product speaks for itself - it is necessary to mask the imperfections of natural nails. Thanks to the use of camouflage gel, you can create the effect of a perfectly smooth coating, without any stains, protrusions or other defects. Most often, this product is used to create a French manicure - impeccably smooth and as natural as possible.
What is the difference between color gel and gel paint?
The difference between the means, first of all, lies in density. Gel paints are applied to already extended nails in a thin layer, and are also used to create decor, drawings and all kinds of manicure patterns. Colored gels are thick and form a dense texture after drying.
The second difference between the products is the method of application. Gel paints are applied to a grease-free, smooth surface immediately before applying the top coat, without requiring further sanding. Colored gels are used only on a base or modeling gel without removing the sticky layer. After polymerization of the material in the lamp, the nails are sanded with a file and only then covered with finishing gel.
Is it possible to extend nails directly with colored gel?
As a rule, colored gel is used for the decorative design of already extended nails, which is why it does not have a thick enough consistency. However, today on sale you can find dense structural gels of various shades, which are suitable as the second phase in three-phase extensions. Colored single-phase strips can also be used to lengthen the free edge.
Why file the nail plate before extensions?
The main purpose of the cut is to create an uneven, rough surface necessary for strong adhesion of extension products to the natural nail. When filing, microscopic grooves remain on the surface. The base coat flows into these irregularities and firmly adheres to the nail plate, which ensures the strength and reliability of the entire structure. Also, a surface pre-treated with a file absorbs dehydrator, primer and disinfectant much better.
What is a primer?
A primer is a liquid that is used for preliminary preparation of nails before extensions and acts as a kind of “primer”, ensuring strong adhesion of natural nails to artificial material.
Do I need to dry the primer in a lamp?
No. Drying in a lamp is required only for the main elements of the gel system, namely the base, sculpture, single-phase, color, camouflage and finish gel. Preparatory products (primer, disinfectant, dehydrator) dry quickly in the open air, without any additional exposure.
What are the differences between base and primer?
The primer is quickly absorbed without exposure to ultraviolet radiation. It leaves behind a sticky layer - a thin film that holds the gel and base together. The product has only a short-term effect - its effect stops 20-30 minutes after application. The base hardens only under the influence of a UV lamp, and after polymerization it forms a dense layer on the surface of the nail, which can only be removed by cutting it off.
Is the primer used for three-phase extensions?
These products are a must when creating a gel manicure, regardless of what type of extension system you prefer.
What is the difference between extensions using forms and extensions using tips?
Tips are an artificial base that is applied to the nail plate with a spare free edge, which is then given the required shape.
A form is paper or film that acts as a temporary support for laying out material. The gel fits comfortably on the form, allowing you to model the desired length and tip of the nail without much effort.
How to properly attach tips?
Tips are attached directly to the nail plate using a special hypoallergenic glue. In this case, the tips should be fixed closer to the free edge. So between the cuticle and the tips there should be a gap of approximately ⅔ of the length of the entire nail - this is necessary in order to align the border between the nail plate and the tips itself. After this, the tips are cut to the required length and sanded with a low abrasive file (180-240 grit).
Are regular false nails used for extensions?
Are used. It is only important to choose the right false nails. They should be smooth and even - without patterns, decorations and various decorative elements. However, it is recommended to use special tips with a rounded cutout at the bottom for extensions. They are much stronger, and aligning the border between the tip and the nail is easier and faster.
Are the tips glued before or after applying the primer?
Tips are glued to dry, oil-free nails treated with a dehydrator. An acid-free primer is applied after fixing the tips only to the natural part of the nail plate.
How to place the form correctly?
The form is carefully curled and placed under the free edge of the nail. A correctly placed template will look like a natural extension of the nail plate. It is necessary to ensure that there is harmony between the template and the natural nail, which completely depends on the natural growth of the nail plates. Then you need to squeeze the side rollers with your fingers for a few seconds so that the shape can be fixed. The basic rule must be observed: the edge of the template must be a cylinder, the diameter of which clearly coincides with the size of the nail plate.
Are there rigid forms?
You can find plastic and metal molds on sale. They are reusable and are produced immediately curved. However, working with rigid forms presents certain difficulties - they are quite difficult to adjust to the desired size of the nail, so they are not used by every master. Instead, you can stiffen a regular disposable stencil using special tubes or metal pads.
Which brushes are best for extensions?
Experts recommend using a hard brush with synthetic bristles for the procedure - this will make it easier to work with a viscous and thick gel. The stiffer the brush you choose, the easier it will be to smoothly and evenly distribute the material over the surface of the nails. It is recommended to use nylon brushes No. 4-6. Each master chooses the shape of the bristles depending on his personal preferences. The most popular are oval shaped brushes.
Which lamp should I dry the gel in and how long does it take to dry?
There are marks on the gel packages, by studying which you can understand what type of lamp is needed:
- If there are no marks on the packaging, or it says UV, this means that the material is dried only in hybrids or a UV lamp;
- LED - the product polymerizes under the influence of an LED lamp;
- LED/UV - indicates that the material is universal and suitable for drying in any lamp.
Separately, it should be noted that the LED lamp is not suitable for drying UV gels, otherwise the product simply will not dry.
To polymerize the gel in hybrid lamps of good power, an average of 2 minutes is required. The total amount of time depends on the color and thickness of the coating. Transparent products harden completely faster than colored products. A hybrid lamp gets the job done much faster—just 1-2 minutes is enough. For complete polymerization of transparent gels, 30 seconds are enough.
Is the same lamp that is used for drying gel polish suitable for extensions?
Not always. Only if the lamp has good power (minimum 36 watts). Also, before you start extensions, you need to check whether the labeling of the products matches the type of lamp.
Why do you feel a burning sensation when drying the gel?
A gel is a polymer that requires an activator to polymerize. The activator is UV light. However, ultraviolet light alone is not enough to completely dry the material. A component such as a photoinitiator, which is part of the gel, is also necessary here. The photoinitiator catalyzes the polymerization process, absorbs ultraviolet light and initiates an irreversible polymerization reaction. During the process, a large amount of heat is released, which causes a burning sensation.
How severe the burning will be depends on the following factors:
- gel composition: the more photoinitiators it contains, the stronger the feeling of warmth will be;
- lamp type: you can reduce the burning sensation and shorten the hardening time of the product by using a lamp type that matches the gel labeling;
- depending on the thickness of the coating: a thick layer of gel contains more photoinitiators;
- the presence of a base layer and substrate: the base layer is applied very thinly and hardens quickly, without causing severe pain. And the substrate protects the nails from the heat generated during the polymerization of denser layers of material;
- condition of the nails: damaged and heavily filed nails are more sensitive to the effects of temperature, due to which the pain intensifies.
The burning sensation can be significantly reduced with proper adherence to all extension technologies.
How to reduce burning sensation when drying?
In order for the procedure to take place with maximum comfort, it is necessary to observe all the subtleties and features of the extension: do not file the nails too thin, use only high-quality products, dry the nails in an appropriate lamp, spread the gel as thinly as possible on the substrate. It is also not recommended to carry out the procedure on thin and damaged nails.
What is a sticky layer? When and how to remove it?
A dispersive, or sticky, layer is formed on the surface of gel nails after they are polymerized in a lamp. This film is necessary for better adhesion of all layers of coating to each other. When applying nail extensions, a dispersion layer is necessary:
- between the base and the nail,
- between the base and modeling gel,
- between layers of sculptural and colored gel polishes.
Before applying gel paint and finishing gel, the sticky layer is removed from the surface with a napkin soaked in a special liquid (cliner) or removed with a degreaser. Here it is important to choose lint-free wipes so that there are no unsightly lint or threads left on the surface of the manicure.
Today you can also choose special finishing products without a dispersion layer. Such coatings do not leave a film and, accordingly, nails do not require additional treatment with a clinser.
Why is sanding necessary before applying the finishing gel?
Treating extended nails with an artificial nail file performs two functions at once - it evens out the surface and removes excess thickness of the material. After polishing, the nails must be cleaned of any remaining dust and only then proceed with the finishing gel coating.
How is the finishing coat applied?
Finish gel (corrective, strengthening) is the final component of gel extensions. It is applied to pre-polished and cleaned nails after removing the sticky film. The corrective gel is evenly applied to the surface of the nail plate in a thin layer, after which the manicure is fixed in a lamp and the sticky layer is removed from it. Today on sale you can find finishing coatings without a dispersion layer. When working with such products, you will not need to treat your nails with a clinser.
Is it possible to cover extended nails with manicure or gel polish?
Can. Any coating on artificial nails easily lasts 3-4 weeks.
How to properly remove extended nails?
Gel, unlike acrylic or gel polish, cannot be dissolved using a remover.
This manicure is completely filed off, after which the nails are sanded to remove any unevenness, and then they are given shine. In nail salons, this procedure is performed using a professional machine. To make the procedure faster, the free edge of the nails is shortened with a tip cutter or nail clipper. When removing gel nails, you need to wear a mask. Upper Forms Nayada Low Curve 120 pcs. Gel for nail extension Nayada Camouflage Confiture 60 ml Top Forms Nayada Arch Pipe 120 pcs. Nail extension gel Nayada Bubble Ball 6 ml Nail extension gel Nayada Bubble Ball 60 ml
The best manufacturers of nail drying lamps
With the development of the nail service industry, the range of drying lamps is becoming wider, and the devices themselves are becoming more and more productive. At the same time, today you no longer need to pay a lot of money for a good device, even if we are talking about professional drying for a salon.
Let's divide all manufacturers of manicure lamps into three groups:
- high-class professionals focused on high-status beauty salons. Basically, these are “Americans”: OPI, Gelish, CND, Harmony , etc. Their lamps for drying nails are expensive and prestigious. However, some of them only work well with their own brand of materials. And in general, they cannot compete with functional, efficient, “omnivorous” and inexpensive devices made in Russia and China.
- “Medium” lamps whose lamps are relatively inexpensive and are suitable for both home and salon use. Basically, these are domestic or Russian-Chinese brands: JessNail, RuNail, Planet Nails, Polaris, Irisk . These also include the Korean brand TNL Professional and the British brand Solomeya . Their advantages are good quality, nice design and the possibility of warranty service. Such lamps for drying nails are most often chosen by novice nail technicians and small salons.
- There are many Chinese manufacturers whose products can be purchased on Aliexpress and similar sites. They handle the drying function of gel polishes well, but they are very cheap. However, among Chinese lamps there are leading brands that break all records in popularity: SUN/Sunuv, SUNONE and Diamond . They are reliable, efficient and affordable, have wide functionality, and can be purchased both for home use and for nail salons. They can be bought not only in China, but also in Russia, with warranty service.
- Complete analogues of the most popular Chinese models can be found in Russian brands: Soline Sharms, Touching Nature, Beauty Factory , etc. Their products are also manufactured in China and are not much different in appearance from the same SUNUV. However, it is important that these brands provide a guarantee on their products, so you can purchase them without fear.
Which gel do you prefer?
What do you need to do nail extensions at home if you have no experience? It depends on the task at hand and the time you can expect with new plates.
The most popular nail extension products:
- Single phase base. It is the easiest to use, is considered ideal for beginners, and combines several functions. With it there is no need to use a base and fixer, although you need to first prepare the nail plate. Single-phase gel is applied in layers, evenly distributed over the surface. There are clear, matte and colored to complete the design.
- Biogel. Performs the same functions, differing in composition and consistency. It is produced from the resinous sap of the teak tree and has a liquid structure reminiscent of rubber. It is considered an environmentally friendly material. It is recommended for those who are interested in how to do nail extensions at home on hands corroded by chemical reagents. Biogel is enriched with liquid protein and calcium - this is an excellent basis for strengthening brittle plates.
- Camouflage gel. It has a thicker consistency, imparts naturalness to transparent tips and colorless forming coatings. It is good to increase the length of the build-up base for a French manicure and even out the tone, thanks to the pigment similar to the color of “naked” nails. White varnish completes the illusion of naturalness.
- Shellac. A universal product with the properties of different bases for extensions. Like other gel bases, it requires curing under a UV lamp (in a nail dryer). Lasts for at least 2 weeks, including a three-dimensional design on the surface with the overlay of stones, rhinestones, and other inclusions.
- Decorative or stained glass varnish. Used for original manicure design.
Attention! Before work, it is important to remove any remaining cuticle, followed by treatment with an antiseptic, degreaser, and primer. The hardened gel polish gives an impenetrable structure.
Neglect of simple requirements can provoke the development of fungus, reduce the quality of work, and lead to separation of tissues under the artificial nail.
Choosing gel polish: nuances
All girls want their manicure to last a long time. This largely depends on the quality of the coating itself. Not all novice masters know what to look for when choosing manicure products. We will tell you how to buy the best gel polish. When looking through offers from different manufacturers, be attentive to the following points:
- the manufacturer must guarantee at least twenty-one days of durability of the coating, only in this case can you be sure that it will last at least two weeks;
- density of gel polish - it should not spread, but, nevertheless, the consistency cannot be too viscous;
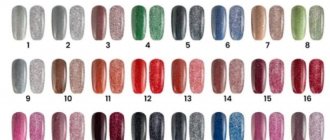
- a wide color palette will allow you to combine shades and give room for creative imagination;
- The smell of the coating should not be pungent.
Not many manufacturers meet all these characteristics. That's what we'll talk about now.
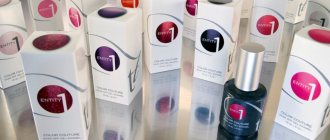
Gel varnishes for LED lamps: brands
Several gel polish manufacturers have established themselves on the Russian market. Moreover, the price range in this area is quite wide. You can choose coverage from two hundred and fifty rubles to one thousand rubles. Please note that low cost does not mean poor quality of the coating.
The very first gel polishes from American manufacturers hit our market. They have a wide range of colors and excellent quality. This product does not emit a strong odor and often contains an innovative formula that helps increase the durability of the coating. Naturally, the most popular among American manufacturers is Shellac CND. This innovative gel polish has already become a household name in the world of nail services. But in fact, only the coating of this brand can be called shellac. The cost of one bottle ranges from one thousand rubles, the bottles have an average volume.
American Gelish Harmony has already proven itself to be the most harmless gel polish of all existing ones. It is available in large bottles of at least fifteen milliliters, and the cost does not exceed one thousand rubles. This gel polish for LED lamps receives the most enthusiastic reviews from clients. The coating remains on the nails until the nail has completely grown out, which in some cases exceeds thirty days.
In terms of durability, only the Pnb brand can compete with the previous brand. This product is in a lower price category, but the quality of the coating exceeds all expectations of nail salon clients. The cost of one bottle usually does not exceed four hundred rubles.
Don't be afraid of Chinese gel polish manufacturers. They are very popular, and the quality is not inferior to American brands. The most common is Bluesky. This Chinese gel polish can adequately withstand competition with more expensive American manufacturers. The average cost of a bottle of this brand is two hundred and thirty rubles, which allows you to purchase the entire color palette without financial losses for the budget. The only disadvantage of this brand is the difficulty in removing the coating; it is cut off along with the base layer.
Recently, Russian gel polishes have appeared on the market. They have not yet managed to win the love of consumers, but they are confidently moving in this direction. The RuNail brand stands out among Russian manufacturers. This coating is excellent for thin nails; during use, it significantly improves the health of the nail plate. Based on reviews of this product, it can be assumed that it will soon become one of the five most popular gel polishes in the country. The cost of one bottle does not exceed two hundred and fifty rubles. This allows the Russian brand to successfully compete with a cheap product from a Chinese manufacturer.
Step-by-step process for gel extensions at home
Those with short nails especially need extensions. It is difficult to do a manicure yourself with strengthening and shaping on a bitten base or cut “to the very root.” Disposable pads, on which a long plate is formed, are inconvenient to attach. After the gel has hardened, the paper form with markings is discarded.
Before starting extensions at home, it is worth assessing the general condition of the nails and the length of the stratum corneum. Strengthening with extension on soft forms is suitable for those who prefer a “natural” manicure.
The step-by-step instructions involve drying each layer under a UV lamp.
- Use a cloth containing Chlorhexidine or an antiseptic with similar properties to treat hands and metal tools.
- Prepare the cuticle (cut off excess or push back with a stick).
- Polish the nail plates with a coarse file (200-220 grit), remove dust with a napkin. Complete the formation of the base with a manicure tool and degrease.
- Use a rough file to remove the shiny layer and treat it with a primer so that the gel has maximum adhesion.
- Place paper forms for extensions with markings on the ends of your fingers, securing them to your fingers - do each one slowly, one at a time.
- The most important stage is application, first on your own plate, gradually lengthening it on a paper pad to the desired length (3-4 cm). Each layer undergoes a polymerization (hardening) process under an Ice lamp for about 1 minute (it can take longer to get hot).
- When the artificial plate is ready, you can remove the paper pad and move on to the other finger.
- Upon completion of formation, the new base is covered with camouflage varnish for a French manicure or other decorative coating.
Gel polish: what is it?
In nail salons, cute female nail technicians boldly manipulate terms such as “gel polish,” “shellac,” and “gel polish for an LED lamp.” All this diversity makes an ordinary woman's head spin. Making a choice is sometimes quite difficult. Although in fact there is nothing complicated in this terminology.
If we describe gel polish briefly, we can say that it is a coating that ideally combines the best properties of conventional nail polishes and gels. It looks like a viscous plastic substance that hardens under the influence of ultraviolet radiation.
Are all gel polishes suitable for LED lamps?
Beginners are always interested in what gel polishes are suitable for an LED lamp? They still have little understanding of the brands and properties of coatings, so sometimes they make mistakes and buy the wrong material for the job. To understand which gel polishes will be ideal for an LED lamp, you need to carefully look at the labeling of the bottle. The manufacturer always specifies which lamps their coating is suitable for. To be fair, it is worth noting that modern products are designed for almost any type of lamp. But still, you shouldn’t take risks; it’s better to carefully study the labeling:
- UV/LED - this combination of letters indicates that this is a universal coating. It feels great in any lamp and retains all its properties.
- LED - under this marking they produce coatings that are suitable for drying in an LED lamp. In such conditions, the gel polish dries in thirty to forty seconds. A similar gel polish for an LED lamp polymerizes well in CCFL dryers; the total hardening time ranges within six minutes.
- UV - do not use this coating for drying in a lamp. Polymerization will take a long time and does not guarantee a good result. Most often, the coating begins to delaminate immediately or hardens with unevenness.
If you follow the manufacturer's recommendations, your manicure will last the maximum amount of time possible.
What you can't do without at work
Beginners are interested in what they need to do to grow their nails at home without the services of specialists. Basic tools and materials:
- Ultraviolet dryer for gel manicure. For home use, a simple LED lamp with a timer with a power of 36 W is recommended. The base is applied in thin layers, dried for about 1 minute (a thick layer leads to overheating).
- Single-phase gel is convenient for beginners - simple work that does not require skills.
- Antiseptics (liquids, wipes) are an important condition for disinfecting hands and maintaining health.
- A degreaser (nail polish remover will do) to ensure an even finish.
- Alcohol (high-quality removal of particles after filing), slightly dries the skin.
- Liquid to neutralize the sticky layer (it is better to purchase BioNail or Zinger).
- Wood stick and essential oil for working with cuticles.
- The primer promotes high adhesion of the gel and the stratum corneum.
- Tweezers and files of different grain sizes (polishing the surface, adjusting the hardened shape).
- "Type cutter" or cutter.
- Lint-free wipes.
- Clips for forming a long nail of the correct shape.
- Gel distribution brushes (thin, medium and wide).
- Forms and tips for nail lengthening. The paper disposable pads are marked with shading in millimeters so as not to make a mistake with the size. Artificial analogues are sold in a set with glue.
Additionally, after completing your nail extensions at home, you can create a beautiful design to suit your taste. You will need bottles with colored varnish, stencils and decorative inclusions.
Method of extension with tips
The easiest way to build it yourself is with ready-made plastic forms, which are available in different forms:
- “bare” nails;
- with a matte, pearlescent or glossy finish;
- with a ready-made design (chameleon, gradient, leopard, flowers, etc.).
Tips are visually no different from natural plates treated with gel polish and are made of high-quality plastic. Bloggers and experts who tell in detail how to properly grow nails at home recommend starting with the simplest method.
The fastening of the pads is carried out with special glue after preliminary treatment of the hands according to all the rules. After this, the preferred materials are applied. If treated with care, correctly applied tips will look good for 2-4 weeks.
The success of the procedure depends on the conformity of the shape selected for each nail. The easiest method is to apply glue to the inner surface of the pad, press it tightly to the nail, stepping back 1-1.5 mm from the growth line (socket).
Hold the tips on each finger for several minutes. Upon completion of the extension, give it the desired shape (file, cut or “bite” with a cutter). After polishing to remove any residue, complete the manicure with a topcoat. Treat the cuticle section with essential oil. Every girl who is interested in how to easily grow her nails on her own should know this.