How to make liquid nail tape at home
There is a varnish that is applied around the nail and removed with a film, called liquid tape.
So, in this article we will talk about how to make liquid tape for manicure with your own hands, replacing it with regular PVA glue. A short informative video instruction - you won’t even have time to get bored. Well, for this you need an empty bottle of nail polish. You can clean an already used bottle with acetone, or you can buy a ready-made empty one in a specialized store.
You will also need PVA glue, consisting of polyvinyl acetate (if this is important to you), that is, this is ordinary PVA glue sold in the stationery store around the corner, which will need to be poured into an empty bottle of varnish, filling about three quarters so that it remains place for a brush.
If desired, you can mark the bottles with a marker so as not to confuse the glue with nail polish. That's all the instructions, and if you are interested in how good this composition is in practice, then read on.
How to use liquid manicure tape
Apply the adhesive as you would regular liquid tape, as close to your nails as possible without touching them. Cover the skin approximately half to one centimeter around the nails, depending on the intended design and how easy the process promises to be. The process can take quite a long time and requires concentration.
Now, you need to let the applied composition dry, and if you are not one of the patient people, then to speed up the process, use a hair dryer. You will know that the glue has dried when it becomes almost transparent and invisible on the skin.
Well, I'll go ahead and do an ombre manicure.
In short, I simply apply a few colors of polish to a sponge and transfer them onto my nails, creating a smooth gradient between the colors.
After that, all that remains is to remove the applied tape from your fingers, adjust the manicure (with a brush or cotton swab moistened with remover), and secure the resulting design with a top coat.
As you can see, there is no noticeable difference between the official product and the composition made independently. I was going to try this method so many times, but I kept putting it off until I finally did it. And guess what? Quite a way to save money. Of course, when doing manicures for clients in a salon, you cannot allow yourself such liberties, but at home, the sensible housewife in me always prevails over the vain beauty.
Source
DIY liquid tape for manicure: materials and methods of application
Every self-respecting girl always takes care of the beauty of her hands, takes care of her nails, and does a beautiful manicure, but in order to save money, you can perform these procedures yourself.
Nowadays, representatives of beauty are faced with a huge selection of nail care products. A unique manicure can be created using a huge list of techniques, methods, and tools.
However, styling your nails with your own hands can be complicated by various kinds of difficulties, including contamination of the cuticle at the nail plate and the side ridges of the finger.
More recently, this problem caused a lot of negative emotions, but today there are special products that can protect the cuticle from pollution. For example, liquid tape for manicure, which is quite easy to make with your own hands.
This is an inexpensive and safe product that can help ensure your nails look beautiful and well-groomed during a manicure. It does not contain harmful substances in its composition, does not cause burns or allergic reactions, so these days liquid tape is very popular among experienced nail artists and fashionistas who are accustomed to caring for their nails on their own.
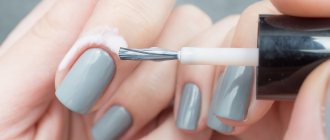
This product is a viscous liquid that hardens after application to the surface of the skin. To make the manicure truly attractive, sophisticated and durable, the composition is applied using a brush as close as possible to the nail plate. The product is allowed to dry for some time (from 1 to 3 minutes) until a dense film is formed, then you can proceed to performing nail art, regardless of its type.
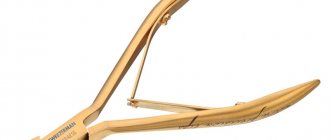
When the manicure is completed, the remaining liquid tape is simply removed from the surface of the skin around the nail; for this you can use tweezers, an orange stick, etc. This way you can get really neat nails.
Many nail art options will have a more attractive appearance if liquid tape is used in the process of decorating the nails:
Important
Undiluted PVA glue can be applied in a thick layer and therefore take a long time to dry, while diluted PVA glue can be too liquid and not form the film necessary to protect the skin around the nail.
In this case, you will need to reapply the glue on top of the dried first thin layer. We recommend: Gradient on nails: how to choose the right combination of colors
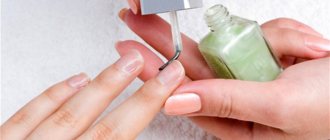
You can apply the glue either with a cotton swab or a brush from used varnish, or with a special manicure brush - it all depends on skill and convenience. Remove using tweezers, a dry wooden stick or a wooden stick moistened with water. Or simply rinse with warm water after the nail coating is completely dry. This method is quite effective and easily accessible.
You can also replace liquid tape for manicure with latex for makeup and creativity. It must be applied in a thin layer with a brush, but with extreme caution, since such products have a much more pronounced ammonia smell and are more likely to cause an allergic reaction in the body.
Manicure around the nail and other available materials
Many fashionistas think about the question of how to protect the cuticle from staining with varnish or gel, because sometimes, due to the inexperience of the master, the manicure turns out to be not very neat and aesthetically unattractive.
Today you can purchase several special compositions that will help your nails maintain their attractiveness and neatness. Many fashionistas are wondering how to make their own liquid tape.
This is a very simple task: it can be made from PVA glue, Vaseline and even tape.
Namely:
PVA glue for manicure around the nail as a liquid tape
When performing stamping, water manicure and other nail art options, you can use PVA glue for manicure around the nail.
It would seem that this is a completely irrelevant substance in this case. However, experienced craftsmen will tell you that the properties that such an adhesive composition has are very beneficial to use to protect the skin from the risk of becoming contaminated with residues of varnish, gel polish or gel. PVA glue does not need to be prepared or mixed with other components; just open the tube cap and squeeze the product onto the skin. Gently spread it over the skin with a thin brush, not forgetting to check the space close to the nail. Next, the composition should be allowed to dry thoroughly; when this happens, a thin but very reliable protective film will remain on the skin, which will not allow decorative varnish, gel polish or gel to stain the skin around the nail and thereby ruin the appearance of the entire manicure.
Nail Defender: what is it, how to choose and use?
join the discussion
Share with your friends
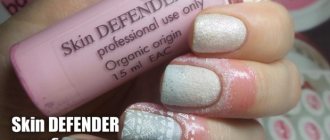
A beautiful and high-quality manicure is an integral part of the image of a modern woman. The fashion world does not stand still and constantly dictates its own rules. Cosmetology companies work every day to create new products that have universal properties, improved texture and a wide color palette. One of the newest developments in the field of nail decoration is Skin Defender, which has significantly simplified the work of decorating nail plates, reduced the time required for work and prevented chemicals from getting on the skin and cuticles. Defender is used to create water manicure, gradient, stamping, as well as designer airbrushing. Innovative technologies and modern equipment have allowed manufacturers to produce products of different shades with a mild scent in beautiful and convenient bottles. The new products quickly took leading positions in the sales rankings of this group of products, and their unique properties make it possible to use the product not only in professional salons, but also at home.
Pros and cons of using tape
Like any product, nail art ribbons have their advantages and disadvantages. Each lady has her own, but we will try to generalize.
Pros of manicure with tape:
- Quickly and easily get a simple and beautiful drawing at home.
- The ribbon is not noticeable on the nails, it looks very harmonious and high quality.
- Low cost for a rather large roll. It lasts a long time.
- Wide choice of color palette.
- Can be used as a stencil.
Disadvantages of tape manicure:
- The quality of the self-adhesive strip is not always good.
- A poorly glued ribbon may start to slide off at the wrong time, thereby ruining the entire manicure.
- To obtain an intricate pattern, you need to spend a lot of time.
- Quite painstaking work, not everyone will like it.
Description
Skin Defender is a natural product that is made of rubber and does not contain chemical components. Long-term laboratory studies have revealed the absolute safety of the product and the possibility of its use on any type of skin. For ease of application, manufacturers have developed a convenient brush, which makes it possible to apply the composition to the side rollers, cuticle, and also to the skin around the finger.
The beautiful glass container and bright design of the liquid tape will appeal to even the most capricious fashionistas and will look harmonious among other bottles with varnishes and decorative products. On the shelves of specialized cosmetic departments you can see a large number of protective products, which differ not only in color and country of production, but also in price range.
To apply a high-quality protective layer, novice craftsmen must know the main stages of performing this type of work.
What you need to create nail art with ribbon
To create a nail design with ribbons, you will need:
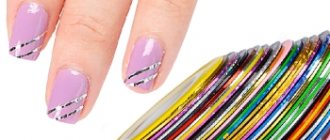
- Nail tapes. They come in different qualities and shades, can be matte, glossy and holographic, but they all have an adhesive layer on the back. The cost of the tape starts from 30 rubles, you can buy it at any store that sells nail design products.
- Coatings. The simplest nail design with ribbons can be done with just 1 shade of polish; for more complex options, choose 2-3 shades of coating.
- Top base and finishing. These coatings will extend the life of your nail design and make it more neat.
- We recommend that you use a little trick: to ensure that your design always turns out flawless, you need liquid tape for manicure. It resembles regular nail polish and is applied with a similar brush, but not on the nail, but on the skin around it. After this, the selected design is performed, for example, a manicure with stripes. When the nail art is completed, the liquid tape is removed from the skin with a film, and along with it the errors of your work are removed. The price of this coating is about 500 rubles.
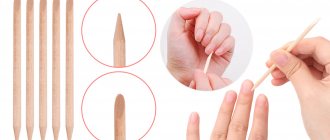
In addition, you will need tweezers to remove the tapes from the nails, an orange stick to securely fix and straighten them, and nail scissors to cut pieces of the desired length. Armed with these materials and tools and having prepared your nails by doing a classic or unedged manicure, you can begin your nail design.
Advantages
Among the main advantages of the new product, experts pay attention to the following:
Home remedies
If this liquid tape is unavailable or it is impossible to purchase it, experts recommend replacing it with other non-traditional protective agents:
To create a designer water-based varnish coating, you cannot use stationery and masking tape, which under the influence of water will get wet and come off your fingers, and the adhesive layer will not allow you to give the material the desired shape.
The use of glue and its uniform distribution is possible only if you have experience and practical skills. Professional craftsmen warn about the presence of chemical elements in this composition that can cause redness of the skin and an allergic rash. The liquid consistency of the adhesive composition creates difficulties in its application and in the formation of a reliable and durable protective coating.
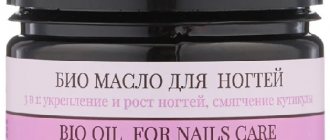
When purchasing a fatty cream, you should give preference to cosmetics that moisturize dry skin or are used in winter. Vaseline, vegetable oil, greasy cream and cuticle products are not suitable for water treatment or nail airbrushing. For subsequent decoration of the nail plate, it is necessary not only to remove greasy compounds, but also to carefully treat the entire surface of the manicure with special means.
Protective oily products must be applied very carefully, trying not to spoil the design. Corrective markers have a low percentage of efficiency and do not allow you to completely cover the entire working surface.
Strong pressure with orange sticks and other tools can deform the surface of the skin and cuticle , as well as the applied coating. Long-term use of cotton swabs soaked in chemical solvents can negatively affect the general condition of the body, causing headaches and dizziness.
In cases where it is not possible to use even simple home remedies, you can wash your hands under warm running water with any moisturizing soap two hours after applying the varnish. The softened varnish coating will quickly and easily come off the skin. This procedure is not suitable for all types of varnish and can ruin your new manicure.
Before using any non-traditional means of protecting the skin from varnish, you must definitely consult with professional craftsmen and study all the intricacies of using traditional methods.
Brief description of the procedure
STEP 1
Examination and diagnosis of skin condition, consultation before the procedure, selection of suitable products for pedicure.
STEP 2
Antiseptic treatment of feet using TOTALDEZ, which is a biocide with a wide spectrum of antimicrobial activity and has a long-term bactericidal effect on the treated surfaces.
STEP 3
Giving nails the optimal length using pedicure tweezers.
STEP 4
Giving nails the correct shape using a disposable abrasive file.
STEP 5
Application of keratolytic gel “Liquid Blade” to the skin of the feet to loosen keratinized areas of the skin, soften dry calluses and prepare the feet for cleaning. The keratolytic gel should be carefully distributed over areas of the skin with keratinization and calluses.
STEP 6
Macerate the feet in a bath of warm water for 10 minutes.
STEP 7
After 10 minutes, one foot is wiped dry with a towel.
STEP 8
Using a disposable double-sided abrasive grater, the softened dead skin on the foot is first filed with the coarse abrasive side of the grater, and then sanded with the back side with a fine abrasive. Next, the foot is lowered into the bath to wash off the peeled skin particles. Then all the same actions are repeated with the second foot.
STEP 9
A fast-acting cuticle softening and removing agent, DGP CUTICLE REMOVER, is applied to dry cuticles and the skin of the side ridges of the nails, which delicately softens the rough cuticle skin without damaging the nail structure. As a result of regular use of this product, the growth of the cuticle slows down and its growth on the nail plate is prevented. DGP CUTICLE REMOVER should be applied to the treated areas without touching the skin with the bottle (for hygienic purposes).
STEP 10
The cuticle is removed using an orange stick.
STEP 11
The softened dead skin on the side ridges is cut off with tweezers. Next, steps 9, 10 and 11 are repeated with the second foot.
STEP 12
Treatment of the skin of the feet with DGP gel scrub - an effective exfoliant to normalize cell renewal processes. The feet are massaged for three minutes, after which the feet are rinsed with water. The remains of the scrub gel must be thoroughly rinsed off so that there are no abrasive particles left between the fingers, which after the procedure can cause discomfort to the client when walking.
STEP 13
Treatment of feet with foot cream with lemon, lanolin and silver, which moisturizes dry skin and makes it silky and elastic.
STEP 14
Toenails are degreased using DGP NAIL PREP LUX and lint-free wipes.
STEP 15
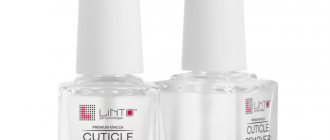
A base coat is applied to the nails - a reinforcing base for varnish (diamond nail hardener) DGP DIAMOND STRONG.
STEP 16
Nails are coated with colored decorative varnish DGP Mini Nail Polish in two layers.
STEP 17
DGP SHINE FINISH TOP COAT (varnish fixative with SUPERSHINE effect) is applied over the colored varnish.
STEP 18
The procedure is completed by applying a quick-drying polish with a drying agent, vitamin E and Inca Inchi oil from DOMIX GREEN Professional to the nails.
Reviews
The universal properties of the protective agent, affordable price and ease of use have made the product popular and in demand. A huge number of positive reviews are left not only by professional craftsmen, but also by novice decorators.
This product has become indispensable for creating complex types of manicure, gradient nail plate design, nail art and unusual water decoration.
Liquid tape has become an indispensable product for home use when there is a high probability of varnish getting on the skin. Affordable price, high quality, ease of use and cost-effectiveness are the main advantages of the protective coating.
The high speed of life of a modern woman and the presence of a huge number of things to do leave very little time for visiting beauty salons or independently caring for her body. Knowing this problem, manufacturers of decorative cosmetics have released a new product that makes it possible not only to use new technologies and styles in nail design, but also to save a lot of time. Skin Defender has become an indispensable assistant for both professional professionals and beginners , who appreciated all the positive qualities of this product.
note
This product can also be used with the usual standard monochromatic nail coloring for a more neat and attractive manicure.
We recommend: Moon manicure for short nails - a wonderful, but unfairly forgotten manicure design. The only inconvenience that may arise when applying liquid latex is its rather pungent smell.
This is due to the content of ammonia in the composition, so it is necessary to apply the liquid tape at a sufficient distance from the face, and after use, close the bottle tightly to prevent the product from drying out prematurely.
The ease of use and undeniable advantages of liquid latex for manicure make it popular and indispensable both among nail technicians in beauty salons and among women who do manicures and apply nail polish on their own.
Liquid latex for manicure is produced mainly by manufacturers of professional manicure products, but similar protective bases and correctors can also be found in the lines of popular brands specializing in nail polishes. The differences between them are only in the degree of thickness of the product, the color when applied, the sharpness of the smell, the milliliters in the bottle, the country of manufacture and, accordingly, the price.
Among manufacturers of professional manicure products, the following are popular:
- Liquid Palisade from the American brand Kiesque.
- Manicure corrector “RIO Profi” is rubber-based, manufactured in Russia from American ingredients.
- Skin Defender by Konad.
- Liquid tape for manicure Masura made in Russia.
- South Korean Skin Defender Tatnail.
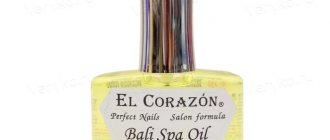
Popular nail polish brands El Corazon and Dance Legend produce liquid tape in several variations that differ in color and smell, but perform their main function equally well.
El Corazon Kaleidoscope Cuticle Defender comes in two colors—blue and pink—that dry almost clear within 30 seconds.
Dance Legend Pure Manicure has a very strong ammonia smell, but is convenient due to its thin brush. For ease of application, Dance Legend glitter base is available in white and black and has almost no specific odor.
You can make a product similar in quality to liquid tape yourself; the well-known and affordable PVA glue is suitable for this. It can be applied undiluted or diluted with water to the required thickness.
LIQUID TAPE SKIN DEFENDER: AN ESSENTIAL MANICURE ASSISTANT
Since its introduction, Skin Defender has become one of the most favorite auxiliary products for creating complex types of nail art. Girls who adore water-marble, gradient, stamping, airbrush design and other techniques that involve involuntary contact of the coating with the skin immediately breathed a sigh of relief. It has become possible not to use a mountain of cotton swabs to correct soiled periungual ridges, adjacent skin and cuticles. By modernizing, this convenient manicure assistant acquired different shades, reduced the intensity of the aroma, acquired a stylish design and convenient volumes. Now creating an artistic nail look has become even more pleasant and comfortable with it. Today in our article we will reveal to you all the secrets of liquid manicure tape and teach you how to use it correctly.
Skindefender: what is it? Main characteristics, pros and cons
Liquid tape is a special composition created on the basis of high-quality natural rubber. It does not contain harmful synthetic rubbers, so the drug can be absolutely safely used on any skin type. It comes in a convenient package (with a brush or sponge applicator), which allows you to carefully apply the substance to the side rollers, touch the cuticle, and even “paint over” part of your finger while performing a water manicure. For practicing manicurists, as well as ordinary girls who love to decorate their nails with intricate, complex nail designs, Skin Defender has become an excellent saver of time, nerves and consumables. What can this nondescript-looking assistant do? Let's look at its main pros and cons.
The undoubted advantages of liquid tape include the following characteristics:
The execution of even complex, creative and designer images will finally become a real pleasure. A variety of color pigments, decorating products to protect the cuticle and skin, as well as aromatic additives (including natural oils) bring their own share of positivity and aromarelax when creating a particular image;
Skin Defender will be especially invaluable when working with liquid gel polishes when the artist is sealing the end. It reliably protects the skin from accidental contact with the coating, which can be extremely undesirable, especially for allergy sufferers;
This product allows you to improve your skills by practicing careful manicure, mastering the techniques of stamping, French and moon manicure. Despite various cheap analogues, it is branded products that cope with their tasks best;
Skindefender is convenient to take with you on a trip or vacation, when you don’t want to burden your luggage with excess weight, but want to experiment with new varnishes or shellacs;
This product will be appreciated by those with sensitive and allergic skin, since applying a protective tape will avoid unwanted contact with aggressive components of nail polish and nail polishes;
Skin Defender dries very quickly, its application and removal will take much less time than correction with improvised means. Unlike Vaseline or greasy cream (replacement options), Skindefender does not negatively affect the already applied coating. And you will not need to additionally degrease your nails and skin if you plan to further decorate your nails after using the drug;
If you don’t have special stencils on hand, liquid tape can successfully replace them. Create the contours of the stencil design with a brush from a bottle of the product, and use thin nail tweezers to remove the dried “rubber” film after creating the finished image.
As for the existing disadvantages, they include the following points:
Each manufacturer has its own skindefender consistency. Individual specimens harden in a uniform thin layer and are removed in one layer, without any “bits.” With others you will have to tinker, or apply a protective product in several layers, which will increase its consumption;
Although manufacturers are trying to make this product as pleasant as possible, or at least not with a pronounced odor, it still cannot be called absolutely neutral. If you are sensitive to the aromas of waiting lists and correctors, be prepared for the fact that you will have to create your design in a ventilated area.
Application rules
Liquid leather is non-toxic, so you can work with it indoors and without a respirator. But you should wear disposable gloves, because it stains your hands like paint.
Tools
Liquid leather is most often applied with a sponge - this way the layer is not perfectly smooth, but porous and reminiscent of the texture of natural leather or eco-leather. In some cases (for example, when a special template stamp will be used to create a texture), the surface is covered with an artistic brush.
In addition to a sponge or brush you will need:
- degreaser (alcohol is best);
- lint-free fabric;
- tool for creating texture (stamp template);
- fine-grained sandpaper or sprayed nail file;
- a small spatula (you can use an unnecessary bank card or a thin ruler instead).
Product preparation
The connection of liquid leather with the base material occurs according to the principle of diffusion - the molecules of this product penetrate into the leather from which the product is made, mixing with its molecules. However, this process is hampered by fat accumulated on the surface of upholstery, clothing or shoes, so degreasing is indispensable. First, wipe the product with a lint-free cloth soaked in alcohol.
To make the molecules mix even more actively, the surface of the product must be sanded with sandpaper. Don't overdo it - the surface should be rough, not full of holes. At the end, be sure to remove all the smallest particles of material formed during sanding - blow them off with a hairdryer or brush them off with a soft brush.
Application of liquid skin
The procedure for applying the product depends on the defect that needs to be eliminated.
If there are only abrasions on the product, proceed as follows:
- Apply a thin layer of liquid leather to the damaged area or to the entire surface of the product.
- Trim the boundaries of the area being restored so that there are no bulges or thickenings.
- If necessary, use a template stamp with a texture.
- Leave the product to dry.
If you need to remove small cracks or cuts, follow these instructions:
- Using the fingers of your left hand, connect the edges of the damaged material so that they are end to end.
- Using a brush, apply a little liquid leather to the joint and wait until it dries, while continuing to fix the edges.
- Apply a second layer of product, this time with a sponge, over a larger area.
- If necessary, restore the original texture using a template stamp.
- Wait until polymerization is complete.
In very difficult cases - when the product has deep and long cuts or tears - you should first fasten the edges of the holes, which requires fabric with an adhesive base (for example, non-woven fabric):
- Glue the fabric on the wrong side by ironing it.
- If it is not possible to turn the product inside out, take high-quality leather glue, lubricate the interlining with it and insert the fabric through the existing cut inside the product, so that the adhesive side is adjacent to the wrong side of the main material. Wait for the glue to dry (how long it will take should be written on the packaging).
- On the outside, apply liquid leather in one or more layers, give it texture and leave until completely dry.
What is the purpose of the “pink thing” and why is it pink?
The so-called “pink thing” is necessary and necessary both in home manicures and also when there is a large flow of clients. It is very economical, the product may well be enough for at least 50 manicures. And this more than pays for the cost of good, branded drugs, with an increased content of useful components in the composition and the most muted aroma.
As for color pigments (defenders are available in literally all colors of the rainbow and even black!), the additional ingredient plays an auxiliary role in the product. With its help, manufacturers help us visualize the already treated skin from the area where there is no protection. The pigment itself does not affect in any way (either for the better or for the worse) the strength of the liquid tape or its additional caring properties. You can be sure that a white, pink, or green bottle will please you just as much as a purple or blue one.
Cuticle Defender: dangerous or safe for the skin? Alternative and analogues
As with any other product applied to the skin, girls who are getting acquainted with it for the first time have many questions about liquid tape. One of the main ones is whether the product is as safe as the manufacturers say about it? As the experience of professionals in the manicure industry shows, high-quality professional skindefenders will not cause any negative reaction in your skin. They do not contain any components harmful to the health of the skin and nails.
An allergy test should be carried out only for those girls who have previously encountered manifestations of allergies to various manicure products, including gel polish itself (read about the manifestations of allergies to shellac in our article “Allergy to gel polish: causes, types, symptoms, treatment and prevention"). Other nail fashionistas can safely use products from any professional brand, without paying attention to the color pigments in one or another version of the liquid tape.
Surprisingly, this manicure assistant not only performs protective functions, but also manages to take care of the skin. This becomes possible thanks to the natural composition of the cuticle protector, in particular neroli oil. Thus, the defender not only prevents the penetration of color pigments of varnishes into the nails and skin, but also performs disinfecting functions and also restores the skin in areas of microdamage. In a short time on the skin, the cuticle protector manages to slightly moisturize, nourish and protect it from drying out.
How to choose the color of liquid skin?
As a rule, manufacturers produce this product in different shades - darker and lighter, warm and cold, bright and pastel. Among such a rich palette, it will not be difficult to find exactly the option that will ideally match the color of your product.
But sometimes you need an unusual shade. In this case, you will have to buy several jars of liquid leather in different colors and mix them, guided by the rule of the color wheel. It can be difficult for a non-professional to reproduce the correct tone the first time, so it is better to do this in a separate container, and check the finished mixture by applying it in an inconspicuous place.
How to properly apply manicure around the nail?
Liquid tape is perhaps the simplest, most pleasant and effective way to protect the design being created, regardless of the type of coating and the chosen nail decoration technique. To ensure that the process of using it gives you only positive emotions, follow the following technology and recommendations for working with Skin Defender:
Before starting work, be sure to perform a trimmed or untrimmed manicure, work well on the cuticle (tweezers or cuticle remover and an orange stick). Do not file or polish your nails after applying liquid concealer, as the film may tear during its removal. And you will have to spend more time removing it from the skin;
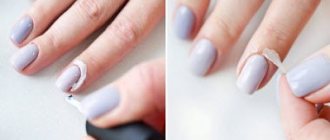
Gently brush over the periungual skin with a brush generously dipped in the “pink stuff.” Try not to let liquid get on your nail, otherwise your design (be it a water design, gradient or stamping) will turn out unclear or blurry, and the polish or gel polish will not lie evenly. If you plan to create a water-marble design, then you should treat not only the skin around the nail, but also the two phalanges of the finger with a protective preparation. Apply the product generously so that the film becomes thick and strong enough to make it easier to remove;
Make sure Skin Defender is completely dry before creating your design. Due to its component composition, the liquid turns into a film in about 30-60 seconds (depending on the manufacturer brand) and becomes colored (the color that you see in the bottle);
Having finished creating the nail art you have chosen, use tweezers to pick up the edge of the elastic film and gently pull it to the side and up. All traces of coatings on the film will be removed along with it, leaving clean skin and a smooth, beautiful edge along the line of the nail.
Liquid skin
“You haven’t used liquid skin yet!? - then we’re coming to you!” I bought it to try what “it” is... If you suddenly don’t know what liquid leather is, it’s a liquid (something between paint and glue) for repairing leather products
Today we will conduct an experiment - what kind of crap is this, and what is it used with to repair a couple of leatherette products.
The store paints beautiful pictures of the “revival” of ruined things... is this really so?
I’ll say right away that I’ve never dealt with such crap, I didn’t know what would happen at the time of writing these lines :))) In the process of writing the review, I will conduct experiments and be able to create some kind of opinion about the benefits of such a product!
The rating of the store where this chemical was purchased is above 98%, there are more than 3000 orders with a rating of 4.9 - this, of course, was somewhat inspiring!
From the store description:
For leather and vinyl repairs: car interiors, chairs, sofas, vinyl flooring, belts, clothing, wallets, shoes... kit contains several mixable colors (black, blue, green, red, white and yellow) corrugated paper, spare cloth, putty knife and a mixing container.
Well, I’ll add to the list of applications; I’ll experiment with this store on an undescribed “group of products,” and if it turns out well, I’ll also try to restore the jacket from leatherette.
First, as expected about the arriving product, then experiments.
Package
Contents... as written on the back, the repair kit includes 7 small containers with liquid leather of different colors, a spatula, instructions and another larger container for preparing the required color (by mixing the supplied ones)
In addition, there are several flaps of “fabric”. On top is a small piece of “young Chinese dermantine” leather - for experiments. It is needed to simulate the damage being repaired, in order to practice a little (at least that’s what I understood from the translation).
Underneath there is a small piece of fabric for repairing through holes (glued from below under the repair site)
Below are several sheets of embossed paper to create a pattern corresponding to the product being repaired. There are several options with different designs.
They have a top and a working side (signed).
Well, that's all! I won’t be boring - let’s move on to the experiments (not a single animal was harmed as a result)
The first candidate for the role of test subject will be the case from my old smartphone. It is original, which is probably why it served “faithfully and truly” for quite a few years, but unexpectedly, all at once, pieces of the surface began to be removed from it. It's a shame, a shame... but you can't find such a case now (it's really comfortable + has a magnet - the screen unlocks when you open it). And even if I found it, it’s not a fact that I started buying it because of the unreasonably high price. The last time I saw one on Ali, it was exactly half the price of my smartphone (it is also still on sale, although it has not been a new product for many years). This is the look it acquired literally over the last month - it seems like a shame to throw it away, but it’s at least awkward to use.
In general, the idea to buy liquid leather and try to restore the case came precisely after searching for a NORMAL case for Lenovo P780 - I didn’t come across anything worthy of attention, even without looking at the price. I thought it would be “fun” for you, I don’t think I’ve come across any reviews like this, and I’ll “get rid of myself” - what if something happens?
Well, let’s get some alcohol and degrease the surface... This is exactly what the instructions say, but you must understand that not every surface can be painlessly degreased with alcohol. So I got excited... the remaining coating began to peel off in pieces, also leaving salt streaks (and strangely, technical alcohol is specifically for cleaning contacts, etc., should not have additives)
I didn’t dare to use a spatula right away; I wanted to try it with a minimum layer thickness. So I wrapped cotton wool around tweezers and worked with it. I can’t say that the first result was very impressive. But however, it became noticeably better than it was... and here I made a fatal mistake. As is our custom, I didn’t read the instructions BEFORE use, but started reading AFTER!
I haven’t found any normal instructions (correctly translated) or a good video review on the Internet. In the one that came across (outwardly similar), it was suggested that for final vulcanization (and creating a skin relief) the final layer of leather should be heated through the relief paper from the kit... Well, he warmed it up... with an iron. It’s a pity that there was no photo of the results of my experiment BEFORE using the iron - but it was quite acceptable. Not 5, but 4 with some deviations. After a day, the skin remained, not to say sticky, but too soft and more glossy.
After heating with an iron, a piece of heated material remained on this embossed paper, making the cover even more unsightly than before the experiment began.
I had to sit down to read (translate) the instructions. By the way, it also contains a type of color mixing table, although it is very conditional (in my opinion).
Below is an approximate translation of the instructions (as I understood it at least)
Instructions
Leather and vinyl repair kit.
Do not freeze. Store at temperatures above 25. If the product is frozen and hardened, it is necessary to quickly warm it to room temperature, placing it near heating until it thaws and softens. Do not place near open flames or expose to extreme temperatures. Do not place the product in boiling water. Excessive heat will cause the plastic container to melt. Keep out of the reach of children. Application: Prepare the damaged area. Clean the damaged area with alcohol. Remove jagged edges from damaged leather or vinyl. The repair area should be flush with the undamaged area.Repair Fabric: Using the fabric included in this kit, cut a piece slightly larger than the damaged area and insert it underneath the damaged area. This will provide a basis for repairs. This means repairing through holes
Mixing different colors: Using the mixing chart, select the desired color. When the color matches the repair area, apply the mixture to the area to be repaired. Each layer needs to dry for one hour. The volume of liquid leather will decrease after drying. If necessary, apply a second and third coat.
After drying, the color will be slightly darker than in the liquid state.
Textured Paper After applying the final layer, select a sample of paper whose pattern best matches the undamaged area of the leather or vinyl. Place the paper over the repaired area and apply maximum pressure. This should give the surface a relief similar to the undamaged area. Let dry overnight. When the joint is dry, remove the paper.
Practice on a separate piece of material before making the actual repair. To do this, use the vinyl included in the kit to create similar damage and try to repair it.
In general, the instructions are so-so... many details are not indicated.
The second mistake was applying a new layer to the damaged surface! It should have been cleaned well and debris removed. After putting several layers on top, this became obvious, but I didn’t tear it off again - I decided to drag the case for a week or two to test the durability of the surface. This is what the case looked like after the second (unsuccessful) application of liquid skin
After carrying it around in my pockets and bag (there were keys and other items in one pocket), I didn’t notice any special changes in the applied layer. The only thing is that it has become less glossy. The photo does not convey these nuances, so take my word for it. The layer is of quite decent strength, resistant to scratches and damage.
By the way, after roughly translating the instructions, I tried (sort of according to it) to create a drawing using this paper. Apply a layer of liquid leather to the skin, press down and leave overnight.
In the morning I could hardly tear off the paper (alive), along with the skin (no longer liquid). The question remains open - HOW to apply a pattern with this paper!? The only option left is to apply dry skin to it and leave it overnight!
Experiment number two - a leatherette jacket.
I wore it for several years, the situation was similar - I probably hung it up wet without the hangers and it stretched and became covered with cracks on the back. In addition, there are a couple of other damages. Let's see if it is possible to restore the jacket so that it can be used “outside the home.” I decided to start with subtle damage (due to its location) on the bottom of the sleeve.
To restore something like this, mixing/matching colors is already required.
I decided to start by adding black to the brown... I added black, and at first I was afraid that there was too much. It turned out to be not enough After application, it became clear that the color OBVIOUSLY did not correspond to what was intended. The good thing about color selection is that several layers are required, and during their application you can adjust the shade as necessary. The lower layers are still not visible. I decided to add red.
In principle, I guessed right away, but I didn’t stir it well enough. However, it turned out quite acceptable both in color and quality. I decided to move on to other damaged parts so that the “paint” would not dry.
After applying the first layer
Another injury on the back, which I wrote about at the beginning.
The result is still the same after applying ONE coat! It can be assumed that several layers will give a quite decent look. Especially if you still manage to apply a design and wipe it with a leather product on top for a uniform shine.
Here is my final result of the “treatment” of the jacket. In principle, it is quite acceptable, almost imperceptible. Well, or rather, I want to continue the experiment with applying the relief, and choose the color a little better - in the bright sun there is a difference in shade. But this is no longer so interesting - I think you understand the general meaning
The strength of the hardened leather is decent (I tested it on the case in an “extreme place” - the pocket of a bag with keys and all sorts of junk). By the way, I continue to experiment with the case - but there the skin is too soft and thin (the coating) and the surface is even, it’s more difficult to make it really beautiful. There is an idea after the results to try to cover it with carbon fiber and then throw it in the trash. Although in fact you can throw it in the trash now. Because of the experiments, I carried the smartphone without a case, and just yesterday I let the screen fall onto the asphalt. I haven't decided yet whether to change the screen or switch to a newer model.
The restoration product is very useful when restoring damage to shoes! Almost everyone has experienced the toes of shoes (especially children's ones) being knocked down. And if with basic colors you can somehow “get out of the situation” by applying shoe polish, then in the case of “non-standard” colors (mainly children’s and women’s shoes) everything is MUCH more complicated! For such cases, such a set can be truly indispensable. You just need to choose the right color for your renovation! For best results, after repair (drying), you need to apply a layer of transparent cream - it will be completely invisible.
Unfortunately, I didn’t have a “test subject” for the experiment. To show you the results of such a restoration, I copied pictures and comments from a couple of product reviews - I thought that this could be an interesting addition to my “research”.
... degreased, dried, and applied in three layers at intervals of an hour.
everything is great! then rub a little with a rough cloth so that it does not shine. Product 10 out of 10! Absolutely satisfied! I ordered it because I scratched my leatherette boot very badly on the toe. Before applying, I went over it with a rough nail file and removed the “catches”. Then I applied it to the skin, after drying it becomes darker. So that it doesn’t shine too much when it dries, I press it with my finger. The skin is easily removed from anywhere with nail polish remover. Dries quickly.
Well, it might also be of interest to animal owners - cats love to “walk with their claws” on leather sofas/chairs - you can try to restore something
My verdict: The product is, in principle, quite workable and you can achieve good results. The result is a fairly durable coating that is not too noticeable. It’s bad that there are no normal DETAILED instructions and pictures of the sequence of working with this material. In addition, there are several varieties of these kits - apparently with different operating algorithms. Are they better or worse, of course, an interesting question... At the moment, I threw a set of a different type into the cart - I’ll probably buy it to experiment. A smartphone case is, of course, a trifle, but sometimes it may be necessary to restore a more significant item, such as a seat in a car - for example, it is not uncommon to have burn marks from a cigarette and scuff marks.
UPD: Another photo of the result of the repair on the back - the area of liquid skin treatment on the back is outlined in red to make it clearer. The photo is clickable, you can view it larger - if you wish, you can see the layer of liquid skin.
“Good luck everywhere” to everyone, stop by for a review