» Beauty » Nails » Nail design » Neon manicure technique
0
247
Article rating
Neon manicure, popular in the 90s, is coming back into fashion. In the 2000s, pastel natural shades replaced bright acid colors, but now such varnishes have again appeared on store shelves.
Manicurists have already come up with many new options for using neon tones. They can be found both in the form of varnishes and as decor for decorating nails.
Features of manicure
The main distinguishing feature of neon nail polish is its dazzling brightness.
It’s better to do this manicure when you’re going on vacation—it’s unlikely that anyone in the office will appreciate your originality.
By decorating your nails with jellyfish, fish and other sea creatures, you will get a themed design.
This option is also suitable for young girls, she will definitely be the center of attention. Neon nails will make any look catchy and memorable.
There are several more features of acid manicure:
- choose it for short and medium length nails;
- do not overdo it with makeup - it will look vulgar;
- monitor the condition of your manicure, avoid chipping and use oil to soften the cuticle;
- Carry a bottle of varnish with you so that you can touch up problem areas at any time (if shellac was used, this is not necessary).
Find a balance: choose either an acidic manicure or flashy outfits. Together these will work against you. Contrasting nails go well with clothes in light blue, soft pink, beige and white tones.
Advantages
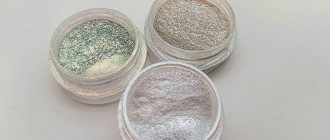
In salons, experienced professionals have dozens, or even hundreds of jars of pigmented powder at their disposal. This material is often used due to its obvious advantages:
- reliable fixation, the powder is perfectly fixed on a gel base for the entire period until the next correction;
- the ability to easily create a gradient manicure, which is great for any special occasion, and a good option for everyday life;
- it’s easy to combine different types of pigment, just a few jars, and you get an unlimited number of nail design options;
- affordable pricing policy and minimal consumption, one jar is enough for a long time, and the cost does not exceed 80 rubles.
If you are tired of the usual monochromatic coating, you should pay attention to bright powder that shimmers with all the colors of the rainbow. How to apply pigment to gel polish? The material spreads very easily on the base and can also be used when mixed with a liquid composition. A variety of decorative solutions will allow you to create real masterpieces of nail art.
Color spectrum
The following colors are suitable for neon manicure:
- green - classic option;
- pink – for a feminine look;
- yellow – attracts attention, like an acid marker in the text;
- lilac – stylish and fashionable;
- blue - for those who do not want to stand out;
- peach is an unusual shade for neon;
- orange – glows not only in the dark.
All these colors are in trend now.
Neon varnish on a white coating looks brighter than on a transparent one.
Neon rubbing is very popular today; for originality, you can even make your nails multi-colored.
Creation technique
All techniques for creating designs with neon nails have a number of features.
If several layers are applied, let each one dry, otherwise it will crack and bubble.
Pencil
This special product is a good option for a bright manicure. It will neatly fill the space.
Technique:
- The base is applied.
- Covered with base. You can make your nails plain or draw beautiful patterns with a pencil.
- An enamel finish is used for fixation, providing richness and durability.
It is very convenient to draw neon flowers on your nails with a pencil, they turn out beautiful.
Varnish and gel polish
There are regular acid-colored varnishes on sale; they won’t last long on your nails, but you can do a manicure yourself without special tools or equipment. The product is applied using a brush in a bottle in 2 layers.
There are also neon shellacs. To apply them, you need a UV lamp in which to dry your nails. For durability, use a base base, as well as a finishing top. Manicure lasts 3-4 weeks.
Pigment
Neon nail pigment is a fine powder of a rich shade. Its composition is similar to starch.
Technique:
- The pigment and base coat are mixed in a glass bowl. Take a third of the product for 3 drops of base and mix until smooth.
- The resulting mass is applied.
- Nails are coated with two layers of gel polish and finished with a top coat.
To make a drawing using pigment, a dry brush is dipped in it and applied to the sticky layer of the base. The ornament is covered with a top coat and dried in a special lamp.
A variety of colors allows you to get new unusual shades, adjust the intensity, make your nails matte or shiny.
Powder
This product consists of crushed acrylic, resembling a powder in structure. In contact with the gel, the powder hardens and forms a hard surface. It anchors the design well.
Bright color options (pink, orange, etc.) are used for interesting decoration solutions. Powder particles fall on the entire plate or only part of it.
How to use neon nail powder:
- Apply base and gel polish.
- Sprinkle with a layer of powder. If the entire surface is covered, dip your finger into the container with the product, and then use a spatula to sprinkle the remaining space.
- Excess is shaken off.
- Lightly rub in with a brush.
- Nails are dried under a lamp for 2-3 minutes and covered with a finishing layer.
Tools
To create a unique design with pigment you need to collect:
- basic set for performing hygienic manicure;
- primer;
- gel polish;
- top or fixative;
- polymerization lamp;
- brush;
- the pigment itself;
- mixing container, you can take a metal tablet;
- pusher - a special spatula for collecting powder.
Different techniques may require additional tools and materials. For example, pigment is often used to combine with acrylic powder. You should be wary of cheap Chinese analogues; they often provoke allergic reactions.
Design ideas
There are many ideas that are used in creating acid nail art.
French
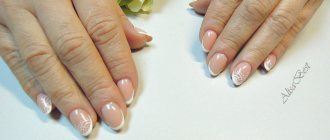
Bright tips combined with a neutral background or a combination of two catchy shades are stylish options for a French jacket.
They also combine acid tones with powder, which provides a soft contrast.
French
Neon shades go well together. Using any of them creates a stylish gradient. Look best in pairs:
- red with blue or black;
- yellow with pink;
- blue with green.
In this option, you can also combine a bright orange color with a soft tone.
The transition effect is done using a sponge, sponge or brush. Two or three bright colors are applied to the chosen tool and transferred to the nails with careful movements.
Geometry
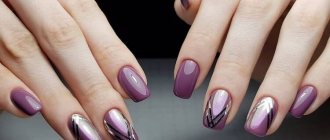
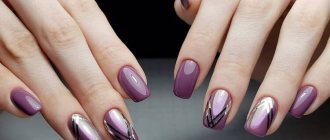
Stripes and shapes are made with bright shades, complemented with decorative elements: rhinestones, ribbons, sequins. Lines of different thicknesses and lengths look presentable on a neon manicure.
Nowadays, the option with acid “shards” folded into a stained glass window is popular.
Neon leopard
To make such a design, apply a base and neon varnish.
Spots of different sizes and shapes are placed with a different color. Trace the blots with a toothpick, which is dipped in black varnish. At the end, a top coat is applied.
Matte manicure
The matte finish mutes the neon on the nails a little, but this design looks even more beautiful. You can do this over the entire surface or cover only half of the plate and leave the other glossy.
Moon
For this manicure, apply a clear or colored base coat, and then make the moon a neon shade. The design is complemented with rhinestones or glitter.
Spray
Stains, blots, drops are fashionable decorative elements. Neon varnishes of different colors are sprayed onto the white background coating. The more careless, the more interesting the result will be.
Mica
The nail design uses imitation mica and thin multi-colored foil plates. For manicure, dry and liquid options are used. The first is packaged in jars or bags, and the second has the form of a varnish and is applied with a brush. They come in different colors, including neon shades.
Mica is used in different ways: it is used to lay out the entire surface of the nail, individual areas in a French manicure, or to create a pattern.
To decorate with the dry version, apply a base coat of varnish, allow to dry and coat again. Immediately dip a toothpick in water, pick up a little mica with the tip and transfer it to the nail. Lay it out in the desired order. If the entire surface of the plate is covered, you can apply the product with a brush, dipping it in water and mica.
The liquid version is easier to use. It is applied in 1-2 layers to any varnish. This will ensure both the originality of the manicure and its durability - mica is less susceptible to chipping.
Stickers
They come in the form of multi-colored abstractions or drawings in neon colors. Before using stickers, degrease the nails and apply a base.
- The selected pictures are cut out so that they match the size of the coating area.
- The sticker needs to be wetted and applied to the nails, secured and the layer of paper on top removed.
- Check for wrinkles. If necessary, correct with an orange stick or toothpick.
- Wait for the film to dry and apply the finish.
Rubbing on long nails
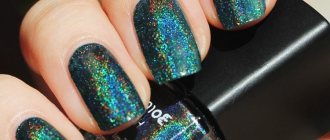
The presence of long nail plates allows you to more clearly demonstrate all the magic of brilliant tints that only rubbing is capable of. In this case, you can use any type of material. The main thing is that the shine of the manicure looks harmonious with your image. The rub can be used to cover all nail plates, combined with designs, various techniques and decor. For example, we perform a manicure with one of the halographic types of powder and place voluminous flowers with pearls on the ring and middle fingers or apply cobweb patterns with small crystals to the sparkling surface. Just awesome!
A material such as rubbing is deservedly considered one of the most beloved and popular among manicurists. It is able to simultaneously transform the calmest shades and smooth out the aggression of bright or dark tones of varnish.
MANICURE WITH RUB – A WIN-WIN, STYLISH AND INSANELY BEAUTIFUL DESIGN OPTION
More interesting articles here: Beauty and health.
Article source: Manicure with rubbing: extraordinary design ideas 2022. 75+ photos.
- Previous: Free school meals, the foundation of a healthy nation.
- Next: 8 unstylish things that are embarrassing to wear in 2021
The best neon polishes
A set of neon manicure polishes can consist of different brands. In order not to be mistaken with the manufacturer, we have identified several popular series for you:
- Ciate Corrupted Neon Summer (300-350 rubles). These are luminescent varnishes made using new technology. She makes the manicure shiny and glowing at night. You can also choose colors in the palette for a bright jacket.
- Orly colorful gel polishes (460-580 rubles). The company offers 6 neon colors.
- Revlon pencil (300-380 rubles). They create monochromatic versions or draw ornaments, figures, flowers.
- Varnishes from LiaNail (320-470 rubles). They cover the nail plates with a rich shade in one layer.
- Budget series Limoni (120-170 rubles). This new brand doesn't offer a lot of colors, but for the price these polishes are of good quality.
Concept and types of rubbing
To create an original chrome effect on the nail plates, a mirror rub is used. A real kaleidoscope of rainbow tints is achieved after using holographic pigment, which in turn can be divided into several types. The most common types of holographic rubbing include a chameleon rubbing, a powder with the interesting name “Chafer bug,” a prism that creates an extraordinary light refraction effect, and a diamond rubbing. To give your nail plates a special delicate shine and soft shine, you should use pearl rub. Any of the options looks amazing in its own way and will not leave your hands unattended.
