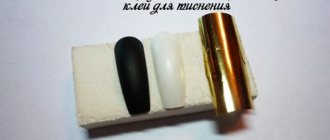
What is rubbing for nail design
Nail design rub is a very fine dry pigment that can be compared to loose eye shadow or powder, only without cosmetic additives. Used to decorate nails: giving a pearlescent shimmer, mirror shine or liquid metal effect. The smaller the powder particles, the brighter the shine obtained when applied. The larger the particles, the more noticeable the graininess of the rub, which can also be used in an interesting way. Dry pigments do not have their own adhesion. This means that they are not sticky and do not adhere well to the nails unless they are secured in a special way.
Rubs are placed in a separate class precisely because of the method of application: to obtain a mirror shine, you need to rub the pigment into the surface without residual stickiness . If you rub into the residual stickiness, there will be no mirror shine. You can also rub glitter, pearl or neon pigment into the residual stickiness.
How to use?
Before you get acquainted with the sequence of applying the rub to the nail plate, you need to take note of a few tips. If the purpose of the manicure is very bright, acidic and saturated colors, it is better to use a dark-colored coating as the base. Ideally, black. In this case, the color obtained after applying the powder will be deep. And, conversely, for gentle, calm tones, use light varnish (white), or do without it altogether. The top on which pollen is rubbed should not be sticky. Otherwise, your nails will become dull in color and lack shine.
The nail plate should be free of flaws, since the powder will be difficult to rub in and all the irregularities on the nail will be visible. It is also very important to monitor the drying time of the nail. It is impossible to rub powder into a dry surface. It should be applied as soon as the nails are removed from the lamp. The big advantage is that it can be applied in two layers (if there are certain unevennesses or to add more shine). But before re-coating, the nail needs to be coated again with a top coat without a sticky surface. On top you can apply a colorless coating with a glossy effect.
5 troubles you can expect at a nail salon
What types of rubs are there for manicure?
Conventionally, rubs can be divided into transparent, translucent and with dense, heavy pigment. The denser the pigment is, the worse it adheres to the nails. Below in the article, in order of color compaction, the most common types of rubs are described.
Mirror rubbing
Most manufacturers have a transparent one that does not cover the color of the gel polish, but gives it a bright shine. Therefore, it can be applied to any background. In nail design, this rub is good as a base for a design and in combination with “velvet” and matte textures.
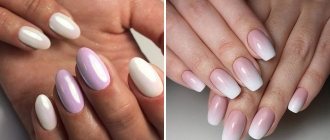
Pearl rub
Transparent or translucent - does not cover colored gel polish, but gives a pearlescent shimmer. It can be classic pearl white or blue, pink, gold, etc. Has a softer shine than mirror. Sometimes such rubs are also called “northern lights”. Can be applied to any background, but may look a little muddy on darker gel polishes.
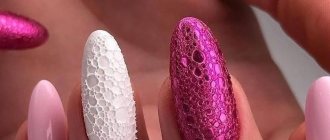
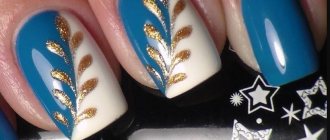
Rubbing “unicorn” or “mermaid”
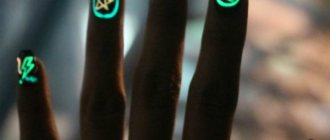
When applied, this pigment gives the nails a very bright shine and a shimmer of contrasting colors: from pink, through yellow, to blue, from green to gold, etc. Translucent, looks most vibrant on white, but can be applied to any shade. When applied to colored gel polish, it loses its brightness a little, and the shimmer corresponding to the tone is lost. That is, if the “unicorn” shimmered from pink to blue on a white color, then a pink tint will be visible on the blue gel polish, and a blue tint on the pink one.
Rainbow rub for nail design “unicorn” on a milky background.
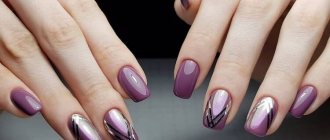
On translucent camouflage shades of gel polish, all three types of pigment look more elegant. There is shine and shimmer, but overall the manicure does not have any provocative brightness.
Rubbing “May bug”
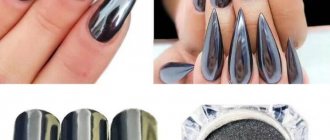
Opaque, has its own color and bright pearlescent shine. It is best visible on dark shades; craftsmen most often apply it on a black background.
From left to right: two “bugs”, a yellow-green rainbow rub on black and white, a “unicorn” on white and black, a black pearl rub, a mirror rub on black and white, a pearl rub with white, gold and green shimmer on a white background.
Rubber for nail design “chrome” or metallic
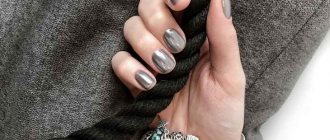
Opaque, almost completely covers the background color. Gives nails the bright shine of polished metal. May have various additional shades: silver, gold, darker chrome, pink, fuchsia, green, blue, etc. When applied to a light background it looks softer and is most pronounced on a black background.
From left to right: gold on a white and black background, silver on a black and white background, two types of “chrome” on black and white, pink, fuchsia, purple and blue metallic.
The quality of the pigment is of great importance: the camera lens caught the uneven application of gold and silver colors, which were not purchased from a professional store. These errors are usually not visible to the naked eye.
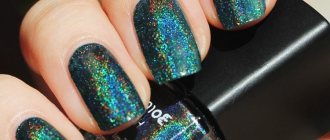
Prism or holographic rubbing
The densest of all, “harmful” when applied. In relation to the background, it behaves the same as metallic (brighter on black), and can also be additionally pigmented with colored metallic. Colored holographic pigments are sometimes called "peacock".
How to apply rubbing on gel polish
The mirror shine highlights every imperfection on the surface of the nail, making the manicure look sloppy. Therefore, the better the leveling is done with the base, the more evenly the color is applied, the more expensive and beautiful the nail design with rubbing looks.
There are several ways. The first one listed below is the most reliable and gives a predictable result; most masters choose it.
On a hot top without a sticky layer
Top coat for gel polish without residual dispersion is a porous material. The longer we polymerize it in the lamp, the narrower the pores are, the more difficult it is to rub the pigment into it.
You need to apply a gel polish top coat onto the background color with a slight leveling and dry it for about half the time specified by the manufacturer. Rub the pigment into the hot top just taken out of the lamp until a uniformly shiny surface appears. Then dry for the remaining time.
Tops with residual stickiness have a different molecular lattice and, even if the sticky layer is removed from them, will not be suitable for our purposes. If you want to understand this topic, we have a separate article about gel polish tops.
On liquid to remove the sticky layer
You don't have to use the top without l/s. Apply colored gel polish, cure it in a lamp and immediately remove any residual stickiness with Nail Prep. And rub the pigment into this puddle of degreaser on the nail until it dries.
For residual stickiness
In this case, the pigment will lie denser and there will be no bright shine. You can use this method with coarser pigments, pearl and chrome rubs. It should be rubbed into the residual stickiness of colored gel polish or base, but the residual stickiness of the top coat will not work.
Budget colored gel polishes level quite poorly, and even if a good leveling is done with the base, applying pigment to the color can show unevenness and ruin the overall look.
Methods for removing rubbing
Removing a manicure with rubbing is no more complicated than applying it. You don’t need any special products either, just a regular gel polish remover kit: nail polish remover containing acetone, cotton pads, foil, orange sticks and hand cream.
- Cut the cotton pads into small pieces (the size of a fingernail);
- Soak each piece of the disc with nail polish remover, apply it to your nails, initially lubricating the skin around the nail with a rich cream to avoid drying it out and wrap your fingers in foil in 10x10 pieces (let stand for 10-15 minutes);
- Remove the foil and use an orange stick to carefully remove the gel polish along with the rub;
- Wash your hands thoroughly under warm water and lubricate with cream.
If the rub was applied to regular nail polish, the procedure will be even simpler. Simply soak a cotton pad in nail polish remover and wipe away the polish until it is completely removed, changing the cotton pad as needed. After which you also need to wash your hands under warm water and lubricate them with cream.
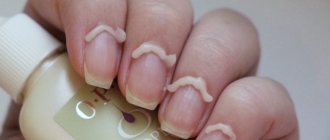
How to fix the rub on your nails so that it goes on before removing the gel polish
At the beginning of the article, we already said that the nail design rub does not have its own stickiness, so it has nothing to “hold” to the nails. The top without residual stickiness is also a non-sticky material. What magical things do the craftsmen do to make this miracle dust fly by for a month and not come off?
- Firstly, it is more difficult to stay on a soft and moving surface than on a hard one. Therefore, dry pigment requires strengthening of nails with gel or a hard base using the leveling technique.
- Secondly, the top into which the pigment will be rubbed is, on the contrary, better to choose an elastic one. This will avoid chips and cracks.
- Thirdly, you should remove pigment particles from the end of the nail with a buff and go over it with an acid-free primer. At the end, normally, all materials lie in a thin layer, but the load on this area is very large. The top will better cover the thin line of the end if there are no protruding elements on it. And the primer will add the missing stickiness.
- Fourth, cover the rub with two layers of material on top. The first layer should be made of a material with residual stickiness - this can be a transparent base or a sticky top for sliders or rub-ins. Apply your usual favorite topcoat as a second layer.
Algorithm for applying rubbing for nail design
- We perform manicures and prepare nails for coating.
- We strengthen nails using the technique of leveling with gel or base
- Apply the background color, maybe in one layer
- Level the nail with top coat without l/s
- Dry the top 1/2 of the time (15-30 seconds)
- Rub the pigment into a hot top until shiny. You can do this with your finger, a silicone brush or a makeup sponge. The main thing is to degrease your instrument so as not to get cloudy stains on the surface.
- Brush off excess particles with a soft brush and dry for the remaining time.
- Barely touching the end with the buff, we remove possible particles from it
- Using an almost dry brush, apply a minimal amount of primer to the end of the nail. Not from above, but from the end, from the side of the front roller.
- Air dry the primer for 30-120 seconds
- First we cover it with a base or a special sticky top and polymerize it in a lamp.
- Cover with top
- Wipe the skin from any remaining pigment around the nail with lotion or micellar water.
Tips for purchasing rubbing
Helpful information. Most often, before applying nail polish to shellac, it is ordered from online stores on Chinese websites. However, if there is no time to wait for the purchased cosmetic products, such a new product can be purchased in a specialized store.
The advantage of purchasing rub in a specialized store is the opportunity to visually evaluate the product, what exactly is in the jar, and also get advice from the seller. The disadvantage of this method is the inflated prices for the products presented, as well as a significantly smaller range of shades.
Rubbing on shellac is considered a fairly popular trend in the field of manicure design. Having mastered some skills and following the instructions, you can carry out this procedure at home and make a proper manicure using the shellac rubbing technique.
FAQ
After covering with topcoat, the rub lost its shine
- Sometimes low-quality rubs behave like this, there is nothing you can do about it, just change the rub.
- It is also possible that you forgot to brush off excess particles from the surface and when covering with topcoat they appeared as grain.
- Sometimes the top or base can dissolve the pigment. To begin with, try changing the top coat to the most transparent and medium-liquid one, applying it with a little leveling.
- Cover the rub quickly, avoid unnecessary movements and try not to scratch its surface with the brush.
The rubbing peeled off the tips of the nails in the first days
- Most likely, leveling was done, but no strengthening was done. Leveling the nail plate with elastic materials does not reduce the mobility of the free edge, so the rubbing simply “wipes off” under mechanical stress.
- Pay attention to points 8-11 in the application algorithm.
- It may also be associated with a very heavy load on the hands and nails. For example, this decor is still not suitable for girls who play the guitar.
The rub does not rub in or goes on in bald spots
Most likely you have dried out the top you are rubbing into or it has cooled down. Try reducing the curing time and rub in immediately rather than after a few minutes. Just check on the tips how friendly your materials are with rubbing and empirically select the optimal drying time for the top for each rubbing.
Nail treatments
Caring for your nails and hands at home is simple. Minimal daily procedures will help a girl have well-groomed hands. Any artificial coating lasts longer on healthy nails:
- Every day the dermis on the hands is treated with a nourishing cream. It is best to purchase a product that is designed not only for skin care, but also for strengthening nails.
- To keep your nails strong, you shouldn’t go on diets or limit yourself to eating healthy foods. Nails reflect the condition of the entire body. Therefore, it is necessary to eat well and drink vitamin supplements.
- You should apply cuticle oil to your nails several times a day. It moisturizes the skin around the nail plate and strengthens the nail cells.
- You should definitely pamper your nails with salon treatments. Paraffin therapy and Brazilian manicure have a special healing effect.