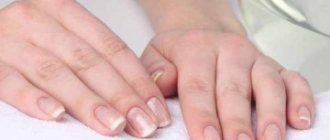
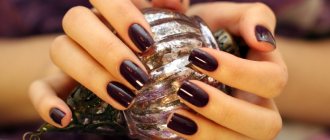
Beautiful and well-groomed fingernails and toenails have always given grace to the female half of humanity, but it is not always possible to protect them from dirt. Dirt under the nail plates on your hands immediately spoils your appearance and forces you to hide your hands from prying eyes. When it is impossible to avoid contamination of the skin and fingernails, the only option left is to quickly remove dirt and other skin defects.
In order for dirty nails to be transformed and become well-groomed, you need to have an accessible arsenal of manicure accessories on hand. Orange manicure sticks, which can be purchased at any household chemicals and cosmetics store, will help facilitate the manipulation of tidying up the skin and nail plates on your hands. Also, to remove dirt under nails, you need hydrogen peroxide, soda, salt, and hot water.
The importance of hand hygiene
A lot of dirt accumulates under our nails , which contains pathogenic microorganisms.
Reference. A study conducted by the University of Pennsylvania found that the number of germs on the tip of one finger is similar to that on the entire palm.
The area between the growing nail and the skin is the habitat, growth and reproduction of harmful microbes. A favorable environment for them is created thanks to a warm, humid environment and protection from external influences.
It has been experimentally proven that hand washing does not affect microorganisms under the nails, and artificial manicure only increases their content. Therefore, it is important to pay attention to cleaning this area. Regular hygiene measures can not only provide your hands with a well-groomed appearance, but also prevent many pathologies caused by bacteria.
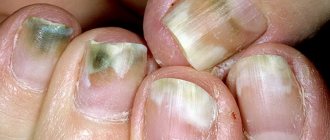
Fungi on the skin
On the body, fungal infections can develop anywhere: on the head, feet, buttocks or palms.
The most common forms are:
- Dermatophytosis: damage to the deep layers of the skin, which is caused by both yeast and mold fungi.
The most common fungal disease. This infection triggers an inflammatory process and leads to the formation of pink or red spots or plaques. The size of such plaques is very diverse. Fungi that cause dermatophytosis are permanent residents of hair and skin. They are able to perfectly absorb and assimilate keratin from hair and nails. - Keratomycosis: a disease that affects the top layer of skin. Symptoms of the disease are small, hard nodules on the skin that are filled with pus. The forms of the disease vary and include pityriasis versicolor, axillary trichomycosis and erythrasma.
- Deep mycosis: the disease affects the subcutaneous tissue, muscles, joints and bones, mucous membrane, tissues of internal organs and parts of the nervous system. With such a lesion, warts and deep fistulas appear on the skin.
- Candidiasis: The infection is caused by yeast. The most common sites of lesions on the body are in the groin area, in the armpits and under the female breast.
The manifestation of the disease depends on the location of the lesion and the type of fungus.
Candida and dermatophytes cause itching, discoloration of the skin to red-bluish, peeling of infected areas, dandruff and dry hair, and discoloration of nails.
With mycosis of the foot, in addition to peeling of the skin, blisters up to 2 mm in diameter appear, filled with liquid. These bubbles collect between the toes. The smell that appears when the fungus decays also causes trouble for the patient. Often a person gets such diseases in a sauna or in the summer, when wearing tight shoes for many hours.
When fungi get on the skin of the face, they first attack dead epithelial cells. If treatment is not carried out, the skin begins to peel, become rough, and red or yellow spots appear. During the transition to the severe stage, purulent foci and ulcers appear. Fungal infections of internal organs begin.
On the head, fungal infections lead to hair loss, flaking, dandruff, and the formation of bald patches.
Sugar and olive oil
Oil your hands and rub a handful of granulated sugar in your palms. This “scrub” will not only remove dirt, but also cleanse dead skin, and the oil will soften the dermis and nourish it with useful substances.
After processing, rinse your hands and apply oil again, let it absorb.
Microbes on your hands: what they look like under a microscope
It is recommended to show photos of microbes under a microscope to children who forget to wash their hands. This photograph of the palm of her 8-year-old son was taken by Californian microbiologist Tasha Sturm, who works at Cabrillo College.
Microbes under a microscope (the photograph reflects them in huge quantities) exist even in a healthy child. The baby whose hand is in the photo only played a little in the house and with the dog.
Photo of a child's palm covered in germs:
The transcript of the photo is as follows:
- white colonies of microbes around the fingertips - staphylococci;
- micrococci are marked in yellow;
- Colonies colored pink are serratia.
Staphylococci and micrococci are often harmless and are part of the natural microflora of humans. Serratia, on the contrary, can cause infections, especially in weakened people.
On the hands, in addition to the already mentioned streptococcus, staphylococcus and fungal bacteria, you can find the following microbes:
- salmonella, which have the shape of rods up to 7 microns in length and cause intestinal infections, including severe typhoid fever;
- Escherichia coli measuring 0.4-0.8 × 1-3 microns, sometimes leading to death in elderly people and small children due to general poisoning of the body;
- Shigella, which causes dysentery and seizures in children;
- spheroid-shaped brucellae without flagella that infect internal organs.
Basic ways to clean up contaminants, including after working in the garden
There are many simple and affordable ways to clean your nails from dirt. You can do this using special tools. Folk recipes that will tell you what to do if dirt gets under your nail will also help.
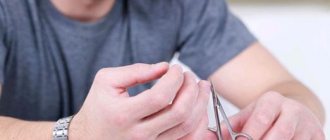
How to remove using mechanical methods?
The following tools can be used to clean nails from dirt:
- Brush. Used after washing hands or bathing them. The nail plate must be treated both from the outside and from the inside. If you don't have a special brush, you can use a toothbrush.
- Scissors. A sharp tip can be used to remove dirt. Cleaning is carried out with dry hands. It is important to do this under good light to avoid injury.
- A spatula for pushing back the cuticle (pusher). It has straight edges and a rounded shape.
- Scraper. A double-sided tool, with a spatula on one side and a spear or hatchet on the other. The tool is not sharp, so you cannot hurt yourself with it.
- Curette. This is a special device for cleaning the space under the nails, on the sides of which there are pointed edges of various shapes.
Attention! You can also use a regular toothpick. Proceed with caution to avoid skin damage.
The video below shows how to clean your nails with a toothbrush:
Use of household chemicals
To clean your nails, you can use products that can be found in every home.
- A simple way to clean is to rinse your hands with soap, which should be light and natural based. You can buy a specialized powder that can make your nails clean in 5 minutes.
- A preparation for cleaning dentures, which includes soda and citric acid, will be useful. To clean your nails, soak your brushes in the solution.
- Handwash. Many housewives have noticed that when washing things by hand, the dirt under their nails disappears. It is better to use soft washing powder, and then nourish and moisturize your hands with cream.
- Washing your hair works in a similar way - dirt is washed away due to the foam formed by shampoo.
How to clean using traditional methods?
Traditional recipes for cleansing nails are completely safe and effective. The ingredients for them can be found in every home.
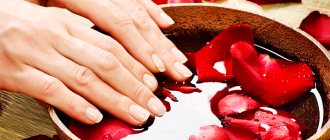
Cleansing baths
- You need to prepare a soap solution by adding soap to warm water.
- Place your fingertips there for a few minutes.
Soap softens the dirt , making it easier to remove.
How to get rid of peroxide?
To prepare the solution, boil two tablespoons of water. There you need to pour three tablespoons of dishwashing gel, as well as 100 ml of hydrogen peroxide and 20 ml of ammonia.
How to remove with baking soda?
Baking soda is a simple and effective remedy . You can use it to clean your nails in two ways:
- Heat 250 ml of milk, add 3 tablespoons of grated laundry soap, a large spoon of soda and a glass of boiling water. Place your hands in the resulting liquid for 15 minutes.
- You need to dilute a teaspoon of baking soda in warm water. Dip your fingertips into warm liquid for 5 minutes.
How to wash with sugar solution?
To prepare the solution, you need to mix sugar, milk and liquid soap in equal proportions. Soak your fingertips in this liquid for 15–20 minutes. After this, you can easily remove the dirt.
How to clean with potato starch?
This is an effective cleansing and whitening agent:
- You need to take a liter of water, add a tablespoon of starch, let the solution boil, then cool it.
- Soak your hands in the liquid for 15 minutes.
How to wash with fruit juices?
Attention! Citrus juices can be used to deep cleanse nails.
You can use lemon or other sour fruit.
- Squeeze the juice from one fruit and apply to the desired area.
- After 10–15 minutes, you need to wash your hands.
If the dirt is deep, take a lemon, cut it in half and dip the tip of your nail into the pulp. Leave for no more than 15 minutes. After exposure to acid, you need to apply a cream or mixture of vitamin E and base oil to the skin.
How to use vinegar?
Proportions for preparing the solution – 1:1
It is extremely important to mix the vinegar with warm water until the liquid is completely smooth. This is easier to achieve by vigorously shaking a tightly closed jar or bottle of solution for several minutes.
As soon as the mixture is ready, it should be sprayed onto the dirt and wait 10-15 minutes. After this time, the stained area should be treated with a damp sponge and then wiped dry with a rag.
The vinegar solution can dry out quickly, so you should not leave the car, you need to check the condition of the stained area and, if necessary, spray it additionally.
Most of all, life is poisoned by two mentalities: “everyone is a stranger” and “there is nothing”
If you are subject to a hacker attack: call your bank and check your accounts
How the show “Let's Get Married” changed the lives of its most shocking participants
The fastest ways
There are express cleansing methods that will be appropriate if the dirt is located very deep, or the procedure needs to be done as quickly as possible.
Soap bath with soda
- Take some water, dissolve a small amount of soap and a large spoon of soda in it.
- Place your hands in the bath for 15 minutes.
After it, dirt can be easily removed, regardless of the tool used.
Lemon acid
Citric acid acts similar to fruit , but it is concentrated, so it has a faster and more aggressive effect.
You need to slightly heat 150 ml of water, add a 25 gram bag of citric acid.
The solution can be used in two ways:
- place your fingertips in the liquid for 10 minutes;
- drop the cooled solution onto areas with dirt using a pipette or simply blot with a sponge.
Vegetable solution
Sorrel is useful for cleansing nails. You need to grind it to a pulp and place your fingers there.
Mashed potatoes can be used in a similar way.
Traditional methods of removing cement from a car body
Lemon juice
Cement is an alkaline compound, so an acidic environment can be used to remove it from a vehicle. An example of such a substance is lemon juice. To clean the body, it should be used as follows:
- Cut the lemon in half.
- Rub cement stains.
- Wait 10 minutes.
- Wash off the acid and cement with water.
Important! The acid is found in various fruits, which can also be used in a similar way. A good alternative solution is to use apples
Vinegar
Regular 9% vinegar is another great remedy that is available in the kitchen of any home. In this situation, it is acetic acid that will serve as an indispensable assistant when removing cement from the car body. Procedure:
- Using a soft cloth, apply a small amount of the substance to the cement stains.
- Wait a few minutes.
- Remove dirt with a damp cloth.
How to clean your nails after gardening?
In order to clean the skin under your nails after gardening, you can use regular sugar, which perfectly dissolves dirt and allows you to remove stains from grass juice. Sugar is used in combination with any soap, be it solid, liquid or antibacterial. If you use laundry soap, it is first ground on a grater. As for sugar, it can be purchased in both crumbly and solid forms.
The ingredients are mixed in equal proportions, the hands are kept in this solution for 15 to 25 minutes, and then thoroughly washed under running water. After the procedure, steamed hands should be thoroughly treated with iodine to speed up the healing process of the existing torn cuticle and prevent pathogenic microbes from getting under it.
Glycerin will help deal with caustic dirt. It is mixed with hydrogen peroxide in a ratio of 1:5 and applied under the nail plate and on it for 4 to 5 minutes. After this, the mixture is washed off with running warm water and soap, and a nourishing cream is applied to the hands.
We clean country dirt quickly and easily
First of all, it is important to understand that we are talking about types of dirt after dacha work - earth, plant sap, etc. Getting rid of it can be problematic and people are forced to hide their hands for weeks. You can clean your skin yourself after gardening using the following tools:
- hand baths based on herbs, soap, lemon or other products;
- special manicure tools;
- brush and soap;
- restorative creams, lotions.
The main rule is not to leave dirt or traces of plant juice for a long time. The sooner you wash them off your hands after work, the greater the likelihood that no traces will remain.
Restoring whiteness after cleaning
For certain reasons, nails may turn yellow. This may be due to:
- long-term wearing of gel polish;
- smoking;
- regular work with chemicals;
- lack of vitamins and minerals.
Also, the nail plate changes color if you work with coloring ingredients, including berries and some vegetables, without gloves.
The following home whitening methods will help restore your nails to a well-groomed appearance, gloss and pure color:
- Soda. There are many recipes for whitening with soda: you can mix it with lemon juice, peroxide, toothpaste, or make baths. The simplest recipe calls for diluting a teaspoon of baking soda with water to create the consistency of toothpaste. The finished composition should be rubbed into the nails, left for 10–15 minutes, then rinsed off.
- Lemon. Also effectively whitens nails. You need to soak a cotton pad with lemon juice and rub it into each nail. To enhance the effect, you can wrap your fingers in cotton wool. Keep this compress for 15 minutes.
- Toothpaste. There are also many recipes with it. You can simply apply a small amount of whitening toothpaste to your toothbrush and brush your nails with it in a circular motion for five minutes. Leave the product on for 15 minutes, then rinse with warm water and apply a cream with moisturizing properties.
- Hydrogen peroxide . Mix 3% peroxide and soda in proportions 1:2. Apply the product to your nails, leave for 5 minutes, massage them for another couple of minutes and rinse with water.
- Vinegar. Excellent for cleaning nails after working with berries, beets, etc. You need to dilute a tablespoon of vinegar in a liter of warm water. Dip your fingertips into the resulting solution, leave for 5–10 minutes, then dry your hands and apply the cream.
- Salt. It is recommended to use sea salt. It makes it possible to return your nails to their natural color. A tablespoon should be dissolved in 250 ml of water. Place your fingertips in the solution for 15 minutes, then rinse it off and use the cream.
- Oil. The well-known castor oil has whitening properties. It is rubbed into the stratum corneum for five minutes. Then you need to blot it with a napkin. Important! Additionally, castor oil will strengthen your nails and saturate them with nutritional components.
You can also use cosmetic brighteners that are sold in stores . They come in the form:
- gels;
- pencils;
- varnishes;
- markers.
Useful if you need to get your nails in order as quickly as possible.
Below is a video about whitening nails at home:
How to tidy up your cuticles after gardening
Just like the dirt sitting deep under the nail, the cuticle also looks untidy after gardening work. Baths with lemon juice, soap, and small manicure procedures will help tidy it up.
You can make your cuticle beautiful on your own as follows:
- Steam your hands (recipes for baths for hands and nails can be found below) and make a bath. Gently pat your skin dry with a towel and apply cuticle cream (oil).
- Massage the cuticle and fingers. Using a special orange stick, carefully peel off the peel.
- Wipe off the oil and apply moisturizer generously to all hands.
This procedure will take you no more than 30 minutes. After such a mini-manicure, your fingers will look well-groomed and beautiful.
Cleaning your nails with baking soda
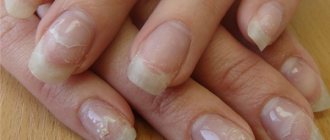
Most often, the condition of the skin and nails on the hands worsens when exposed to soil and contaminated objects, after which it is difficult to remove soil and other foreign particles. Moreover, if with a single contact you can clean your hands quite quickly, then with regular work in the garden or garden, not only the nails suffer, but also the condition of the skin worsens. The skin on the hands becomes dry, cracks appear, and the nail plates begin to peel off, their color changes, and the appearance of the cuticle deteriorates.
To remove dirt under your nails and improve the condition of the skin on your hands, you need to start dry treatments. To effectively remove contamination, the uneven, damaged ends of the nails are cut off and the free edges are filed. Therefore, before these manipulations, you must first wash your hands well with soap.
In first place in the effectiveness of cleaning fingernails from contamination are procedures with soda.
The method is publicly available and painless. Soda baths remove all impurities, soften cuticles, and moisturize dry skin. The method also allows you to combat the yellowness of the nail plates.
There are two options for preparing a baking soda bath. At first, take table soda and dilute it with water in the proportion of 1 tablespoon of soda with 250-300 milliliters of warm water. The second option suggests adding a teaspoon of hydrogen peroxide to the prepared solution of soda and water. You can also add a teaspoon of lemon juice to improve the effect. Dip your fingers into the prepared warm solution for 5-10 minutes. It is recommended to carry out the procedures with your hands one at a time, so that immediately after steaming you begin to use the nail cleaning technique. Removing stains after a bath is easy and quick.
After the procedure, the skin layer on the hands softens, which allows you to remove interfering hangnails, work with the cuticle, and get rid of dirt. To remove any remaining dirt under the nail plates, you can use wooden sticks or special orange sticks. You need to have time to clean your nails of dirt while they are still wet and steamed. If the contamination is seriously ingrained into the skin layer, then a single procedure will not remove it.
Surgical removal of the nail
Relatively recently, the surgical method was used everywhere, today it is much less common, since new treatment methods have appeared. The surgical intervention is carried out quickly and gives a good effect.
The procedure does not take much time - the finger and nail are treated with an antiseptic, a hemostatic tourniquet is applied and a local anesthetic is administered - lidocaine or ultracaine. The nail is separated from the bed using scissors, then removed with a special tool. The nail bed is cleaned of tissues affected by the fungus, disinfected with iodine and a bandage with an antiseptic is applied.
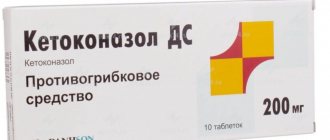
Previously, nail removal was traumatic and painful; a side effect of the procedure was deformation of the newly grown nail. Today, doctors use new technologies to make the procedure as safe and painless as possible. Once the nail bed has healed, treatment of toenail fungus with topical medications begins.
What to do to avoid getting dirty?
To prevent dirt from getting under your nails when planning gardening work or contact with the ground, use the following protection methods:
- Wear gloves. If you work in the garden, use latex products.
- There are special liquid gloves that reliably protect against contamination. They are a special product that needs to be applied liberally to your hands and allowed to dry. This forms a protective film on the skin, preventing dirt particles from getting under the nails. You can use simple liquid soap in a similar way.
- Regular soap is also useful. Before starting “dirty” work, scrape it so that the space under your nails is completely filled. If the surface becomes hard, moisten it with water. A protective crust will form, which you can easily wash off later.
- Another way to prevent dirt from getting in is to apply silicone cream to your hands.
What you need to know about soot
The properties of soot directly depend on what materials were burned. For example, wood releases more resinous soot; when plastic burns, it is caustic and sticky. In any case, carbon deposits contain a certain amount of fat, so you can’t just wipe it off the surface.
If you try to wipe off the soot with a regular napkin dipped in water, the situation will only get worse. To remove soot, you must use fat-soluble products.
Soot particles are very small. They easily penetrate into porous materials, from where they are difficult to remove.
Among other things, fumes are toxic. It is especially dangerous to stay indoors for a long time after a fire. When cleaning, it is recommended to wear a respiratory mask and protect your hands with gloves. When cleaning the ceiling, wear safety glasses to prevent the suspension from getting into your eyes.
On a note! Laundry soap and hot water will help remove soot from the skin.
Useful tips
How often do people neglect to use gloves when doing housework? Yes, almost always. They are motivated by what is inconvenient. Nonsense! It's inconvenient to sleep on the ceiling. And now the industry produces a lot of things to make it convenient:
- latex gloves
- finger pads
- silicone creams
- adhesive plaster
So, most likely, it’s a matter of human laziness and unwillingness to create comfortable working conditions for themselves. As they say: a bad head gives no rest to your feet. That is, instead of a well-deserved rest, you will then have to clean your nails of dirt. Or go for a manicure. And this is an additional waste of money.
If the shape of the nails allows, then for additional prevention of contamination, you can carefully sand the skin under them. It is better to do this with a fine file with emery coating, so as not to cause more harm than good.
Try to time your nail cleaning so that it happens in the evening. Or leisure time before bed. Then you will know for sure that there will be no dirty work for today. And you don't have to repeat the procedure several times. After all, no matter what soft tools and gentle products you use, all the same, any cleaning is a microtrauma for the delicate skin on your fingertips.
Never forget about nourishing cream or special oil for cuticles and nails. Regular use of these products allows your nails to remain properly hydrated. This means they are less likely to be scratched. Consequently, smooth nails will be less susceptible to contamination. After work, it will be enough to simply wash your hands with soap, rather than engage in deep cleaning.
By the way, there are recommendations to use clear varnish to protect the nail plate. But few people know that those with long nails can varnish the inner surface of the free edge. This procedure remarkably protects the subungual space from contamination.
Cleaning your nails should become a daily procedure. Even if you didn’t dig in the garden today. You shouldn’t accumulate dirt so that you can scrub under your nails with brushes and sticks on long weekend evenings.
How to remove dirt from under your nails? It turns out to be very simple. The main thing is not to delay the procedure and do it as soon as possible. Otherwise, you will have to work hard later to get your hands in order. Too lazy to do such an unpleasant thing? Then cut your nails as short as possible. And this problem will pass you once and for all.
how to make nails strong at home
https://youtu.be/PldH86hjKfA
How to clean laminate flooring from dirt and stains after renovation
Many apartment owners are interested in knowing, especially those who like to see their floors smooth and beautiful, how to wash laminate flooring after renovation so that it shines as before. To achieve the desired result, you need to follow a certain sequence of actions, since it can be difficult to wash stained laminate flooring after repair. The first step is to remove large debris from the floor. Then you should wash the laminate from construction dust, after vacuuming it, avoiding hard-to-reach places.
If you decide to use a washing vacuum cleaner, you should find out in advance how to wash laminate flooring with it, since there are some special features. The fact is that not all models of washing vacuum cleaners are suitable for this floor covering. For this purpose, you can use vacuum cleaners that do not scatter water so intensively and have special attachments for quickly collecting it. An abundance of water can cause it to get into the joints between the lamellas and cause them to swell. As a result, the floor will swell and become unsuitable for further use.
Often, after repair work, small scratches and chips remain on the laminate floor, compromising the integrity of the coating. You can cope with such aesthetic defects using wax pencils, mastic or paraffin. However, it is impossible to do this without leaving marks on the surface. First of all, you need to know how to carefully wipe off the wax remaining from wax pencils and paraffin from the laminate. This can be done in two ways:
- Mechanically, by scraping wax from the floor, for example, with a credit card. The use of sharp metal objects is out of the question. They can leave their scratches on the coating. You should also avoid cleaning products with strong solvents or abrasive particles.
- By heating the remaining paraffin or wax using an iron or a regular hair dryer. Simply blot the melted material with a paper towel and wipe the mark with a rag.
In addition to wax crayons, defects in laminate flooring are masked with mastic. For this purpose, both liquid and solid mastic compositions are used. Usually, immediately after repairing the laminate, the remaining composition is removed with a rag, but if for some reason this could not be done and the composition has dried out, then the mastic stain is removed from the laminate with a special mastic remover.
Although such a method of finishing premises as whitewashing is used extremely rarely today, some still whitewash the ceiling. After such repairs, they have to think about how to clean the laminate from white deposits. And it’s not at all difficult to do. It is enough to wet a cloth in water softened with vinegar or citric acid. Then wipe the floor with a well-wrung out cloth. Then rinse it in clean water and wipe the floor covering again.
Precautionary measures
Regardless of which method you choose to remove dirt from your nails, it is important to follow a number of precautions. This will help prevent finger injuries:
- Don't make your nails too short. This can cause wounds, which in turn increase the likelihood of infection.
- All tools must be used with extreme caution, especially if they are sharp. Cuts are fraught with discomfort and risk of infection.
- When using chemical and plant-based products, try to avoid contacting them directly with your skin.
- Tools must be disinfected after each use. Moreover, disinfection is important, even if you use the devices only for yourself.
- The duration of cleansing procedures should be no more than 15 minutes.
- If there is an increased risk of contracting an infectious disease, it is recommended to trim the stratum corneum short.
Clean nails are beautiful and aesthetically pleasing. Regular cleaning will not only keep your manicure looking attractive, but will also prevent infections and inflammation. You can use both professional tools and folk remedies. In any case, it is important not to forget about this hygiene measure.
When to cut your nails
A healthy nail grows 2-4 mm in a month, so you need to shorten it every week.
When there is a danger of contracting infectious diseases, it is better to cut the stratum corneum short.
This is why school canteen workers are prohibited from applying or using varnish.
According to sanitary standards, doctors are also not allowed to have long, artificial or painted nails.
Girls should not have a manicure that is too short, as the finger will widen and look rough.
According to the lunar calendar, it is better to cut the plates on the new moon or on the waxing moon. Many girls claim that long nails are less susceptible to contamination.
Nail cleaning techniques
In order not to deteriorate the condition of the skin layer and fingernails, it is necessary to clean them of contamination daily. Often you have to stay in the country for a long time or far from beauty salons; in such cases, simple recommendations will help you quickly remove dirt:
- Every evening you need to wash well and remove dirt from the skin with soap.
- Clean your nail plates from dirt every day using sticks or even a toothbrush.
- You need to use moisturizing nourishing creams.
After a hard day of dirty skin and fingernails, you need to take a hot or warm shower with soap or gel and use a hard washcloth. In general, wearing rubber gloves will help keep your nails free from dirt.
If it was not possible to avoid dirt, improvised means will help. Lemon will help remove remaining dirt from the skin and nails. It needs to be cut and your fingers well cleaned in slices. Lemon juice will allow its acid to remove remaining dirt on the skin and fingernails. After the procedure, it is recommended to treat your hands with a moisturizing or nourishing cream.
If the dirt is well ingrained into the skin layer and nail plates, then tooth powder or paste will help out, which can effectively remove it.
Most of these hygiene products contain chemical elements that can destroy bacteria and remove dirt. Apply a small amount of powder or paste evenly to your fingertips and under your nails, wait about five minutes and rinse with warm water. This will help to effectively remove remaining contamination and cleanse the keratinized skin layer on the hands. In addition, the cuticle of the nail becomes snow-white.
Cleaning the nails of a little fidget
It will be more difficult to do this with a baby. Meanwhile, soil or sand accumulates in them much more actively than in adults. You are lucky if your child likes to sit in the bath - this way the skin is easily steamed, then all you have to do is rub it with a washcloth. But most children are not friendly with water.
You can use special scissors. With their help it is easy to trim your nails and get rid of dirt.
How to avoid dirt accumulation under your nails?
In order to avoid the accumulation of dirt under the nails, you need to wash your hands daily with soap and carry out procedures to cleanse subcutaneous dirt. When working in the garden, you should not neglect the advice of gardeners and always wear latex gloves or at least finger caps when working with the soil.
You should also know that in most pharmacies you can find special silicone creams that ideally help prevent the accumulation of dust, soil particles and coloring plants under the nails.
Reference! Some gardeners prefer to apply adhesive tape to the nail plate. This method can also work, but it must be taken into account that the adhesive plaster reduces the sensitivity of the fingers and does not allow the skin to breathe. After wearing an adhesive plaster for a long time, the skin may bulge and cause discomfort.
To minimize dirt getting on your nails, you can use a special coating on your nails in the form of a protective varnish. This product can be applied both on top of the plate and under it, while protecting the entire structure of the nail. This will really help to avoid contamination, and if dirt gets under the nail, it will be easier to remove it from there.
At home, you can clean your nails with a variety of available products. Depending on the degree of contamination of the nail plate and the nature of the dirt, various traditional methods can be used. To prevent dirt from sticking to your hands, you should take precautions when working with soil, wear protective gloves or lubricate your hands with protective cream.
Advantages of hardware cleaning of nail plates from fungus
Hardware pedicure (medical) is a painless and safe procedure. Immediately after the procedure, the patient can live a normal life without worrying about long recovery and possible consequences or complications. This is the main advantage of hardware cleaning of nail plates, in contrast to surgical removal of nails affected by mycosis, which previously was practically the only way to get rid of fungal infections. The process was as follows: the entire damaged nail was removed from the nail bed. This caused pain, created injury and caused bleeding, which carried the risk of infection in the open wound.
Complete healing was possible only if all rules of care and treatment were strictly followed, which on average took from three to four weeks. The patient had to undergo dressing changes and take medications prescribed by the doctor. But after such operations, unpleasant consequences very often occurred - the new nail grew unevenly or completely grew into the tissue of the finger.
Advantages of hardware pedicure:
Does not cause pain.
Medical cleaning of the nail plates is a completely painless process; during the manipulation the patient does not feel the slightest discomfort. It does not require any additional anesthesia.
The risk of complications is eliminated.
Hardware cleaning of nail plates does not imply damage to the skin adjacent to the nail and eliminates even the slightest bleeding and the spread of infection. Recovery is fast.
Effective treatment of fungal diseases.
Removing the damaged layer of the nail plate improves the absorption of medications. They are applied to the treated areas to completely destroy the fungi remaining in the nail structure, which makes healing much faster.
Eliminates ingrowth.
When affected by mycosis, the nail plate becomes compacted and deformed, sometimes growing into the skin of the finger. Medical hardware pedicure solves this problem forever.
There are no contraindications.
Cleaning of nail plates with a device is allowed for absolutely all patients. Even people suffering from diabetes, varicose veins, thrombosis, atherosclerosis of the legs and poor blood clotting.
You are allowed to repeat the procedure if necessary.
You can carry out the procedure of hardware cleaning of the nail plates as long as necessary until the fungal infection is defeated.
Minimal chance of getting sick again.
The method of hardware cleaning of the nail plates guarantees complete removal of the infection and eliminates the risk of resumption of mycosis or the spread of the disease to healthy tissue or skin.
Healthy appearance.
After the procedure, the nail plates damaged by mycosis regain an almost full aesthetic appearance. The patient will not have to wear closed shoes to hide the effects of the disease.