Home page » Beauty » Nails
Author of the article
Svetlana Pavlikhina
Reading time: 5 minutes
AA
A manicure using gel polish, done according to all the rules, lasts a long time (at least 2 weeks), looks neat and tidy. To prevent the polish from chipping or peeling off 2-3 days after the procedure, you need to properly and thoroughly seal the end of the nail. This nuance must be taken into account by the manicurist in order to extend the life of the gel polish.
When is a sealing procedure still needed?
The end is closed not only when applying gel polish, but also in a number of cases when it is necessary to preserve the coating (nail).
If the stratum corneum begins to peel off, and the manicure is still very fresh, then the master can reseal the edge, maintaining a neat appearance.
Sick, peeling nails that lack vitamins can be grown back and preserved by sealing.
When the tip of the nail or its edge breaks off and there is no time for proper care, the crack is sealed with gel polish.
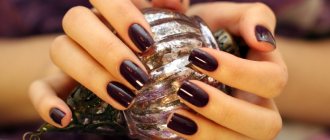
Advantages
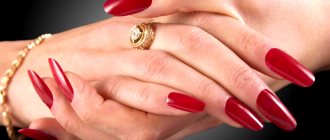
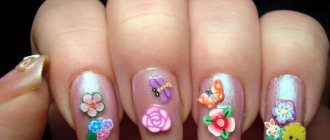
Gel polish is a unique tool for creating original and very attractive nails. This manicure has recently become incredibly popular among fashionistas all over the world. Even short nails with this coating look incredibly interesting and can decorate any look.
The advantages that such a tool has are very significant:
- characterized by a pleasant glossy shine that does not wear off for a long time;
- lasts a long time without chipping or cracking if you know how to seal your nails with gel polish;
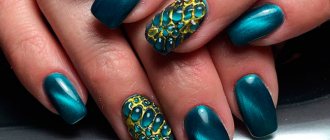
- due to the wide range of colors, it does not limit the flight of the artist’s imagination and allows you to create a wide variety of designs for nails;
- quite affordable for its price;
- environmentally friendly and harmless to women’s health;
- if you seal the edge, the composition does not peel off;
- the coating does not require trauma to the nail plate, as when using a regular gel (requires preliminary filing), etc.
However, we note that all these positive qualities of such a nail product are fully manifested only if the master adheres to all the rules for applying shellac. It is important to understand exactly in what order to apply the base, gel polish and top coat, as well as how to properly seal your nails with gel polish.
Mistakes made can lead to a short service life of the coating, peeling and other unpleasant surprises for the fair sex.
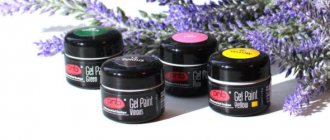
Tools and materials
Gel sealing requires the same tools as coating. First, the nail should be prepared, degreased, then get to work.
Tools:
- manicure scissors help adjust the length and shape of the nail plate, and remove the cuticle;
- buffs (polishing blocks) of varying degrees of abrasiveness prepare the stratum corneum for applying varnish;
- files with different grain sizes level and shape the free edge of the nail;
- brushes for applying varnish;
- UV lamp for drying each layer.
You may need wire cutters or orange sticks. They are used if you need to remove excess skin around the nail bed.
To apply the coating and seal the chip, it is necessary to use high-quality materials:
- means for removing liquid and fat from the nail plate (bonds, dehydrators);
- disinfectant;
- primer;
- the basis;
- top
The primer and top are colorless, the base is colored.
Varnish coating
The main stage requires compliance with all the subtleties of the work
It is also important to choose a high-quality composition that will last at least 2 weeks, meet all expectations, and will not fade or wear off. The technique is quite simple:
if the plates delaminate, file them down with a buffer, you should choose the abrasiveness depending on the condition of the nails, tangential movements in different directions, this will allow the color coating to stick better; then you should treat it with a disinfectant, moisten a lint-free cloth and carefully treat each nail, you need to be careful with the cuticle and side cuts, with microcracks and cuts, unpleasant sensations may occur, special attention is paid to the end, if you do not work it thoroughly, the varnish will easily peel off; Next, you should apply a primer, many skip this stage, believing that it is enough to disinfect everything, but it is this that allows you to maintain the moisture balance, drying only the upper layers of the plate, it is also indispensable for strengthening and caring for weak, depleted nails, in this case it is better to purchase acid-free composition, apply a thin layer with a brush, it is important to cover the edge of the free edge, the liquid dries very quickly in just a minute; evenly apply the base for the varnish, it is a transparent viscous liquid, which not only allows you to make the coating stronger, but also protect your native nails from yellowing and disruption of natural processes, choose one with vitamins, oils and proteins, it is usually sold in a set with shellac, but can be purchased separately; the base is not always applied to the edge; Now the important moment is to seal the end, dip the brush in regular gel, remove excess droplets, distribute perpendicular to the edge; Polemicize in a UV lamp, depending on the manufacturer, can take from 1 to 3 minutes, remove the sticky layer with a lint-free cloth; then a layer of gel is applied, leveled with a dry brush, possibly in several layers to obtain a more saturated tone, but no more than 2, to avoid drips, each is dried in a lamp for 3 minutes; The top coat is used last, it is applied in a thick layer, it will help protect the manicure from any mechanical damage, contact with water and aggressive chemical elements, and is dried in a lamp; you also need to treat the end of the free edge; if the nails are long (protrude beyond the fingertips), then carefully apply to the grown inner part; professionals know that it is always better to overdry than to leave an unsealed coating; it is strictly forbidden to distribute all the compositions in turn - base, gel and top coat and only then send them to dry; it is important to test each applied coating in a lamp; If a sticky layer remains after drying (it all depends on the composition of the finishing varnish), remove it with the same napkin using alcohol or an acetone-free product; for care, treat the cuticle with moisturizing oil.
End sealing technique
The work can be divided into 3 stages: preparatory, main, final. If you strictly follow each of the suggested steps, the coating will turn out to be of truly high quality.
Step 1 (preparatory)
First, the cuticle and excess skin are removed, and the nails are given the desired shape.
It is important to thoroughly degrease the surface of the horny plate and remove excess moisture with dehydrators . The same manipulation is carried out at the end.
After treating with any liquid, hands are dried without using a lamp.
Then the surface of the nail is polished with a buff, partially removing the keratin layer for better adhesion to the primer.
Use a special lint-free cloth to remove any remaining nail dust.
It is important that the plate is well cleaned of any particles, otherwise the coating begins to swell and peel off from the horny plate.
Step 2 (basic)
A primer (base) is applied to the keratin layer and end. Using a brush, apply the product to the back side of the free edge, pass well along the end, trying not to leave bald spots.
Dry the first layer for 5 minutes with or without a lamp (this depends on the instructions for use of the product).
As soon as the base dries, apply a colored layer. It is applied from the base of the nail, pulled out to the free edge, moving slightly past the end.
At the sides, all layers of varnish are carefully applied, pushing back the skin. The base is dried under a UV lamp for 3-4 minutes.
Step 3 (final)
After the base has dried, begin applying the top. Using a dry thin brush, carefully process the edges of the nail along the entire perimeter, then apply a fixing coating to the entire horny plate, going beyond the edge.
The finishing layer is dried under a lamp in accordance with the instructions.
When and how can you save your manicure?
If a piece of gel polish breaks off on the side, it’s not a problem. You should not immediately blame the master and call him with complaints about poor quality work. This usually happens for two reasons:
Due to the negligence of the woman herself, who can catch the nail and accidentally damage it. Any scratches spoil the coating and make it more fragile, causing chips; In case of improper manicure care before and after the procedure
It is recommended to avoid contact with water for 3-4 hours after applying gel polish. And before going to the specialist, do not use aggressive chemicals, or do housework with gloves. On softened nails, the adhesion to the coating is worse.
So, if just a piece breaks off due to your own negligence, don’t worry, we’ll tell you how to save the situation
Method 1: restoration if there is a lamp
If you did the coating yourself, without visiting a beauty salon, it will not be difficult to fix the broken piece. There is no need to completely redo the manicure; just file off the top layer of the damaged nail, then degrease the nail plate and cover it with a base coat.
Dry the transparent layer in a lamp. Then we apply the color:
- If it is dense over the entire surface at once;
- If it is translucent at the beginning, chip it and dry it, then onto the entire plate.
Cover with top coat and don’t forget to seal the end. We dry it in a lamp, remove the sticky layer and enjoy the result.
If the manicure was done in a salon, but you also have everything you need to cover your nails at home, repeat the procedure. If the desired shade of gel polish is not available, file the color down to the base. Then we repeat the sequence:
- degrease;
- apply base and dry;
- two layers of any color (you will get a new design, because today it is fashionable to paint nails in different shades);
- top
Method 2: glitter
An example of how to apply glitter to your nails to hide chips.
You can hide a chip at the tip of your nail using glitter. This is a gel polish with a lot of glitter.
If you apply glitter in a dense layer, nothing will be visible from below. It needs to be dried in a UV lamp. If it is not there, choose a regular varnish with a lot of glitter and perform the same procedure.
To make the design look harmonious, you can cover only the top part of the nail with glitter, simulating a “flowing glitter” design. On the adjacent nail you can do the same, but in the opposite direction: from the cuticle to the free edge of the nail.
Method 3: French
You can disguise a chip not only with a classic jacket, but also with diagonal patterns, wide stripes, etc.
You can save a nail on which a chip has formed using any varnish. Carefully draw the French coat and let it dry thoroughly. This way, a monochromatic manicure will turn into a fashionable design - a colored French manicure.
Method 4: Nail stickers
To ensure that the stickers stick well, do not forget to cover the end of the nail with varnish.
Today, a large variety of nail stickers are sold that completely cover the plate. Choose a beautiful design and stick it on your nail. You can fix the sticker with clear varnish or topcoat if you have a UV foot in which you can dry it.
Method 5: patch
This, of course, is a joke option, but it will save you in an emergency.
The last method has nothing to do with nail restoration
This is a little trick to avoid ending up at an important event with ragged nails. We put a band-aid on the problem finger and pretend that we cut ourselves.
and now you are no longer the one who doesn’t know how to take care of your manicure, but a lady who accidentally injured her finger.
Subscribe to our channel or
Follow us on social media. networks!
Sealing the end on short nails
The preparation of a short nail plate for the application of gel polish is carried out more carefully to increase the adhesion of the varnish and the keratin layer. You need to properly seal the end and edge so that the gel does not peel off.
Application technique:
- Carefully remove the cuticle and excess skin around the nail plate, especially if the manicure is performed at home. The salon performs hardware (unedged) manicures.
- It is good to degrease the keratin layer, remove moisture, especially along the free edge. You can use pharmaceutical alcohol (70%).
- Treat the surface of the nail plate with a soft buff until matte. With this device you need to go well along the edge so that all layers of the gel lie evenly and “stick” well.
- Remove dust and crumbs with a napkin.
- Apply the primer in a thin layer (you need to do this especially carefully along the edges), dry according to the instructions. A thick coating on short nails will not last.
- Gel polish should be dense in texture, but applied in a thin layer. Carefully process the edge of the nail and dry it under a lamp for 3-4 minutes. It is not recommended to apply more than 2 layers of base.
- The top is applied especially carefully; it is important to thoroughly process the ends of the horny plate and the free edge. The finishing layer is applied in a thin layer, otherwise it will move to the edge and wrinkle. It is dried under a lamp for 3-4 minutes. It is important not to touch the edge of your nail to the lamp panel and not damage the polish.
- After drying all layers of gel polish, a sticky residue may remain on the surface. It can be removed with clinser or alcohol.
At the final stage, nourishing oil is applied to the cuticle and cream is applied to the hands.
Features of application for a lasting effect
In order for your manicure to remain stable for a long time, you should know how to properly coat your nails with gel polish.
Let's divide the preparation into several stages:
- Hand treatment.
- First, you need to pay attention to the condition of the skin of your hands, if necessary, carry out nourishing baths or soft peeling to remove dead skin particles.
- Next, we proceed to the treatment of the nail surface: we push back or remove the cuticles, give the same shape to each nail, remove the gloss, getting rid of unevenness and peeling.
Remember that after water treatments it is not recommended to immediately cover your nails with Shellac, since the nail plate is slightly deformed due to contact with hot water. Such procedures must be carried out in advance (30 - 40 minutes before the manicure) so that the gel polish adheres tightly to the nail.
- Let's start degreasing.
We treat each nail with a special liquid in a thin and even layer, not forgetting about the end (this is also quite important). Please note that if the skin of your hands is oily, it is better to carry out the degreasing procedure several times to completely rid the nail plate of unnecessary particles.
- Apply primer.
In this case, it is better to use an acid-free one, since the harmful effects on the nail are minimal, and the effect is indistinguishable from the usual one.
The primer ensures a tight bond between the nail plate and the gel polish, so the free edge also needs to be treated.
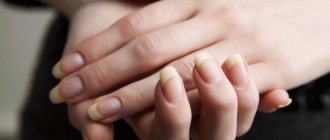
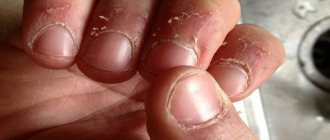
Consequences of an unsealed nail
If each layer of gel is not sealed, the manicure will not last long. Water gets between the varnishes, the layers begin to delaminate . After a few days, the coating peels away from the base and chips may appear.
If the free edge is not immediately covered with gel, then the manicure will look sloppy and untidy. The nail plate is visible from under all the layers, especially if it is thick. Over time, dirt begins to accumulate.
This means that the master performed the work poorly and unprofessionally.
Treatment of the nail plate
Before applying gel polish, it is not necessary to file your nails with a buffer. This should only be done if the nails are peeling too much. In other situations, treat your nails with a soft file and cover with a degreaser. For sanding, it is preferable to use a lint-free cloth.
Pay close attention to the edge of the nail, since this is where the gel begins to peel off. You can no longer touch the buffed nail plates with your hands.
At the end of this stage, the nails are treated with a degreaser.
Using a Primer
To prevent brittleness and brittleness of your nails, you can apply a primer (primer) to them. The product dries instantly and guarantees the best adhesion of the next layers to the nail plate.
The primer allows you to degrease, dry and disinfect the nail plate. Both acid-free and acidic substances can be used depending on the type of plate.
Gel polish base
Upon completion of all the above activities, you must begin applying the base. This colorless, viscous substance not only makes the coating more durable, but also protects nails from weakening and yellowing. Choose a base that contains biologically active substances or caring ingredients.
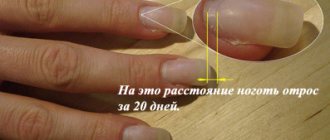
The thickness of the base should be extremely small. It is necessary to dry the base in a specialized lamp. The sticky layer must be removed. The base counteracts the invasion of the colored enzyme into the nail plate. It is best to try to apply the base coat a little under the protruding edge of the nail. When the nails are cut too short and their size is not enough to seal, it means that you either need to grow your nails or simply do not expect an impeccable quality of manicure.
Sealing the end with gel varnish
This procedure includes the following steps.
Apply a thin layer of base coat. Take a brush and dip it into regular gel
Remove excess liquid and carefully brush the edge of the nail plate, holding the brush in a perpendicular position, with the hair tuft towards the tip of the finger. This will make it possible to prevent the manicure from peeling off the nail plate. Dry the base coat in an LED or UF lamp for 2 minutes. Apply a layer of gel polish
If the liquid is thick, then one coat will suffice; if it is not thick enough, more coats will be needed. Dry each one in a lamp. Apply top coat and dry it. Use a lint-free cloth to remove the sticky layer.
Finishing gel
After applying and drying the gel polish, you should coat your nails with a finishing agent. The finish layer should be slightly higher than the thickness of the base coat. The gloss of the nails directly depends on the quality of drying of the finish. Nail treatment experts say that it is better to let it be over-dried than under-dried. When the coating is under-dried, then along with the removal of the remaining gel, the gloss will disappear.
Sealing errors
The durability of the gel coating is influenced by the technology of its application.
Errors that lead to chipping and delamination:
- applying gel to the unprepared edge;
- processing the edge with a file, not a buff;
- applying cream, oil before applying gel to the end;
- applying thick layers of gel polish;
- shaking the bottle of varnish before applying it;
- drying not in a horizontal, but in a vertical position;
- sealing when applying one layer of gel, and not all;
- removing the sticky layer released during drying from the primer or base (it can only be removed from the topcoat).
If you avoid these mistakes when sealing your nail, a manicure with gel polish will last about a month.
Preparatory stage
Before sealing the nail with varnish, the plates must be carefully prepared. To do this, you need to perform a hygienic manicure. It is better to use unedged or hardware manicure. If you choose a trim manicure, then you need to wait three days before applying the gel.
Using nail files, the length of the nail is adjusted. The plates are given the desired configuration. To seal the end, it is necessary to remove the protective fatty film on the edge of the nail and on the back of the regrown tip.
If the nails peel off, it is advisable to carefully remove all exfoliated particles. You can use a nail file for this. The surface of the nail plate must be cleaned of dust using a special brush.
In order for a gel manicure to last long enough, you do not need to wet your hands two hours before the procedure, and also use greasy and moisturizing hand creams. The same applies to the cuticle; it is better to remove it without using a special softening cream.
If you are going to perform a manicure with Shellac gel polish, then additional polishing of the nail plates is not required. For varnishes from other companies, nails need to be sanded, removing the glossy shine. To do this, it is better to use a special file or buff.
Advantages and disadvantages
The growing popularity of wax polishing is explained by the presence of many advantages over other methods of nail restoration:
- After this procedure, you don’t have to worry about the condition of your nails for several weeks, since they are reliably protected from infections, diseases and injuries. This is perhaps the ideal option for a manicure on vacation.
- After sealing, your fingers will no longer be afraid of “dirty” work: you can safely wash dishes, floors, cook and exercise.
- You can still apply colored polish to your nails.
- Sealing stimulates the processes of keratization (keratinization) in the nail bed, thereby accelerating the growth of the plates.
- The nail tissue becomes stronger, acquires shine and a healthy color.
However, like any other cosmetic procedure, this method has its disadvantages:
- Price. Despite the growing popularity and distribution, in our country, sealing nails remains a very expensive pleasure.
- The procedure requires three to four repetitions to firmly consolidate the healing effect.
- This treatment method can only be used on short nails, so their length will have to be sacrificed for the sake of health.
Please note that polishing your nails safely requires patience and care. An inexperienced master can simply worsen the condition of the plates if he acts on them too intensely
Be very careful when polishing yourself. On average, you should spend 2-3 minutes on each nail. Pay special attention to the tip and back of the nail, carefully filling all places with wax, because nail separation begins from here.
Review of the best strengthening wax for nails and cuticles
Manufacturers offer a large selection of various cosmetic waxes for manicure, and each insists on the uniqueness and maximum benefits of their particular product. The properties of the product can be supplemented by other components included in its composition, and it is on them that the set determines whether the product is suitable for a particular person and whether it will give the desired effect of treatment, strengthening and protection.
Belvedere
The product is produced in a small round jar, the weight of the product is 6 grams. Wax is intended for the care of nails and cuticles. The consistency is light, non-greasy, the composition is quickly absorbed into the fabric upon application, creating a protective layer on the surface. The composition also includes lavender, shea butter, jojoba, sesame and castor oils, panthenol, aloe extract and vitamin E. Suitable for special, intensive care of damaged and brittle nails, for protection before housework and as a general care product during the procedure manicure It has no side effects, so if desired, it can be used on an ongoing basis.
Spivak Ylang-Ylang
Wax is suitable for any age and any skin type. Ylang-ylang oil, which is part of the product, has a strengthening effect on the nail plate, helps improve its quality, shea butter and apricot kernels have a softening effect and also have a beneficial effect on the cuticle and nail folds. Bergamot oil in combination with wax gives nails a healthy shine and creates a protective film on their surface. The consistency is thick, the wax is hard, so for application it is recommended to apply a little pressure with the nail itself and swipe so that a small amount of rubbing agent remains on the plate.
Limoncello
Limoncello is another type of cosmetic wax from the Spivak brand. The product has a delicate creamy color and a light and pleasant lemon aroma. The consistency, like Ylang-Ylang, is solid. The 20 gram jar has a fixed lid, which does not interfere with the use of wax, but it will not get lost. The product strengthens nails, and due to the inclusion of lemon oil, it also whitens them, allowing you to significantly improve their appearance. It also contains apricot kernel oil, rice bran wax and candelilla wax.
DNC nutritional
The product is positioned by the manufacturer as a bio-wax and is available in a 6 ml round jar. The composition includes castor oil to enrich the nail plate with nutrients and accelerate the healing of skin damage, beeswax to create a protective coating, and silicone to strengthen and fill microscopic cracks on the surface. Also in the list of ingredients you can find extracts of sea buckthorn and ginseng, vitamins, polysaccharides and pectin substances.
PHYTOcosmetic Healthy nails
The product is produced in a fairly large volume compared to similar products - 10 ml. The formula includes a large number of natural components that allow you to comprehensively care for your nails: castor oil improves the structure of the plate; mink oil has a softening effect; iodine and calcium in the wax help strengthen nails and accelerate their growth; wax is necessary to protect the plate and give it a beautiful, healthy shine.
Making wax
Buying wax is the easiest and fastest option for sealing. However, it is not always available at hand or in stock in nearby stores. But the absence of this specialized product at hand is not at all a reason to cancel the procedure. After all, you can prepare nail wax with your own hands at home. To do this, you need natural beeswax and base oil, almond, olive or other, used for baths.
Melt about a tablespoon of natural purified beeswax in a water bath. This volume is enough for one or two procedures, depending on the length of the nails. For this volume of wax, pour about 80 grams of the selected base oil and 2 teaspoons of boiled warm water at a temperature of about 40 degrees. Pour 5 - 7 drops of your favorite essential oil into the mixture, suitable specifically for your nails. So, to relieve inflammation, this is tea tree oil, patchouli oil - from delamination, etc. The resulting composition can be applied to the nails in accordance with the procedure described above. The prepared mixture should be stored closed and at room temperature.
In addition, this wax can be successfully used for cuticles. It not only helps to intensively soften it even in very advanced cases, but also soothes and relieves irritation. It can be applied directly during the polishing process.
Sealing with biogel
Biogel, also called biosculptor, is another sealing material. Due to the higher price, it is used somewhat less frequently, but is no less effective than wax. This product is made from the resin of the teak tree growing in South Africa. It is thanks to its natural base that the gel is well suited for creating an impenetrable and durable coating. The procedure is carried out in the following order:
- Hands are treated with an antiseptic solution.
- A hygienic (trimmed) manicure is performed.
- The surface of the nails, as well as the skin on the periungual ridges, is polished with a polishing stone.
- A layer of gel is applied.
- Within a few minutes, the first layer is dried using an ultraviolet lamp.
- The second layer is applied.
- Repeated drying.
- A special fixing cream is applied to the nails.
If you follow all these steps, the procedure for sealing your nails with gel will take from 60 to 90 minutes.
The main advantages of this tool are:
- no risk of allergic reactions;
- the opportunity to buy colored gel and use it for nail art.
Indications for use
Beeswax for nails has a versatile positive effect on nails. Regular use of this product, both in the sealing procedure and as part of creams and masks, can improve the health of nails in several ways. The main positive impacts can be the following:
- Acceleration of nail growth. Nails grow not only quickly, but also healthier and more beautiful, as well as stronger;
- Sealing nails, both in the salon and at home, can strengthen them mechanically and prevent further delamination by gluing and preventing peeling of the plate scales;
- The excellent aesthetic effect is also often the reason why many choose the sealing procedure. As a result, the nail plate becomes completely smooth and glossy;
- The nails are intensively nourished, treated and strengthened.
[yandex2] [google2]
In this regard, there are a number of indications for this procedure. In this case, sealing is prescribed for both sick and healthy nails. In the first case, sealing improves the condition of the plates and strengthens them, and in the second, it prevents the development of the disease and the occurrence of fragility.
The essence of this procedure is that the plate is polished using a special cosmetic cream wax. This allows the wax to penetrate the upper layers of the plate to a sufficiently large depth and strengthen the nails. The sealing procedure is suitable for absolutely everyone, as it is therapeutic and preventive in nature.
There are a number of circumstances and indications under which nail technicians recommend carrying out the sealing procedure. First of all, this is the removal of extended nails. In this case, your nails are extremely weakened, prone to brittleness and splitting. To ensure that all these negative consequences do not occur, nails are sealed with wax at home. In addition, splitting of nails is also an indication for use, as is their increased fragility.
Useful tips
@goodhousekeeping.com
To prevent your manicure from peeling and to last as long as possible , it is important to follow several recommendations:
- Dry the brush thoroughly and apply varnish and primer without pressure.
- The brush should always be held perpendicular to the nail, and sealing movements should be done from left to right or vice versa. But under no circumstances apply varnish from top to bottom or bottom to top.
- To prevent the gel from getting on the skin, you can apply liquid tape.
- For several days, try not to use boiling water. Moreover, avoid visiting beaches and solariums. If this requirement is not observed, your manicure will crack within 2-3 days.
- Don't file your nails. If something happens to your manicure, then the gel coating must be removed and all operations must be performed again.
- When washing dishes or working in the garden, use rubber gloves. They will protect your nails from dirt and protect sensitive skin from irritation.