Features of the “liquid stone” design on nails
A manicure created using this technique is reminiscent of covering nails with rhinestones. However, instead of heavy, bulky stones and natural minerals, which fall off quite quickly.
This happens especially often if they are attached to natural nail plates, special gels and other additional materials are used. With their help, craftsmen reproduce original patterns imitating precious stones, gold, platinum and silver.
Liquid stones look very natural and impressive, so it can be difficult to distinguish them from jewelry creations.
Types of foil
The casting technique directly depends on the type of foil; it comes in three types:
- translated;
- tear-off;
- based on glue.
When using any of these types, there are small features that should be taken into account to achieve the desired result.
- When using transfer foil, material is applied to the design and once peeled off, it is transferred onto it like a sticker.
- When tear-off foil is used, the required pattern is cut out of it and attached to a gel with an adhesive layer.
- Foil with an adhesive backing is also easy to apply. To do this, you need to remove the bottom protective layer and press the foil onto the nail plate with the adhesive side. After which the foil is smoothed so that there are no bubbles left under it.
How to do a manicure with liquid stones and casting at home
The “liquid stone” technique on nails and photos of this design are gaining popularity , so now you can learn how to do a manicure in this style yourself at home. To do this, you need to prepare tools and materials that are sold in almost any decorative cosmetics store.
Liquid stone on nails: what it is and how to do it.
For a beginner in this matter, you need to follow detailed instructions to avoid ridiculous mistakes.
Another important step in creating perfect nail art, especially for natural nails, is the proper preparation of nails for applying gel and other materials, because the durability and beauty of the manicure depends on the working surface of the nail.
Advantages and disadvantages
The “liquid stones” technique has a number of advantages , among which are the following:
- the manicure turns out refined and sophisticated, there is no weighting effect;
- beautiful and shiny natural decorations on the nails are obtained without the use of expensive materials;
- You can get a manicure not only in the salon, but also at home.
Moon manicure with precious stones
In addition to the advantages discussed, this nail art technique has a certain set of disadvantages:
Casting on nails in amber tonesHigh price of work in the salon.
This is due to the fact that to create a design, the master does a colossal piece of jewelry work that needs to be appreciated.
- The technique is relatively new, but not every salon has a master who can implement it on nails. But the training itself lasts more than one day and is very expensive.
Required materials and tools
To create a manicure using the liquid stone technique, you will need the following materials and tools:
- UV lamp to speed up the drying of each layer of gel.
- Manicure foil that matches the selected stone.
- Colored art gel used to create a French jacket.
- Gel without dispersion.
- Gel paint necessary for applying contours and imprinting foil after polymerization.
- Thick sculpting gel.
- Stained glass gel for stone casting.
- Angled brush for making basic French.
- A basic brush for applying most layers of manicure.
- The so-called hair, necessary for drawing contours.
- Special polymer stones.
- Nail degreasing products.
- File to prepare nails for casting.
Step-by-step instructions for basic design
To create a beautiful and elegant manicure in this style, you will have to follow these steps:
- It is necessary to treat the surface of the nails with a file to remove their natural shine, otherwise the pattern will blur.
- Now the nail plates need to be degreased using alcohol or a special product.
- As soon as the nails are dry, you can cover them with gel, and a very thin layer should be applied to natural nails. After this, they should be dried under an ultraviolet lamp.
- Now you need to rid your nails of the sticky layer by wiping them with an alcohol-containing solution and you can begin to form the design, first completing its outline. Here you need to show special diligence, because the quality of the contour determines whether the selected pattern will hold or blur.
- Then, using special glue, you need to fix the foil selected to match the pebble on the nail, and when it is firmly attached, tear it off with a sharp movement.
- Decorate the “frame” of the stone with paint or gel, drying it after application under a lamp.
- Now all that remains is to form the stone itself, using a structuring gel and acrylic materials, and also cover the finished pattern with gel for a shining or mirror effect, drying each layer under a lamp.
Distinctive features
Nowadays in salons you can find a manicure that is in great demand, this is decoration using casting. The procedure is most often performed on extended nails. The pattern is made using foil, which forms the pattern and different types of gels. The nails are covered with a layer of special gel and placed under an ultraviolet lamp to harden. After this, foil is placed on the nails and repetition occurs. Drying time is very individual and depends on the gel used to attach the foil. After the end of the time spent under the lamp, the nails are pulled out and the foil is quickly torn off, after which a beautiful, unusual, sometimes bizarre design is left. It is advisable to have this manicure done at least once by a professional manicurist, and then if you like it, you can gradually master the procedure at home. But you need to be confident in your abilities and it is advisable to choose a design in advance. There are a lot of designs, gold casting is in great demand, but you can come up with your own style. There are such options as using a French manicure with white varnish to perform gold casting. Or it could be cast silver. Sometimes casting is applied to individual fingers, for example, ring fingers, and the rest of the nails are done in a classic style. Gold casting on black varnish looks luxurious and evening-like. A manicure with cast cherries on nails looks fun and mischievous. You can also come up with an interesting design with other berries and bright varnishes. There is room for fantasy and imagination to run wild here.
Correct technology for applying liquid stones
To create liquid stones, multi-layer manicure technology is used, in particular three-layer manicure. Therefore, they are based on contour drawing, stained glass, and also sculptural gel.
Technique for applying liquid stones:
- At the first stage, the outline of the future gem is drawn with black gel, which in most cases is decorated with gilding or silvering, depending on the chosen foil.
- At the second stage, the prepared outline of the drawing is filled with translucent or transparent gel to create depth of color.
- At the third stage, the formation of a gem occurs. Using a sculpting gel and a fine brush, you can create an original gemstone that looks completely natural.
The technology of applying liquid stones also involves repeated use of a UV lamp, as well as coating the finished pattern with a finishing gel, which will give the stones a natural shine.
Technique, how to do it right
Photo - Liquid stones on nails
To make a manicure casting, you will need:
- Manicure foil. Sold in any cosmetic store;
- UV lamp. In principle, you can do without it, it will simply speed up the process significantly, in addition, with the help of rays, the gel becomes brighter and more beautiful;
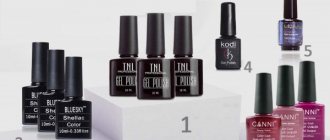
- Varnishes of the desired shade;
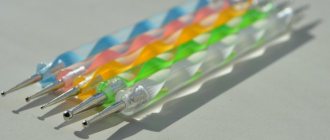
- Thin brush, hair;
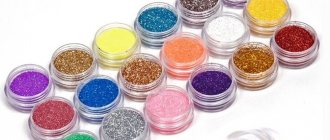
- If necessary, other patterns, ribbons, beads or sparkles.
Instructions for “liquid” manicure step by step:
- You need to prepare your nails, clean them of old polish, trim them and give them the desired shape;
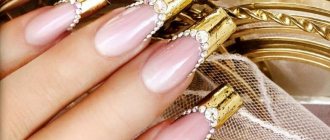
- After this, you can do a French manicure, but it looks most chic with liquid stones. To do this, apply a base layer of beige varnish to the nail, then stick a white stripe on the desired length of the edge and paint it with white varnish;
- If you use foil, then stick it on the outline with the glossy side, dry it and tear it off sharply. Then you will get a gold or silver manicure. If you plan to leave it like that, skip points 4 and 5;
- Next, draw designs on the nail using the desired color. These can be simple abstract lines. The best contrast is obtained when using black. You need to draw fairly dense lines of patterns so that when they dry, they become convex and acquire volume. Dry your nails under the lamp;
- Now draw lines in the dark outline using the colors of the future liquid stone. We recommend using shades close to the chosen palette. Let's say turquoise, light blue and light blue;
- When you paint the entire surface of our stone, you need to cover it with a transparent sculptural gel to give it a voluminous shape. Many craftsmen use pearlescent colors for a stronger shine. All that remains is to dry your nails under the lamp.
You may not get a perfectly even drawing the first time, but after a few experiments everything will work out. In any case, you can buy liquid stones for natural or extended nails, their price ranges from $3 per set. These are special polymers that have a hard base, but when applied to the nail they take on a soft shape. After gluing it, you just need to dry your hands under ultraviolet rays and strengthen it with transparent gel polish.
Tips and pictures for inspiration:
Options for imitation gemstones
Judging by numerous photos, the liquid stone casting technique will allow you to create an imitation of almost any precious stone and natural mineral on your nails - it all depends on the level of skill and creative approach of the artist.
But the following gems are especially popular:
- translucent emeralds;
- amber;
- sapphires of various shades;
- juicy rubies;
- rose quartz;
- exquisite pearls;
- luxurious turquoise;
- iridescent malachite.
Liquid stones for natural and extended nails
The technique of casting liquid stones was originally developed for nails extended with gel or acrylic, since it required a fairly high density of the surface to be covered and a good length. Nowadays it is actively used for natural nails, and a manicure made in this style looks quite impressive on them and is not heavy.
Liquid stone on nails: a new product for manicure and pedicure.
The only limitation in this case may be the length of the nail plate. Because to make a high-quality drawing so that it does not blur during application, a lot of free space is required.
How is casting done?
The execution of the cast pattern depends on the type of foil used, which can be:
- translated;
- untranslatable (tear-off);
- on an adhesive basis.
If non-transfer foil is used, the procedure should be as follows:
- First, the selected pattern is cut out of it.
- Varnish or sticky gel is applied to the surface of the nail.
- The cut out pattern is attached to the sticky varnish surface.
- It is secured with a colorless varnish or gel, which is applied on top.
Transfer foil is made in the form of thin strips or sheets.
The technology for applying the pattern in this case should be as follows:
- The gel is applied to the surface of the nail in the shape of the selected pattern.
- The entire nail surface is covered with thin transfer foil.
- After the foil sticks in the places of the pattern, it is quickly removed from the surface. At the same time, in places where the helium pattern is applied, the adhered foil remains and repeats the applied pattern.
Adhesive-based foil has a bottom sticky layer covered by a backing. It is produced in two forms: for the entire nail plate and in the form of random pieces.
Its application to the surface is the simplest:
The protective backing is removed from the product and the adhesive side is pressed against the nail plane. Using a cotton swab, the “cast material” is carefully smoothed in the direction from the cuticle to the upper edge to level and remove all bubbles.
In addition, shiny material has a different appearance. Its surface can be mirrored, matte, holographic, or have various patterns and designs on a mirror background. Any variety of it can be successfully used to create original nail art.
Design depending on the shape of the nails
The liquid stone technique on nails, photos of which are becoming increasingly popular in specialized and fashionable glossy magazines, is used on extended and natural nails. Therefore, the design and size of the stone is selected by the master depending on the shape of the nails.
Stone casting can be done on round, square, pointed and oval nail plates, the main thing is that they are not too short. On almost any work surface you can recreate miniature jewelry masterpieces that will delight the owner of this manicure.
Technique for doing it at home
First stage:
First, let's prepare the nails for gel coating; this coating cannot be done without first treating each nail. If this is not done, then your new manicure will not hold on at all and will quickly peel off. Using a rough nail file, carefully file away the topmost covering of the nail. But do it carefully, otherwise you may damage the structure. If you are working on artificial nails, file off the top layer of gel. After sawing, the surface must be degreased; you can use simple alcohol. Wipe each finger with a cotton swab dipped in alcohol.
Second phase:
Next, you need to cover each nail with a layer of gel; when applying the procedure to already made non-natural nails, the application procedure will have different lengths and thicknesses. If you are doing it on natural nails, try to apply the thinnest layer possible. For drying, a lamp is used, not a simple one, but a special one, for several minutes. After hardening, treat the gel surface with alcohol to remove the sticky layer.
Third stage:
This stage is associated with the outlines of the boundaries; if the boundaries are not drawn, the drawing will not be clear. Why choose a design invented in advance and apply it directly to the nail. After the design is outlined, apply glue for the foil. If it is not available, apply a simple colorless varnish. Give it time to dry, after which it will become sticky. Outline the edges with varnish and apply the selected foil of any color. Wait until everything sticks, and with a sharp movement, tear off the foil. The contours of the design will remain on the nail - this will be the basis for enclosing the stone.
Fourth stage:
You can choose different liquid stones of the selected color and shade. Depending on what color you have chosen for the stone, apply paint to the place where the stone will be. Masters advise using acrylic paints, but this technique does not exclude the use of glitter and gel for decoration. You remember that after applying the gel you need to hold your fingers under the lamp.
Fifth stage:
After the color has been applied, we create a convex shape for the stone. This is done using acrylic material or structuring gel. These materials have a high density and can harden quickly. Using a brush or toothpick, take a drop of gel and place it on the drawing. Then immediately under the lamp for a few minutes. Then everything follows the scheme, next finger, toothpick, gel, lamp. If there are several stones on one finger according to the design, then they are applied one by one.
Sixth stage:
When all the butu stones are made, a protective layer must be applied. What is protective varnish or shellac used for? If you did everything correctly, your new manicure will last as long as possible.
Design ideas: popular decor and new items
One of the most popular decors when using liquid stones are oriental motifs , which are performed in most cases on long square nails. Their tips are covered with gold, onto which a simple pattern is applied with bright blue and turquoise gel.
In order not to overload the image, casting is done only on one nail, and is not limited to one gem. At the base of the design there is a large turquoise stone, a little further away a bright red ruby is created, and around them there are many small transparent emeralds, which act as the setting of this “jewelry”.
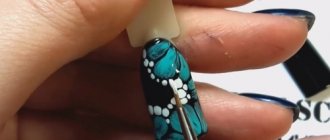
New decor items using liquid stones represent original spring motifs. So on the nails of fashionistas appear emerald insects, ruby dragonflies, sapphire scorpions and butterflies, as well as luxurious peacock feathers, the “eyes” of which are made of large and juicy gems.
All these designs are decorated in gold, and the background of the nail plate is chosen in the most delicate pastel shades in order to concentrate attention on such an unusual contour of the liquid stone.
Eastern style in drawing
Casting liquid stones is gaining popularity, so masters are happy to experiment, creating jewelry masterpieces on their nails. Oriental-style patterns are especially beautiful when combined with this technique, because they themselves are rich and luxurious, since they are made of “gold and jewelry.”
And liquid stones allow you to achieve stunning results, because gems made on nails look natural and bewitching, turning your fingertips into a luxurious oriental fabric, embroidered with gold and covered with bright red, blue and green stones.
Liquid stones with French
One of the simplest designs in this style are liquid stones with a French finish. This manicure looks elegant and gentle, especially if it is created to match the jewelry that the woman is wearing. Therefore, it is not too flashy and is suitable for everyday life.
To perform this technique, you need to go through the following steps:
- Using an angled brush and white gel, draw a French pattern on the tips of the nails and it is better to choose discreet, pastel shades.
- Dry your nails under the lamp.
- Apply protective gel and fix it under the lamp.
- Using black gel and a thin brush, apply a pattern - the frame of any precious jewelry and dry the nails again.
- You need to apply gilding to your nails using foil, gluing it and sharply removing it.
- The place for the stone should be covered with yellow and silver gel to create depth of color, drying each layer with a lamp.
- Using a thin brush, cover the stone with colored stained glass gel, using the desired shade, and dry again.
- To form the volume of the stone, a sculpting gel is applied to its surface, giving it the desired shape using a thin brush. Then dry your nails under a lamp to harden the stone.
- Now all that remains is to cover the entire surface of the nail with the finishing gel and dry the nails again.
Advice from experienced professionals
Experienced manicurists recommend taking note of some important points when performing the “liquid stones” technology:
- after each application of a layer of any gel, its subsequent polymerization in a special UV lamp is necessary; the time of such a fixing session should be two minutes;
- to paint “stones” with stained glass gel, you can use several colors or their shades; this method will give the design an unexpected color scheme;
- colored stained glass gel perfectly replaces sculptural gel, to which the desired paint or tint pigment should be added to add color;
- You should not apply too thick a layer of sculptural gel; it is enough to make its height 5-7 millimeters (due to excessive convexity, the central element of the composition will not decorate the nail, but will interfere);
- in the “liquid stones” technology, the use of the “casting” technique can be eliminated, then there will be a need to make an additional color frame for the “stone” with a contrasting or black art gel;
- You can make several small ones around the central large “stone” and place the same small “stones” on the nail plates of adjacent fingers.
Still, experts note, the main thing in this technology, as in any design, is the play of colors and paints.
Liquid stone for wedding manicure
Each bride carefully thinks through her wedding look, and a special place is given to her fingers. Traditionally, girls choose a French manicure - stylish and discreet, but with the advent of liquid stones they began to increasingly resort to casting. At the same time, it is not worth decorating each nail with a gem, since the bride’s appearance should remain gentle and not overloaded.
Therefore, most often they work with the ring finger, choosing not too bright stones - pearls, crystal, soft pink or white sapphires and they are framed exclusively in gold or silver to match the wedding ring.
Features of removal, how to remove a design with liquid stones?
This type of manicure looks impressive and is extremely durable, so it is not easy to remove. The main thing to remember is that you should never pick stones off your nails , otherwise you can damage their surface layer.
To get rid of the casting, you will have to use a special machine or a hard file, which you need to grind the pattern until it disappears. But in this case, tedious and long work awaits. And when there is no trace left of the stones, all that remains is to treat the nails with special solutions to remove any remaining gel.
Pros and cons of liquid stones on nails
A manicure created in this style has its advantages and disadvantages, which you should know about before you start implementing it.
The advantages of casting are undoubtedly:
- Durability. When creating this nail art, not rhinestones are used, but special gels, so the stones embodied on the nails will not fly off with any careless movement. So the completed drawing will last from a week to a month or even more - it all depends on the lifestyle of its owner.
- Beauty. This technique will allow you to create real masterpieces on your nails that are not inferior to precious stones and will captivate those around you with their radiance and rainbow tints.
- Relatively easy to apply. To create the perfect manicure you just need a little practice. In addition, you can always use ready-made pebbles made of special polymer materials that are easy to attach and sit firmly.
- Versatility. This technique is used not only on artificial, but also natural nails.
This manicure has its drawbacks:
- This technique is quite expensive, since an impressive list of ingredients is required to create polymer stones.
- This manicure is designed for long nails, since large free space is needed to complete the patterns.
- In most cases, the finished manicure turns out to be heavy and quite bright, so in everyday life it will look catchy and quite defiant.
One of the most luxurious and original manicures appeared thanks to the liquid stone technique.
With its help, you can create amazing jewelry masterpieces on your nails, at home, that are suitable for special occasions and for every day, and their photographs will not leave any fashionista indifferent.
Casting materials
Ideal casting is obtained on artificial nails or on other durable coating if gel polish or other gel-containing material was used to create the manicure. But inventive girls who are fond of nail art have long mastered other ways to create such an effect on their nails.
Foil casting
A luxurious design can be made without applying a pattern, but simply using the left sticky layer. It is important to use both traditional gold foil and material with a pearl effect, holographic, mother-of-pearl or shimmer.
A beautiful manicure is obtained if you use foil to designate elements in popular manicure techniques: French, moon.
For example, the trend is to decorate a white jacket with foil with minor effects: mother-of-pearl, shimmer. This is done like this:
- After painting the tip of the nail white, the gel polish is polymerized and the dispersion is not removed;
- Then you should take a piece of foil and lean it against the white tip. The selected effect will remain on the nail;
- Secure the design with topcoat and dry. Remove dispersion.
By analogy, you can make another spectacular design, leaving a sticky gel mark on the nails in the right places: in the middle of the nail in the form of a strip, a hole, horizontal stripes, etc. For filigree cleaning of stickiness with a clinser, you can use ear sticks or small twisted cotton swabs.
Painting nails with gel polish
There are incredibly many options for beautiful painting on extended nails or covered with gel polish. Popular design options include the following:
- geometric patterns and other thematic elements;
- monograms and stylistically similar patterns, ornaments;
- floral theme;
- marble effect;
- “drops”, “reptile”, “scales”, etc.
Painting can be done with gel polish, but in some cases it is important to use a top coat, which will serve as the basis for a three-dimensional image.
Simply painting with gel polish on a natural nail will not work; you need an artificial coating in the form of a gel base or colored gel polish.
Special paint
Gel-based paint is convenient for painting due to its consistency, because it is a little thinner than a similar varnish. It often happens that it is impossible to create an impressive volume the first time. therefore, several drying layers are required to create the intended design.
The paint is convenient to use for a French manicure in any color scheme to paint the tip of the nail. Due to its minimal density but high pigment content, the paint lays flat and does not bulge, and the sticky layer left after drying allows you to create your favorite effects with transfer foil.
Casting with glue
You can get a chance to make casting on regular varnish with a special glue for foil. It can be applied to any surface: natural nails, extensions, coated with regular varnish, gel polish, gel, etc. This glue is analogous to casting in the traditional way with gel polish.
Casting adhesive
For ease of application, this glue is equipped with a brush; it does not need to be dried in a lamp, and the fact that the glue is ready for use is indicated by a change in color - from white to transparent. Then you can safely use the foil, pressing it tightly against the surface of the nail. If necessary, it can be straightened using a silicone or rubber pusher. After completing the design, a top coat (if gel polish was used for the base) or a fixer for regular varnish is applied over the foil print.
Casting with glue
Option for casting on nails using glue
Adhesive casting cannot replace the volume effect that is obtained with the use of gel coatings. But with its help it is convenient to make different designs, clearly controlling the location of the future print.
