Queen selection
With the question of which manicure is better, you should approach the ladies, whose hands, faces and entire image have always been under the close sight of television cameras and photo flashes.
Namely, to representatives of the best European dynasties, to those women who have long become style icons:
- Her Majesty Queen Elizabeth II of Great Britain
- Her Majesty Queen Margrethe II of Denmark
- Her Majesty Queen Letizia of Spain
- Her Majesty Queen Rania of Jordan
- HRH Duchess of Cambridge Catherine Middleton
All these women can afford any manicure. But in most cases they wear only a classic jacket. Moreover, the British royal protocol even prescribes discreet natural tones.
And when it comes to jewelry, members of the British Royal Family can only afford this very French jacket. The only exception here was Her Highness Princess Diana, who occasionally allowed herself to wear a classic red manicure.
Queen Margrethe II of Denmark now prefers to wear the same red manicure. Moreover, with such bright nails she goes to both a business reception and a sports trip.
All other famous representatives of royal dynasties also prefer natural or classic options:
- Pink or beige jacket
- Transparent gel coating
- Red monochromatic manicure
- Burgundy matte solid finish
This choice allows queens and princesses to always look stylish and tasteful.
Complex nails
Any nail technician has encountered or will encounter clients with complex nails, so it is extremely important to be able to competently work out all the features of such nail plates in order to ultimately get an excellent result that will please your client and you. Let's analyze several situations and determine the procedure: 1. Wide nails.
For such nails, a rounded shape is best, although filing will take quite a lot of time.
It is necessary to carefully work out the sinuses. The stuck cuticle is pushed back slowly in several passes using a pusher or an orange stick. Treat the surface with a buff. The next stage is working with a cutter; for this we take the “flame” attachment and carefully process the cuticle, carefully removing the pterygium. We treat with a buff and polish. If everything is clean, you can start applying the base coat. 2. Extremely rough skin in the periungual area.
First, you need to soften the skin for easier processing and dry it, then work on the free edge with a file, smoothing it with light movements.
We push back the cuticle with an orange stick or pusher. We continue to work with a manicure cutter in the shape of a “flame”. Keep the speed in the region of 10-15 thousand, clean out the pterygium with light movements. We process it with a buff. If everything is done cleanly, then your nail is ready for applying a base coat or modeling. 3. Springboard nails.
Correcting curled nails is necessary from the thumb.
It’s better to start from the corner, apply the base coat as thinly as possible, then add a drop of polygel and spread it over the surface of the nail plate. We cut out the arch of the modeled nail from the inside using a cutter, removing excess thickness. Then we give the desired shape to the free edge. Next, you need to go through the polishing file, removing roughness and giving a beautiful shine to the nail. Voila! Curled nail fixed. 4. Correction of “bitten” nails.
They are characterized by several characteristics:
- Small short nail bed,
- Large burrs.
- Complex, sticky cuticles.
- Polished and thin skin in the cuticle area.
First, carefully but forcefully move the overgrown cuticle with a pusher or an orange stick. Then you need to clean off the pterygium with an ultra-soft “flame” or “bullet” shaped nozzle. Avoid sudden movements to avoid cutting the nail plate or burns. Try to maintain the correct angle of the cutter. If the eponychium has grown very widely, it is best to carefully cut it off with nail scissors, and then trim off the remaining pterygium. Also pay special attention to cleaning the lateral sinuses and sinuses. We treat the remaining dry cuticle with a spherical nozzle with a red notch. You only need to move along the cuticle and under no circumstances go onto the skin behind it, so as not to cause injury. Then, closer to the free edge, treat the surface with a nail file to ensure good adhesion to the decorative coating. 5. Correction of wide nails growing upward.
At the first stage, it is necessary to symmetrically narrow the side lines using the sawing method.
After this, shape the end using a file, placing it perpendicular to its edge; it is best to choose an oval shape with a narrowing or squaw-oval or “almond”. When choosing a shape, you should not be too zealous, since the “stiletto” shape will not suit wide nails due to the too pronounced contrast of the wide upper part and the extremely narrow lower part. It is better to perform all stages of work with a thin file or fissure cutter, also with a “flame” cutter - it is especially suitable for cleaning out the pterygium. 6. Raising the “pecking nail”
.
First, reduce the length slightly, maintaining the shape, for example, a “soft square”, then process the sinuses with a milling cutter with a red notch, it is best to do this with a fissure attachment. Use gentle movements to clean out the pterygium. Then remove the sawdust with a napkin. Also work on the cuticle area. Then trim the overgrown cuticle with clippers or nail scissors. In the second stage, apply a thin layer of base and dry. Then, using acrylic, distribute its bulk closer to the end, and also work on the transition zone from the artificial coating to the natural nail. Next, level the material on the surface as much as possible. After drying, carefully file away any excess acrylic. If the end is too thick, trim it with a cutter and make a beautiful arch. Polish any minor roughness with a buff. The “pecking” nail is aligned and ready for applying a decorative coating. 7. Wet nail plate.
Hyperhidrosis of the nails can affect the duration of wearing the decorative coating, so it is extremely important when working with this type of nails to take into account the following several rules: Degrease with a dehydrator, using gentle circular movements.
It is necessary to strengthen the nail plate with acrylic or sculptural biogel. When choosing a decorative coating, it is better to suggest using hybrid gel polishes; such materials absorb excess moisture and adhere perfectly to such nails. 8. Thin nail plates.
There are many reasons for the appearance of thin nail plates, the main ones being:
- Lack of vitamins and microelements.
- Hormonal disorders in the body.
- Mechanical damage.
- Exposure to chemicals.
- Frequent use and removal of artificial turf.
What to do about it?
- Review your diet or diet.
- Use vitamin and mineral complexes.
- Use strengthening baths of oils or sea salt.
- Conduct paraffin therapy sessions.
How to work with such nails?
It should be remembered that such nails are susceptible to peeling, and accordingly the artificial coating will peel off and chip. Therefore, it is better to wait for their condition to improve. But what if you need beautiful nails now? There are two options for finding a solution for such marigolds:
Strengthening nails with a hard material, such as gel, acrylic or acrylic powder.
We will describe step-by-step instructions for strengthening thin nails using acrylic powder.
This scheme is quite simple and popular, so we decided to choose it. 1. Degrease the nail. 2. Apply a primer, depending on the situation, apply the composition only to the free edge area or along the side ridges, or for better adhesion, cover the entire nail plate with it. 3. Apply a thin layer of base coat. 4. Without drying, immediately begin applying the powder with gentle movements using a brush or manicure spatula, making sure that the powder covers the entire surface of the plate as evenly as possible. 5. Remove excess powder and dry in a UV lamp. 6. After polymerization, treat the nail with a manicure brush to remove any remaining acrylic powder. 7. Now your nails are strengthened and ready to apply colored gel polish. A very thin coating of the most flexible gel polish.
Technique: 1. Apply a plastic base, the layers should be as thin as possible so as not to lose plasticity, because the material will be a kind of damper and will move along with the natural nail.
Dry in a lamp. 2. Apply the same plastic gel polish in the same thin layer, because the thicker the layer, the less mobile the coating will be. The best choice would be a pigmented gel polish to get the most rich color with a minimum layer. 3. Using the same principle, select the topcoat, because a “hard” topcoat will simply crack. And it will happen very soon. Alas, even this coating will not “live” longer than two weeks. 9. Gardener's nails.
Such nails are characterized by breaking off the nail plates, rubbing or irritation of the skin around the nails or cuticles, soil, grass and other debris get clogged under the plate. How to work with “handles from the garden”? We offer brief instructions:
- Remove the old coating with a milling cutter.
- Clean dirt from under the nail plate and side ridges. Use a pusher or hatchet for this. In particularly difficult cases, the skin will need to be steamed in a special bath. After this, a classic trimmed manicure procedure is carried out using hand tools.
- Remember that you should never work with steamed skin or wet nails using a manicure machine!
- Using a ball cutter, remove light calluses and cracks from the side bolsters.
- Carefully trim the cuticle with nail scissors.
- Additional modeling may be necessary, especially for the corners of the nails, which very often fall victim in the unequal fight against weeds. For this, you can choose fiberglass; this coating is resistant to damage. Then dry it in a lamp and remove the excess length.
- Then you can apply gel polish. To the taste of the client or master.
Well, we have analyzed the most common cases of “complicated nails” and described the procedure for working with them. We hope that our recommendations will help you cope with all the difficulties. Have beautiful marigolds.
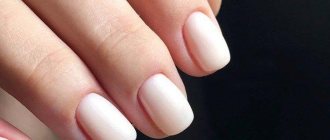
Options for every day
The best manicure for every day has the usual requirements:
- It should suit any style and clothing. Then the coating will not have to be changed often
- It should match the tone of your clothes or makeup. Color may vary, but cool tones will look tasteless against warm ones.
- The manicure should be perfect: there should be no broken ends, hangnails, dry cuticles or calluses.
In terms of neatness of manicure, a striking example is the Duchess of Cambridge Kate Middleton, who is famous for her love of household chores. She has been spotted more than once with bandages on her fingers, which suggests that she is no stranger to minor household injuries. But no one has ever seen her with errors in her manicure.
Advice. To keep the nail hole and cuticle in perfect condition, this place just needs to be lubricated with oil every evening. Then hangnails or dried skin will not appear.
Ideas for the best daily manicure:
- Classic French
- Using Camouflage Varnish
- Beige or pink colors
- Red or burgundy color combined with glossy or matte textures
- Decorate one nail on the hand with 1-3 rhinestones or stripes.
Advice. When using bright red nail polish or gel, you should always have a remover for removing such coating at home. Since a piece of nail or polish can always break off. In this case, you can quickly fix everything in the evening.
Important! Pink color is not suitable for all nails. On wide fingers or square nails it will create a rough and simple effect.
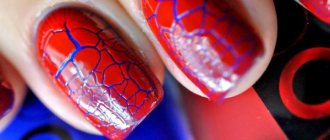
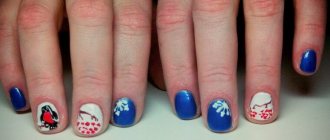
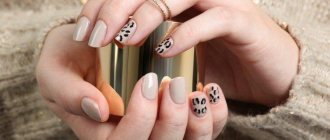
Unusual oriental manicure - a stylish hit in 2022
The world of the East is diverse and unique, represented by many national cultures and traditions. They agree on one thing: amazingly beautiful patterns, bright colors, abundance of gold and precious stones invariably attract admiring glances.
This season, spectacular and creative combinations are in fashion, using a variety of techniques:
- a combination of rich, rich colors, gold, silver and sparkling jewelry;
- shiny, elaborate patterns on a dark or light background;
- recognizable national motifs, symbols of ancient teachings;
- large, catchy decor.
Not all women have the opportunity to travel to distant countries. But, you can give yourself a piece of magic and exoticism by getting an appropriate manicure.
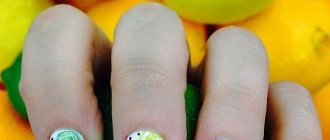
How to make at home
One of the simplest, most accessible methods is a simple drawing with black thin lines on a pastel background. You will need a set of varnishes, black acrylic paint or a gel pen, and a thin brush.
- Apply the base to the prepared plates and dry.
- Then add a layer of colored varnish (white, cream, pinkish, beige, soft turquoise, greenish).
- After drying - painting. Using gentle movements, apply thin, even curls in the form of “snails” or fern sprouts.
- When finished, the picture is covered with a layer of fixative varnish, and everything is dried under a lamp.
You can optionally complement the image with rhinestones, crystals, splashes of contrasting or gold color.
View this post on Instagram
Posted by Unreel (@extremeofficial)
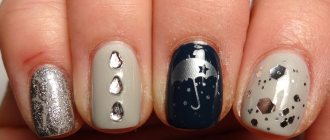
Evening options
The best evening manicure involves the use of rhinestones or sparkles. It is also important here that such a manicure is quite strong. To do this, place glitter at the base of the nail. In this case, they are less likely to hit anything while moving.
Ideas for evening manicure:
- French with silver or golden sparkles on a camouflage, pink or beige background
- Red manicure with golden rhinestones
- Plain red or purple coating of different textures
- Camouflage varnish with red jacket and rhinestones
- Gradient glitter from the middle of the nail to the base or tip
- White sparkles on a pink background
The special property of this manicure is that, thanks to sparkles and rhinestones, it looks elegant, but is appropriate for ordinary business days.
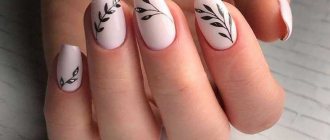
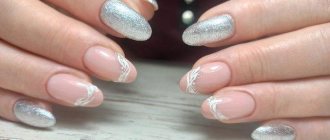
Nail design with stripes and lines: photo 2022
A beautiful manicure with stripes and lines is a stylish nail design in a minimalist direction that goes with any look. A manicure with stripes and lines looks great on nails of different lengths and shapes. The stripes in a manicure can be different; most often, dark colors of stripes with a nude base are chosen.
The best manicure for different lengths
The length of the nail plate also matters for manicure. On meek nails, it is important to clearly emphasize the boundaries of the plate, which can be done with the help of bright varnish. For long nails, care, timely filing and correction are more important.
Long nails
Colors and designs for long nails can be your favorite as any ideas look stylish on this shape. Long nails make hands more graceful and delicate.
However, to make them look perfect, it is important to follow a few rules:
- The colors should be subdued, so the nails will look more elegant.
- If the plate is your own, natural, it must be moistened often. To do this, you need to remove the covering and make masks on your hands.
- If your nails are extended, you should never skip correction. Otherwise, your nail plate will experience excessive stress. As a result, the nails can either break or move away from the bed in several places.
- For long lengths, a monochromatic coating in natural tones looks best.
- Gradient of classic colors: from pink to purple, from pink to red or from white to beige.
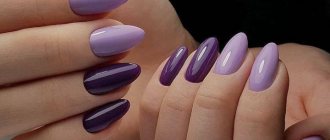
Medium nails
On medium nails, natural manicure and bright colors look best: red, purple, burgundy, black.
Ideas for the best manicure for short nails:
- French in any design from natural tones to red-golden shades
- Matte finish in bright colors combined with highlighting several fingers with camouflage varnish
- Active use of glitter, rubbing or rhinestones. The glitter gradient looks especially beautiful.
Short nails
It is customary to highlight short nails and highlight them with bright varnish. This way the nail plate takes on a clearer outline and becomes more neat.
Options for the best manicure for short nails:
- Clear polish or gel
- Red or burgundy monochromatic manicure
- Black finish or combination with camouflage varnish
- Nude shades combined with red or black
Every beauty has her own best and proven manicure options that make her beautiful every day.
Most often these are classic options, but sometimes it’s worth experimenting with them, which will add a touch of freshness and playfulness.
Shape modeling and nail extensions
Not every master has encountered difficult hands, but we are sure that every master wants to make difficult hands beautiful! imkosmetik master technologist Elena But took on the complex hands of a model who had almost never seen a manicure in 18 years.