Are you interested in unusual and original nail designs, but don’t know where to start and think that only professionals can do it? I hasten to please you: most of the most beautiful and fashionable new nail designs of 2022 are performed by amateurs using simple tools at home.
In our article, we will describe in detail the techniques for creating designs on nails: from simple to those that require some experience, we will tell you what tools you will need and where to buy them, and also share the most current ideas for autumn and winter 2022 and links to nail bloggers who set trends in the field of nail design, so that you are always up to date.
So, how to make a design on your nails? Let's start with a review of techniques for performing various drawings:
Polka dot manicure
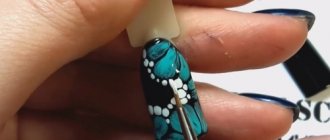
To create a polka dot manicure, you will need a special tool - a dotter, which, depending on the size of the ball at the end, creates large or small peas. Dotters are not expensive and are sold in sets on Aliexpress. You can also buy them in manicure stores, but there they cost several times more.
With the help of a dotter, in addition to the usual pea pattern, you can create floral patterns, scales, leopard, marble and lace patterns, and animal faces. The thinnest dotters can be used together with needles or toothpicks to perform stretching actions. Below, I will give a few examples of the various uses of dotter:
A very cute manicure that reminds us of the coloring of a ladybug can be done with, you guessed it, dotters of various sizes.
The combination of the gradient effect and uniform polka dots looks very nice,
The reverse strategy also works, when the effect of a color transition is created by using different shades of varnish on the dots themselves. It's important to note that you don't have to have a lot of polishes in different colors: for a smooth transition, apply a few drops of the darkest shade to a surface from which the polish can be wiped off and add 1-2 drops of white polish.
You can also use contrasting colors of polka dots to create a dynamic, bright manicure.
Another trend for 2022 - geometric moon manicure can also be easily done using a dotter.
As I mentioned above, you can create complex floral patterns using polka dots; in the video below you can see the creation of a similar manicure in practice.
A leopard print design can be created very simply and quickly using a dotter. In this video, the blogger uses regular acrylic black paint (can be bought at an art or children's store) instead of black varnish, which happens quite often, since it is convenient to paint with paints (they don't dry out longer, have a less pungent smell and are cheaper than varnish). Using acrylic paints, the process of creating a manicure is not much different from creating a painting and you can feel like a real artist
In the video below, a dotter and a toothpick are used together to create a lace manicure that looks very complicated, but watch it and see how simple it is.
Another example of an elegant manicure created using dotter
Drawing on nails in the form of fish scales or a “mermaid tail” can also be done using a dotter - step-by-step instructions below.
An example of using the smallest dotter to create a stunning manicure (I think it won’t turn out so beautiful right away, but practice will do its job). By the way, I highly recommend following Instagram @Sveta_Sanders - our compatriot from Smolensk does an incredibly beautiful manicure, collaborates with the famous brand of nail polish manufacturers PicturePolish, and in general, sets fashion trends in nail fashion on an international scale.
#videotutorial #PicturePolish Twinkle & Black, Tool for marble by @picturepolish @lakodom Music: Calvin Harris feat. Ellie Goulding – Outside
A post shared by Sveta Sanders (@sveta_sanders) on Aug 18, 2015 at 12:23pm PDT
As you can see, with the help of dots you can create many different designs on your nails; remember such a direction in painting as pointillism, in which entire pictures were painted with dots
Matte manicure
Luxurious notes of floral nail design look great in a matte finish or a combination of matte and glossy finishes. The matte floral manicure proposed by designers this season can complement the image of any fashionista with magical and mysterious notes, because both bright and calm shades in the design look equally beautiful in this style. To complement the matte finish of gel polish, you can use rhinestones, glitter or foil. This technique will diversify the manicure with spectacular contrasting details and complement the nails with a chic shine.
Nail stencils
Our article is for beginners, so first let’s take a closer look at these techniques for creating nail designs where you don’t need to draw :). One of these techniques is the use of stencils (nail vinyls), the choice of which is expanding every year. Now we have access to not only zigzag (in English this pattern is called chevron) stencils, but also various seals, hearts, spirals, anchors, etc. As you can see from the picture below, all you need to do is:
- stick stencils,
- apply a second coat of varnish,
- peel off the stencils
- ready! (don't forget to apply top coat)
The stencils have one drawback: they are not that cheap, for example here they cost $5 per sheet of stickers. Cheaper on Aliexpress and Bornpretty. Nail designs created using stencils turn out neat and clear, and the simplicity of the technique opens up a lot of scope for imagination and experimentation.
A technique close to stencils can be considered to be creating a manicure using a thin manicure tape; you can read about this method here.
Features of extended marigolds
To create extended nails, acrylic, gel or biogel are usually used. Tips or special disposable forms are used for the base. Acrylic nail extensions are considered the cheapest. But this type of material has a significant disadvantage - it emits an unpleasant, slightly chemical odor in the first days after a manicure. Also, acrylic quickly loses its shine, which will not have a very positive effect on the design of your nails. But it preserves the health of natural marigolds.
@viktoriya_chernienko @katya_magic_nails
@viktoriya_chernienko
But acrylic is significantly inferior to gel nail extensions. A manicure with gel polish is considered average in cost. With its help, watercolor and aquarium drawings are created, and the gel is dried under a special ultraviolet lamp. The shine of a manicure with transparent gel or colored gels lasts for a long time and looks very impressive.
@nikastudio_nails
@tatiana_kostiuk_4508
@elegant_director
@1001_nail
For extended nails, biogel is also used - the most expensive and highest quality of materials. To design nails, use biogel made from natural ingredients. It is used not only for extensions on natural nails, but also to strengthen your own nail plates.
@gadinalife_nails
@zulfia_nail_art @zulfia_nail_art
Thus, you need to choose which material to cover your nails with. If you have difficulty with a solution, seek advice from a specialist.
@nestea_nailart
@uliana_nails_temirtau
@maya_mynails
Stamping
The stamping technique is very simple and involves transferring an impression from a special stencil plate onto the nails using a stamper. In the photo below, you can see a stamper (here it looks like a lipstick, but stampers come in different shapes and are made from different materials), a scraper, 3 stencil plates with designs for transferring to nails and polish. Typically, a stamping kit includes only a stamper and a scraper, and stencils can be purchased separately based on your preferences.
The simplicity of the technique and the huge selection of patterns or designs (from floral patterns to Mickey Mouse comics) with which you can decorate your nails make stamping one of the most popular ways to create designs on your nails. We devoted an extensive article to stamping, in which we talk about all the nuances of this technique, so here we will limit ourselves to a short video and manicure ideas.
Ideas for nail designs using stamping:
I can honestly say that many nails give me a nagging feeling of white envy, they are so beautiful!
By the way, some of the photos below use the reverse stamping technique. We talk about the features of this method in the above-mentioned article about stamping, as well as how to use a stamper to create a marble effect on nails (water marble nail design) and much more!
(the two photos below use the reverse stamping technique)
Perhaps you noticed the widespread use of gradients? If you don’t know how to achieve the now fashionable ombre effect, read our article (hint: it’s very simple!).
Painting on nails
A somewhat labor-intensive and complex technique for beginners, which, however, opens up endless possibilities for creating an original manicure. It is important to understand that the first time you will most likely get it a little crooked, but, firstly, this has its own charm, and secondly, over time you will notice obvious improvements and will be proud of yourself
So, let's start with the tools necessary for drawing:
- Set of brushes. On AliExpress or in a manicure store you can buy a set or individual brushes for creating designs. To begin with, you can buy one of the thinnest brushes, it will help you create subtle floral and ethnic patterns, all sorts of faces, smiley faces, Shabby Chic roses, stripes, zebra, leopard, etc.
- (optional) Acrylic paints . Acrylic paints are often used instead of varnishes to create different designs on the nails (they are cheap, dry quickly, have a large palette and can be easily mixed to obtain the desired color, lie smoothly on the nail, etc.)
- As with other types of manicure, in addition to varnish, you will need a base and top coat . The base will allow the polish to lie flat and not harm the nail, and will smooth out any unevenness. The top coat will make the pattern smooth and shiny, and also protect it from rapid chipping. Do not neglect the base and top coat for a regular manicure in one layer, so your nails will remain healthy and strong longer, and your manicure will last longer.
- If you are going to add rhinestones, beads, studs, etc. to your manicure, then you will need special glue .
Let's look at how to make simple designs on nails step by step:
Rhinestone inlay
Rhinestones and chic crystals are unconditionally recognized as a stylish and very beautiful addition to an exquisite floral manicure this season. This stunning tandem is a wonderful addition to an already impressive design, and can act as an accent on one or two nails or be placed on all fingers. Sparkling decorative elements are wonderfully combined with designs and look original on any part of the nail plate, are laid out in original patterns and look no less chic as a single decoration.
Roses in Shabby Chic style
To create these adorable roses you will need shades of pink/red polish, green polish and a thin brush.
- Paint your nails and let them dry
- Apply a few spots with your original varnish brush and let them dry a little
- Now, with a lighter varnish (you can make it yourself if you mix, for example, pink and white) paint the petals
- Add color accents with the darkest polish to make the roses look three-dimensional
- Draw triangular shaped leaves
- After the drawing is dry, cover it with a top coat.
As you can see, roses can also be created in one color. They certainly don't look like works of art, but anyone can draw them.
Video on how to create cute roses
See what a wonderful vintage manicure you can create without leaving home, using the simplest means:
You can decorate everyone's favorite French manicure with roses.
Leopard or zebra
We described the process of creating a leopard pattern in detail here and above in the article (using a dotter). Drawing a zebra pattern on your nails step by step is also very simple:
However, everyone draws the zebra pattern differently (and it turns out great every time!):
In this article, we tried to tell you how to make nail designs simply and at home. Of course, there are a great many different manicure options and new trends appear literally every week, so if you like the original manicure, you can subscribe to the newsletter, instagram, twitter, youtube channel (whatever is more convenient for you) of your favorite nail blogger and follow the latest news.
