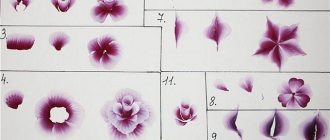
It is impossible to imagine a modern woman without well-groomed hands. Most ladies try to keep their nails in good condition. Due to the constantly high demand for manicure, techniques for creating it are constantly being developed and improved. In this article we will talk about how to draw monograms on nails step by step. This will allow you to learn how to do it yourself. The material will be useful for beginners.
What types of monograms are used on manicures?
Monograms can be considered classics. They decorate the manicure, making it expressive and elegant. With such patterns, not only an everyday manicure will look good, but also a holiday or even a wedding one. So it’s worth learning how to do it.
It is worth noting that the curls on the nails may be different. Depending on their type, the following types of monograms are distinguished:
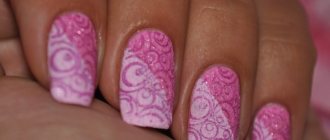
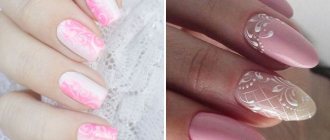
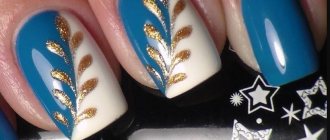
- French. Such monograms are usually applied to pastel colors. Sometimes they do a French manicure underneath. Such curls are drawn on the side of the nail plate. They look neat and gentle, as they frame the space on only one side.
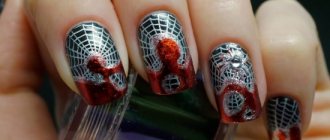
- Original. Such curlicues are drawn outside of any rules. Usually, this is a flight of fancy of the master. Monograms can be bold and shocking. Most often they are applied to extended nails.
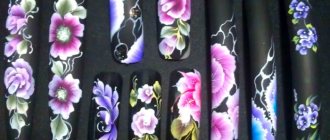
- Modern. This is an even more interesting option. Such monograms are painted on the entire nail plate. A different picture is made on each nail. The result is a varied and very original manicure.
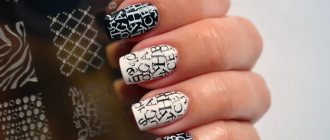
- Initials. The capital letters of the name are drawn on different nails. Graphics can be very quirky and interesting.
It is worth noting that there are no clear criteria for drawing monograms. Curls can be drawn the way you want. The main thing is that they look neat and not blurry. You can use a ready-made pattern to create a manicure or come up with something of your own.
What are monograms
If you turn to the explanatory dictionary, it says that a monogram is an interlacing of the first letters of the first and last names. Previously, such curls were the prerogative of noble ladies and were used for embroidery and printing.
When creating the first decorations on nails, manicurists turned to nature: the graceful interweaving of grapevines or strawberry tendrils formed the basis of the first patterns on nails. In the art of nail art, a monogram is any interweaving of thin lines, the ensemble of which forms an intricate pattern. Manicure with curls is actively used when creating wedding and evening looks, as well as in everyday life.
How to draw monograms
There are a lot of techniques and techniques for applying monograms. In this section we will touch on this topic and tell you the best way to draw such patterns.
Brush
With this tool you can draw nice curls. True, this will be very difficult for a non-professional to do. After all, you need to make sure that there is not a large amount of varnish on the brush. This is important so that it does not spread or smear. The material must be applied carefully. A novice master will not succeed the first time.
Painting with a brush has one advantage. With it you can draw whatever you want. You can make any fantasy come true.
Ready-made plates with patterns
They make drawing monograms easier than ever. You will succeed the first time. There are many options for such plates. They are not expensive. You can purchase several products at once so that you can later choose the optimal combination of curls.
Stencils
Drawing monograms is also easy with them. You can purchase different stencils and combine the resulting patterns. It is also convenient to use homemade products. They can be made from anything.
The advantage of stencils is that with their help you can achieve almost perfectly identical designs on all nails. Also, with these devices it becomes possible to give yourself a beautiful manicure.
Stickers
With their help, it’s easiest to create a manicure with monograms. You just stick on the patterns that you like. Such monograms should be applied on a transparent base or on a plain varnish. Everything is covered with a fixative on top.
There are a lot of stickers made for manicure. They are varied. You can choose products of any color scheme, choose an option to match anything.
This method of doing a manicure with monograms is suitable for beginners. It does not require any special skills.
Spot application technique
To complete it, you also need to “get your hands on it.” Dots are drawn with a needle or toothpick. This way, a minimum of varnish is collected. It doesn't blur. Patterns made in this way are the most accurate and subtle.
It is best to make monograms on your nails with gel polish. It lasts a long time and looks fresh even several weeks after application. Acrylic paints also work well.
What are they?
Kinds
Monograms and monograms can be simple or complex, depending on the number of initials. A simple monogram is one that belongs to one person. Complex monograms are those that have several initials from different people and a family surname. Complex monograms and monograms were previously passed down by inheritance, from one generation to another, and were applied to jewelry, dishes, furniture, etc.
Interesting on the topic: Creating a logo for a furniture factory in ancient Greek style
Now let’s take a closer look at each of these types of monograms.
Personal monograms
This type of monogram can consist of one letter, usually the initial letter of a name or surname, or of two, for example, for Alexei Zaitsev it can be either “A” or “Z” or both letters intertwined together.
Monograms and three-letter name monograms are more popular in the Russian-speaking environment, which is explained by some cultural characteristics, because in Russia a person is often called by his first name and patronymic. When developing monograms, the letter of the surname is made a little larger, or may stand out in some other way.
Family monograms
Couple (family) monograms are very popular these days as a wedding attribute; monograms are used when designing invitations and business cards, for decorating a wedding hall and cakes, and wedding processions.
Either one letter is signed - the initial letter in the surname of a young family, for example, for the Ivanovs - “I”, or two, intertwined from the initials of the spouses’ names. The most common and frequently encountered are paired Russian monograms, consisting of three letters, arranged in a special way: the initial letter of the female name comes first, followed by the first letter of the couple’s surname, and at the end the first letter of the man’s name.
Female or male monogram?
When designing a monogram from Russian letters, you should remember some generally accepted rules: Male signs are made only from block letters; calligraphic obliques are used to create symbols for women; in a woman’s monogram, the first letter will be the initial letter of the name, followed by the largest letter of the surname, and at the end the letter of the patronymic (the same size as the name); in monograms for men, the size of all three letters is always the same; if a man's monogram consists of two characters, then the name is written first, followed by the surname, and the size of the letters is the same.
Interesting on the topic NURA - a neat sans serif font
How to draw monograms on nails: step by step for beginners
In this section we will talk about how to draw monograms on nails step by step; the video at the end of the article will complement your knowledge. We will try to make all this interesting and educational for you.
Step 1
This is the preparatory stage. Before applying anything to your nails, you should get them in order. To do this you need:
- Remove cuticle. Without it, the nail plate looks neater.
- Create a shape using a nail file.
- If necessary, straighten the nail plate.
- Degrease so that the varnish applies evenly and lasts longer.
All these steps are important for a successful manicure.
Step 2
Apply the first layer of varnish. This can be a plain base or a transparent option. It all depends on the composition you come up with.
Wait until your nails are dry. You can speed up the process using ultraviolet light.
Step 3
Select the tool you will work with. As we wrote above, this could be:
- brush;
- needle;
- stencils;
- plates;
- stickers.
The next step will depend on what you choose.
Step 4
Carefully apply the design. If you create it manually, then start from the side of the nail plate. Gradually move towards the middle and base.
If you paint monograms on your nails with acrylic paint or gel polish, then dry all the elements step by step under ultraviolet light. This will keep the pattern neat.
Step 5
Use decorative elements, if desired. It can be stones, rhinestones, sparkles.
Step 6
Secure everything with an additional layer. This will increase the durability of the manicure. Dry the nail plates so that the layers do not mix and float.
So what are the main differences?
Affiliation
A monogram can represent several owners, while a monogram can only represent one.
Artistic richness
The monogram carries much more patterns, heraldic symbols and other additional information. Monograms are simply intertwined initials.
Playback
The monogram can be displayed manually, while the monogram will be much more difficult to reproduce.
Interesting on the topic Basics of web typography
Several interesting manicure options with monograms step by step
About drawings on nails with dots at home
In order to get a manicure, you don’t have to go to a salon or make an appointment with a master who works at home. If you have some experience in creating designs on nails, then you can safely get to work, but still do not overdo it, because everything should be in moderation. Before doing a manicure, it is advisable to practice creating a design, so as not to ruin the entire manicure later.
Can be done at home
So, we discussed the types of dots, how to use them correctly, the technique of creating drawings, and whether it is possible to work at home.
What you should know about painting with a brush
You can create simple monograms on your nails step by step with a brush, even if you haven’t done this before. It may not be possible to do everything neatly right away, but a couple of training sessions will correct this.
What should you keep in mind when getting started?
- Use just a little bit of polish. There should literally be a drop on the brush. You will then stretch it into stripes. In this case, there will be nothing superfluous on the sides.
- The brush for drawing monograms should be thin and elastic. This is exactly how it will be convenient to work.
- Before applying paint, the tool must be formed with your fingers. A thinly folded pile will pick up just a little liquid.
- If you want to draw complex monograms, then do it gradually, drying each curl with ultraviolet light. This will take a long time, but it will be of high quality. The pattern will be really clear.
- Don't go overboard with the decor. It is difficult to do this when drawing from a stencil. But when applying curls according to your imagination, you can overdo it without noticing it.
Having learned to draw patterns with a brush, you will be able to create a beautiful manicure at any time, even when you don’t have stencils or other tools at hand.
Monograms for beginners
Tool
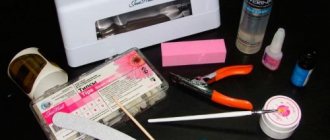
To create a beautiful drawing, you will need a special brush for drawing monograms, number 000. This brush will be convenient for drawing any patterns, which will allow you to create a drawing quickly and without any problems.
You will also need a taper brush with thin, long bristles and dots. Such tools will allow you to draw the finest elements of the monogram, and with the help of dots it is very easy to make circles or dots.
You will also need acrylic paints.
Monograms step by step
This section contains 19 photo instructions on how to draw monograms in a step-by-step manner. The most important thing is not to be afraid to start, and then you will be able to draw any drawing without problems.
Sketches of monograms
A selection of ideas for monogram drawing will help you create your own masterpiece, which will delight you with its ornate and whimsical pattern.
What paint to choose for drawing monograms
First of all, it should be thick enough. If the paint is liquid, it will start to spread. Then nothing will work out at all. Moderate density is especially important if the brush has synthetic bristles that are poorly absorbed.
For a core brush, you can use thinned acrylic paint. The usual varnish of the corresponding color is added to it. The proportion should be 40:60.
Gel polish is also often used to paint monograms. It's convenient to work with him. It then lasts for a long time.
About the secrets of using Dots
When using dots, there are some secrets that both beginners and experts need to know. In order to properly use a tool such as a nail dot, you must strictly follow several rules.
Follow the rules for using dots
It is possible that deviation from these rules will not affect the quality of the drawing, but it is advisable to always follow them. Simple but clear instructions will save you time:
- first you need to cover your nails with the usual composition of varnish;
- Apply a little varnish to foil or a small plastic container;
- lower the stick into the dye strictly perpendicularly;
- Apply the design to the nail, holding the dots strictly perpendicular.
Draw monograms on nails step by step using a brush
Painting monograms on nails with gel polish can be difficult for beginners, but step-by-step photos will help you do it.
- Tidy up your nails. We have already written about this stage above.
- Start drawing. Apply a minimal amount of polish to the brush.
- Pull the tool to stretch the gel polish.
- Draw a small curl on the side of the nail plate. Let it be round. Try to do it carefully.
- Draw a smaller curl next to it.
- If desired, you can make the pattern more voluminous by adding a few more elements. But you shouldn’t try too hard. It is important that the manicure looks neat.
- Make a symmetrical pattern on the finger of your other hand.
If you are still studying, you can stop here. A finger on both hands is enough to add some zest to your manicure.
- Dry your manicure.
You can take monogram patterns for nails from the Internet. There are a lot of options there. Draw with step-by-step photos. This will make it difficult for you to do anything wrong. Practice on yourself, your friends, your neighbors, and over time you will become a professional.
Training cards for painting monograms on nails
Training cards will be a great help for girls who are just learning the art of manicure. Thanks to them, you can hone your skills and accurately apply patterns on your nails.
Of course, there is an alternative to drawing - stencils or stickers, but real creativity brings much more pleasure. This kind of work is unlikely to ever get boring.
Training cards will be an excellent training tool for painting nails for beginner nail artists. This attribute is a sheet that depicts a pattern applied to different nail shapes. Thus, not only the skill of drawing monograms is developed, but also the correct construction of proportions.
