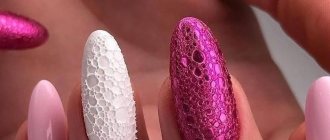
All girls dream of a perfect manicure, but creating it requires spending a certain amount of time and effort, which we sometimes don’t have at our disposal. False nails are an ideal option for girls who want to get beautiful tips with a great design in a few minutes. Learning how to glue artificial plates will not be difficult, since the technology for applying and removing them is quite simple.
In order to create an impeccable manicure, you just need to watch the video tutorials presented in our article. Correctly glued false ends will delight you with their impeccable condition for 7-10 days. Sometimes, looking at photos showing artificial nails, it is not always possible to distinguish them from natural ones, since they look very natural and harmonious.
Types of false nails
The modern nail art industry does not stand still, and now there are two types of false nails: standard plastic tips that sit on glue, and hard varnish. In our article we will tell you more about these varieties, each of which has its own advantages and disadvantages. We will advise you on what to pay attention to if you want to know how to glue false nails on a child. And for those who are going to glue artificial nail plates on their own for the first time, we will provide a step-by-step guide based on a video lesson. You will learn everything not only about how to apply, but also how to remove false nails without harming the natural plates.
Standard plastic nails
Artificial nails are plastic overlays that are placed over natural plates and fixed with special glue. Photos of false tips that have a beautiful design look very harmonious if you glue them, following the basic rules.
This type of marigold has its advantages.
- Fairly reasonable price.
- Properly performed technology allows you to count on excellent results that will delight you for up to two weeks.
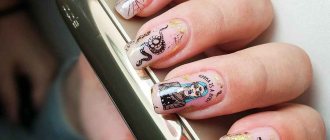
- The set of false nails includes plates of different sizes and glue. The nails themselves can be transparent or milky in color, and all sorts of pictures and patterns are depicted on their surface. You can purchase a ready-made design or decorate your nails yourself by choosing your favorite nail art from the numerous photos on the pages of our website.
- Apart from a great manicure, you can create a great pedicure by applying false toenails.
Many girls do not like to use false nails because the glue can cause an allergic reaction. This is perhaps the key drawback of this technology.
How to make false nails using glue?
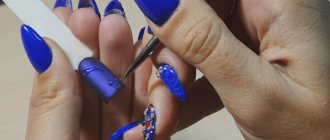
In order to attach artificial nails to your natural ones using glue, you need to know some of the subtleties of this procedure. Step-by-step instructions based on a detailed video lesson will help you quickly master the simple technology.
- First of all, you need to prepare the surface of your natural nails by sanding it with the soft side of the polisher. This is necessary in order to remove the top fat layer. Failure to comply with this rule has serious consequences. If you glue false nails onto an unprepared surface, they may quickly fall off .
- You should carefully consider the selection of plates suitable for the shape of each nail. Since it is more difficult for beginners to navigate, they can try on several nail options right in the store or seek help from a consultant. Do you want to know how to glue false nails so as not to mix them up while working? Take this simple advice. Outline both hands on paper, and place artificial plates selected in size and shape on your fingertips. Such auxiliary pictures will not let you get completely confused.
- When attaching false nails at home, keep in mind that most of the glue is applied to the natural plate and only a drop is applied to the artificial material. This way your nails will last long enough. In addition, on a perfectly smooth and even surface, you can create any design that will look great, as if from a photo of a fashion show. Consolidate your knowledge by watching a video lesson.
How to remove false nails yourself?
The procedure for removing false tips is quite simple and consists of the following steps.
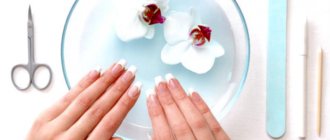
- Before peeling off false nails, you need to moisturize your hands well. A warm bath with chamomile infusion, which will protect the skin of your fingers and nails while removing the plates, will do the job perfectly.
- In order to painlessly remove artificial ends, you should drop a little nail polish remover under the upper edge of the plate.
- Then try to separate the plastic nails with an orange stick. To do this, insert the tool between the natural and artificial nail using loosening movements. If after this the false nails still do not come off, then moisten a cotton swab generously in varnish solvent and apply it to the transition border of the nails. Wrap your fingers in foil to prevent the liquid from evaporating. After half an hour, begin to separate the false ends. Now you know an easy way to remove false nails, and you can safely experiment with manicure.
French glitter
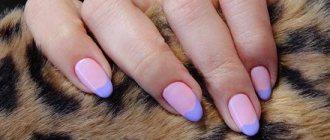
A very popular, but at the same time accessible to any beginner, type of manicure is a French manicure using glitter. To achieve perfect execution, you need to trim your nails in advance, treat the cuticles, you can apply cream to your fingers, so that later it will be easier to remove any remaining polish and glitter that has gotten on the skin around the nail. After applying the base varnish, you can limit yourself to only transparent varnish, or you can use something brighter, you need to give it the opportunity to dry well, and then start applying glitter.
Hard varnish or Impress manicure
Today, artificial nails are still used, but increasingly this technology is being replaced by a newer trend in nail art called “hard varnish.” Many girls prefer this type of false nails because this improved method is convenient and practical. Impress manicure has a number of advantages.
- This technology is famous for the fact that the plates are attached without glue, but with the help of a special sticky biomaterial applied to false nails from the inside. Sometimes an adhesive pad is used for adhesion, which is applied to a natural plate, and a hard varnish is fixed on top. If you don’t yet know how to apply false nails quickly and easily, then this method is just for you.
- Solid varnish looks very natural. As a rule, these artificial nails are short in length and cannot be distinguished from natural tips. This coating will harmoniously complement your look, no matter what design you choose.
- Impress manicure is wonderful because in its collection any fashionista can find a design that suits her. You can see several options for finished nail art in the photo.
Photo gallery of nail art with glitter
Having chosen the most convenient way of working for you and mastered the technique of applying glitter to your nails, you probably want to get ideas for a manicure with glitter. As with any nail art, the choice of design can be very varied and unpredictable. This applies not only to the color scheme, but also to the quantity and shape of the glitter. Next, we bring to your attention a collection of photos of nails with glitter.
The first nail art that deserves your attention is a black manicure with glitter. Dark polishes as a base color are a great base for silver or gold glitter on your nails. It is the silver color scheme that is most popular when it comes to glitter decor. In turn, a manicure with gold glitter looks very solemn and luxurious on the nails, as you can see by looking at the photo.
Blue glitter manicure is another very popular nail art. Its distinctive features are versatility and variability, which are achieved through a wide range of colors and many shades. For example, a blue manicure with sparkles will look lighter, airier and is perfect for the spring-summer period. But a lilac, lilac or violet manicure with sparkles creates a completely different mood and is more suitable for autumn nail design.
Red manicure with glitter is a favorite design of many women, which is often associated with holidays and special events. Young girls are much less likely to do red or burgundy nails, preferring a more delicate pink manicure with glitter. Pink nails can be sprinkled with fine pinkish glitter of a similar color, golden or silver sand. Burgundy manicure, richer red and wine shades harmonize best with gold accents on the nails.
Are you interested in a manicure with glitter that is not so bright and flashy, but, on the contrary, more delicate? In this case, pay attention to white, beige and gray colors - a light manicure always looks more gentle and elegant. A white manicure is almost always complemented by silver particles; in the case of a gray design, gold and metallic glitter are also possible. A beige manicure with glitter deserves special attention. In addition to the fact that this nail art looks very gentle and stylish, it is quite versatile and can be done not only for a holiday, but also for everyday wear.
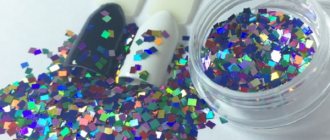
Almost all of the designs discussed so far were made using fine glitter in the form of sand. A manicure with large sparkles looks no less interesting - this is an excellent choice for those who want to create a brighter nail art. By the way, many modern manufacturers have varnishes with large sparkling sparkles in their collection, so you can create nail designs very easily and quickly.
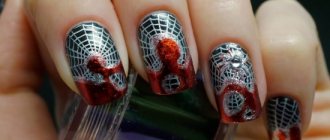
We have not considered all the design options for manicures with glitter, because there are an infinite number of ideas, and nail art is not limited by any boundaries. Your fashionable manicure can be complemented with a beautiful pattern or neat rhinestones. The combination of varnish shades and glitter colors offers thousands more options. When creating nail art, be guided by your own taste and individual ideas about style. You can see some more cool ideas in the photo of a manicure with glitter.
You don't have to have shiny nails on every finger. Get creative and combine several techniques at once. Focus on one finger or make each nail unique. Using glitter polish or dry glitter, you can come up with an amazing array of great designs.
To inspire you, we offer you to watch several wonderful videos, the authors of which will show you step by step the process of creating a beautiful manicure with glitter of varying complexity. Be bright and noticeable while maintaining a sense of style and taste!
False nails for children
Little girls try to imitate their mothers in everything. Therefore, many are interested in the question of how to make false nails for a child. Young children need to glue records correctly, following the recommendations of experts and watching video lessons with step-by-step instructions.
- If you decide to stick artificial nails on your child, then buy only high-quality products from a reputable manufacturer. Choose false nails designed specifically for children.
- Children's delicate skin is prone to allergic reactions, so try not to let your baby wear such a manicure for a long time. You can stick on artificial ends for several hours, for example, at a holiday or a matinee.
- Opt for self-adhesive children's false nails, which have a more gentle composition that is safe for the child's health.
- To remove false nails from children's fingers at home, immerse the baby's hands in warm water for 15 minutes. If after this the plates are still holding tightly, then drop nail polish remover under their tops. Then carefully and without sudden movements, remove the plastic nails and remove any remaining glue. Using gentle massage movements, rub nourishing oil with vitamins A and E into the surface of your nails. If you are not sure that you can cope with this task yourself, then watch thematic video lessons and photo instructions and make sure that it is not at all difficult.
The final video lesson, dedicated to the innovation from L'Oreal, will change your idea of false nails. Flexible and very thin innovative Flex nails, on the surface of which a ready-made, trendy design is placed, allow you to create a stylish manicure in just a few minutes. Don’t believe the stereotypes that the time of false nails is long gone - today they have appeared in a new incarnation!
